4. Create destination pool and configure load balancing
Create a destination pool and configure load balancing according to the selected scaling mode and scaling type.
Create destination pool
- Create a new destination pool.
- Select the destinations depending on the scaling mode:
- Elastic mode: Initially, do not select a destination.
- Static mode: Select all destinations previously prepared for static mode that oneclick™ should start and stop automatically.
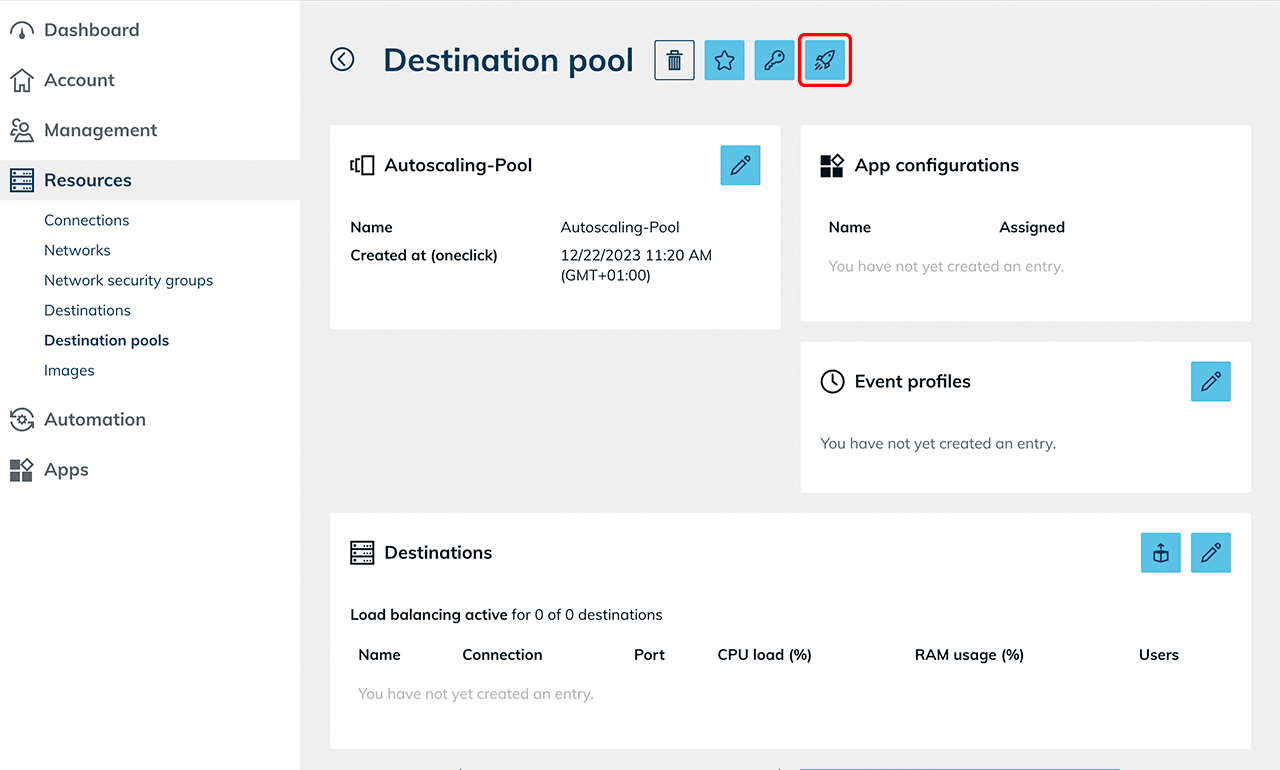
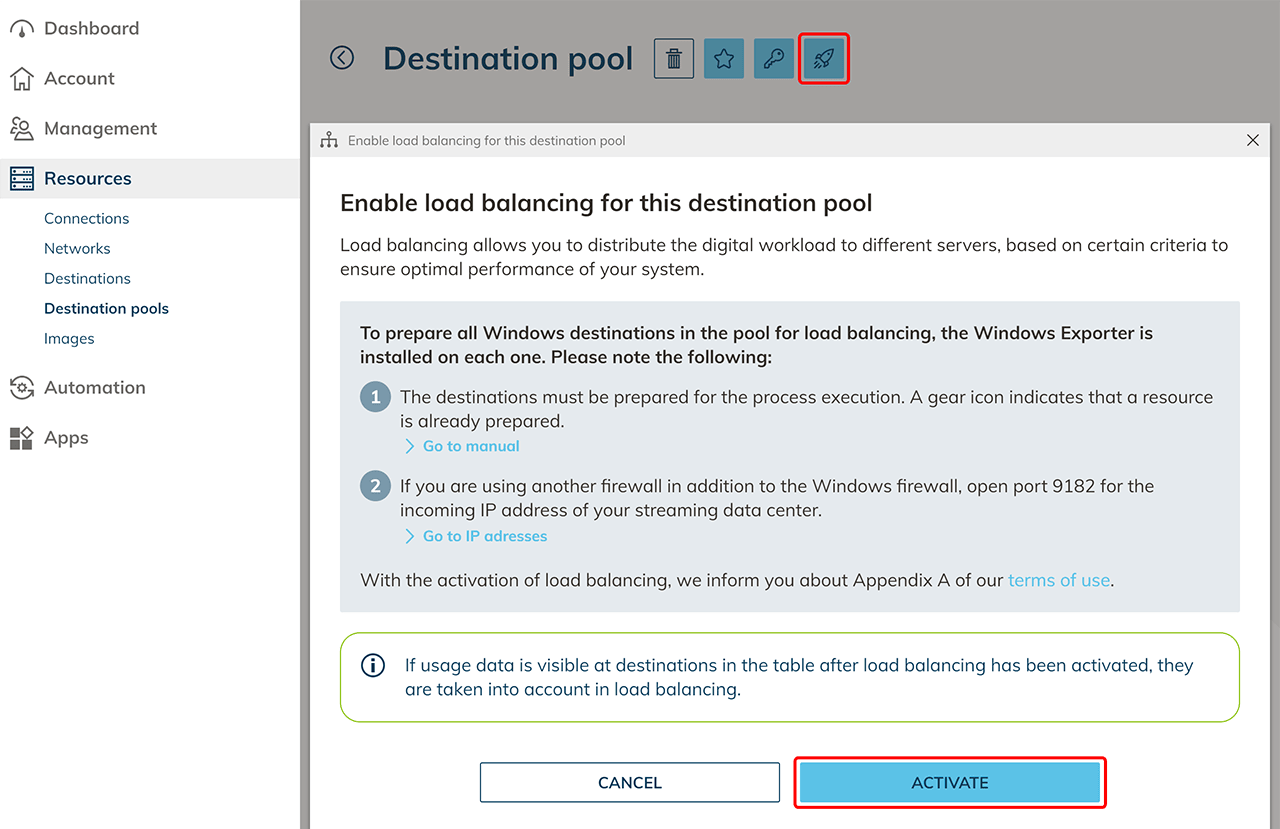
- Enable load balancing for this pool.
- Note the preparation depending on the scaling mode:
-
Elastic mode: Since the VM was created via oneclick™ and prepared for process execution, no additional measures are required to prepare load balancing. The required network settings were already set as part of the process preparation and the selected network security group.
-
Static mode: Make sure that the existing destinations have the required network settings and can be reached by oneclick™.
-
- After enabling load balancing, the function of the button changes. You can then make the load distribution settings for how load balancing should take place.
Check metric collection on existing destinations
After enabling load balancing, oneclick™ creates a process that activates the Windows Exporter on the existing destinations. The Windows Exporter provides the metrics for CPU, RAM, and number of users.
- Click Automation in the menu, then click Processes.
- Check whether the exporterWindows process ran successfully.
If no metrics are visible after a short time, check the WinRM connection and the preparation of the destinations for process execution.
For more information, see Load balancing troubleshooting.
Configure load balancing
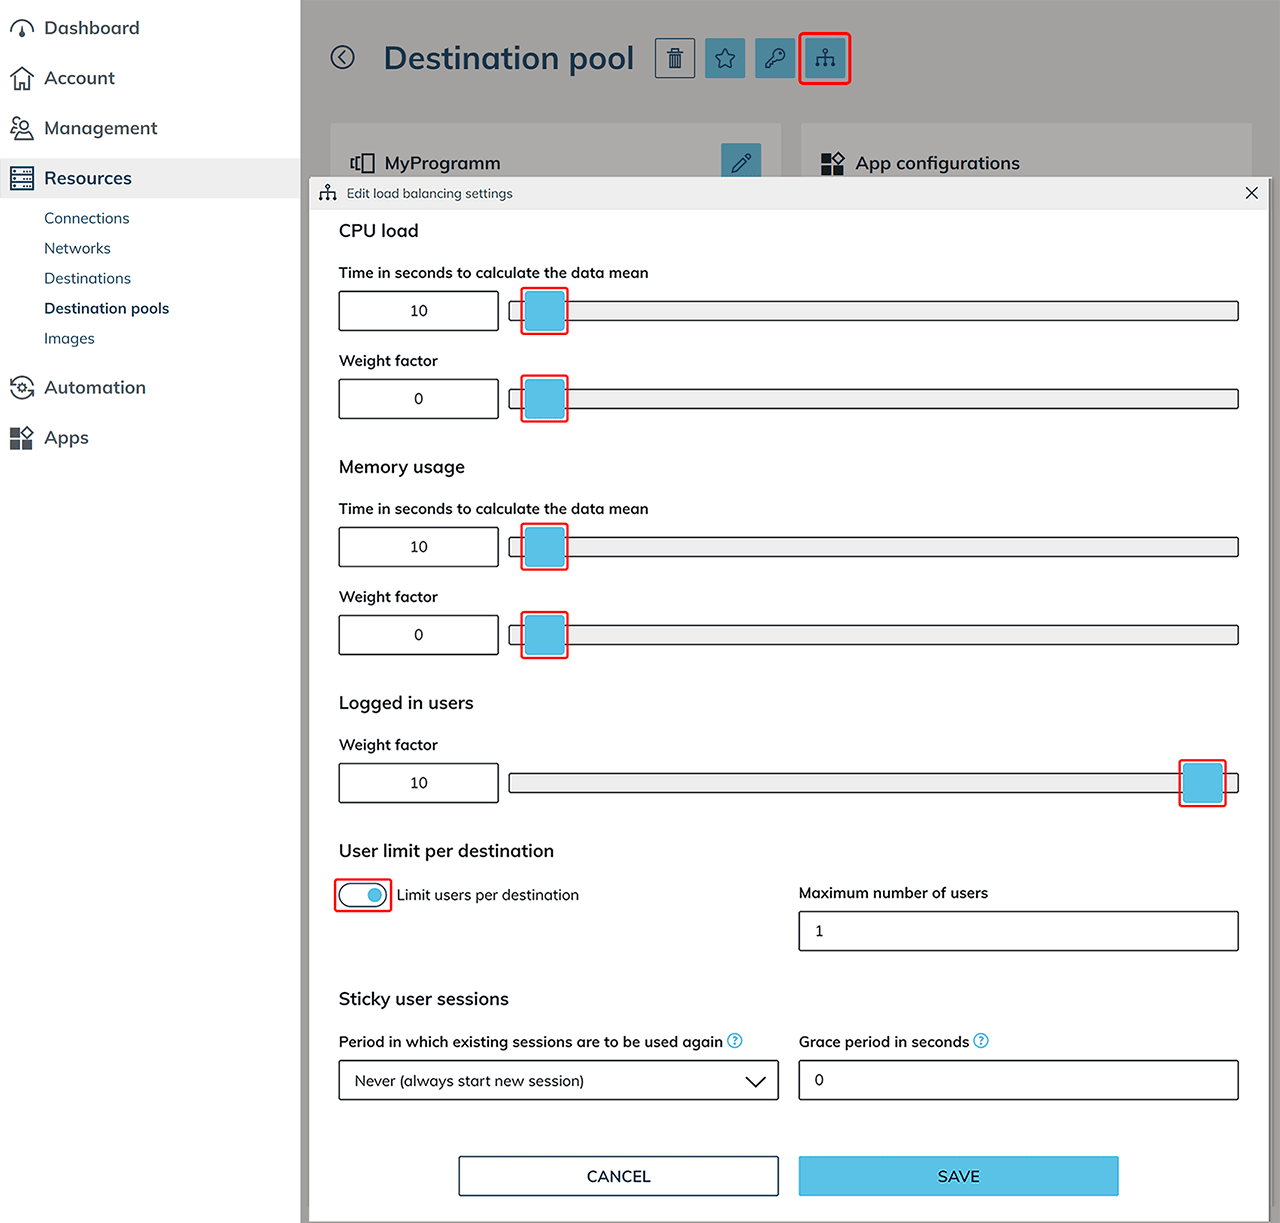
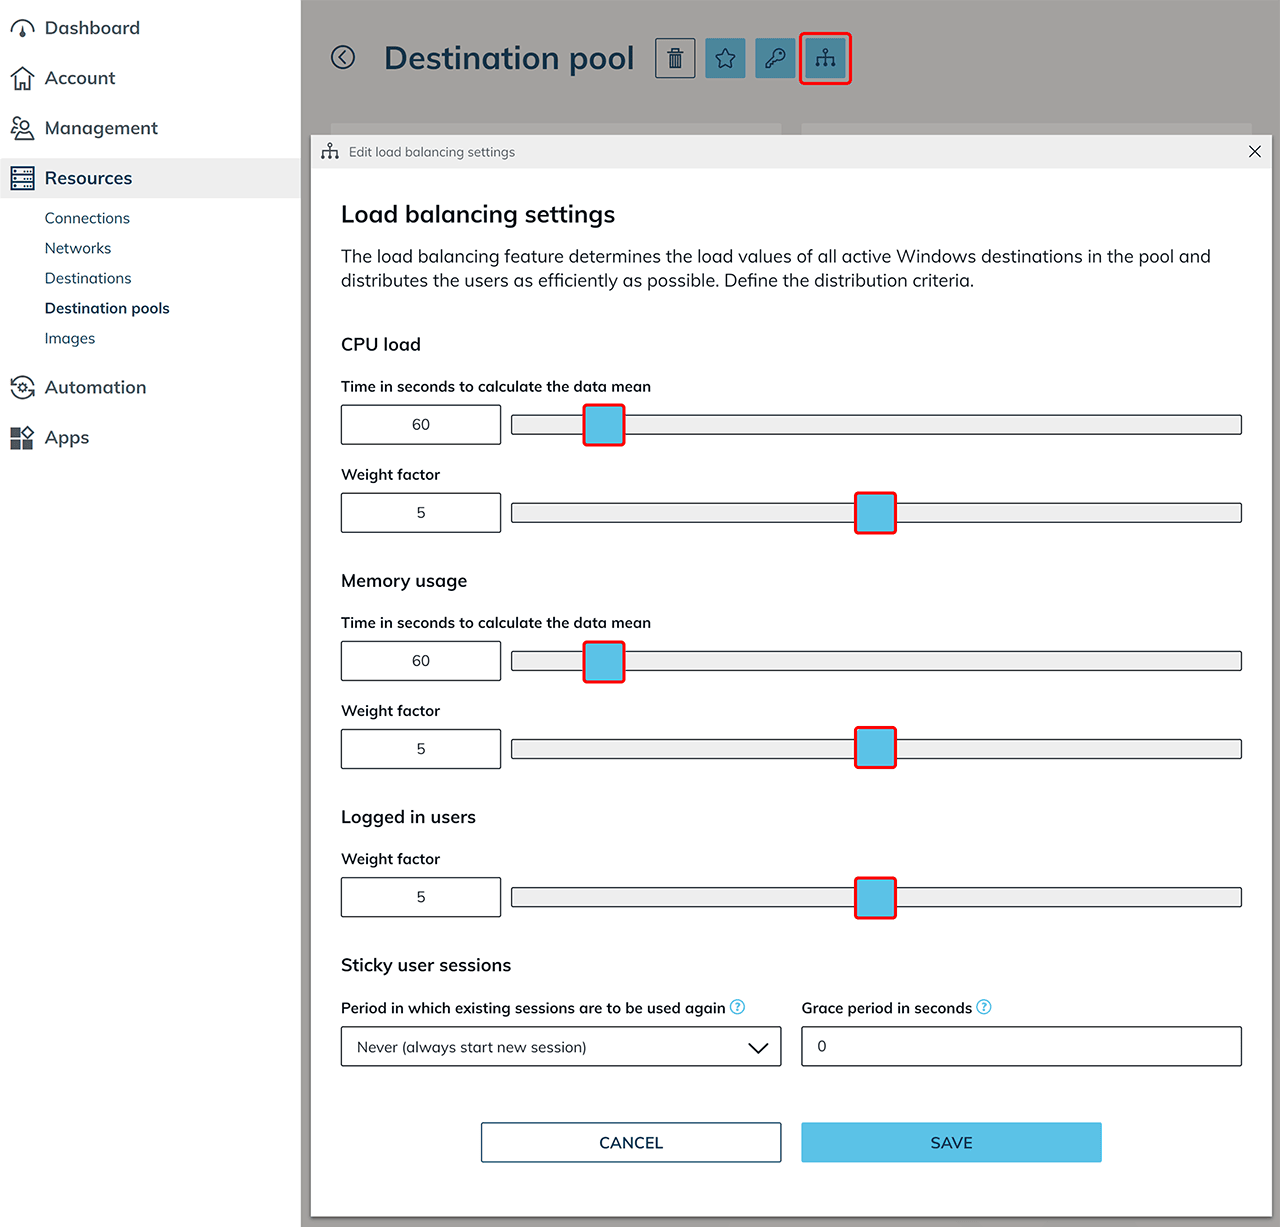
Click the Distribution icon to define the weighting and distribution logic. The configuration differs depending on the selected scaling type.
Single user
For "Single user" scenarios, exactly one user is allowed per destination.
- Set the weighting factors for CPU and Memory to 0.
These parameters are not relevant for exclusive system usage. - Set the weighting factor for "Logged in users" to 10.
- Enable "User limit per destination".
- Set "Maximum number of users" to 1.
- The Sticky user sessions option has no practical effect for "Single user" scenarios, since only one user is allowed per system.
Multi user
For "Multi user" scenarios, multiple users are allowed per destination. Load balancing assigns new users to a suitable destination based on defined criteria. For multi user, define how strongly individual criteria (CPU, RAM, number of users) are weighted when assigning new users. For CPU utilization and memory usage, define:
- the "Time in seconds to calculate the data mean"
This period determines over which period the measured values are averaged. Shorter periods respond faster to load peaks, longer periods result in more stable decisions that are less prone to fluctuation. - the Weight factor
The weight factor defines the priority with which the respective criterion is taken into account when distributing new users.
In addition, you can define a weight factor for the number of logged in users. This controls how strongly the current number of users flows into the calculation compared to CPU and RAM utilization.
The weight factor can be defined on a scale from 0 to 10:
- 0 means that the criterion is not taken into account.
- 10 means maximum priority in decision-making.
If multiple criteria receive the same weighting value, they are given equal priority.
Optional settings:
- "Limit users per destination"
Enable this option and enter the maximum number of users. This sets a fixed upper limit for the number of users logged in at the same time per virtual machine. - "Sticky user sessions"
Enable this option if users should land on the same destination after logging in again. Note the information on using sticky sessions.
Configure user and app assignment
After setting up the pool:
- Create user accounts on the domain controller for all intended users (if an AD integration is used).
- Create an app configuration for the destination pool.
- Create app instances based on this configuration.
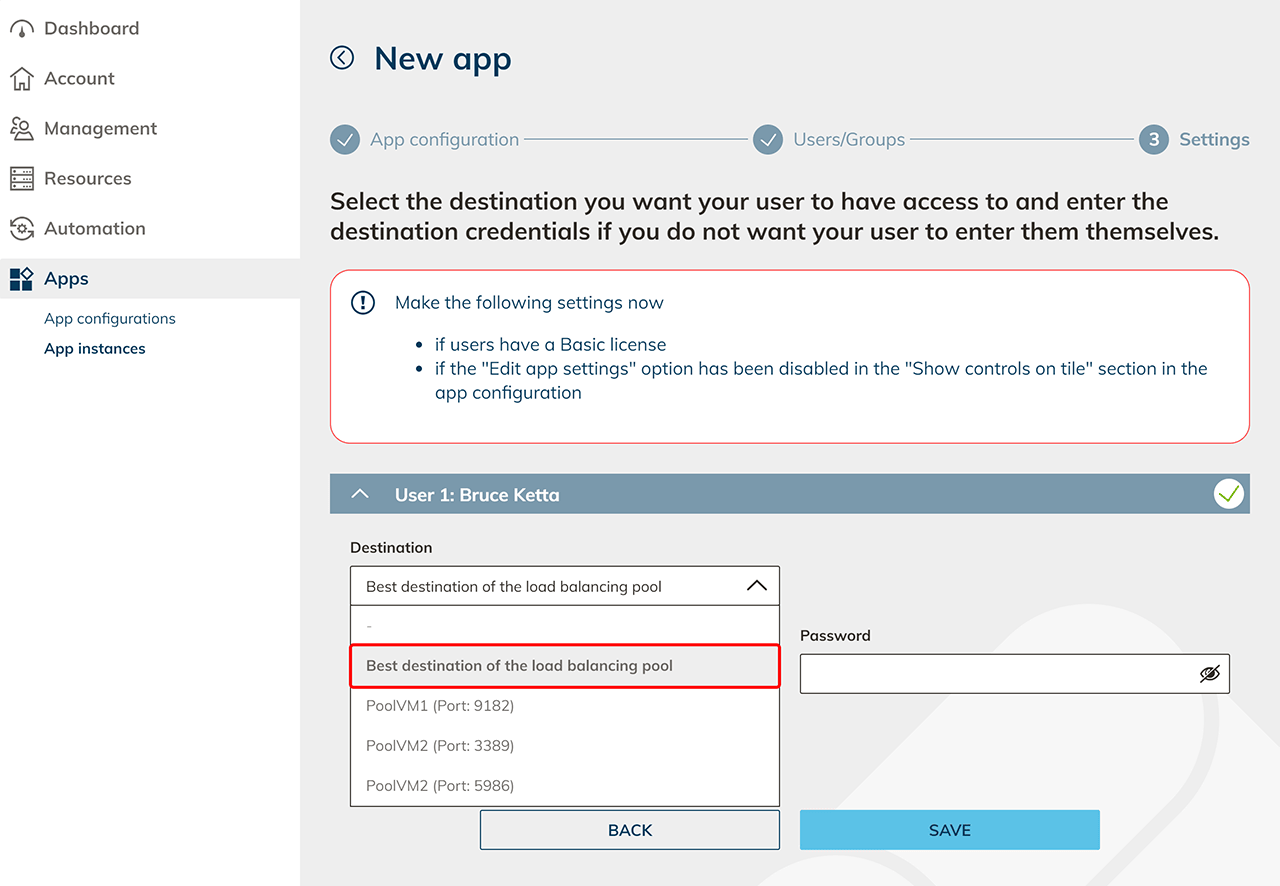
- As destination, select: "Best destination of the load balancing pool" and enter the corresponding user login credentials.
- Click Save.