Load balancing
Load balancing allows you to split the data load across different servers based on certain criteria to ensure optimal utilization of your system.
To enable load balancing for a destination pool, the destinations in it must first be prepared for process execution.
If your resource is already prepared for process execution, a small Gear-icon appears next to the respective name. In this case, proceed directly to point 2. This normally happens automatically for cloud resources during the creation process, unless otherwise selected. Therefore, when creating new resources, make sure that “Prepare for process execution” remains activated.
It is also necessary that all users to be considered in load balancing access the systems through oneclick™ streaming so that they are taken into account. The server can be used for load balancing in only one management unit.
1. Prepare resource for process execution
If there is no Gear-icon next to the respective name of your resource, it must first be prepared for process execution. To do this, follow our detailed instructions.
2. Required whitelisting in the firewall (optional)
If you have any additional firewall in use outside of the Windows firewall, you have to release port 9182 for the incoming IP address of your streaming data center.
3. Activate load balancing
Once you have prepared all the selected resources for process execution, you can enable load balancing in the corresponding destination pool with the following steps.
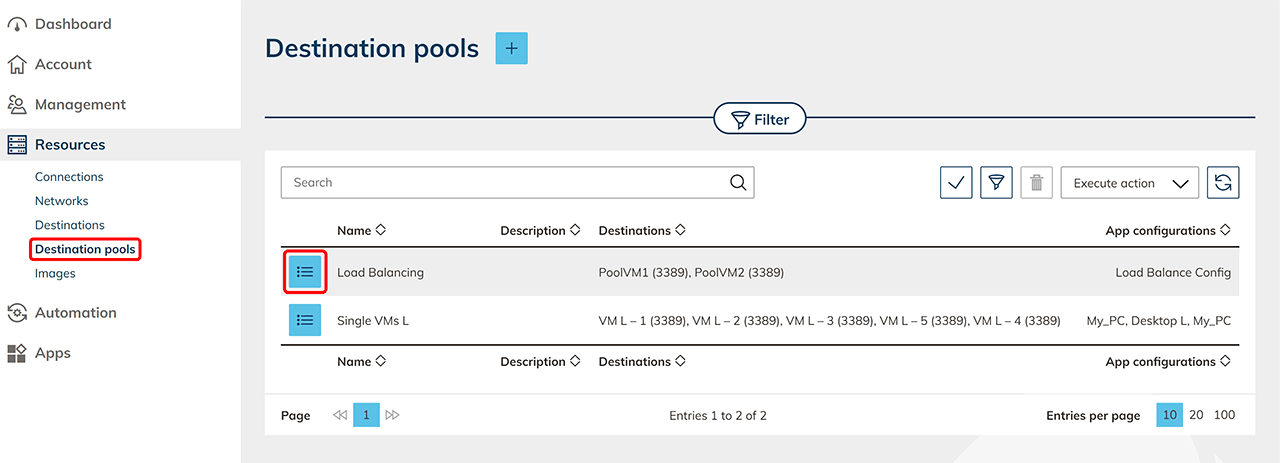
- In the Resources tab, go to Destination pools.
- To enable load balancing for individual pools, you must first enable the feature in general. To do this, click the Rocket-icon at the top of your window. This may take some time.
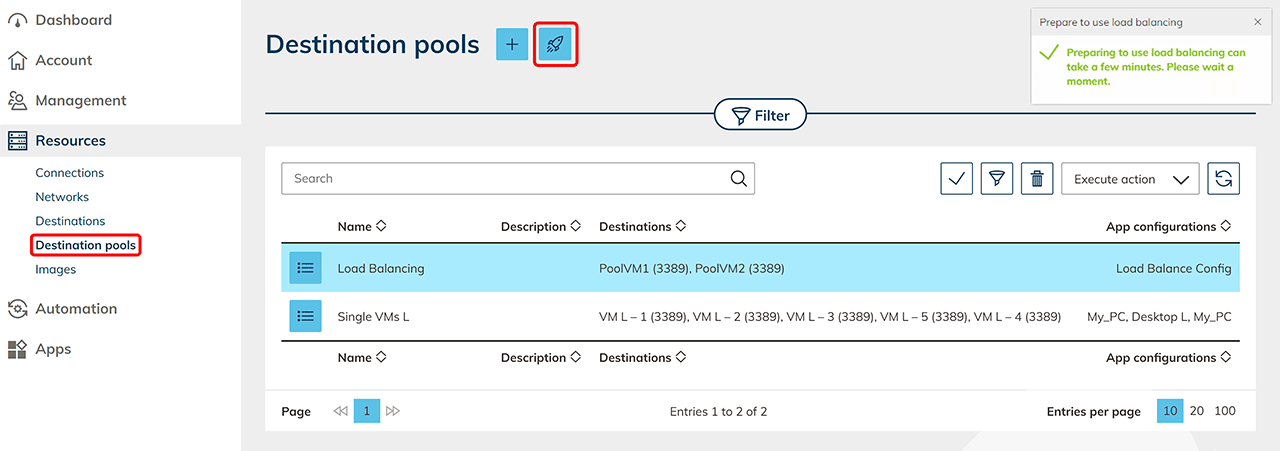
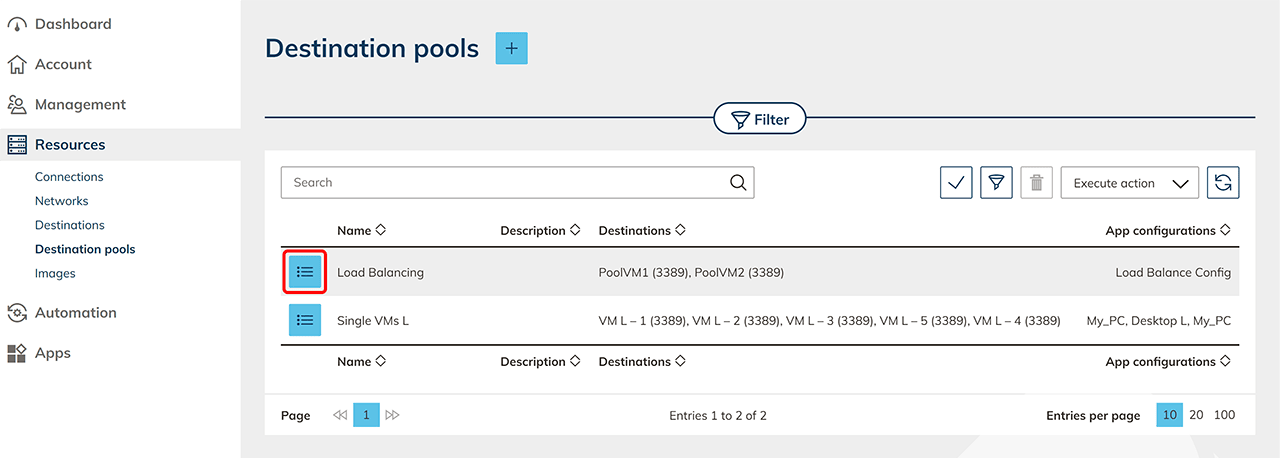
You will receive a confirmation at the top right of the window. - Click the List-icon to get to the details page of your destination pool.
- Clicking on the Rocket-icon will open a popup.
- Follow the instructions and Activate load balancing for this destination pool. If you already performed step 1 and 2 above, you can continue directly at this point.
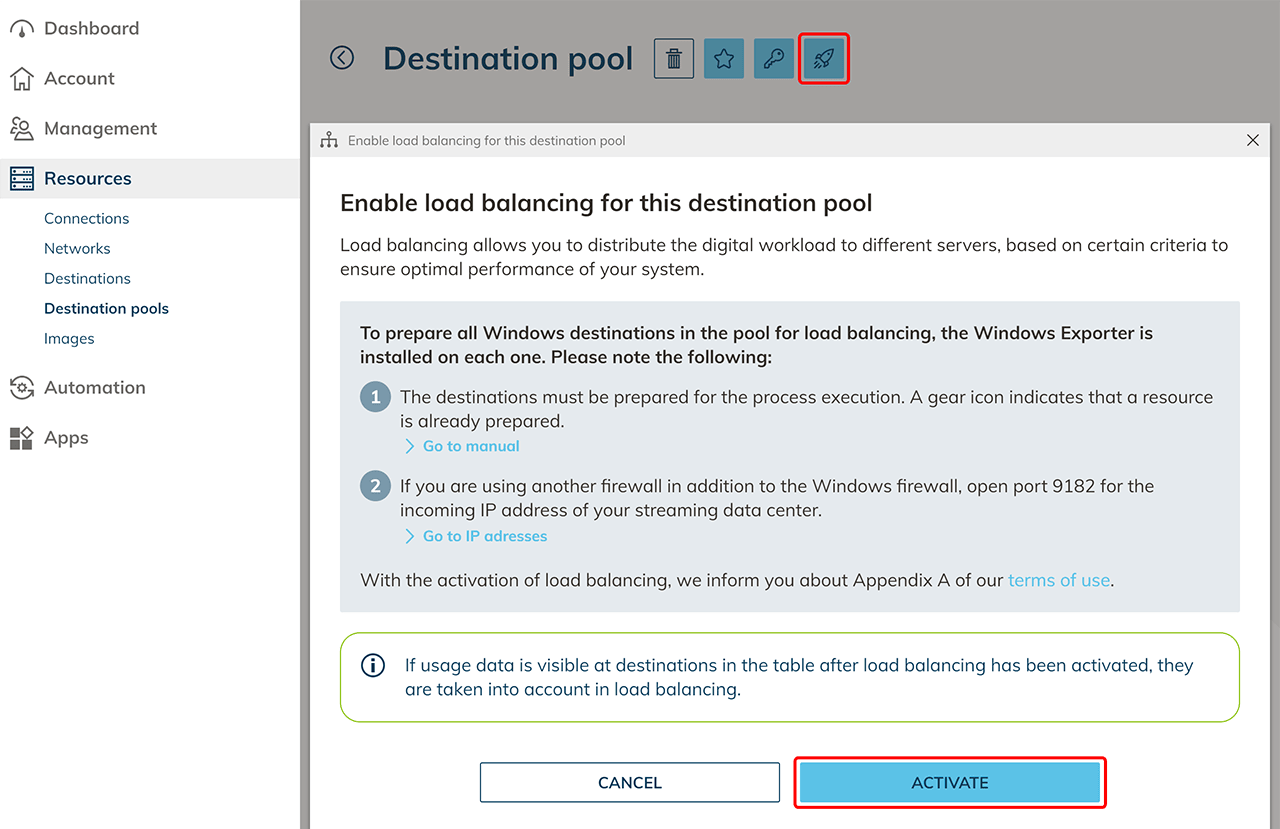
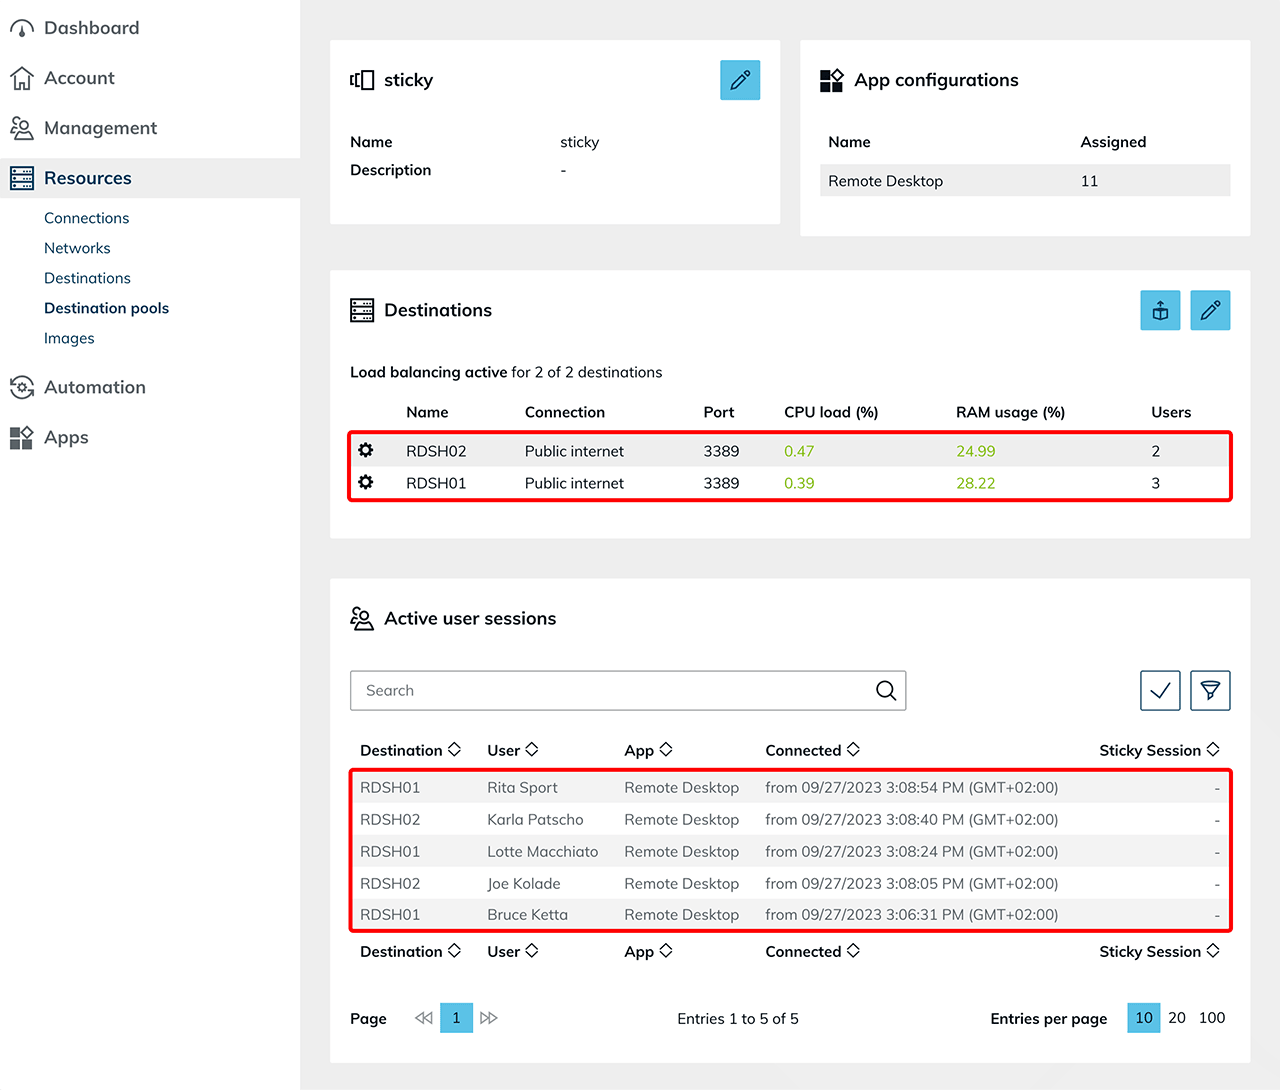
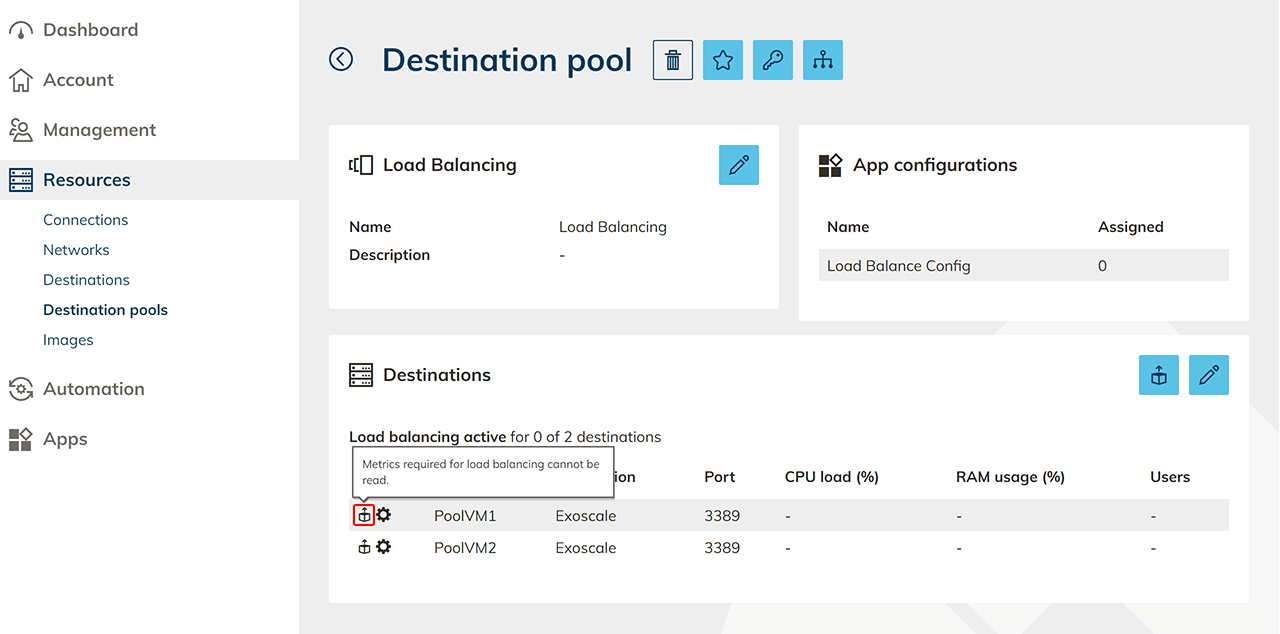
In addition, a new process is created in the Processes tab, which automatically installs the Windows Exporter on your resource when activated. - In the tile “Destinations” you can see all resources of this pool. If load data (metrics) is visible in the row of a destination in this pool after load balancing has been activated, it will be taken into account during load balancing. Please note that it may take a short moment until the respective load data can be seen in the table. In the metrics, all users on the server are displayed. Even an admin who logs in via an admin console, for example, is listed here under "Users". In the „Active user sessions“, all users are displayed who have logged in via oneclick™ Streaming and for whom the "Best destination of the load balancing pool" has been selected in the app instance. Here you can see which user was logged in to which server at which time.
- If the systems do not detect that the Windows Exporter is active on the resource, even after a short waiting time, a Box-icon appears in the corresponding line. In this case, please note our troubleshooting tips.
4. Set up load balancing
Unlike static load balancing (e.g. the round-robin method), oneclick™ now allows you to prioritize load balancing in a much more granular way to dynamically split the data load and to set the weight in the right place for you. Follow these steps to prioritize your requirements by CPU, RAM, and users for an optimal utilizations of your systems.
- From the Resources tab, select the Destination pools subitem and click the List-icon to go to the details page for your resource.
- Click on the Distribution icon at the top of the window to edit the settings for Load Balancing. In the now opened window, you can first change the time for calculating the data average as well as the weighting factor for the CPU load and the memory occupation. You can also set a value for the weighting of logged-in users.
The weighting factor describes the priority the corresponding option should be treated with. The scale ranges from 0 to 10. If several entries receive the same value, they will be treated with the same priority.
Optionally, you can set a user limit per destination to ensure that no more than X users are allowed on a destination.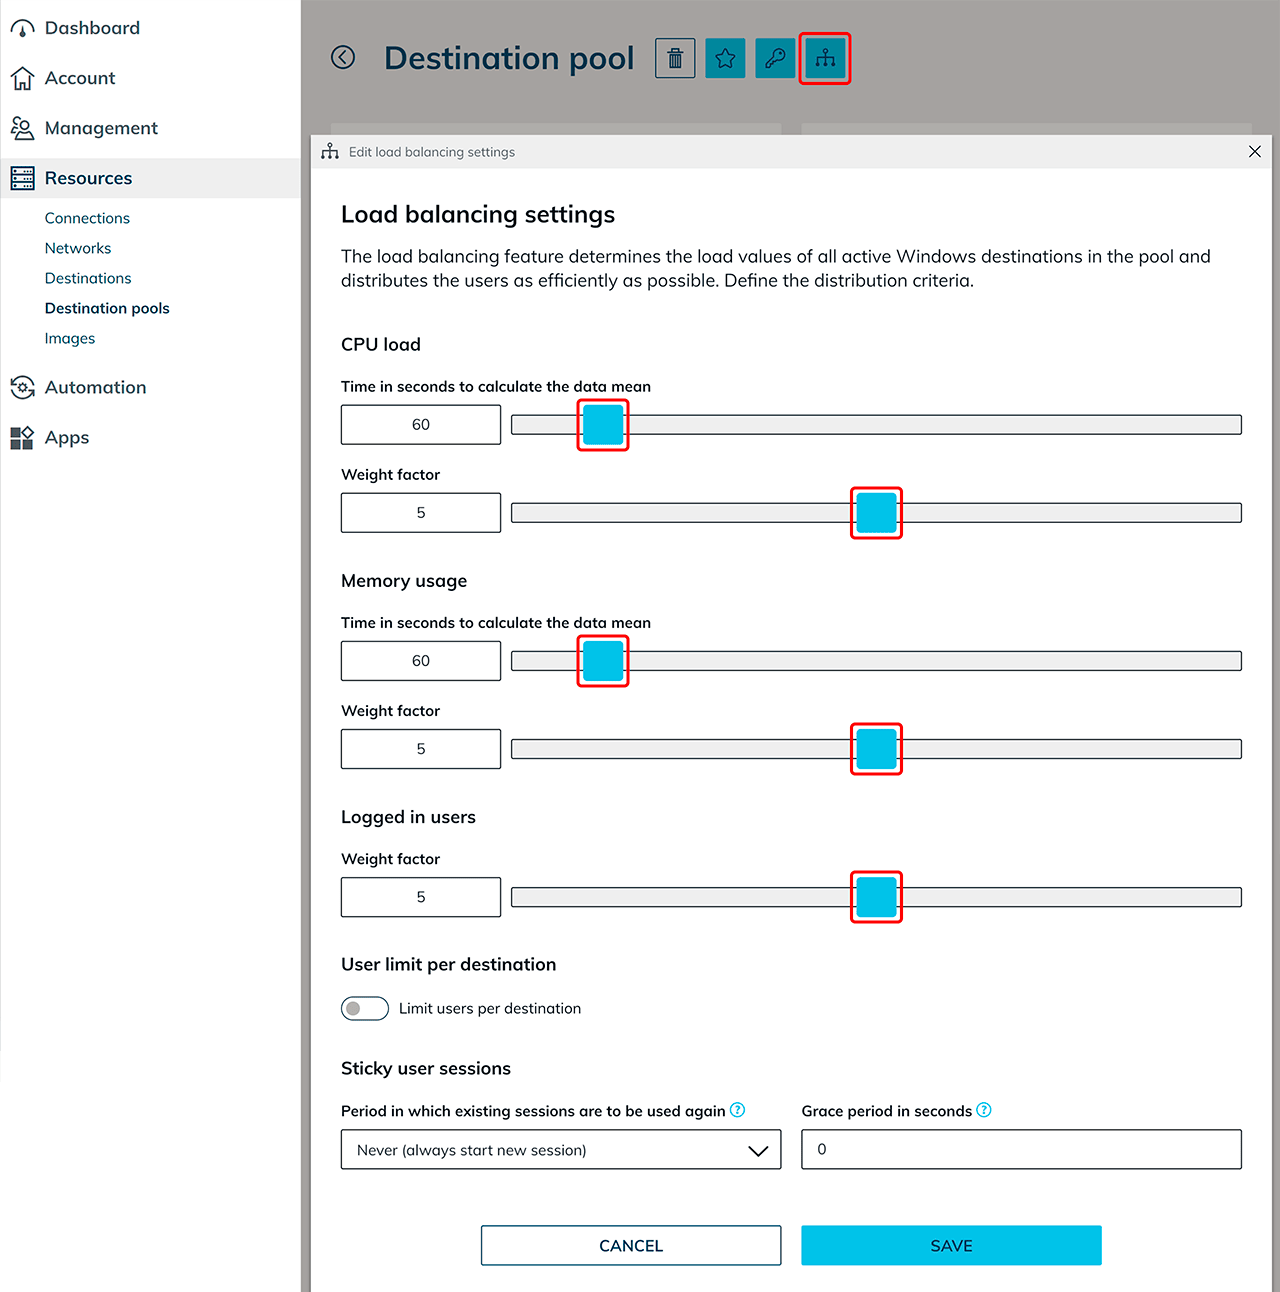
- By default, the user always receives a new session. However, in oneclick™ you have the option of retaining the session for a specified period of time. If you want to enable parallel sessions from one user on one server, you must activate sticky sessions. To do this, open the drop-down menu under the item "Period in which existing sessions are to be used again" to change it. The time period specified here must then also be set exactly in Windows. (See "Configure Sticky Sessions in Windows" below).
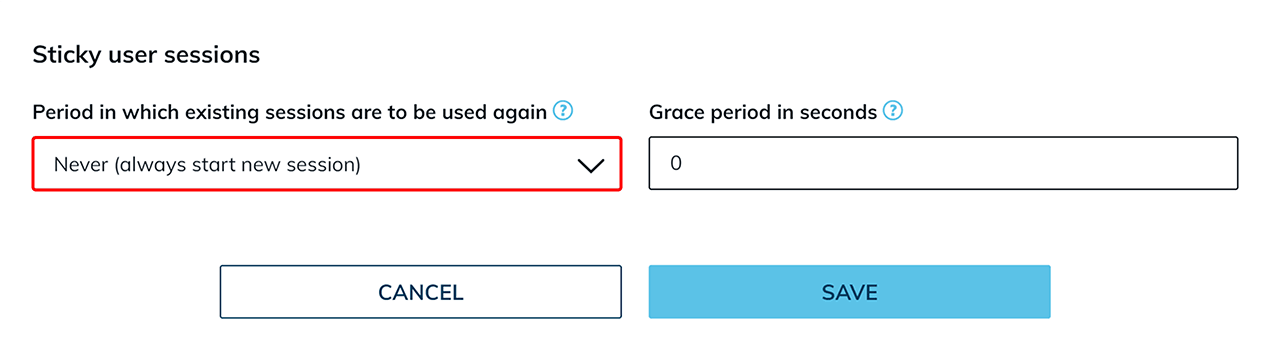
A maximum period of two hours can be selected here. Note, that as the length of this period increases, the effect of load balancing decreases more and more. - In addition, you have the option to set a grace period. This is necessary, for example, for restoring roaming profiles if they are in use. To do so, enter the amount of time that you think is sufficient for this process in the corresponding field under the item "Grace period in seconds".
The recommended length of the grace period depends on many factors and should be determined individually and adjusted after an appropriate test phase. A longer grace period is recommended especially for operations with a high volume of data, such as editing large files. If the "Never" option is selected, the grace period is always "0". Although it is possible to enter another time period in the corresponding field, such an entry will not be valid.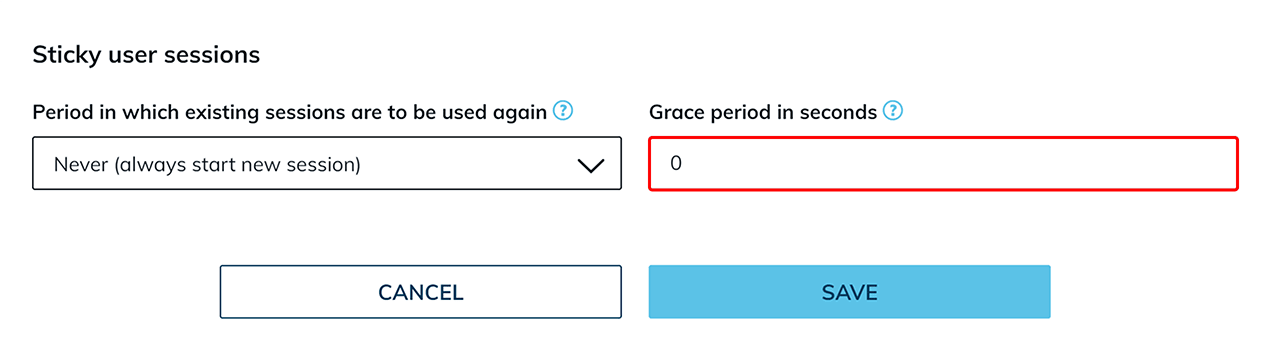
- Finally, confirm your entries with Save.
5. Configure Sticky Sessions in Windows (optional)
To ensure that the same value is also set in all of your connected Windows resources, you should also set this configuration in the operating system of the respective resource. To do so, follow our instructions for setting the time limit for disconnected sessions.
6. Assign users to a destination pool
The following steps are necessary to complete the load balancing setup for your users.
- Create an app configuration for your users. If you want to use load balancing for a single program (remote app), we recommend Kimmknight's Remoteapptool for this purpose.
- Then create app instances for your users. During setup, you can now select the entry “Best destination of the load balancing pool” instead of a single destination under “Destination”.

7. Perform maintenance on a server in the pool
If you would like to temporarily remove a server from the pool because it is not responding or needs maintenance, we recommend that you follow the article Maintenance on a server in the pool.