Create customers
You have activated a Marketplace license for the oneclick™ customer admin and assigned the app or you already see the tile on your oneclick™ Desk.
- Click on the oneclick™ customer admin tile.
- Next, click on Create customer. A customer can also be a location or a department that you want to manage separately.
- You will see the following screen. Your division is always selected as the "Parent division" by default.
- If you have already created customers, you can create new customers one hierarchy level further down - below your already created customer.
- The "Hierarchy levels of parent divisions with access to this customer" is automatically preselected so that you are able to manage the created customer. If you want your parent division to be able to see your customers as well, you need to increase the number by one.
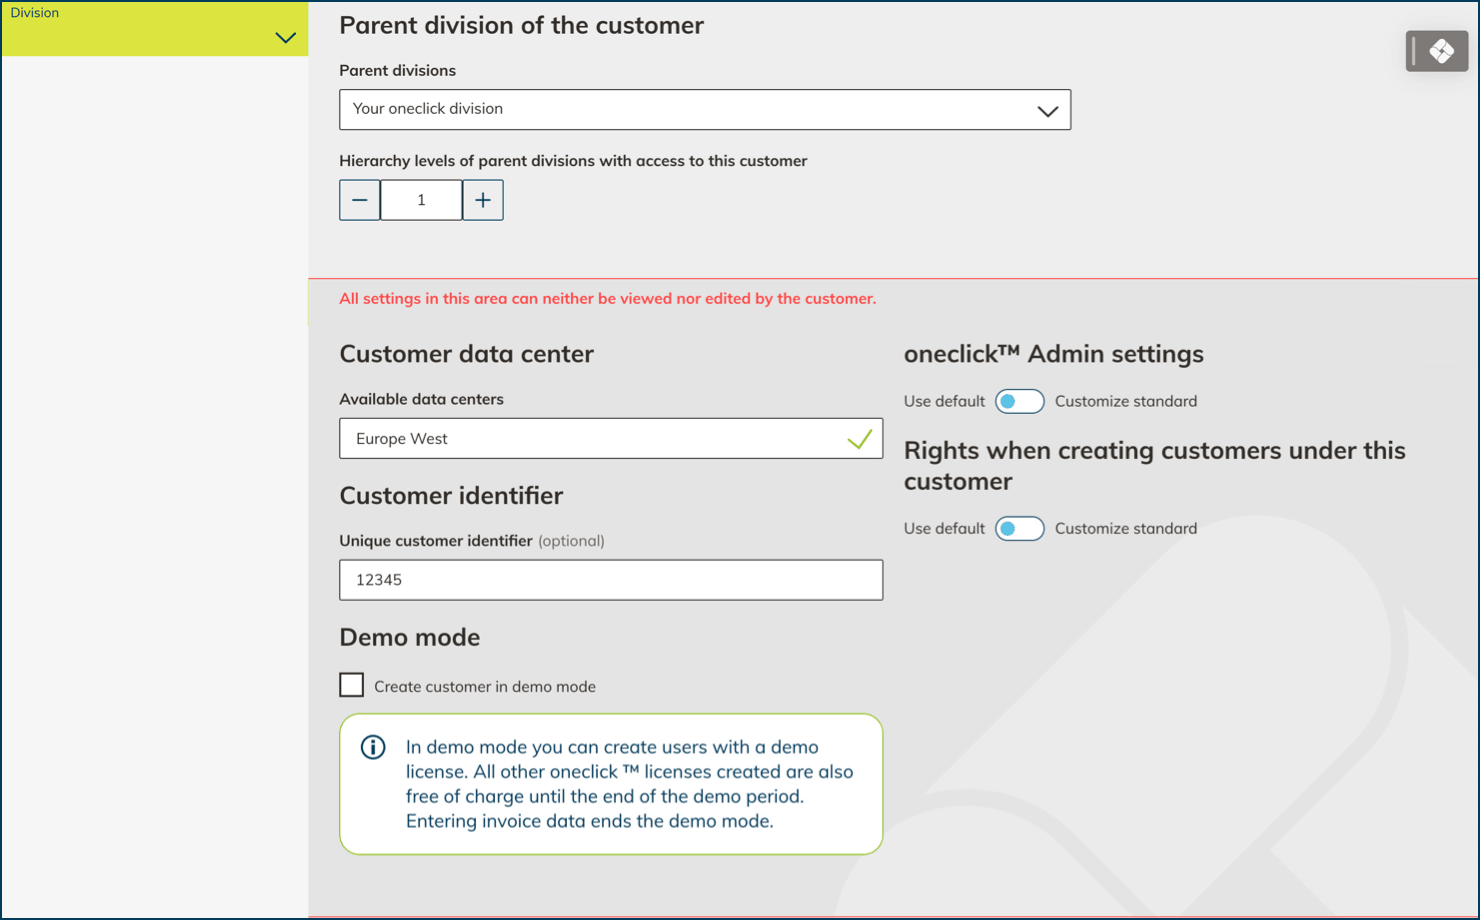
- Select the "Customer data center" in which the oneclick™ account should to be created. The data center can only be changed afterwards via the support!
- Optionally, you can store a customer ID, e.g. from your internal system.
- Select "Create customer in demo mode" if you want to create it with a one-week demo version.
- If you have selected this checkbox, you will not be able to select an invoice recipient when creating a customer. Entering the invoice recipient ends the demo mode.
- Afterwards, you can create users with a demo license. The users with the role "administrator" can upgrade independently during the demo version and after expiration or contact the oneclick™ sales department.
- If you have the right, you can now make settings for license availability in the "oneclick™ Admin". It may be that you do not see this item.
By default, "Inherit all to parent division" is always selected. This means that your customer has the same Cloud Subscription and Marketplace licenses to choose from via the oneclick™ Administration as the parent division selected in point 3. - If you have the right, you can make settings for the "Rights when creating customers under this customer".
By default, only "Enable demo mode" is enabled. - Next, enter the name of the division of your new customer.
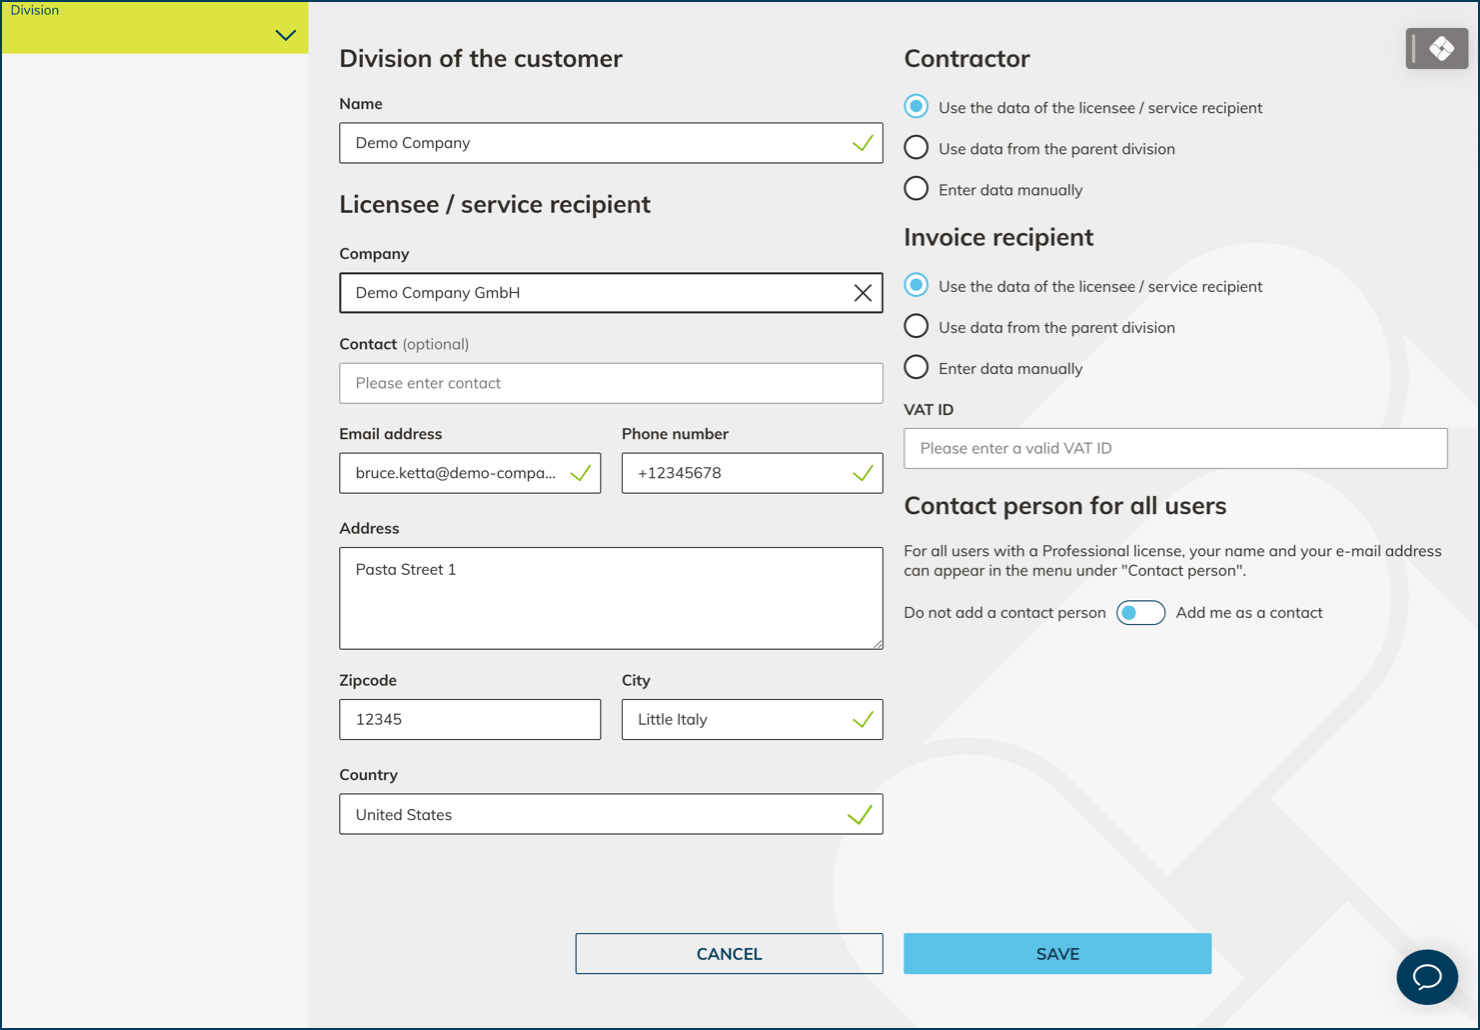
- Under "Licensee / Service Recipient" enter the company data.
- For the "contractor" and the "invoice recipient", use the data from the licensee, from the parent division (e.g. from your division) or enter deviating data manually. For the invoice recipient, you can insert the VAT ID as well.
- Optionally, you can add yourself as contact person with your area of responsibility (e.g. support). The data is visible for all Professional users and administrators.
- Click Save to create the customer. You can now activate licenses for the new customer directly via the customer admin, create users, connect resources and create apps from them.