Marketplace License / Customer admin

With a Marketplace license, you do not require any additional licenses. The running of the software is already included.
1. Request license
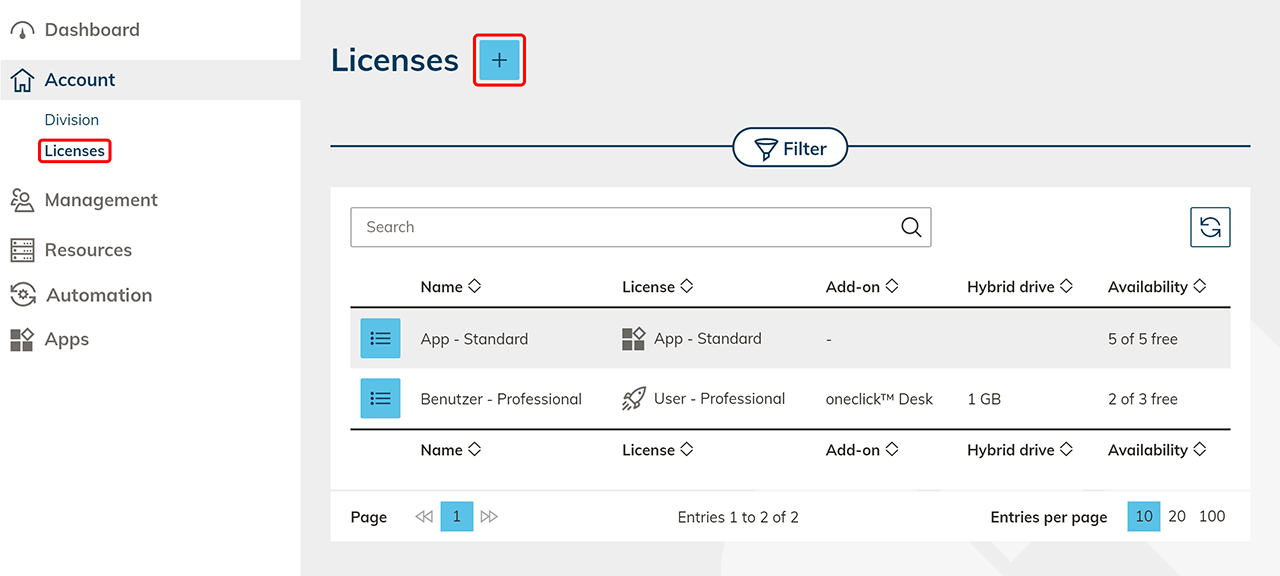
- In the menu, click "Account" and then "Licenses". Click the Plus icon to create a new license.
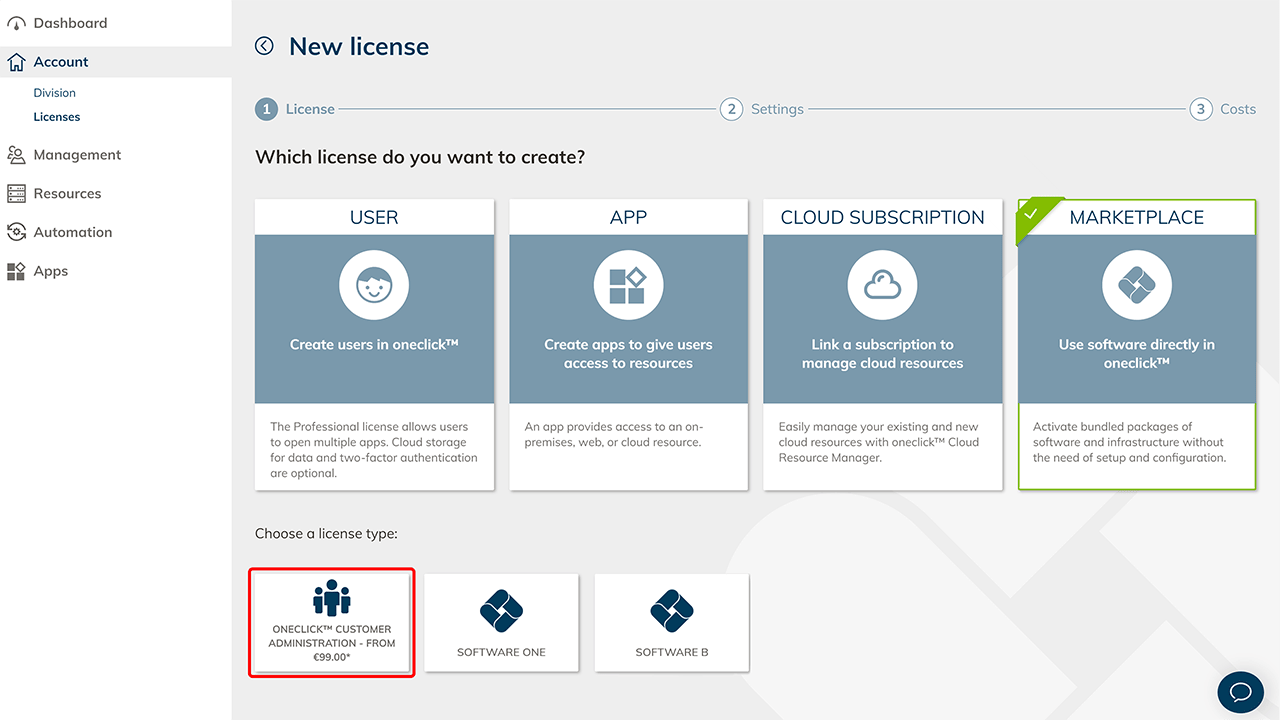
- Select the "Marketplace" tile and click on the app (e.g. the oneclick™ customer admin) that users should receive.
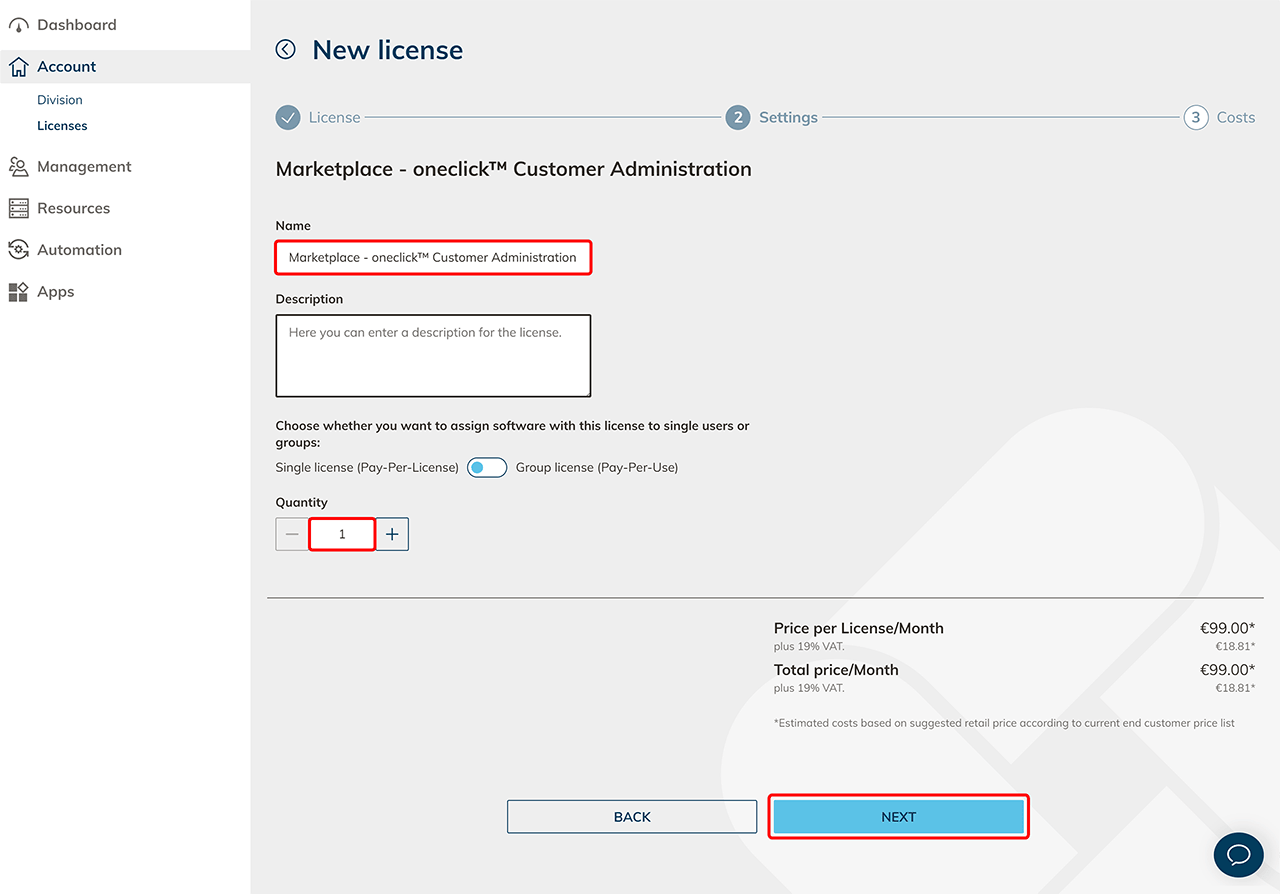
- Give the license any name, enter a quantity accordingly and click Next.
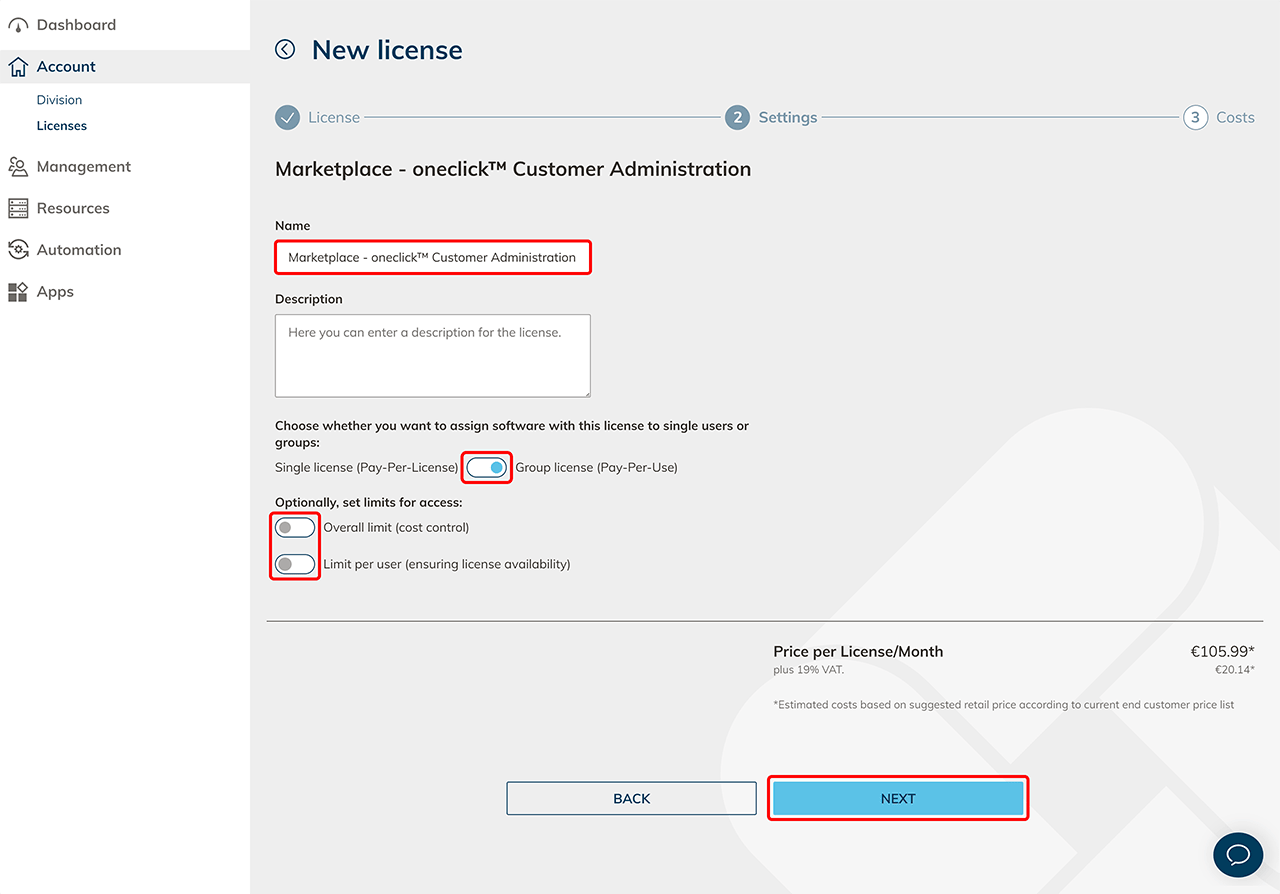
- If you specifically selected Group License, optionally set limits for access and click Next.
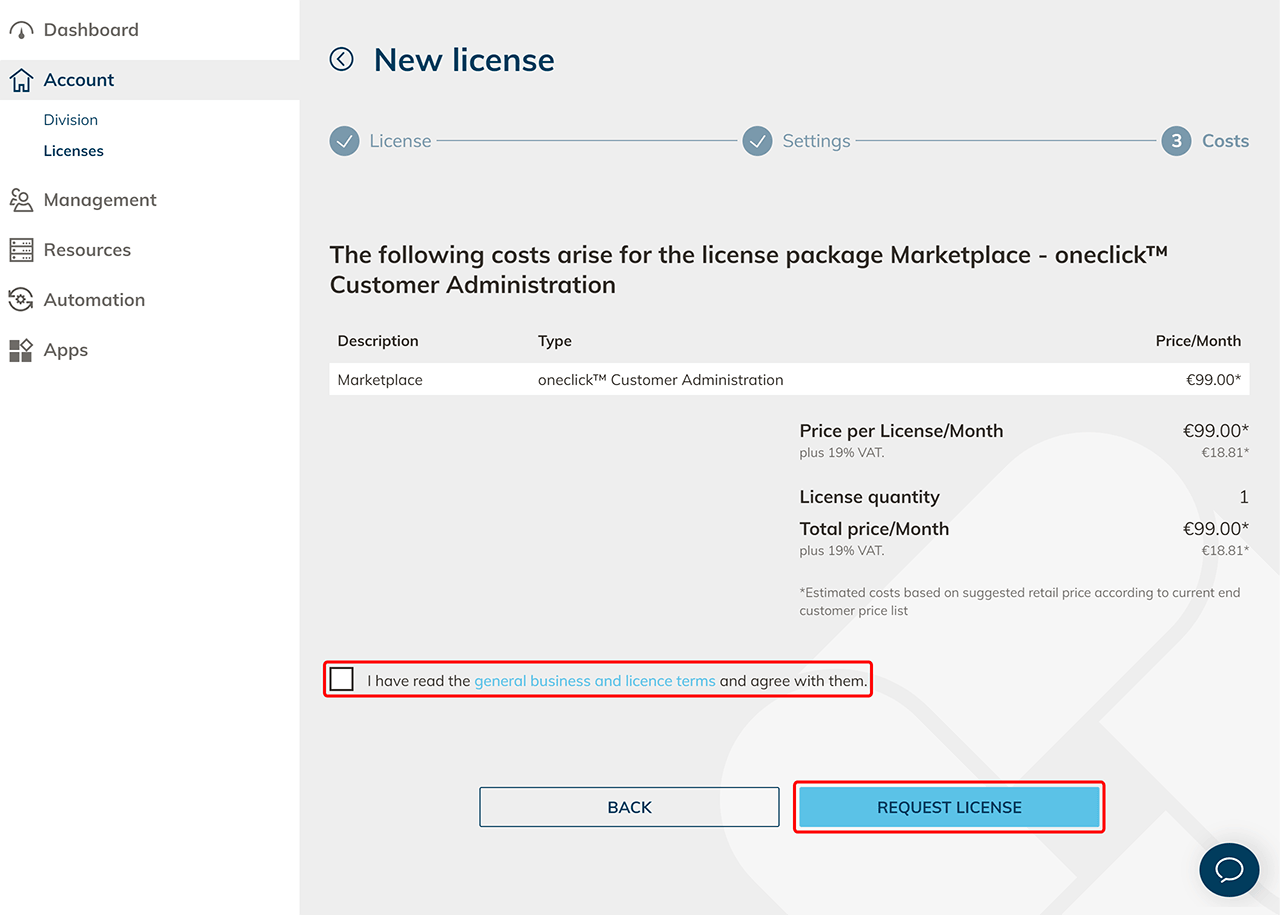
- In the last step you will get the retail prices listed. Click request license to complete the process.
2. Create app configuration and assign app
The following configuration steps use the oneclick™ Customer admin as an example. Other Marketplace licenses have different configuration options — for some, the app configuration is created automatically.
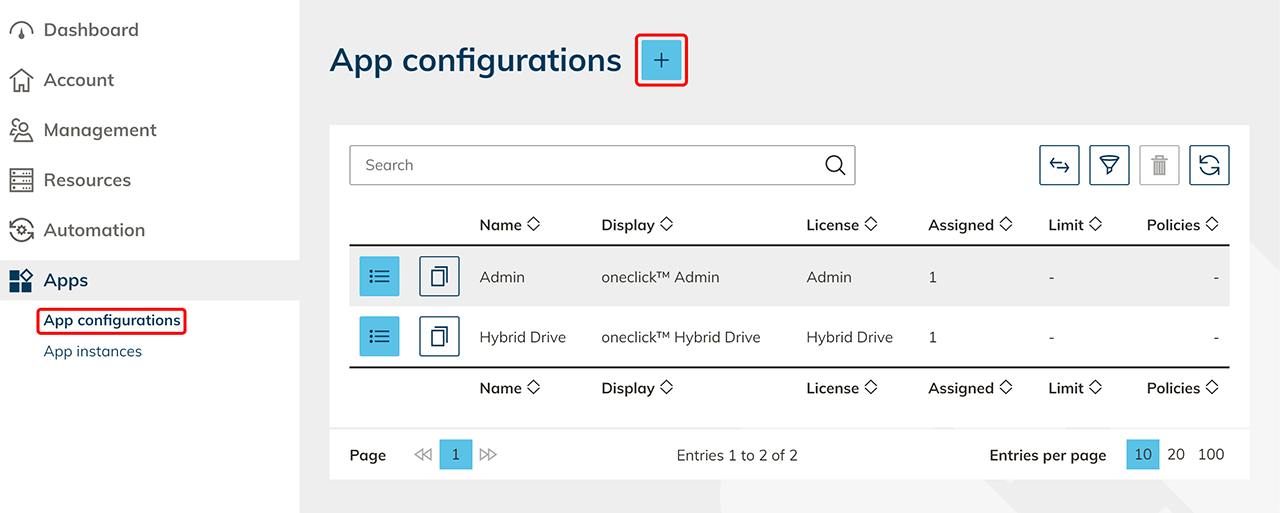
- In the menu, click "Apps" and then App configurations.
- Click on the Plus icon .
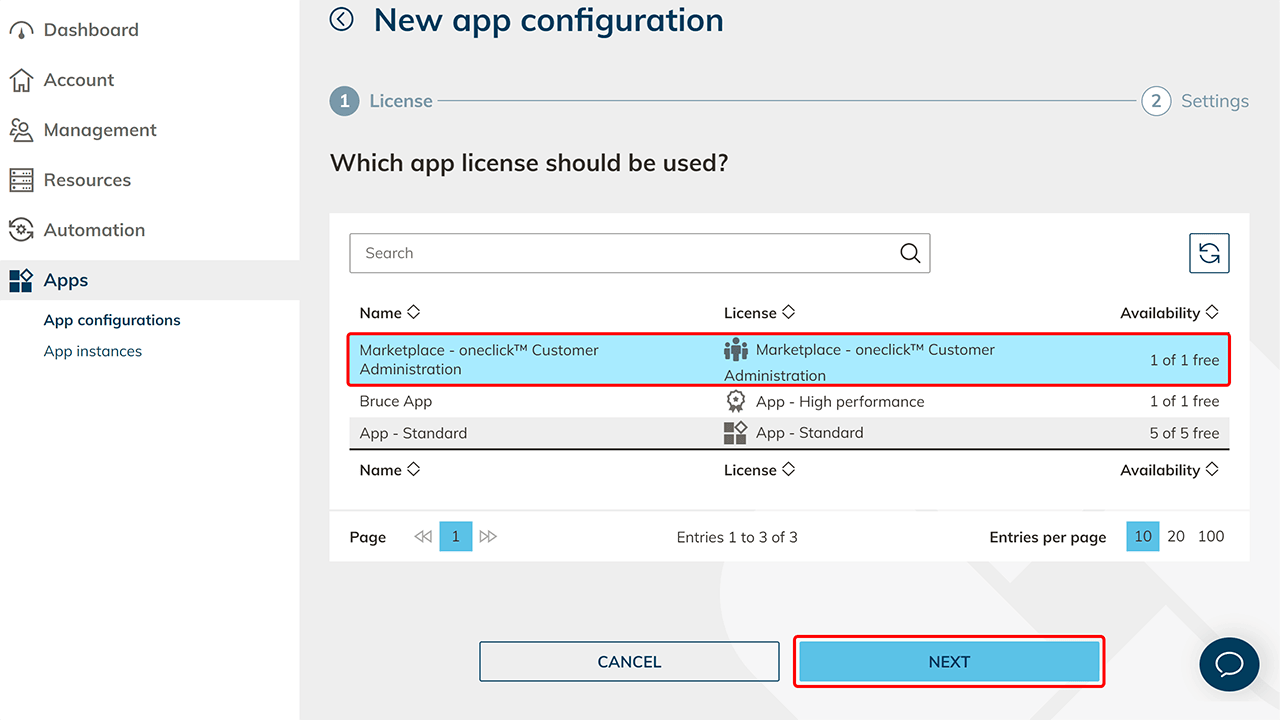
- Select your requested Marketplace license.
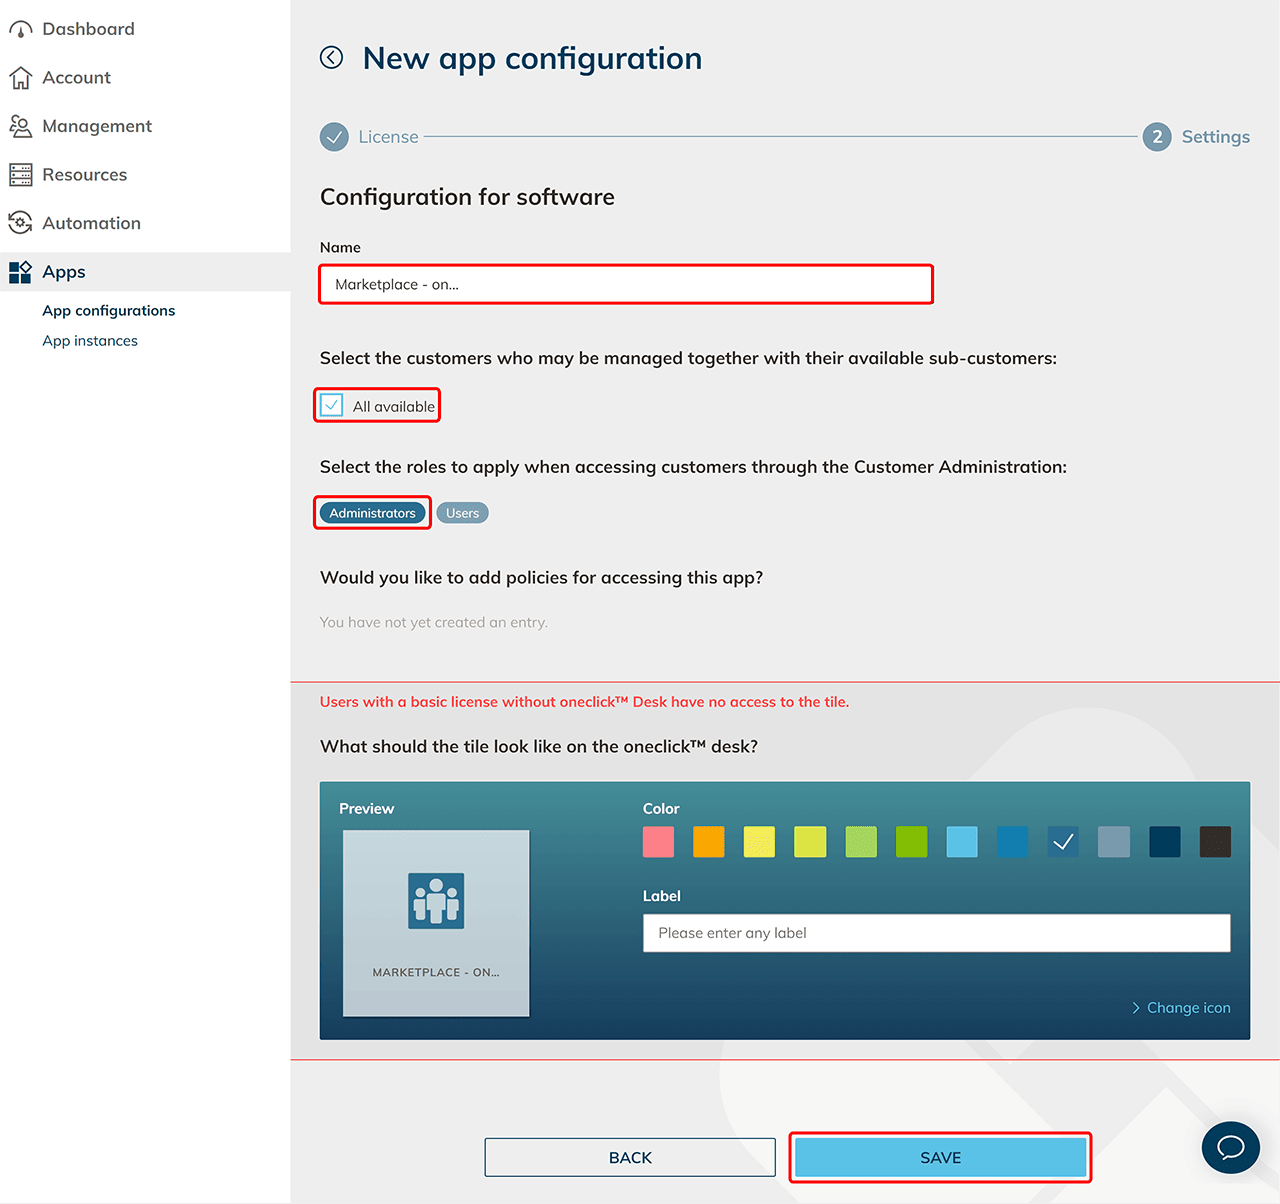
- Give the configuration any name.
- If you want the user who receives the app to manage all customers select "All available".
- Select the "Administrator" role to grant full rights when accessing customers. To grant restricted rights instead, select a role with limited permissions — see Set up a customer admin with restricted rights.
- Optionally, you can add policies like a second factor for this app.
- Customize the tile as desired for viewing on the oneclick™ Desk.
- Finish this step by clicking Save.
- In the menu, click App instances and then click the Plus icon to create a new app instance.
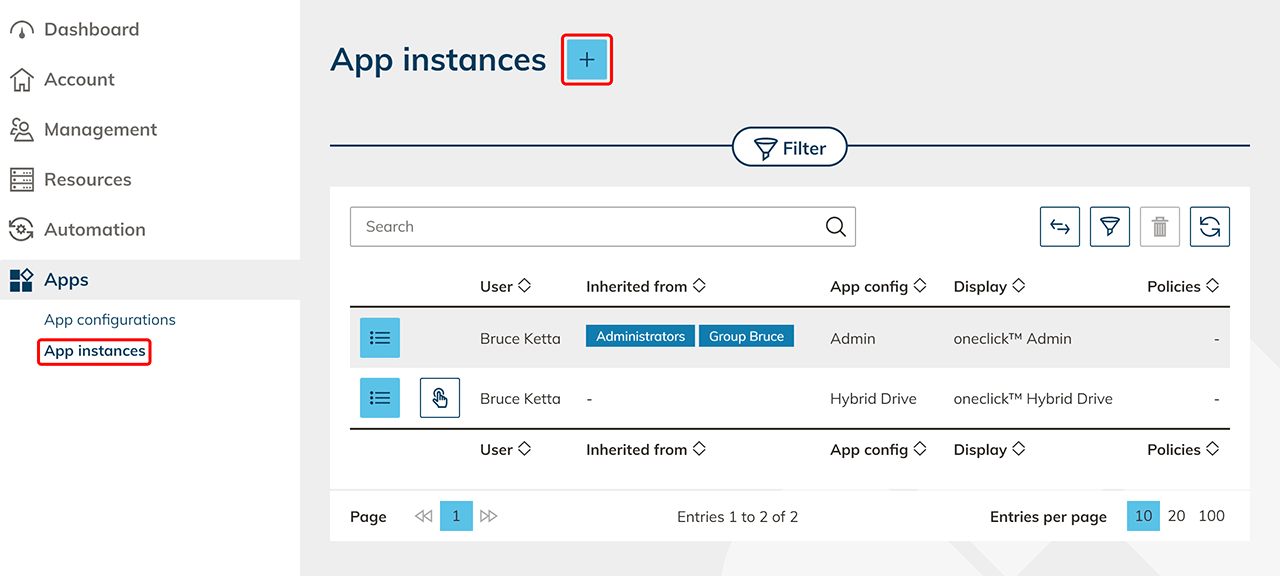
- Directly select the newly created configuration and click Next.
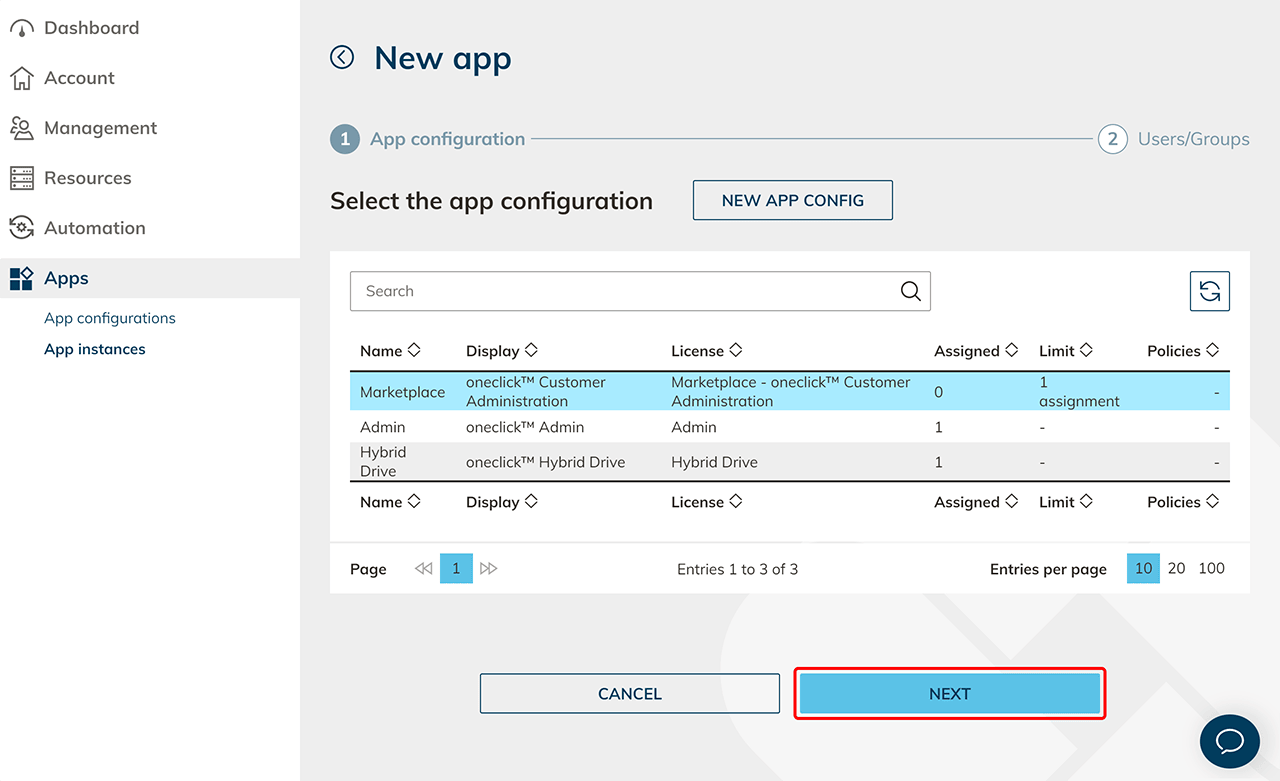
- Depending on whether you requested the license as a single or group license, select the users (single license) or the group (group license) that should receive the app. Click Save.
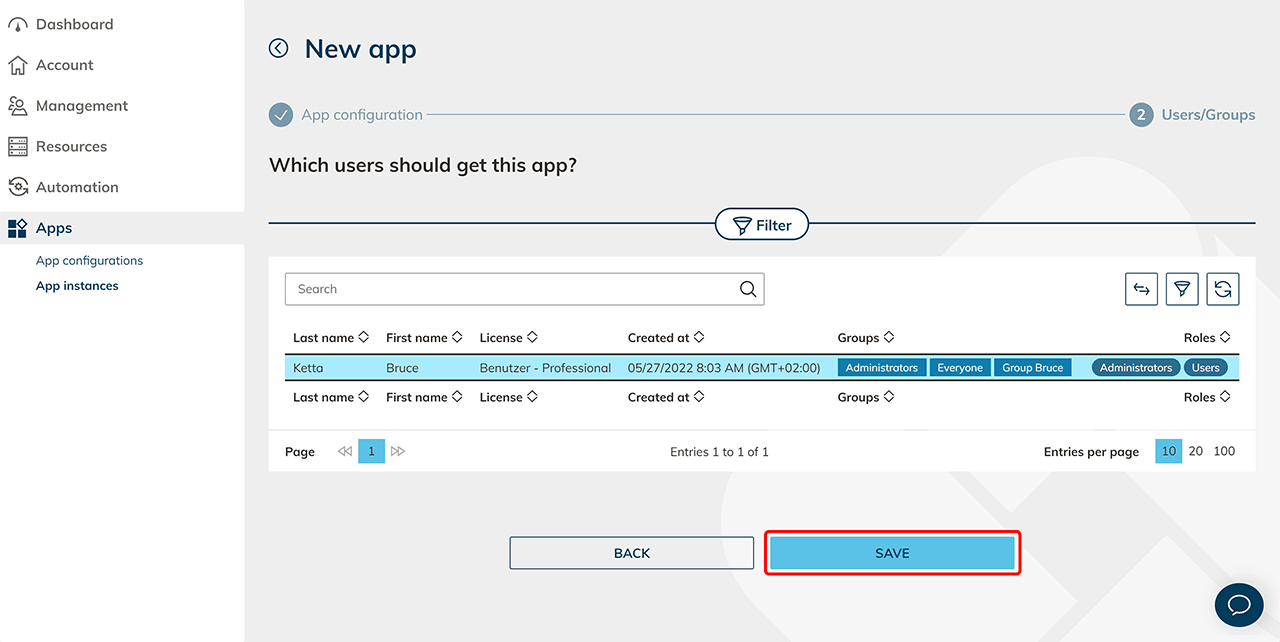
The app is now available. If you have activated the oneclick™ customer admin, you can now create customers.
The rights a customer admin has when accessing a customer are the intersection of two roles: the role selected in the app configuration and the support role of the customer being accessed, which each customer can restrict themselves. A permission only applies when both roles grant it. For more details, see Roles.
Set up a customer admin with restricted rights
A user who receives the customer admin always needs administration rights in your management unit — otherwise they cannot administer customers at all. You define these rights in a role and assign it through a group:
- If the user is a full administrator who also has the Admin app, keep them in the default Administrators group — its Administrator role grants all rights — and additionally assign the customer admin to them.
- If the user should not be a full administrator or does not have the Admin app, first create a dedicated role and assign it to a dedicated group — even if the role has the same permissions as the Administrator role. Do not modify the default Administrators group for this.
A customer admin must keep their admin rights, otherwise they can no longer administer. To limit them, restrict the role in the app configuration, not the group membership. Only remove the user from the default Administrators group if you grant the necessary admin rights through another group.
To give a customer admin restricted rights — for example, access to all customers but without creating or editing users:
- Create a role that includes only the permissions the customer admin should have, as described in Create a role. Remove the permissions the customer admin should not have — for example, create, edit, and delete for users.
- Create a group and assign the new role to it, as described in Groups.
- When you create the app configuration (step 2 above), select this role instead of Administrator.
If a customer admin removes one of their own permissions, they may not be able to restore it with the same user, because they have revoked the right from themselves. This cannot easily be undone.