Activating two-factor or allow-/blocklist IP-addresses
With "Policies", you can add an extra layer of security to the oneclick™ Unified Workspace or to sensitive apps.
You can block access from specific IP addresses or IP ranges, or restrict access by enforcing two-factor authentication (2FA).
You can later combine any number of policies by selecting multiple policies within an app configuration or a user license.
If you want to allow login via an identity provider such as Entra ID or XignSys, follow this article.
Important note on policy logic when two-factor authentication is enabled
Two-factor authentication currently cannot be selectively disabled for individual users or user groups.
Policies are applied additively. As soon as a policy with active two-factor authentication applies, 2FA becomes mandatory.
Settings within a policy only define when and for whom 2FA is activated. An active two-factor authentication cannot be overridden or removed.
Active two-factor authentication cannot be combined with a second one.
Example use case: Applying 2FA in a structured way
Show example use case
If you want only a specific user group to use two-factor authentication while other users work without 2FA, a separate group structure for applications and 2FA is recommended.
- Create a dedicated group exclusively for two-factor authentication, for example “2FA-Users”.
- Link the two-factor policy only to this 2FA user group.
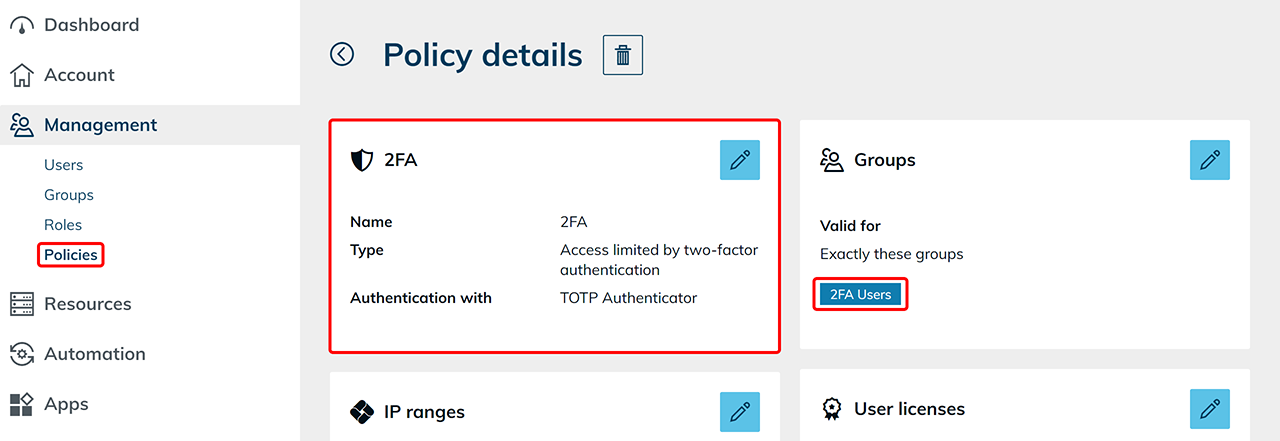
- Add only those users to this 2FA user group for whom two-factor authentication should be mandatory.
Do you want to create a policy that either “restricts access by second factor” or “denies access”?
Proceed as follows:
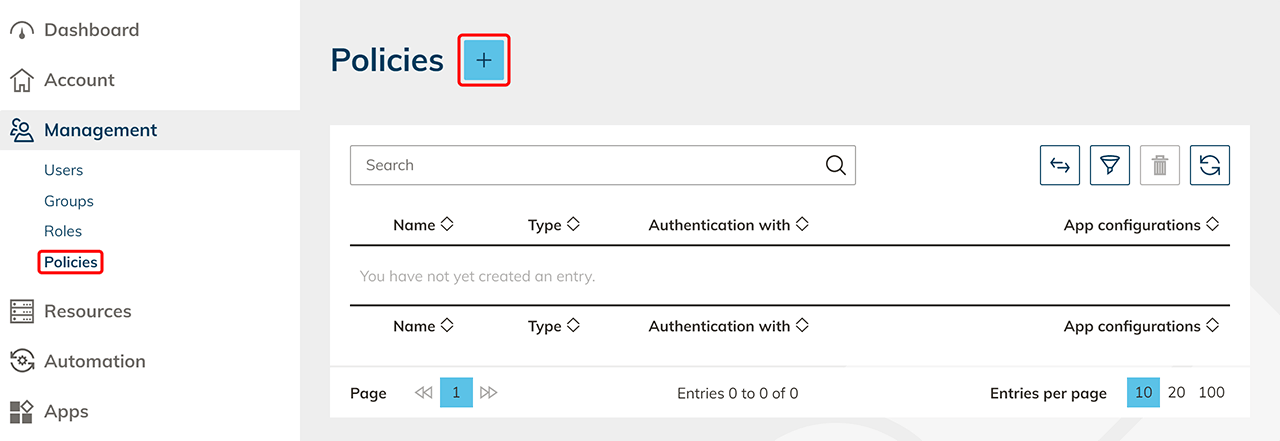
1. Create Policy
- In the Management tab please click Policies.
- Next, click on the Plus icon to create a new policy.
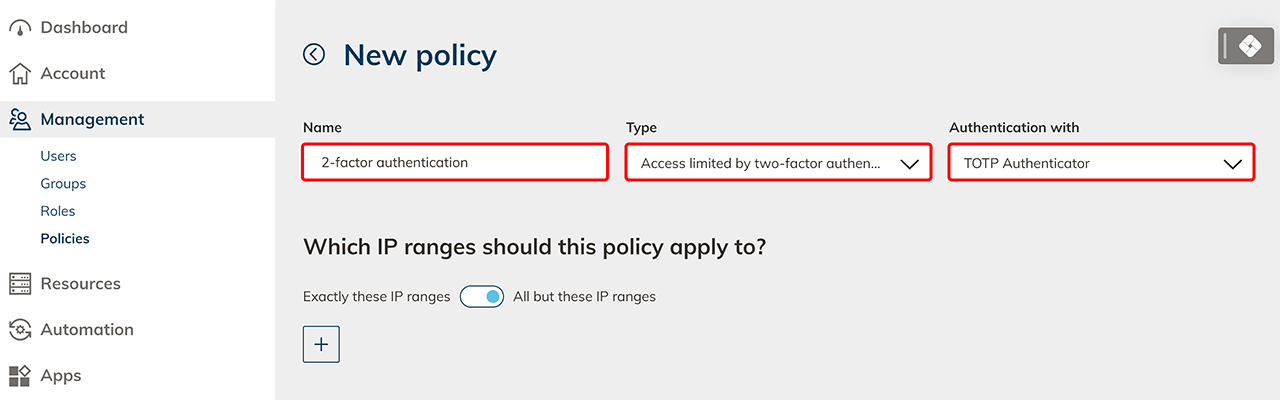
- Assign a name to the policy for later recognition.
- Choose the "Type" of the policy:
- Access prohibited: Access is completely denied.
- Access limited by two-factor authentication: Depending on your selection, access is limited using a second factor via "E-Mail", "SMS" or every "TOTP Authenticator", e.g. by Google or Microsoft. The access code via "E-Mail" expires after 10 minutes, and via "SMS" after 5 minutes.
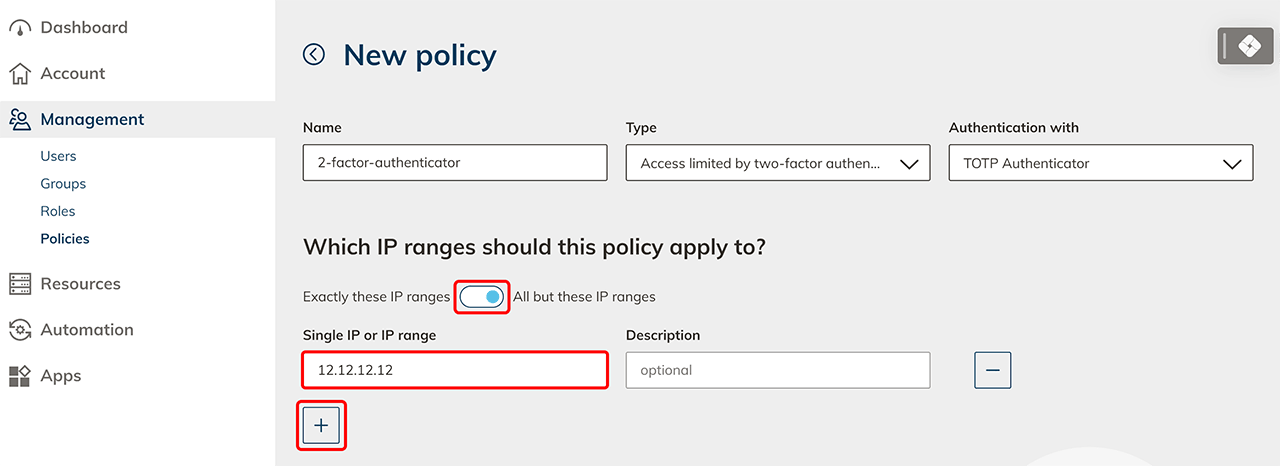
- Use the following section to optional set the IP ranges for which this policy should apply.
- Exactly these IP ranges: Select this option if you want to prohibit or limit access to specific IP ranges.
- All but these IP ranges: Select this option if you want to allow access only to certain IP ranges or like to leave it unrestricted. You can, for example, activate the second factor for all home office users by enabling the "All except these IP ranges" option, clicking on the Plus icon and entering your office IP address here.
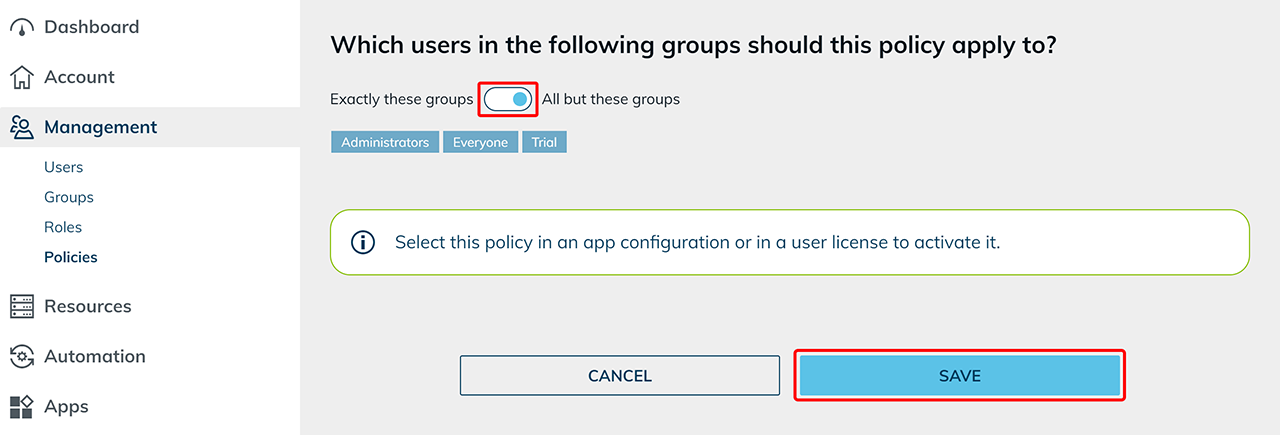
- Use the following section to optional set the groups to which this rule should apply to.
- Exactly these groups: Select this option if you want the policy to be valid for specific groups.
- All but these groups: Select this option if you want the policy to be valid for all but specific groups.
This selection only defines which users the policy applies to. It cannot disable an already active two-factor authentication.
- Click on Save.
For more information about the behavior of multiple 2FA policies, see Behavior of multiple 2FA policies.
2. Assign the policy via the policy details
2. a) Assign the policy to a user license
To prompt for the second factor when the user logs in, select the policy in a user licenses.
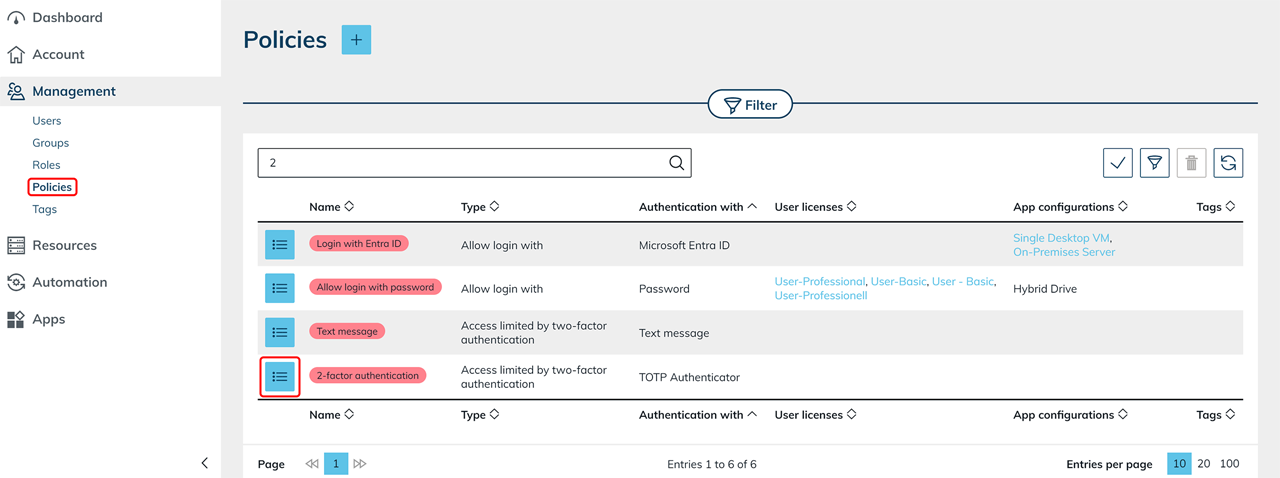
- In the Management tab please click Policies.
- Go to the details page of your policy by clicking on the List icon.
- Click on the Pencil icon in the "User licenses" tile.
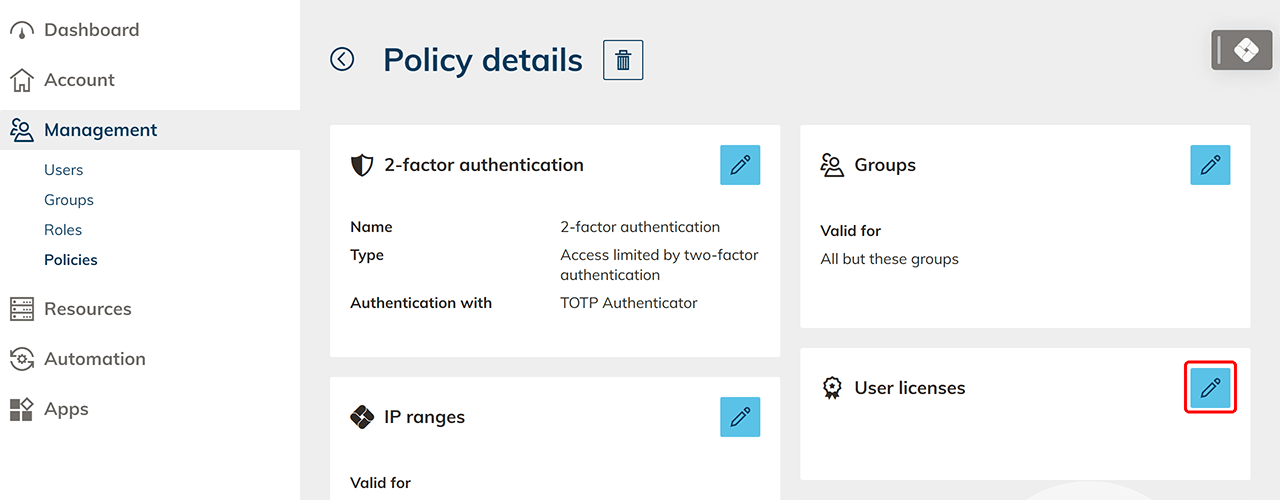
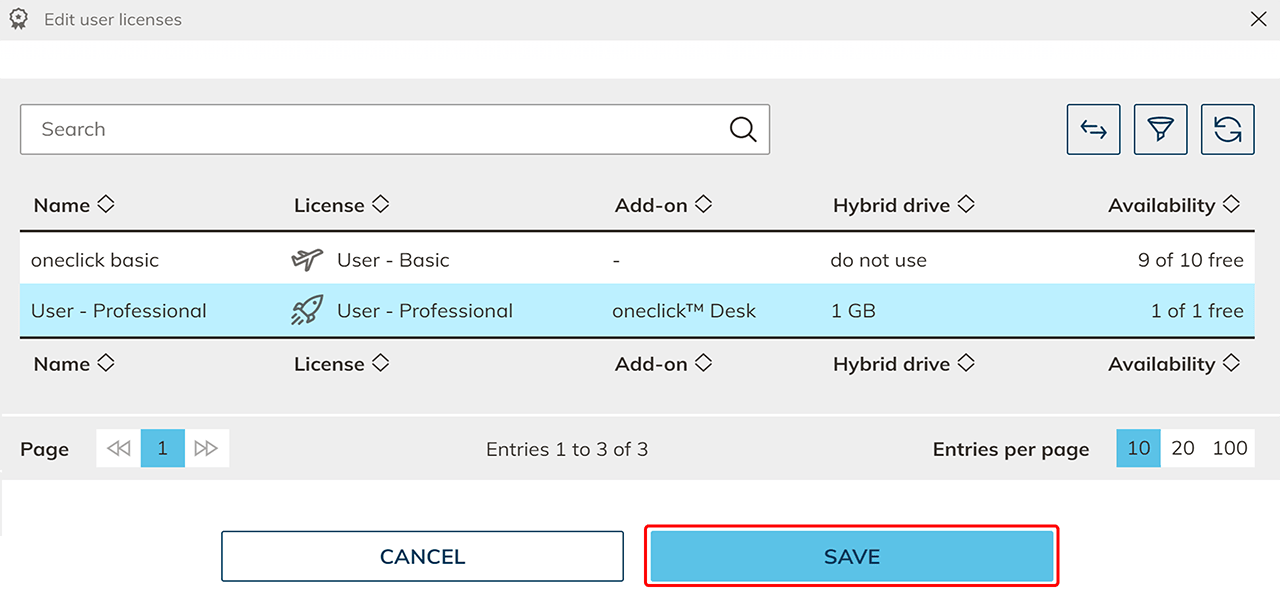
- Select one or more User licenses and finish the process by clicking Save.
The policy is now activated and applies when users sign in.
2. b) Assign the policy to an app configuration
To secure a single app that requires special protection, select the policy in an app configuration.
- Select the Management tab please click Policies.
- Go to the detail page of your policy by clicking on the List icon.
- Click in the "App configurations" tile on the Pencil icon.
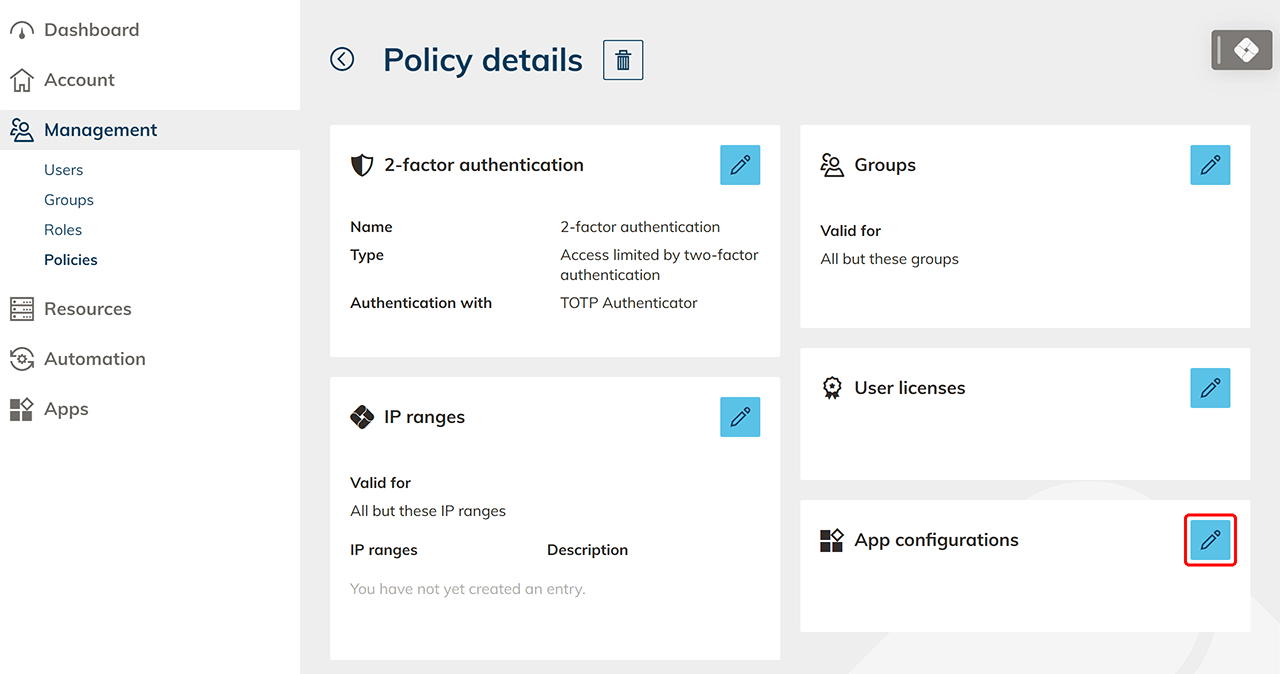
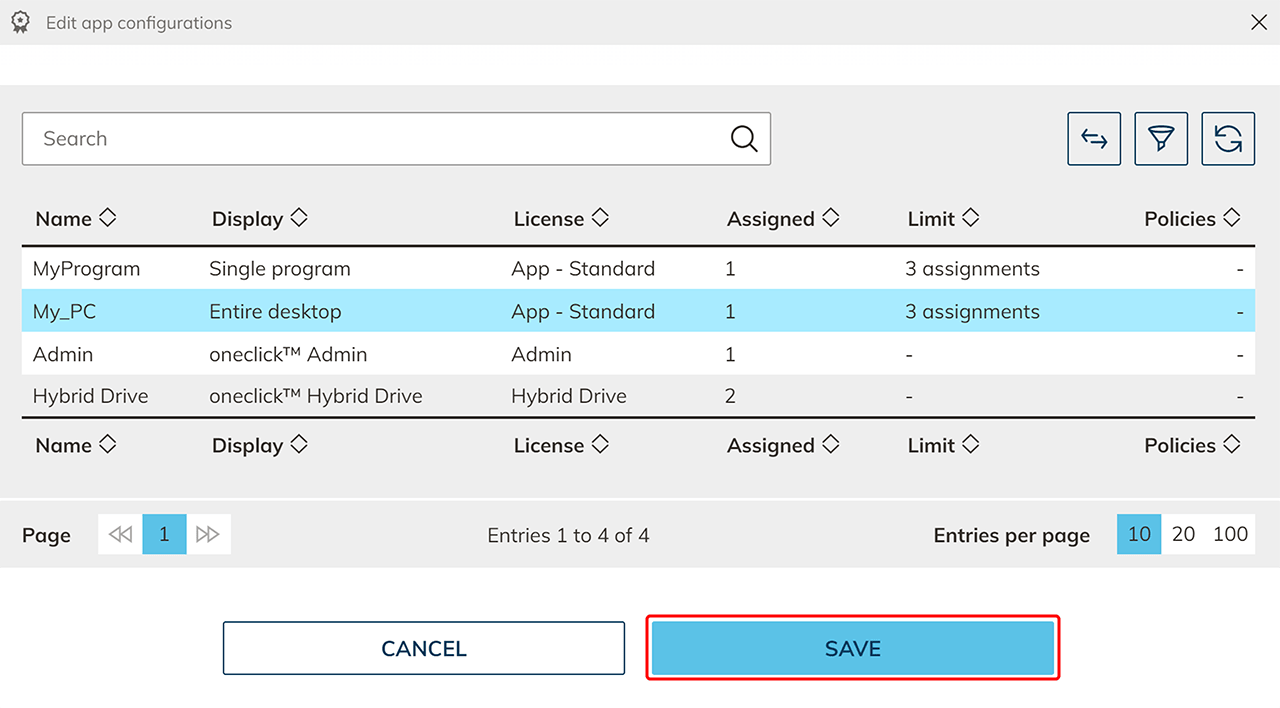
- Select one or more App configurations and finish the process by clicking Save.
 The policy is now activated and applies when opening this app.
3. Assign the policy via the target object
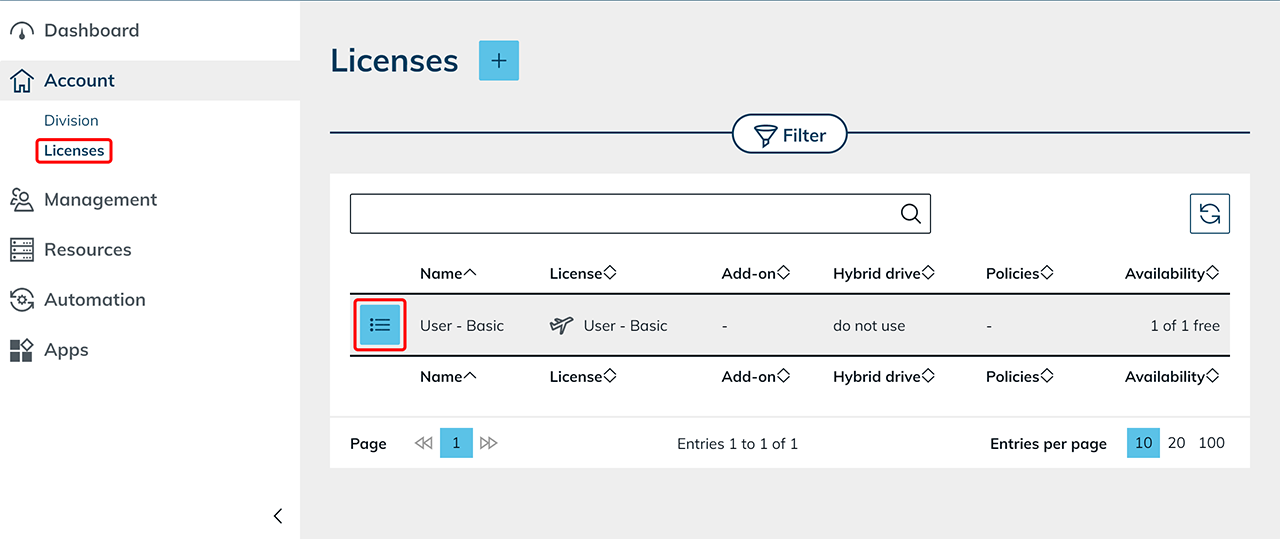
3. a) Assign the policy in the user license details
Have you already created an user license and would like to activate a policy afterwards?
- Click the Account tab in the menu and select License.
- Open the desired app configuration via the List icon.
- Click the Pencil icon in the “Policies” tile.
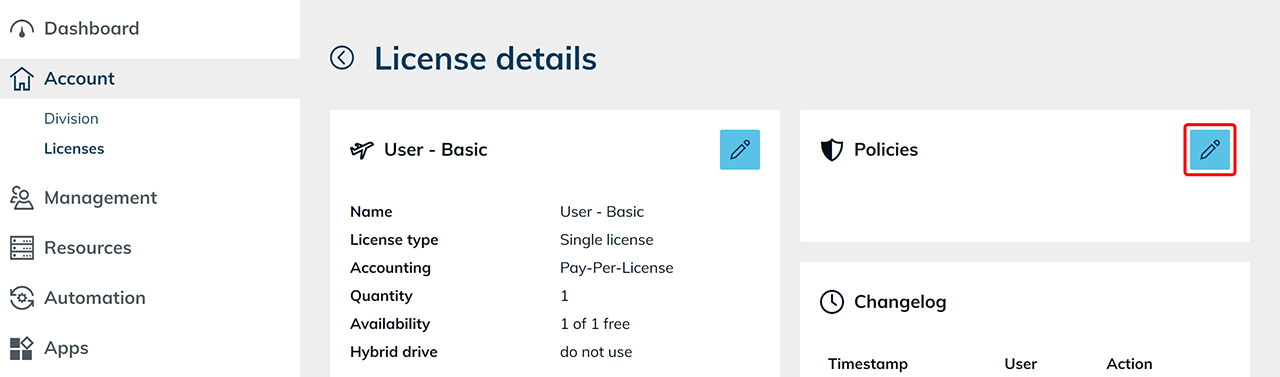
- Select the desired policy and confirm by clicking Save.
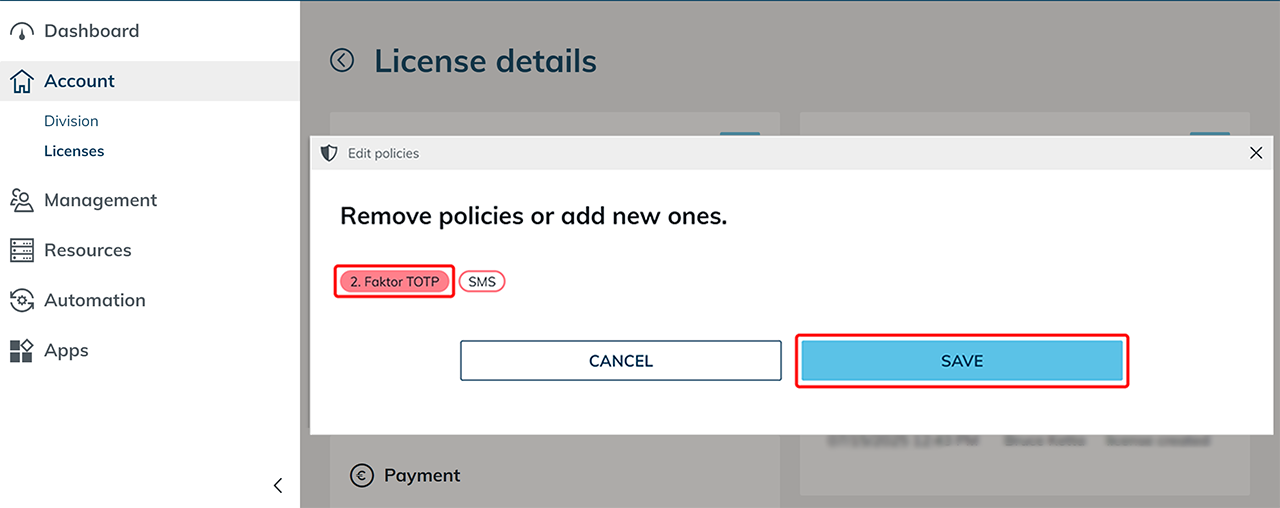
The policy is now activated and applies when users sign in.
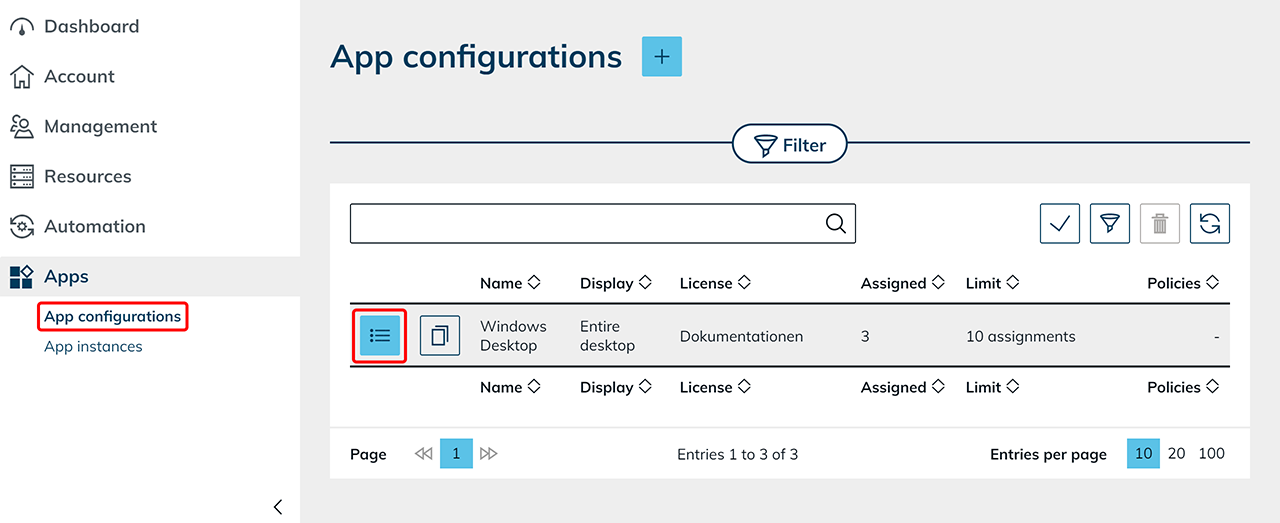
3. b) Assign the policy in the app configuration details
Have you already created an app configuration and would like to activate a policy afterwards?
- Click the Apps tab in the menu and select App configurations.
- Open the desired app configuration via the List icon.
- Click the Pencil icon in the “Policies” tile.
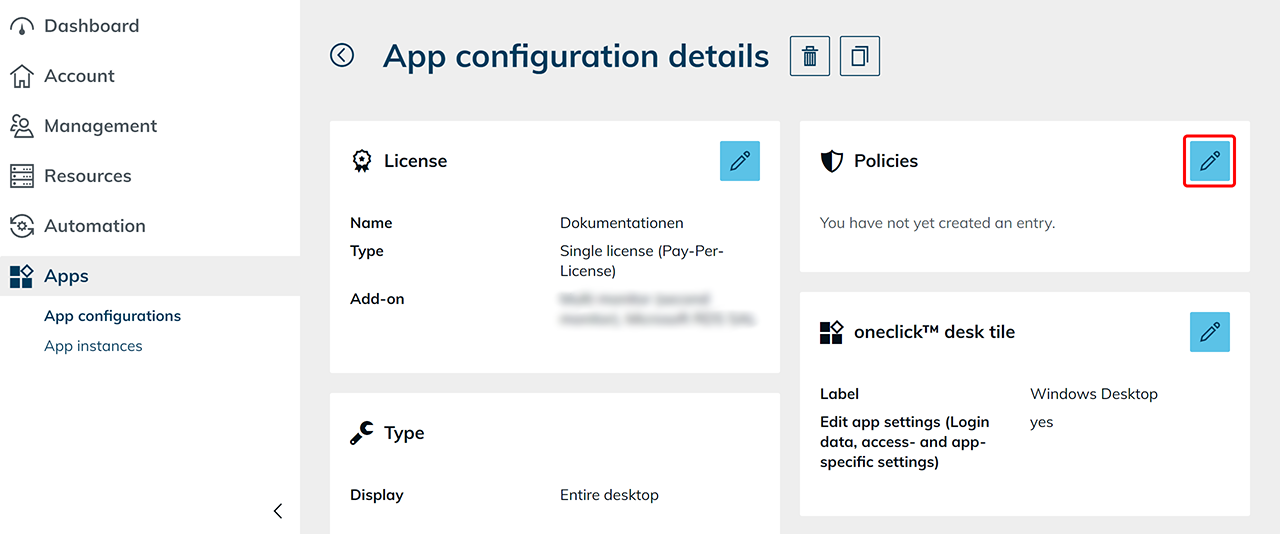
- Select the desired policy and confirm by clicking Save.
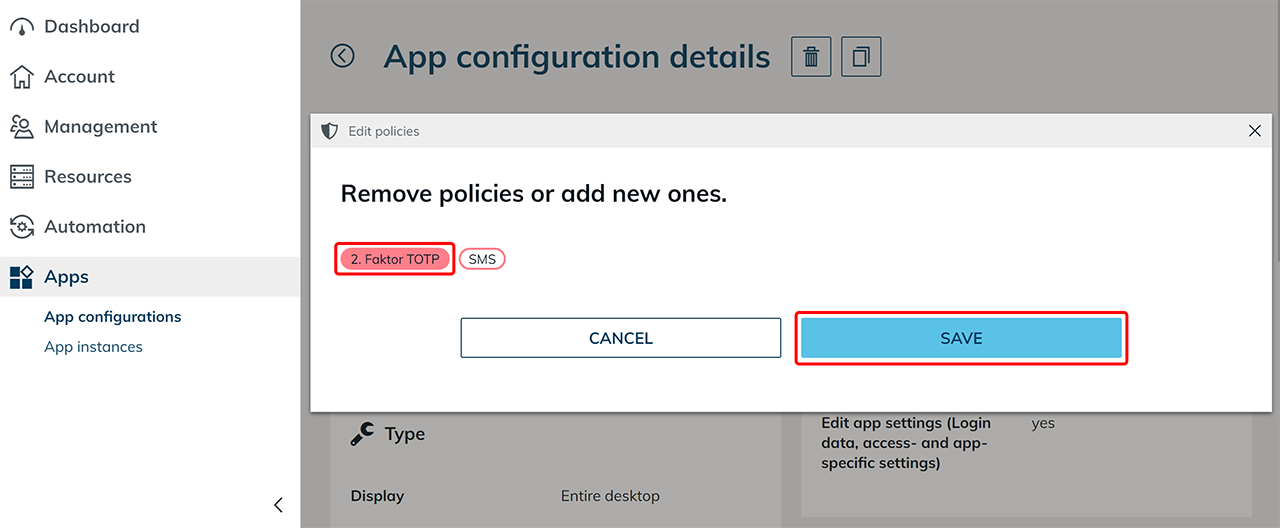
The policy is now activated and applies when opening this app.