Roles
A role combines multiple individual permissions. You can set permissions to read, create, edit, and delete for different areas of the oneclick™ Admin. When you assign a role to a group, the permissions apply to all users in that group. oneclick™ adds up the permissions from all groups a user belongs to. You can only add permissions, but cannot restrict them through another role.
Do not delete or modify the Administrator role assigned to the default Administrators group or the Admin app. Otherwise, users may no longer have full administrative access to the management unit.
Create a role
- Click on Roles in the Management tab.
- Click the Plus icon to create a new role.
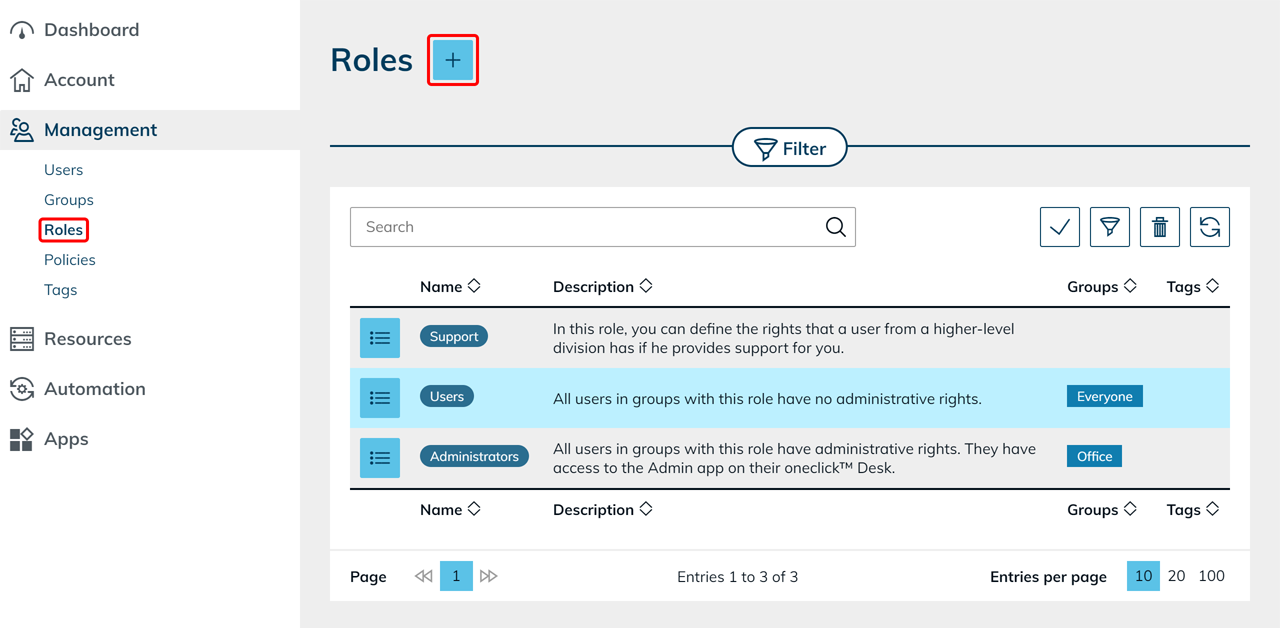
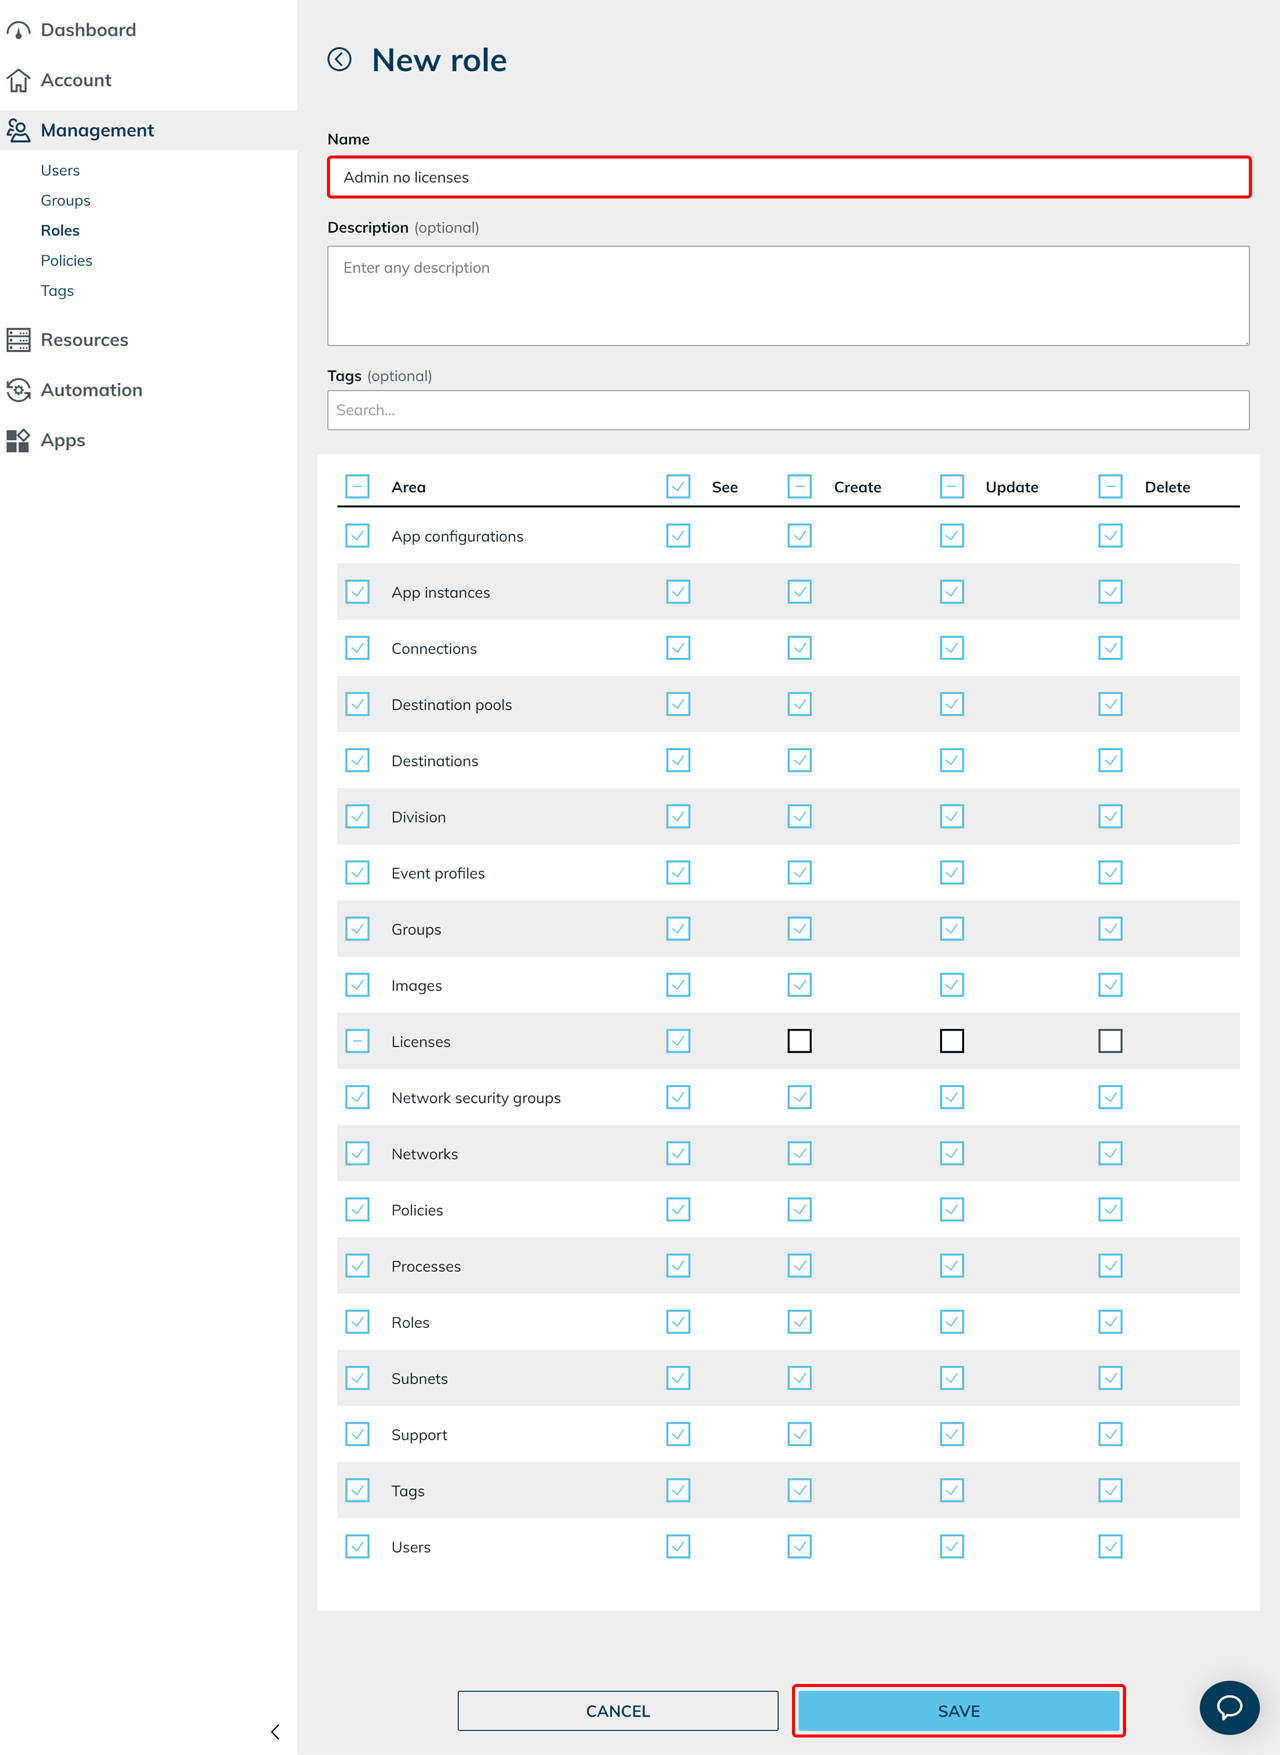
- Give the role a Name and select the desired permissions.
- Click Save.
Assign a role to an existing group
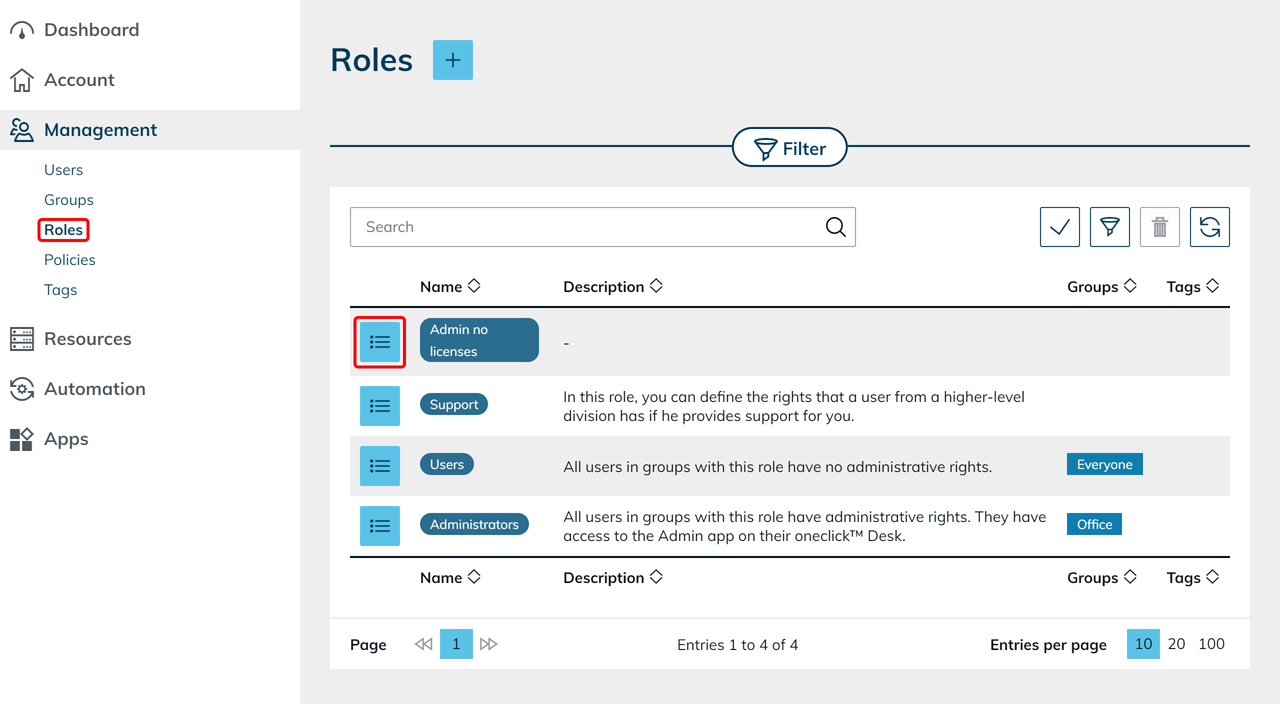
- Click Management in the menu, then click Roles.
- In the row of the role you want to add a group to, click the List icon.
- In the Groups field, click the edit icon.
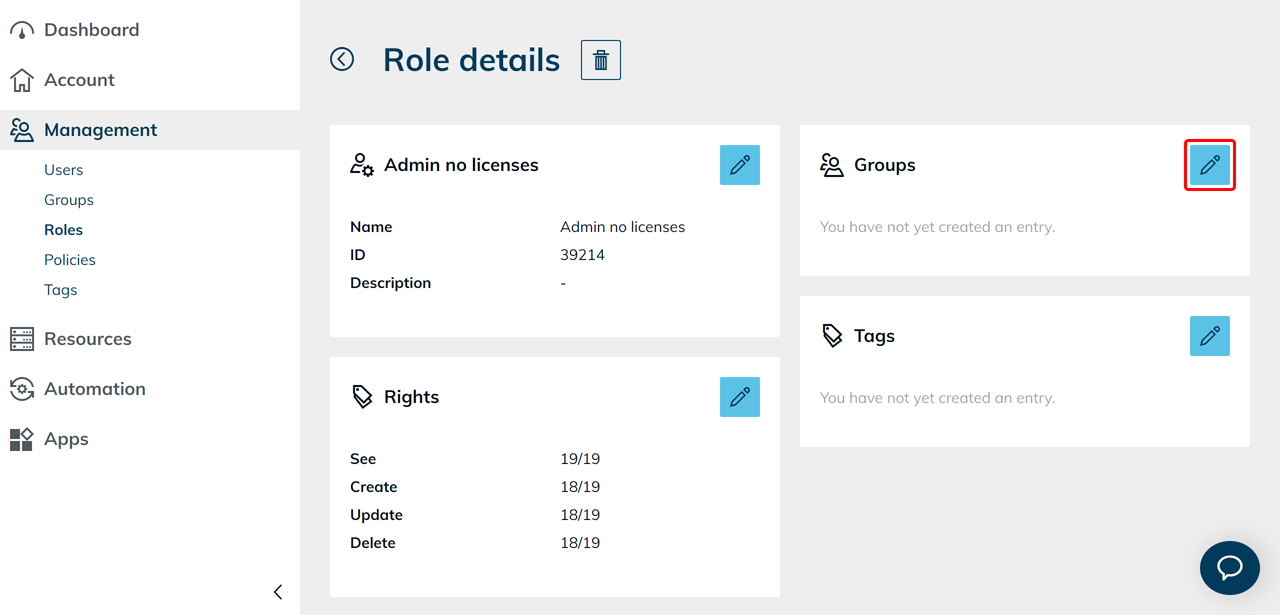
- Select the group you want to add.
- Click Save.
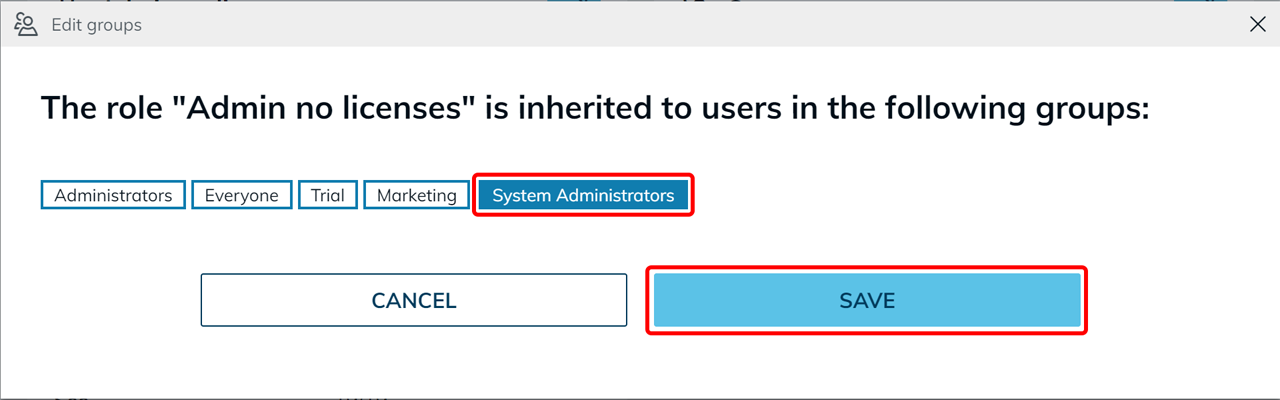
Set up your own administration group with restricted permissions
Create a new group if users should only be able to use certain areas of the oneclick™ Admin. To do this, do not change the role or app assignment of the default Administrators group.
- Create a new role with the required permissions, as described in the Create a role section.
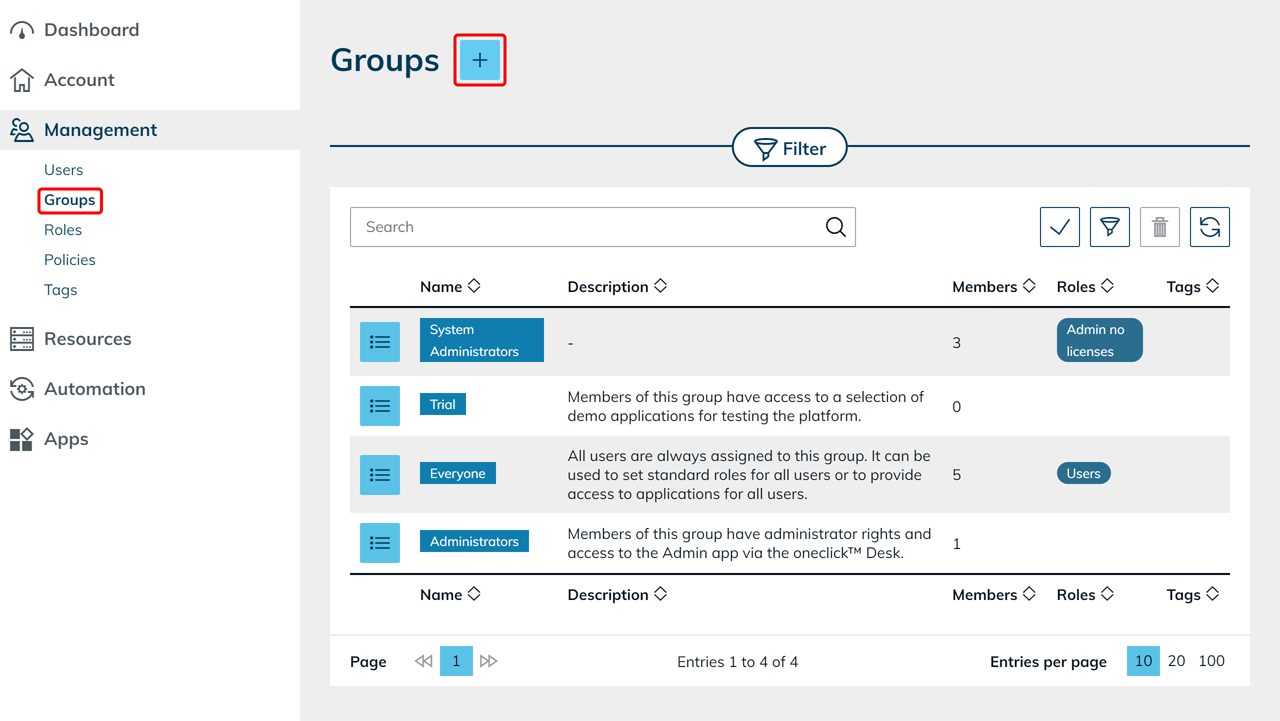
- Then click Management in the menu, then click Groups.
- Click the Plus icon.
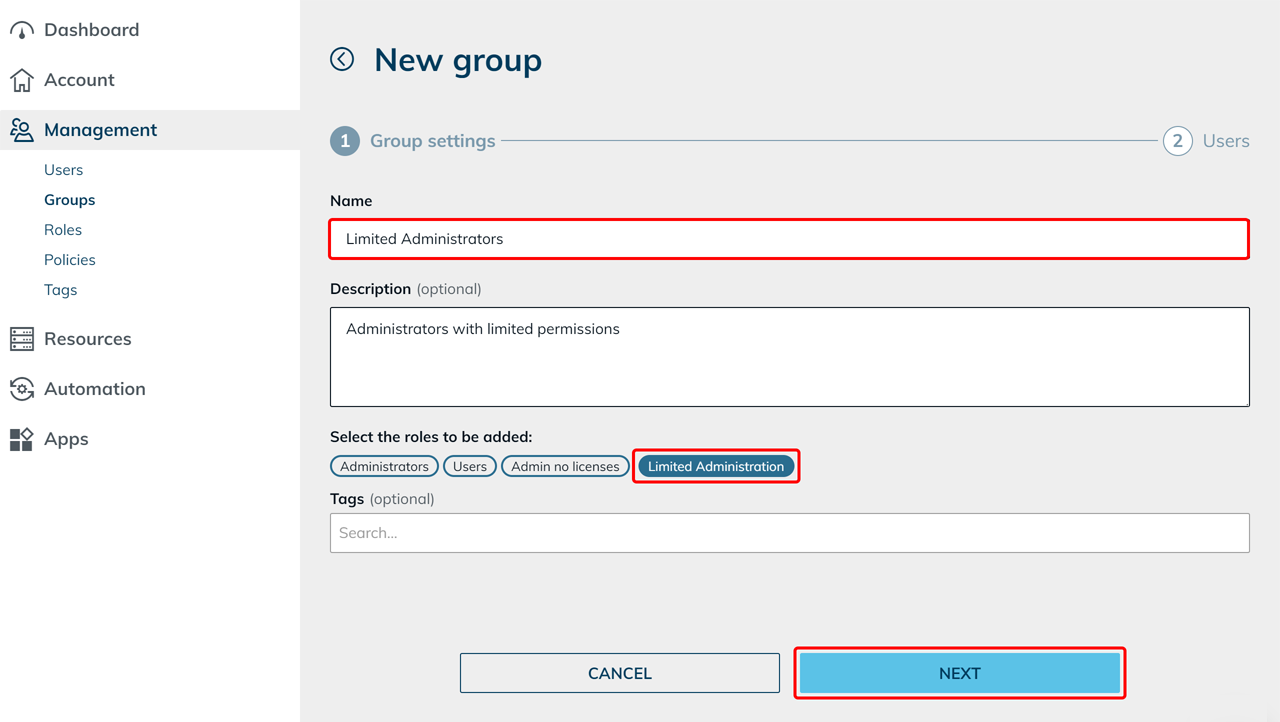
- Give the group a Name and select the new role.
- Click Next.
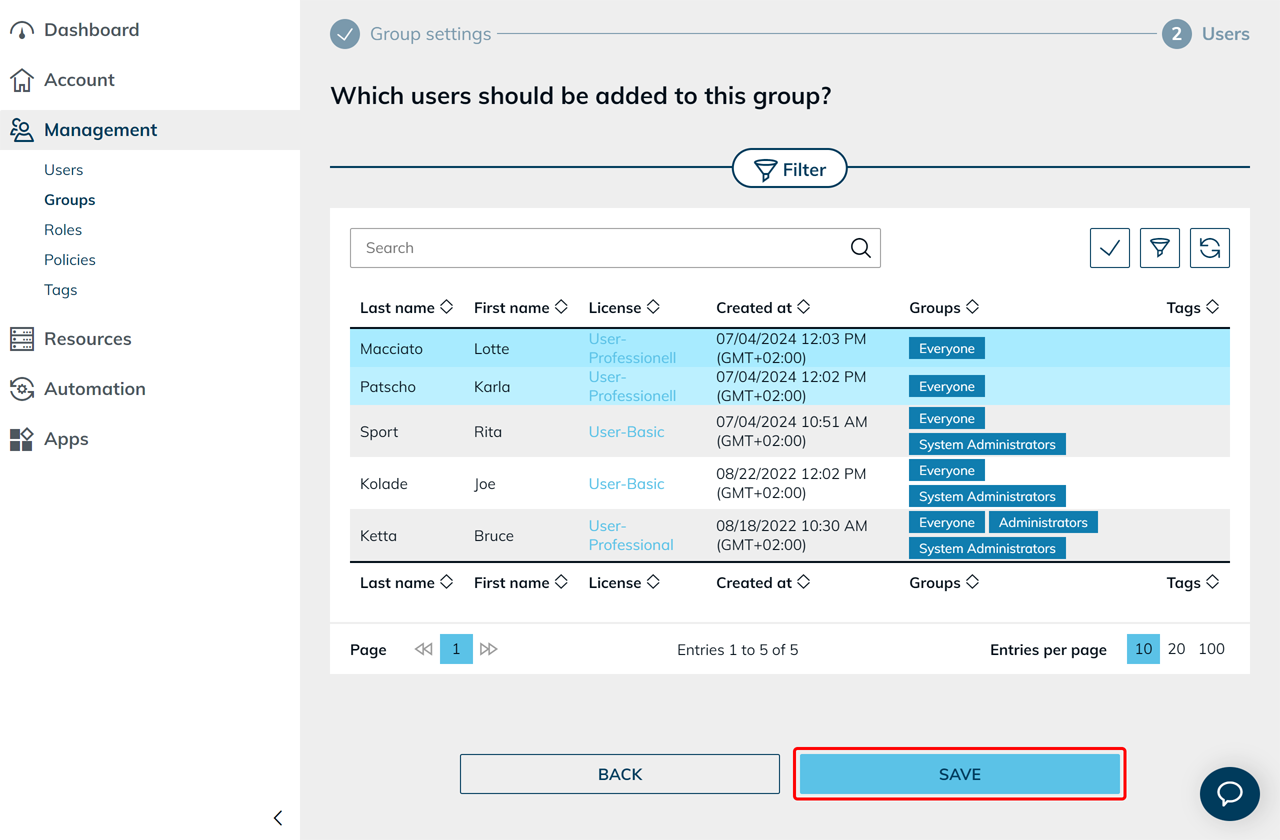
- Select the Users you want to add to the group.
- Click Save.
The Admin app is already assigned to the default Administrators group. New groups do not automatically receive this app. Therefore, assign the Admin app to the new group as well.
- In the row of the new group, click the List icon.
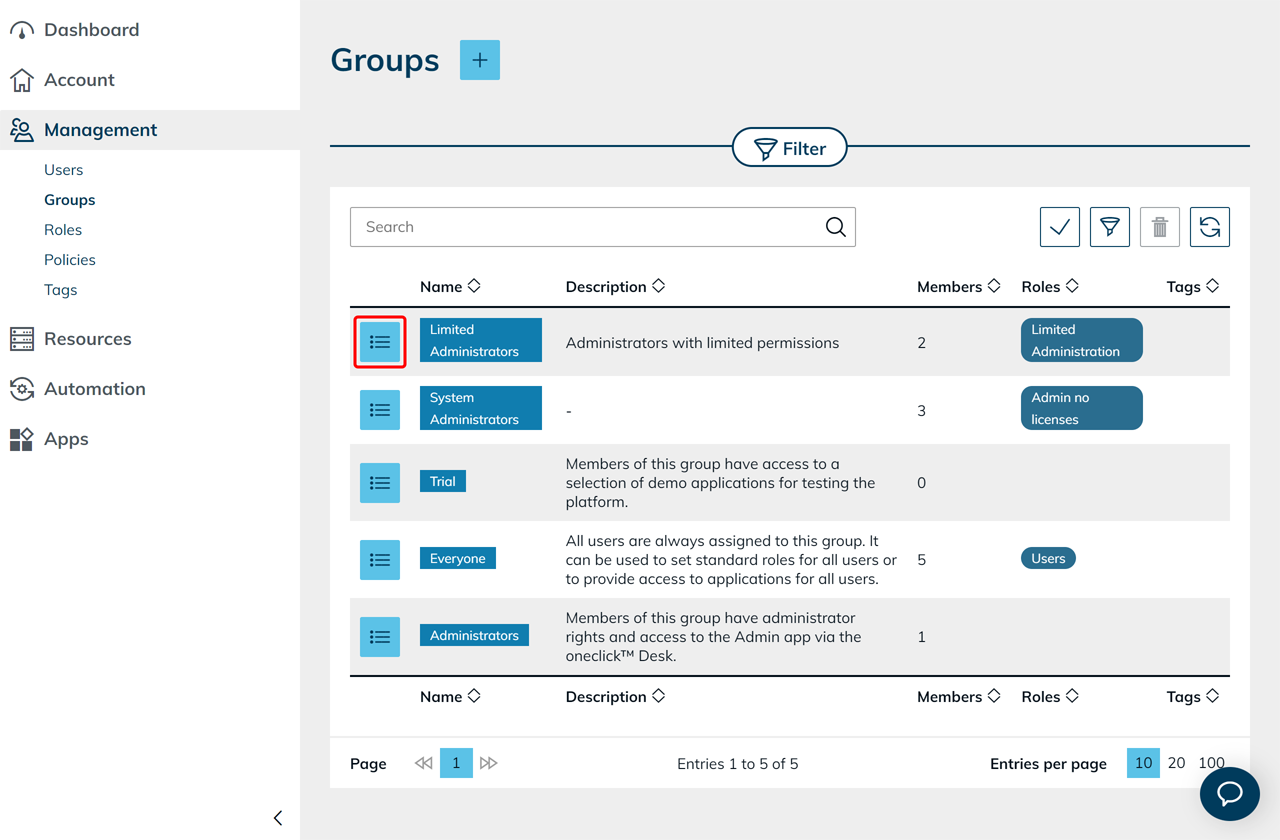
- In the Apps tile, click the Plus icon. If the group already has apps assigned, click the Pencil icon.
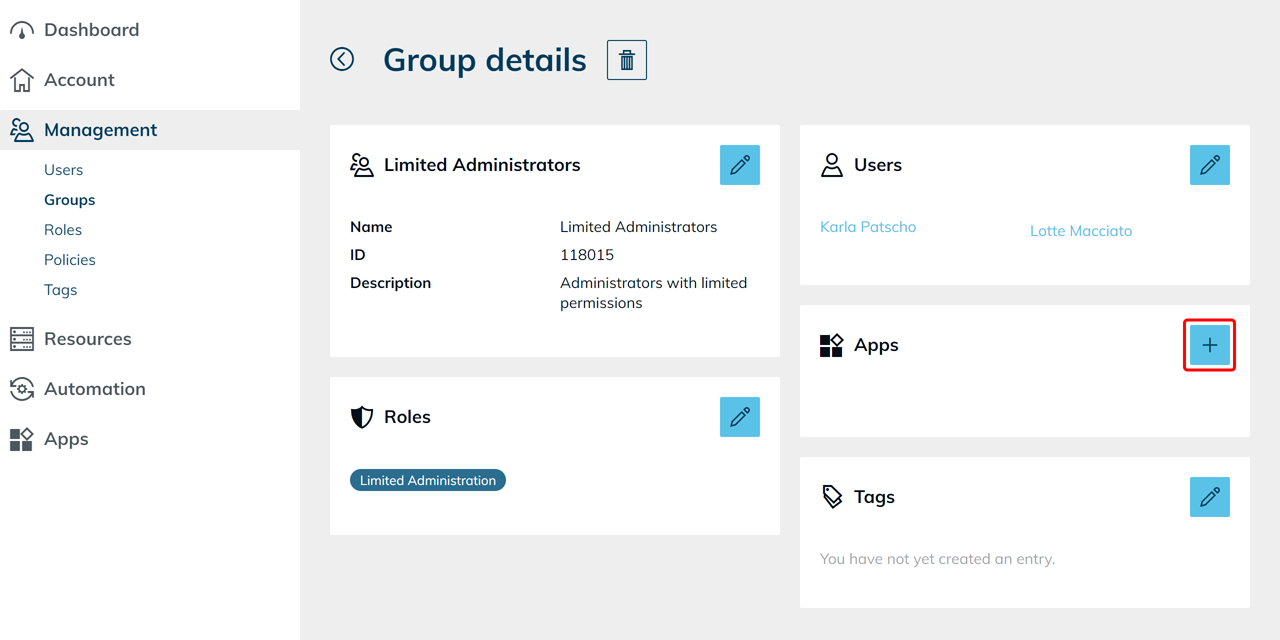
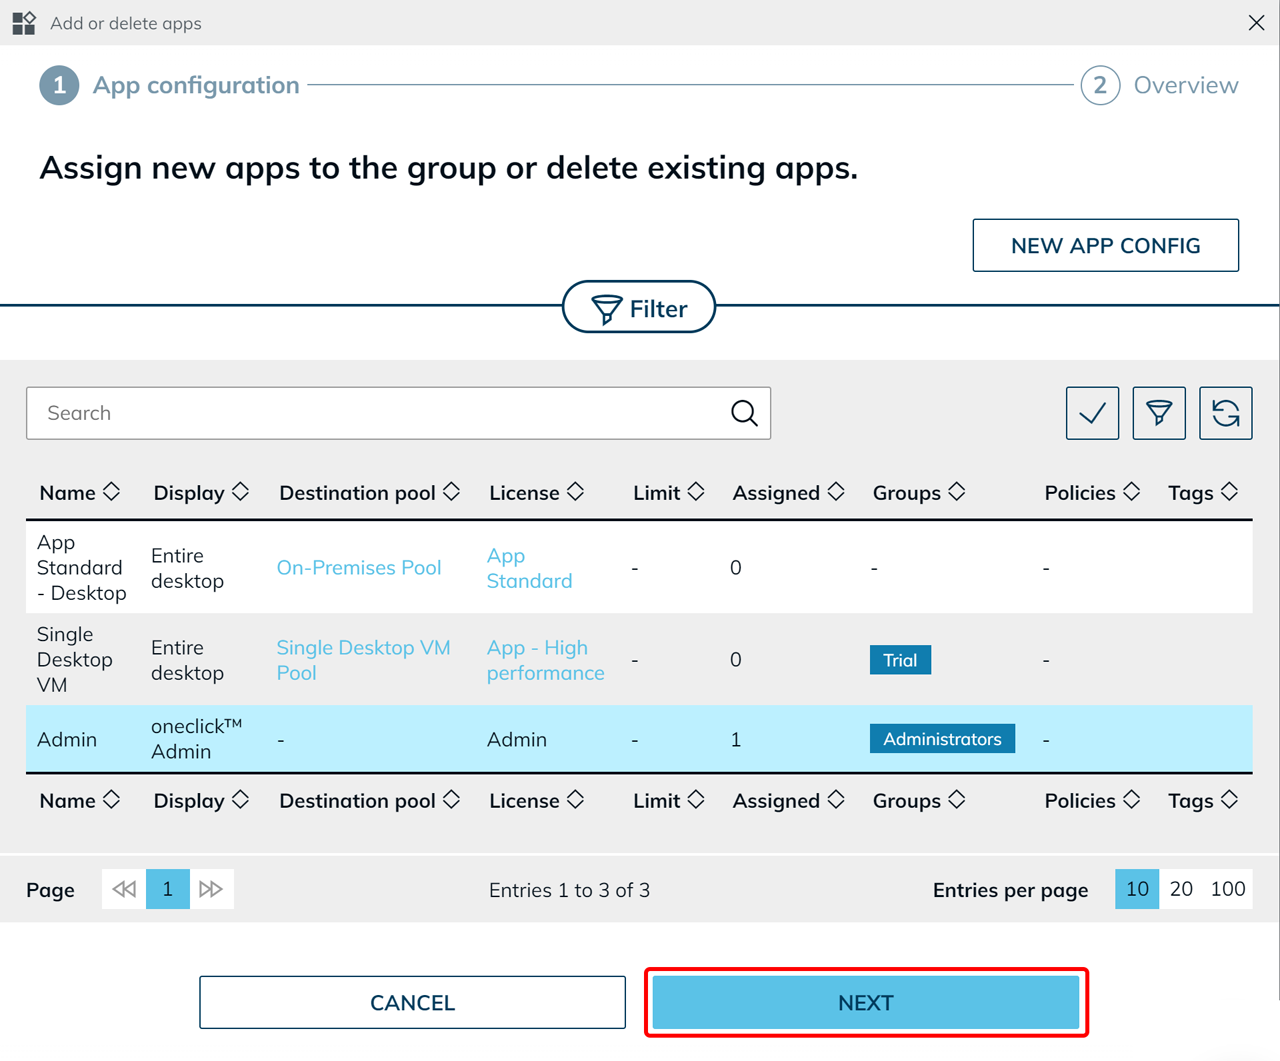
- Select the Admin app with the label oneclick™ Admin.
- Click Next.
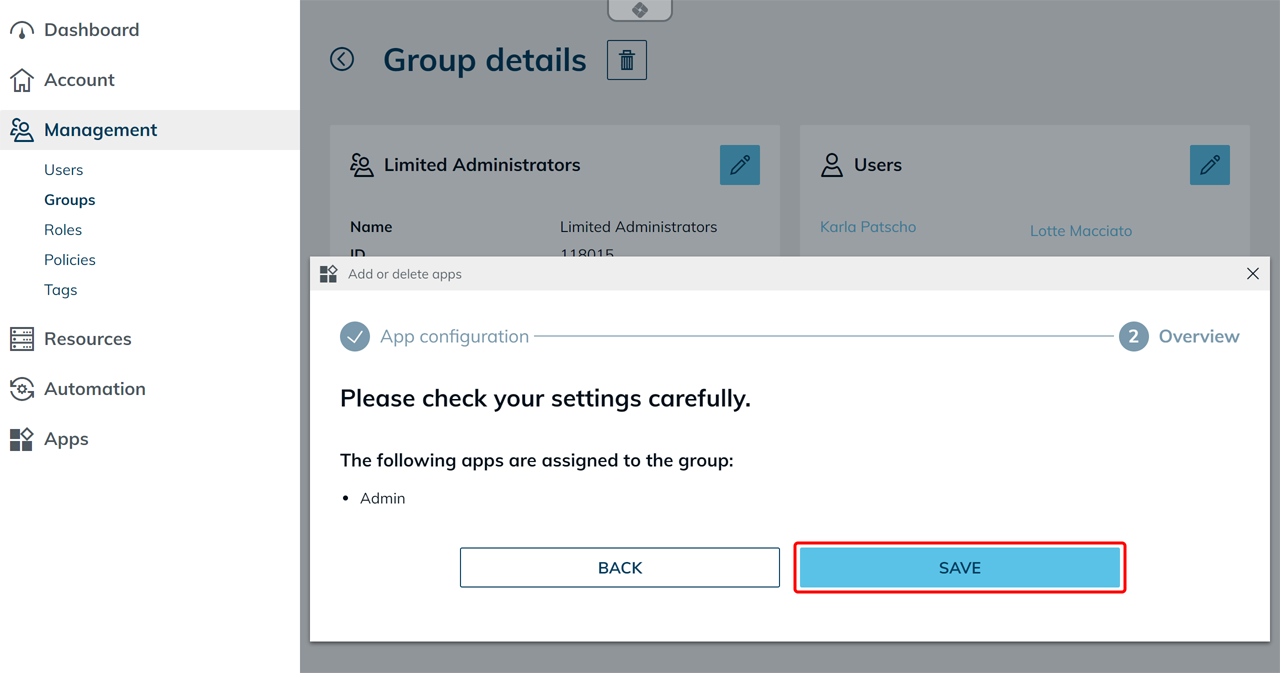
- Review the information and click Save.
Check administration permissions
Log in with a user account from the new group and open the newly assigned Admin app. Check whether the user can only access the areas that you have made available through the new role. If the user was previously a member of the default Administrators group, remove them from this group only after successful verification.
User Role
The User Role is assigned to the All Users group. Users with this role have no permissions in the oneclick™ Admin. However, they can access the apps assigned to them and edit their profile if they have a Professional license.
Administrators Role
The Administrators Role is assigned to the default Administrators group. Users with this role have all available permissions in the oneclick™ Admin.
Effective rights when accessing a customer
When a customer admin accesses a customer, the effective rights are the intersection of two roles:
- the role in the customer admin's app configuration and
- the support role of the customer being accessed, which each customer can restrict themselves.
A permission therefore only applies when both roles grant it. Keep this in mind if a customer admin appears to be missing rights: the customer's own support role may be restricting what is possible.