Configure elastic mode
First, create an event profile for autoscaling and select elastic mode under Scaling mode.
In elastic mode, oneclick™ automatically creates and removes virtual machines (VMs) depending on the load. This can incur costs with your cloud provider. oneclick™ only removes automatically created VMs. Manually added VMs remain.
Select base VM
Select the virtual machine that oneclick™ should use as the basis for autoscaling. oneclick™ creates all further virtual machines as clones of this base VM.
You can only select virtual machines that meet the following requirements:
- oneclick™ can reach the virtual machine via a firewall rule.
- The virtual machine has access to the public internet.
- The virtual machine is prepared for process execution in the advanced settings.
Depending on the cloud provider, you can define alternative instance types. This allows oneclick™ to create new VMs even if the base VM's instance type is not available.
Fallback instance types
This function is available for the providers Open Telekom Cloud, Orange, and Huawei.
Enable the toggle to configure Specify fallback instance types.
Fallback instance types are used if the default instance type defined in the base VM is not available in sufficient quantity.
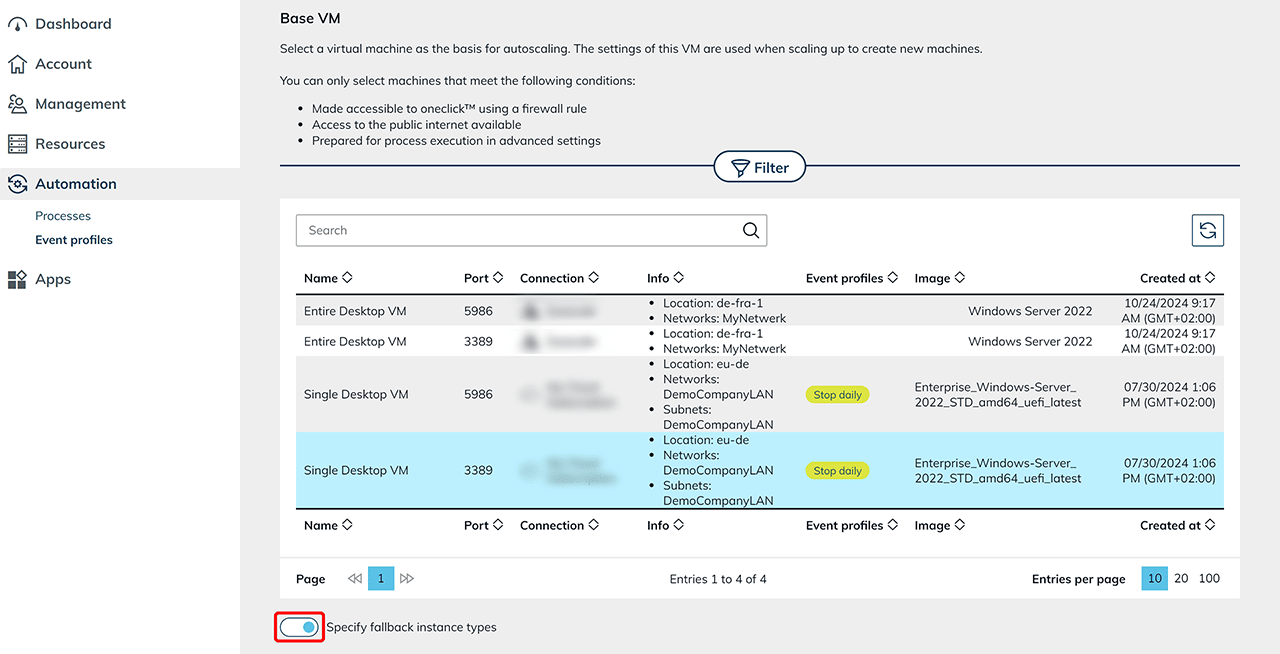
Select the desired fallback instance types from the list of available options.
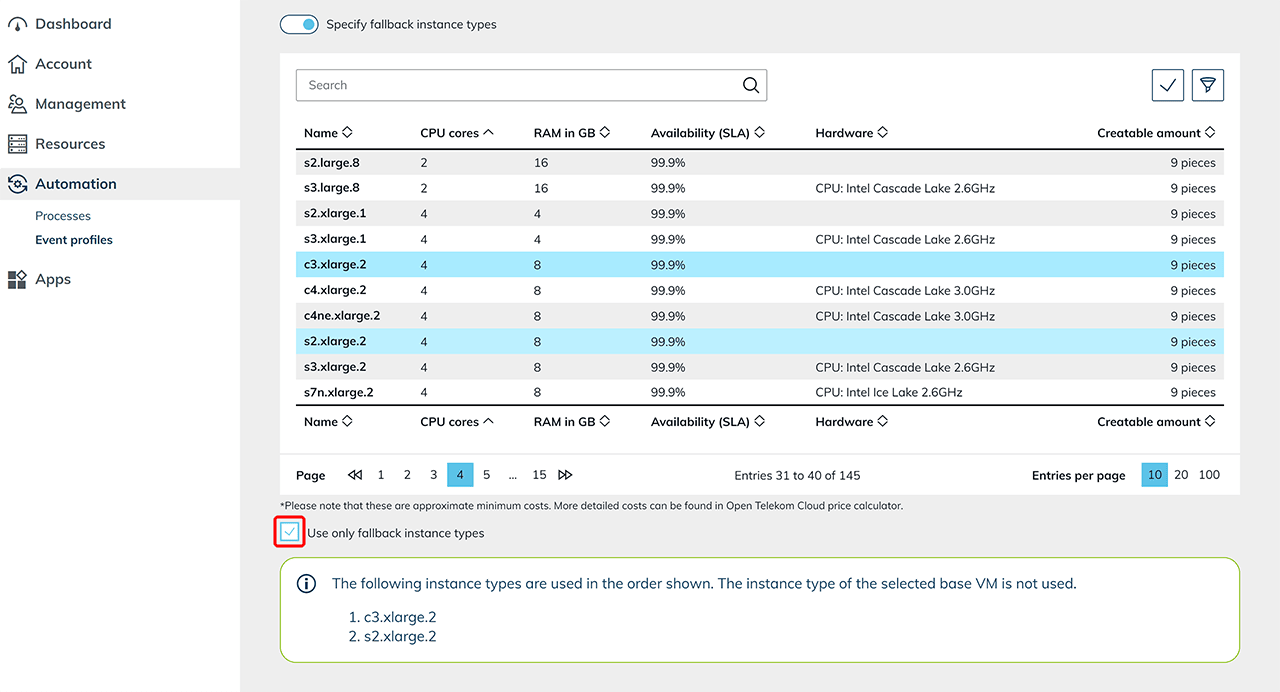
If you want to use only fallback instance types, enable the corresponding option. In this case, only the defined fallback instance types are used, even if the original instance type is available.
They are used in the order in which they are listed in the list.
Different instance type
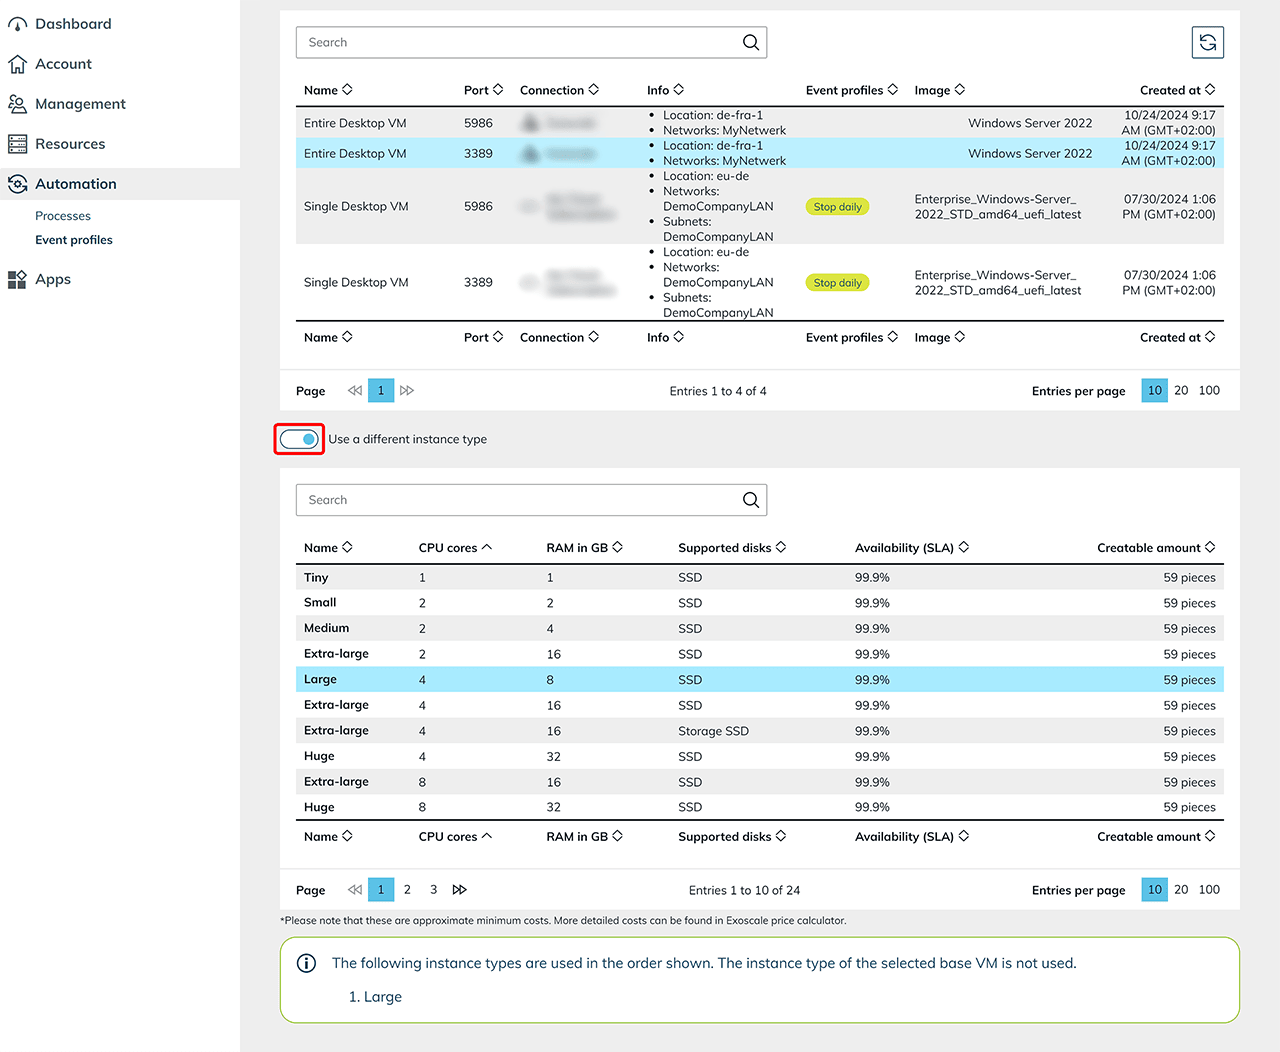
For other providers, you can define a different instance type that is used instead of the base VM instance type.
Enable the toggle and select a suitable alternative from the list of supported instance types.
Scaling behavior
The available settings depend on whether you use single user or multi user.
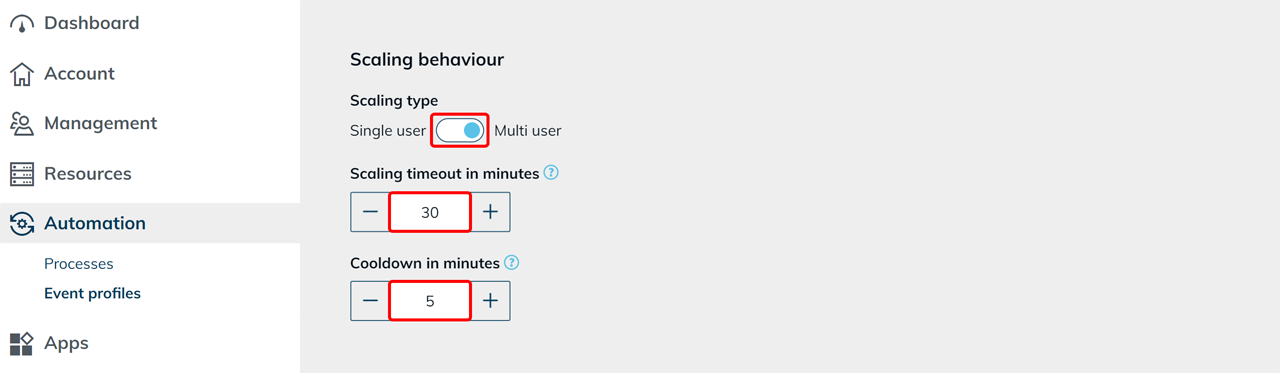
Select scaling type
Select the desired scaling type:
- Single user
is suitable for compute-intensive applications with exclusive system usage, for example CAD applications. - Multi user
is suitable for scenarios in which multiple users work on one system at the same time.
Scaling timeout in minutes
Define how long a scaling operation may take at most. If oneclick™ does not complete the operation successfully within this period, for example due to a failed domain join or an unreachable VM, oneclick™ discards the affected clone and restarts the scaling operation.
The value applies to:
- scaling up
- scaling down
- the initialization of new clones
- force scaling down despite active users
Cooldown in minutes
Define how long oneclick™ waits after a load-related scaling action before the system scales in the opposite direction.
The cooldown prevents oneclick™ from repeatedly starting and stopping a destination when the load is close to the defined threshold.
The default value is 5 minutes. Set the value to 0 to disable the cooldown.
Single user
For single user, select the number of systems to keep available. Also note the information on scaling up and down in the oneclick™ admin.
Configure scale up
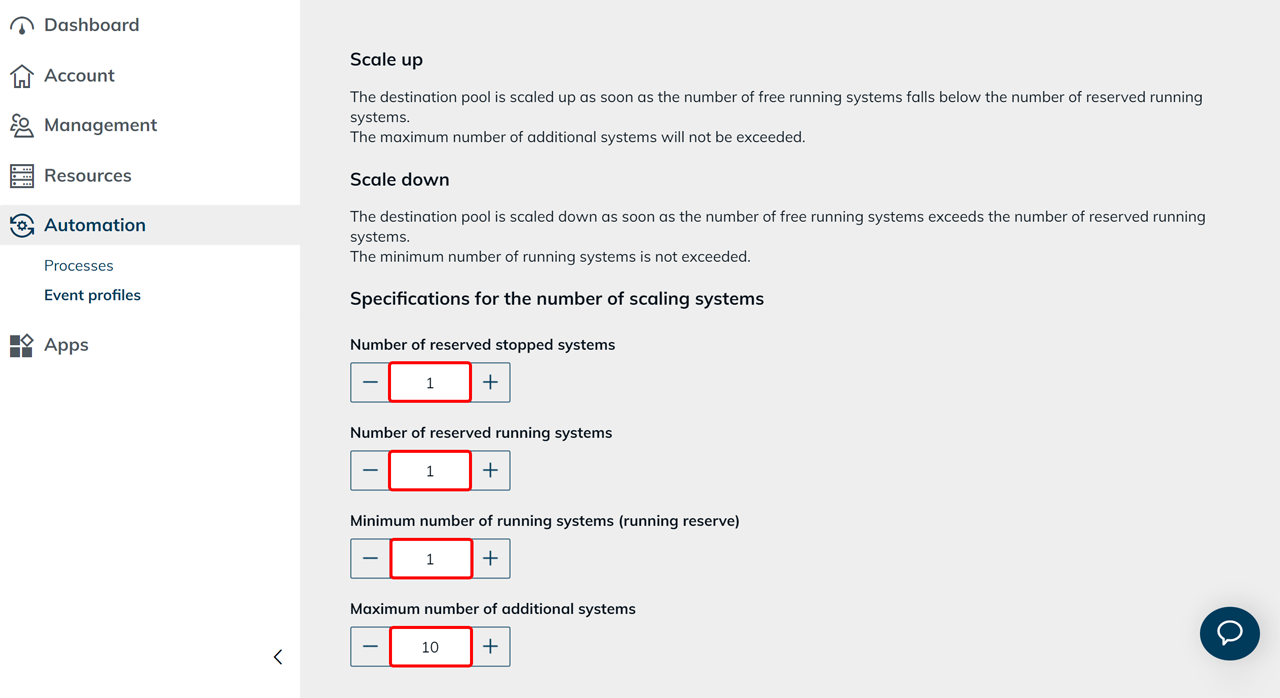
If the number of free running systems falls below the value under Number of reserved running systems, oneclick™ creates an additional clone. The defined Maximum number of additional systems is not exceeded.
Configure scale down
If more free systems are running than defined under Number of reserved running systems, oneclick™ stops the additional systems. If the stopped reserve is already full, oneclick™ removes them instead.
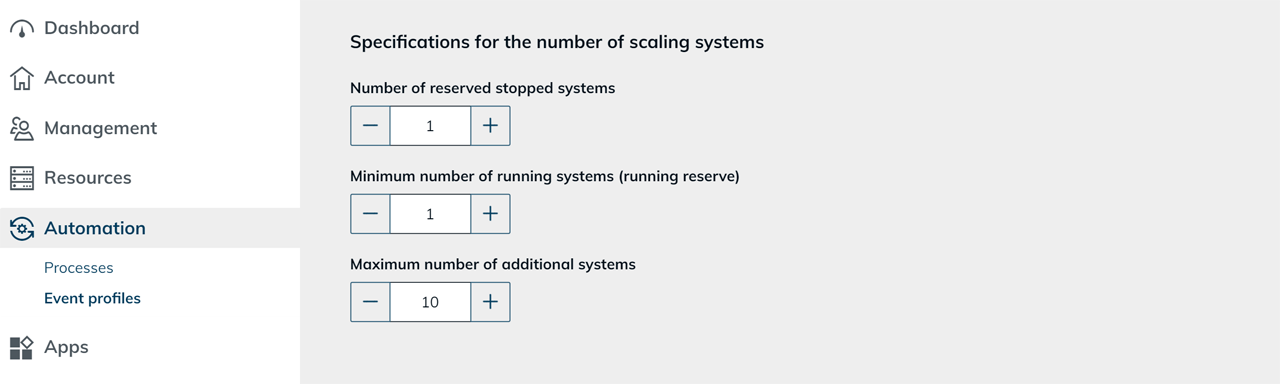
Define number of scaling systems
-
Number of reserved stopped systems
Define how many prepared systems oneclick™ keeps in a stopped state. If oneclick™ starts one of these systems for a user, oneclick™ creates a new clone to restore the defined number of stopped systems. -
Number of reserved running systems
Define how many free and immediately available systems oneclick™ keeps in a running state. If one of these systems is occupied, oneclick™ creates a new clone to restore the defined number of free running systems. -
Minimum number of running systems (running reserve)
Define the minimum number of systems that must be running. oneclick™ does not undercut this value when scaling down. -
Maximum number of additional systems
Define the maximum number of additional systems oneclick™ may create automatically.
Configure scaling down to zero running destinations under Configure scale to zero.
Keep at least one free system permanently in a running state to avoid delays at login. Adjust the number to the actual concurrent usage.
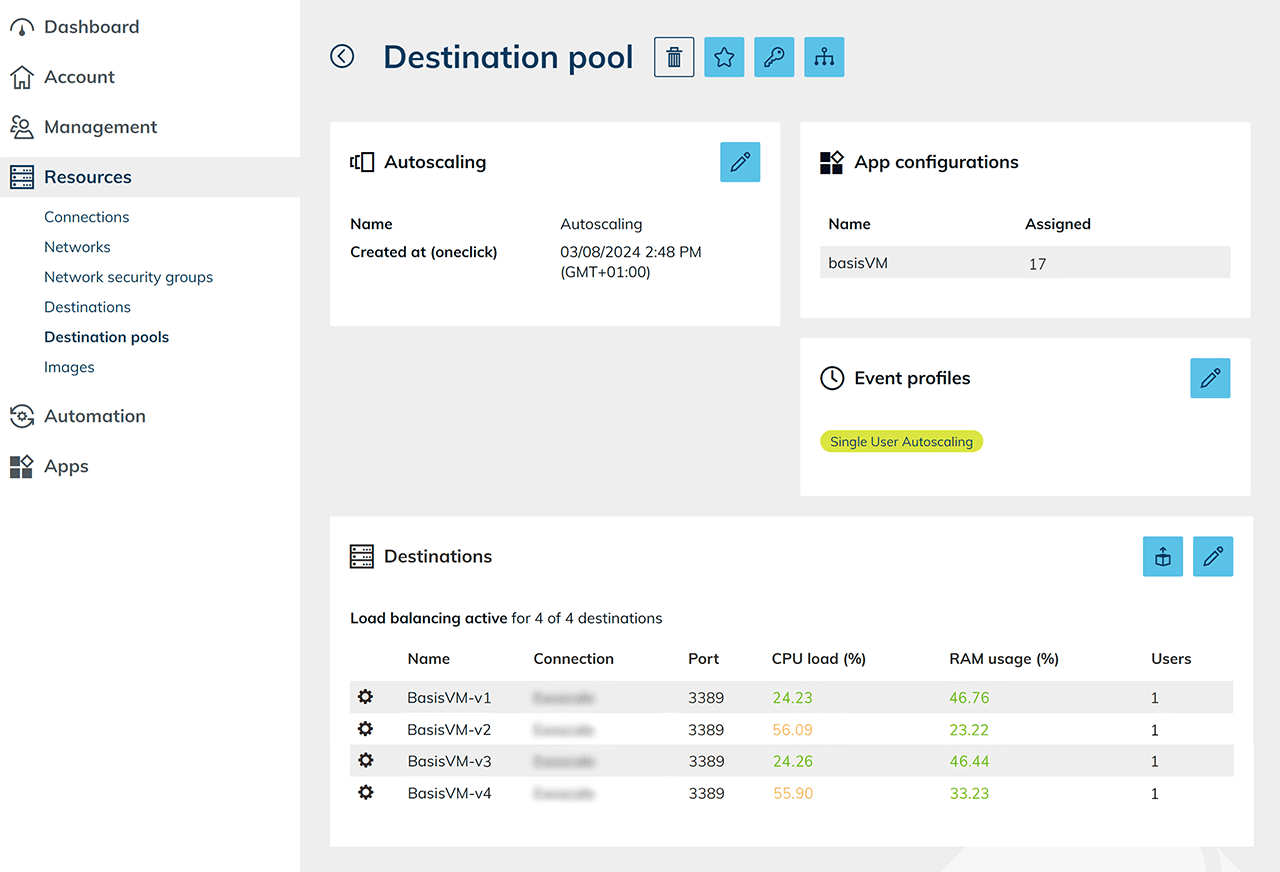
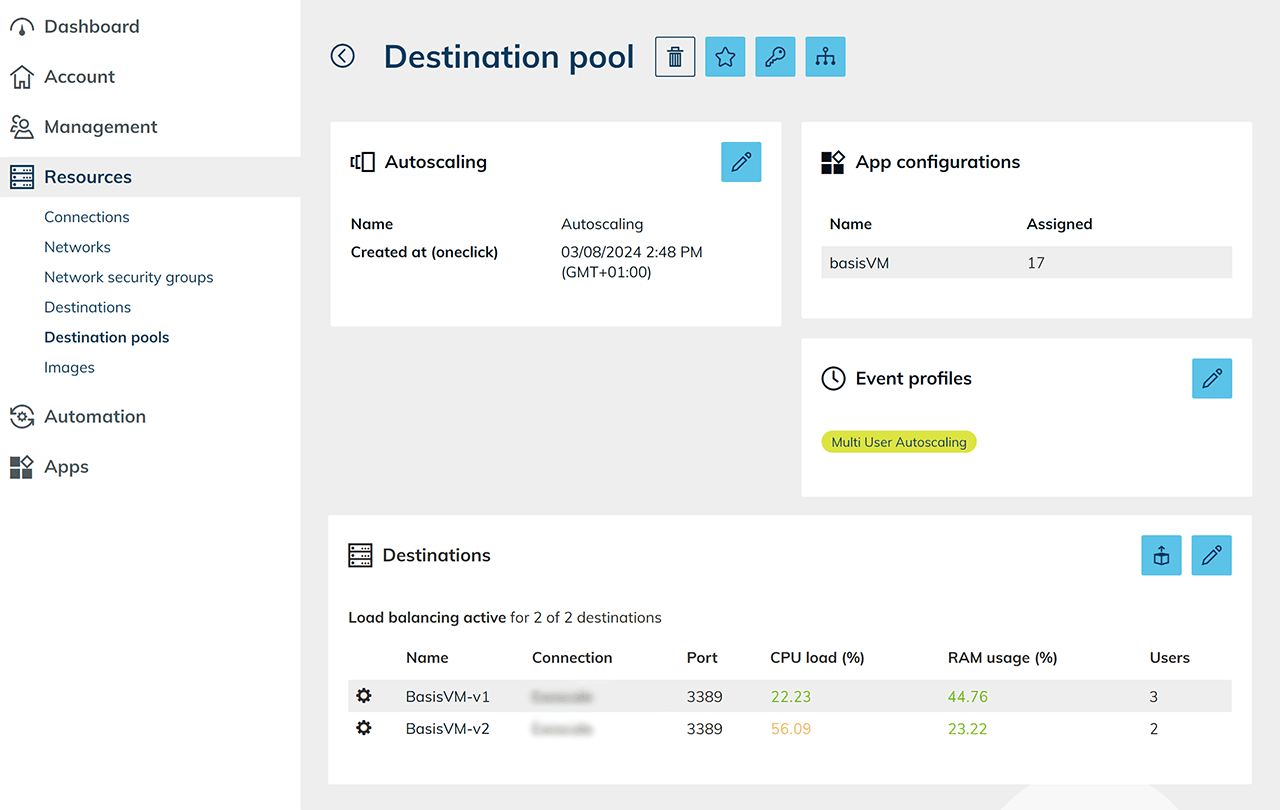
 The configured load distribution and the assigned event profiles are displayed in the details of the destination pool.
Define the execution interval and save your settings.
Multi user
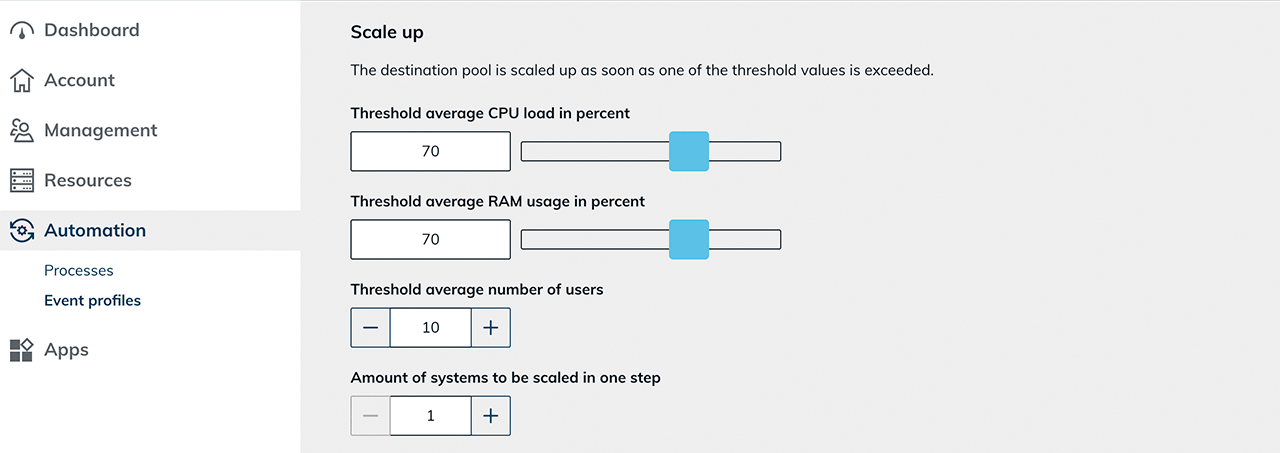
For multi user, multiple users can work on one destination at the same time. Define the threshold values that oneclick™ uses to create additional virtual machines or remove virtual machines that are no longer needed.
Configure scale up
Define the threshold values for scaling up:
- Threshold average CPU load in percent
- Threshold average RAM usage in percent
You define the threshold values here. How CPU load and RAM usage are measured depends on the destination pool's load balancing settings. - Threshold average number of users
- Under Amount of systems to be scaled in one step, define how many virtual machines oneclick™ creates during a scaling action. With a value of
1, oneclick™ creates one virtual machine and re-evaluates the load in the next execution cycle.
If the utilization reaches or exceeds at least one of the defined threshold values, oneclick™ creates additional virtual machines.
Configure scale down
Define the threshold values for scaling down:
- Threshold average CPU load in percent
- Threshold average RAM usage in percent
- Threshold average number of users
If the utilization reaches or falls below all defined threshold values, oneclick™ removes one virtual machine that is no longer needed per check. The defined Minimum number of running systems (running reserve) is not undercut.
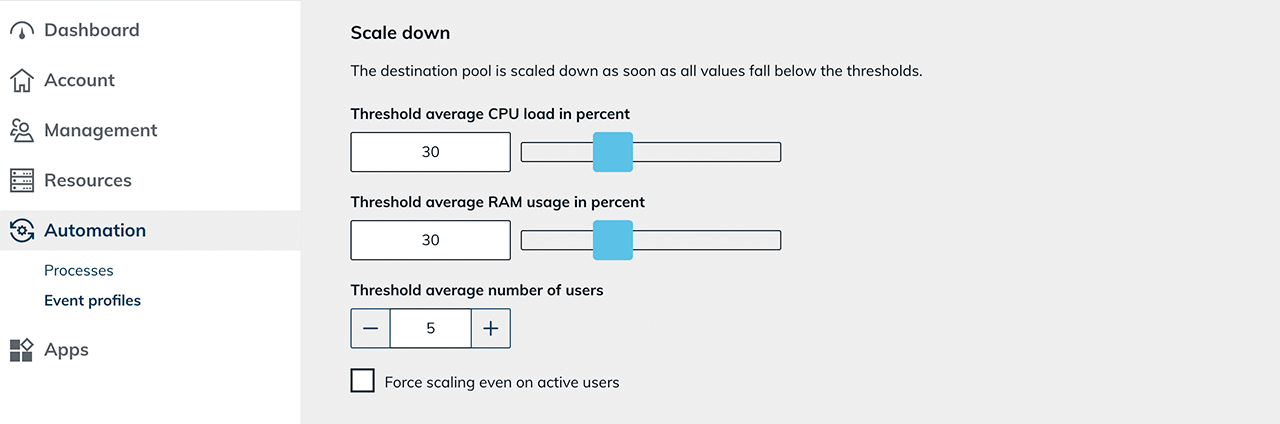
Force Scale Down: Force scaling even on active users
Force Scale Down is available for multi user. Enable Force scaling even on active users so that oneclick™ also removes an automatically created destination if users are still logged in.
The value defined under Scaling timeout in minutes determines the lead time. At the start of the lead time, oneclick™ shows the affected users a warning message with the remaining time.

After the lead time has elapsed:
- oneclick™ ends the active user sessions
- oneclick™ removes the automatically created destination
Forced scaling down can cause unsaved changes to be lost. Only enable this function for controlled maintenance or emergency scenarios.
Notes on threshold values
For multi user, oneclick™ shows a note directly on the affected field if a load criterion is set so that it no longer affects scaling. This applies to both CPU utilization and RAM usage at the following values:
- Scale up:
100 % - Scale down: at least
99 %
Define number of scaling systems
- Number of reserved stopped systems
Define how many prepared systems oneclick™ keeps in a stopped state. If oneclick™ starts one of these systems, oneclick™ creates a new clone to restore the defined number of stopped systems. - Minimum number of running systems (running reserve)
Define the minimum number of systems that must be running. oneclick™ does not undercut this value when scaling down. - Maximum number of additional systems
Define the maximum number of additional systems oneclick™ may create automatically.
Configure scaling down to zero running destinations under Configure scale to zero.
 The details view of the destination pool shows the configured load distribution, the current utilization values (CPU, RAM, number of users), and the assigned event profile.
Configure scale to zero
With scale to zero, the destination pool can scale all the way down to zero running destinations.
- Single user: Set Number of reserved running systems and Minimum number of running systems (running reserve) to
0. - Multi user: Set Minimum number of running systems (running reserve) to
0.
If a connection request arrives while no destination is running, oneclick™ automatically starts the most recently stopped destination.
Define execution interval
Define the start time from which the settings of the event profile apply.
For example, if you want to use the settings from Monday to Friday:
- Select Monday in the calendar menu.
- Define the desired start time.
- Under Repeat only, select Monday.
- Click the Plus icon to create another event.
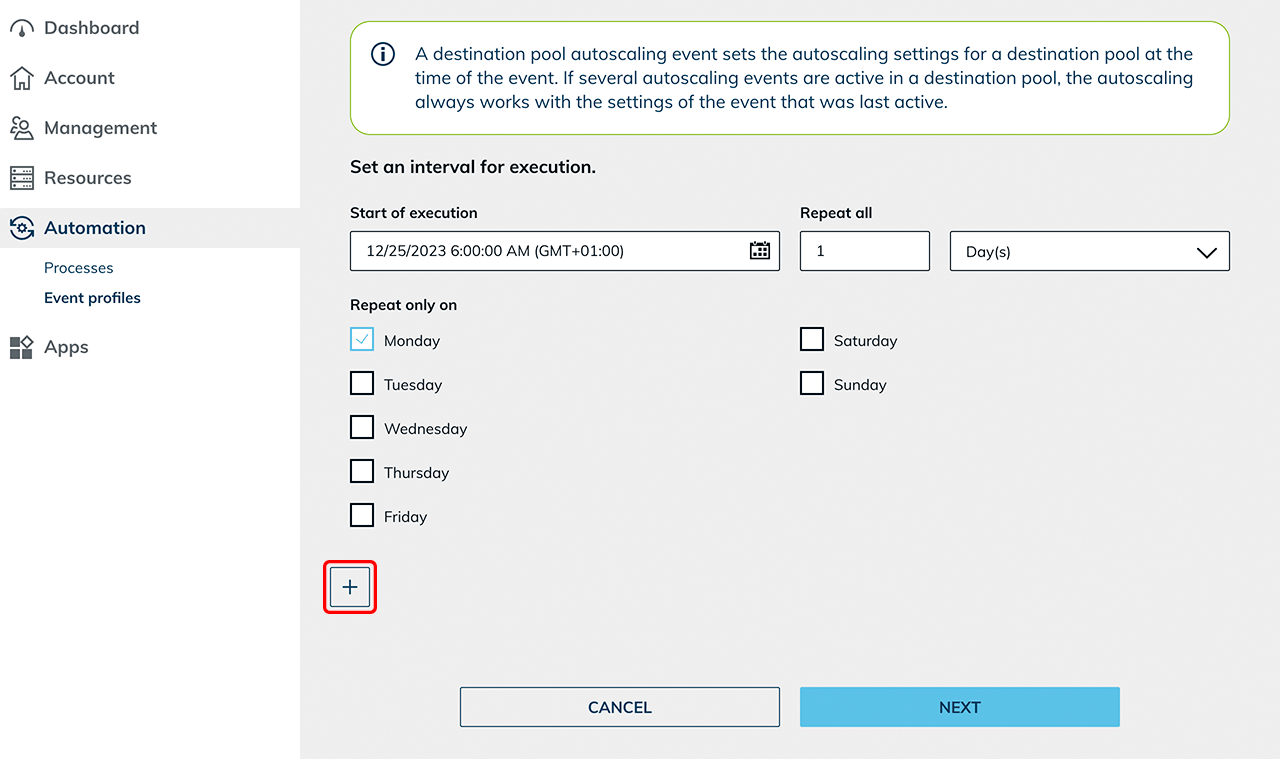
In the new event, configure the settings for the weekend:
- Select Friday in the calendar menu.
- Define a time in the evening from which the weekend settings apply.
- Under Repeat only, select Friday.
From this point on, the weekend event overrides the previously applicable settings. The event for Monday then reactivates the settings for the weekdays. - Click Next.
- Assign a name and Save your settings.
Determine a suitable profile based on the actual usage times. Test the settings with a limited number of users before using the configuration productively.