Login via Microsoft Entra ID
The login via Microsoft Entra ID is mandatory for Windows 11 images as it is necessary for licensing. For Windows 10 images, this feature is optional but offers the possibility of utilizing unified access and management standards.
To ensure login with Microsoft Entra ID works on virtual machines running Windows 11 (or optionally Windows 10 images) through oneclick™, please perform the following settings:
1. Disable NLA on the Windows destination
Disable NLA (Network Level Authentication) on your Windows destination.
-
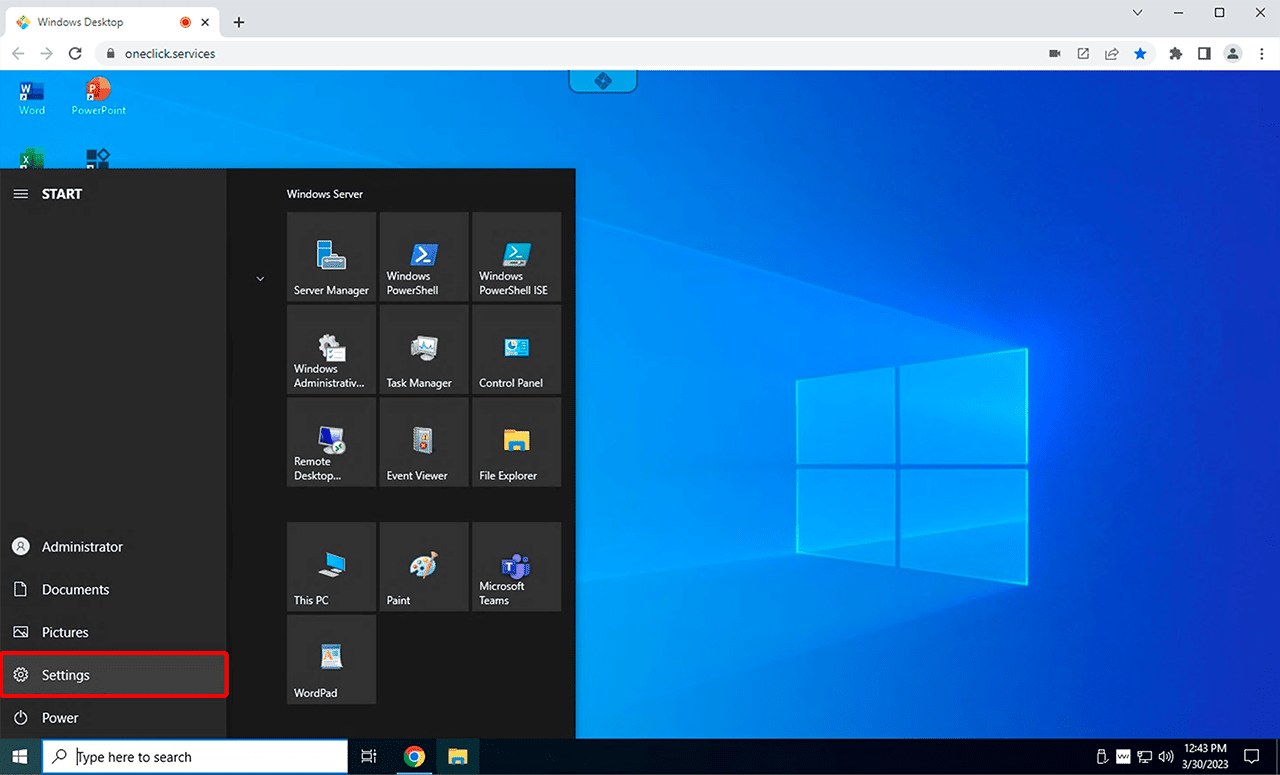
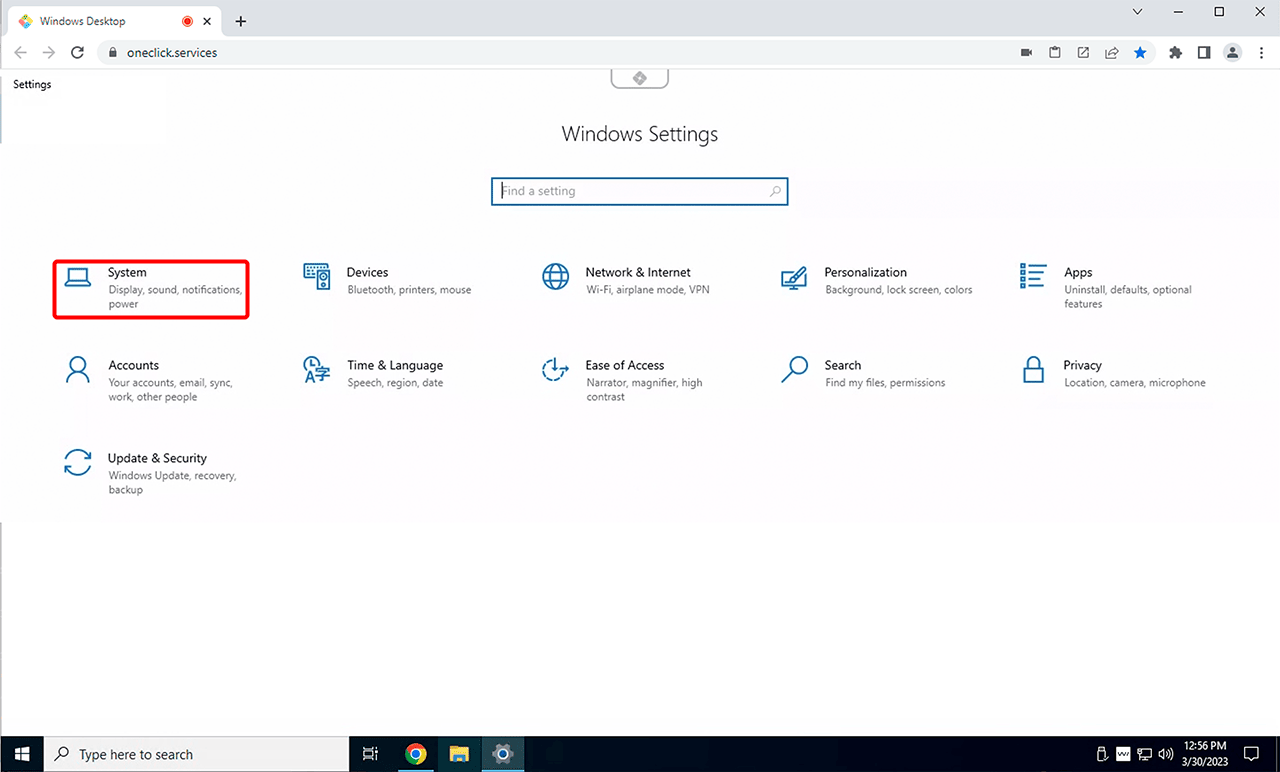
Open the Control Panel on your Windows destination.
-
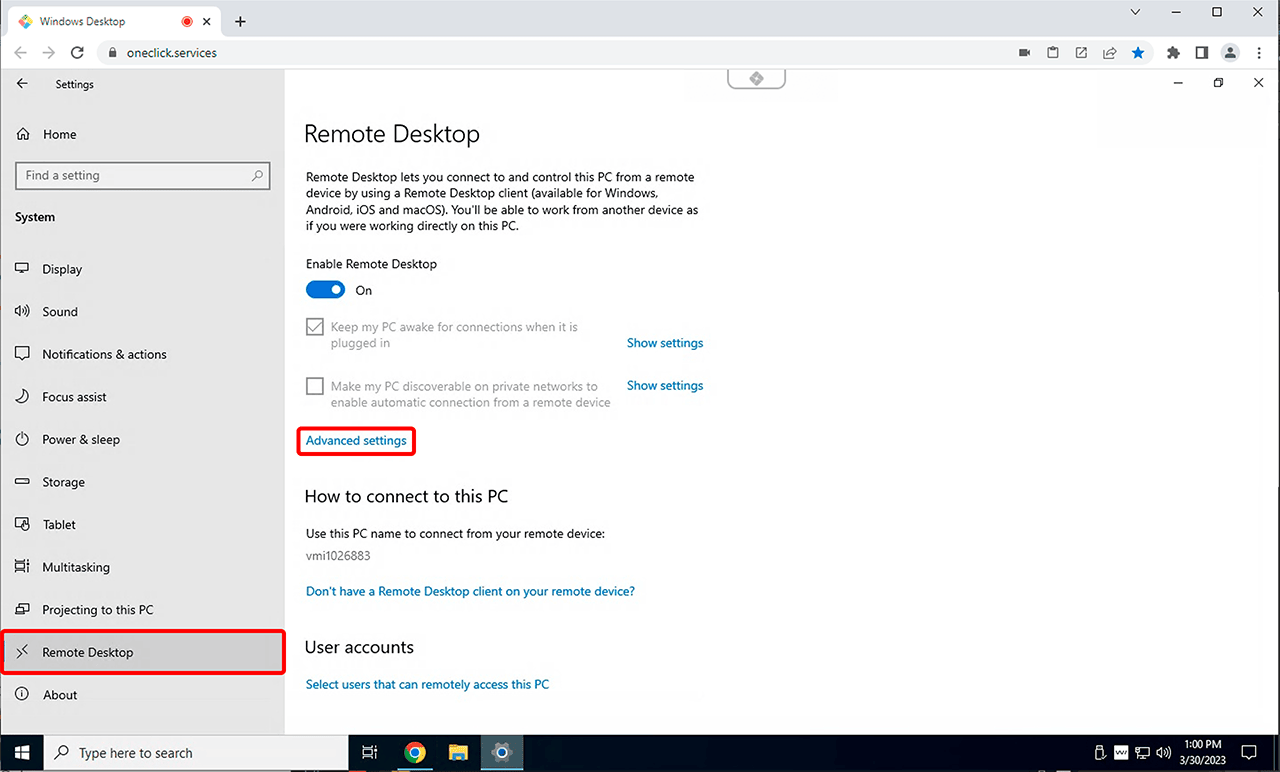
Select the System menu, then Remote Desktop, and click on Advanced Settings.
-
If this option is not available, first enable Remote Desktop on your PC by clicking the displayed switch.
-
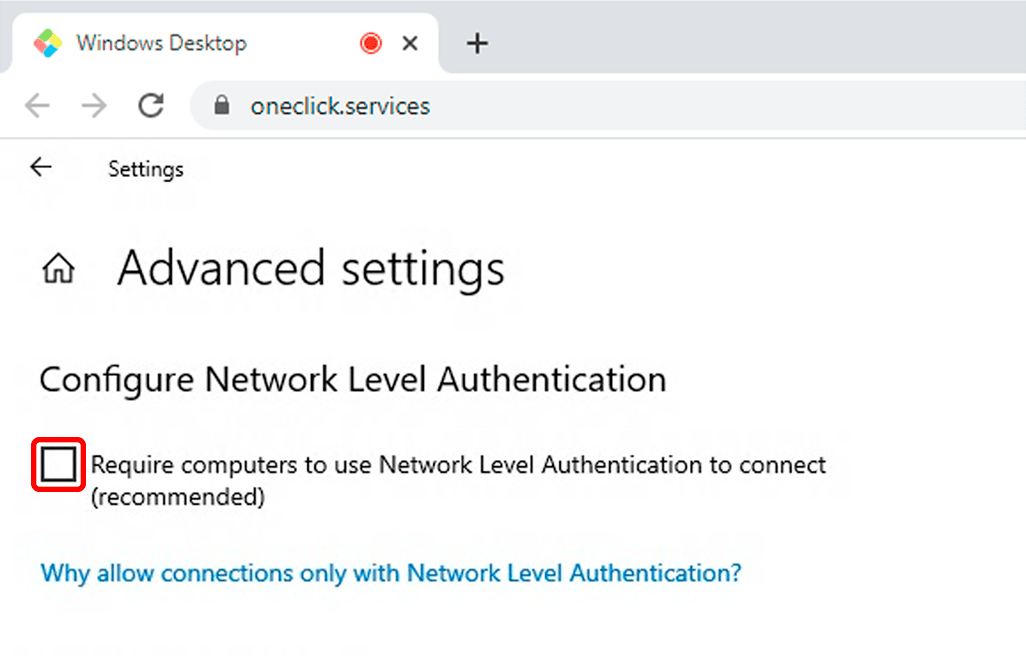
Disable the option "Require computers to use Network Level Authentication (recommended)".
Disabling NLA may pose a security risk due to fake servers. However, oneclick™ ensures the authenticity of the accessed server using its streaming technology, effectively preventing “Man in the Middle” attacks while still maintaining a secure connection.
2. Settings in oneclick™ Admin
App Configuration
When creating an app configuration, note the following points:
- Enable the Customize option in connection settings.
- Select “TLS” as the mandatory encryption method.
- Optionally, enter
AzureADin the “Active Directory Domain“ field. If left blank, this can be added later in the app instance.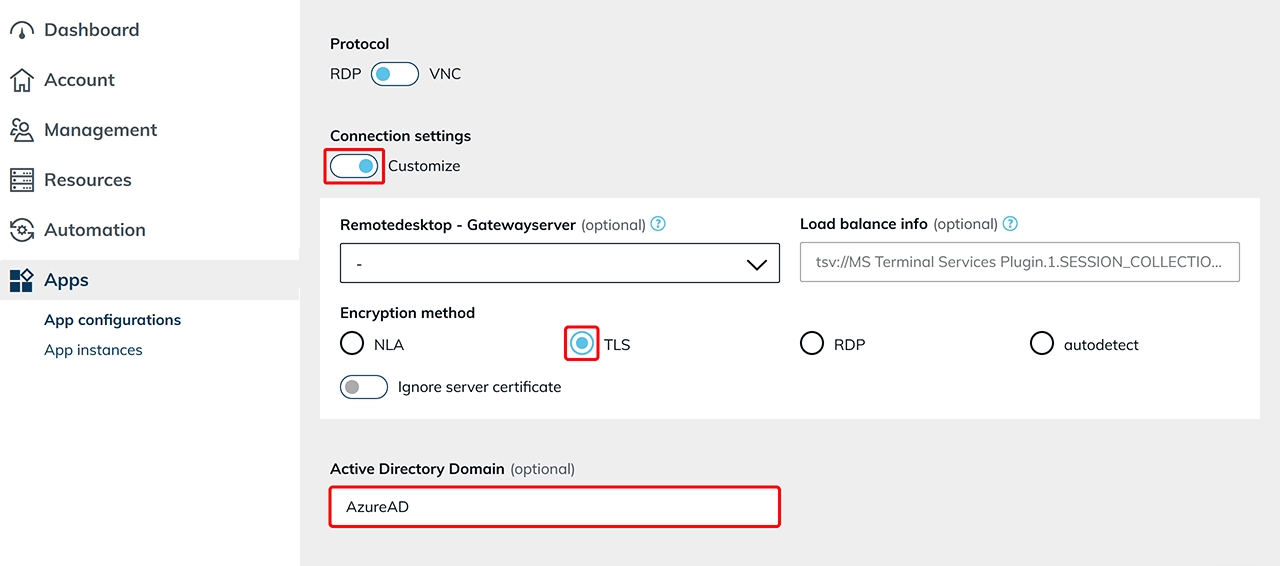
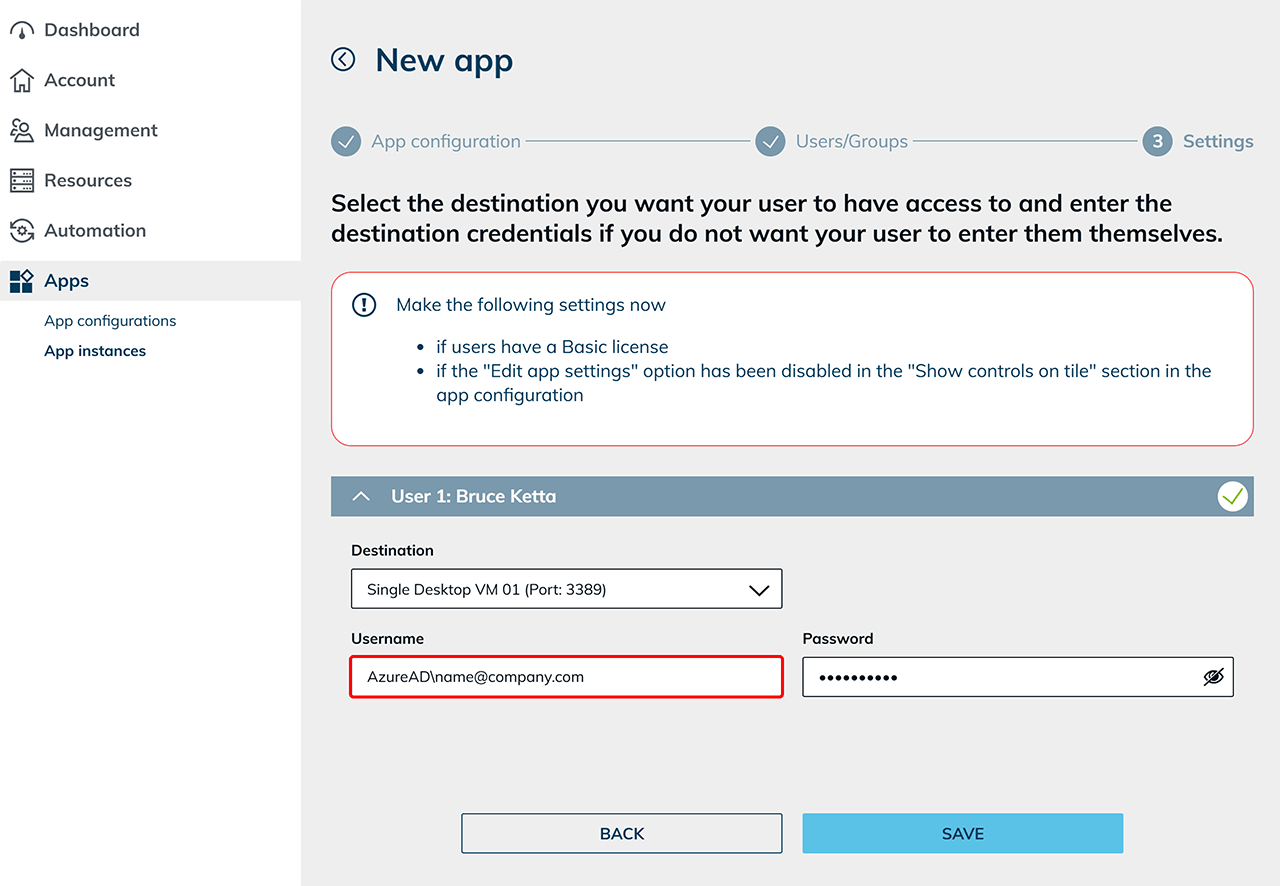
App Instance
When creating an app instance, in the Settings step, enter the following in the Username field: AzureAD\name@company.com If the domain was already specified during app configuration, only enter the email address here.
Your users can now log in to the destination using their Entra ID credentials. Ensure that the option to allow users to enter their login credentials is enabled.