Multiple users on one virtual desktop
By default, access to a Virtual Desktop is designed for one user only. You can create additional users manually and assign them to additional users in oneclick™. Please note that you must provide a Microsoft SAL access license for each additional user who accesses the virtual desktop at the same time. Access is only possible by a maximum of 2 users at once. If a Virtual Desktop is accessed by multiple users at different times (concurrent), you do not need an additional SAL access license.
- If you need an additional SAL access license, please contact our sales department.
- If you want to access a Virtual Desktop with multiple users at the same time, we recommend our VDI for Multiuser.
The following example is valid for Virtual Desktops based on Microsoft Windows Server 2016 and 2019:
- Go to the Virtual Desktop you want to add another user to.
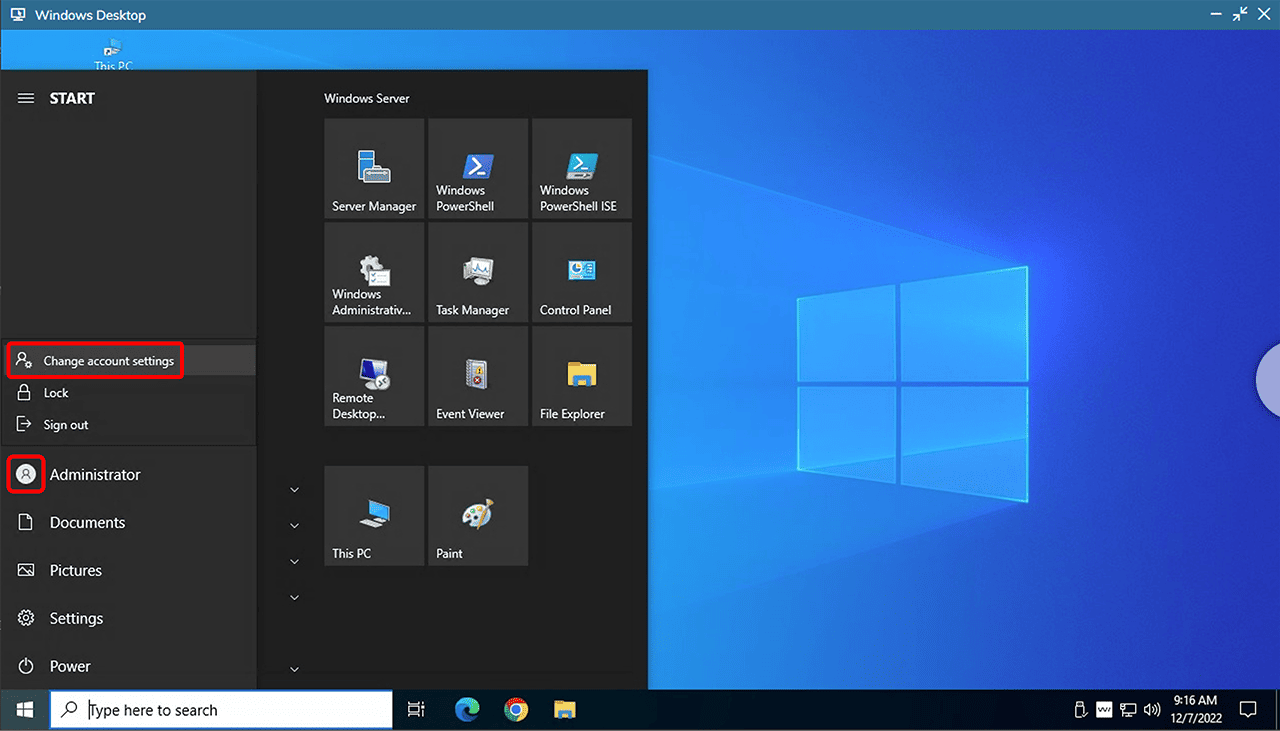
- Open the start menu, right-click the Mannequin icon, and then click Change account settings.
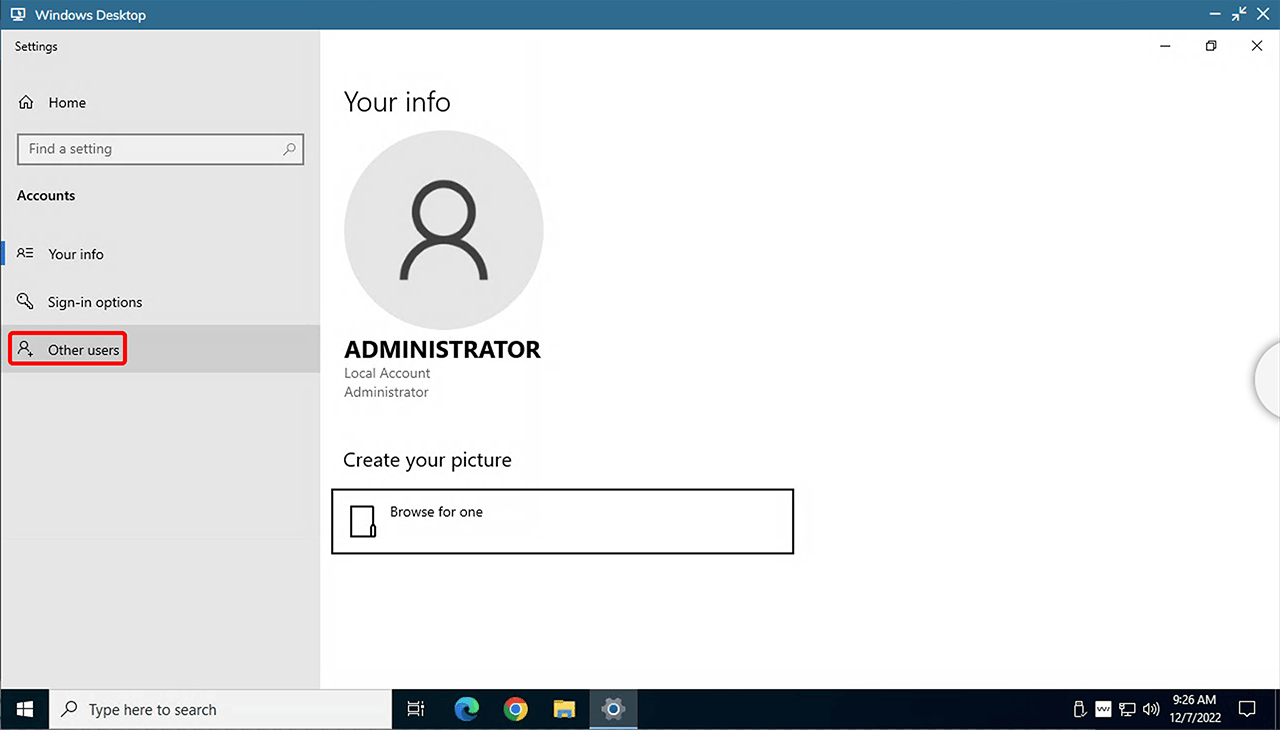
- Click on Other users.
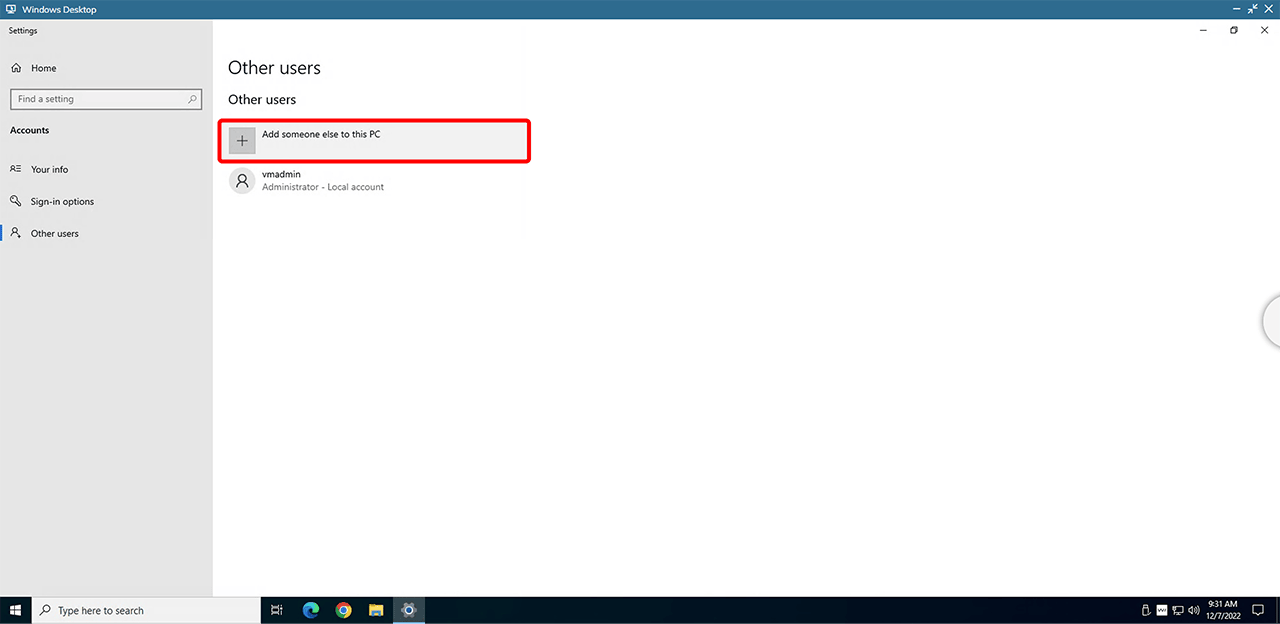
- Click on Add someone else to this PC.
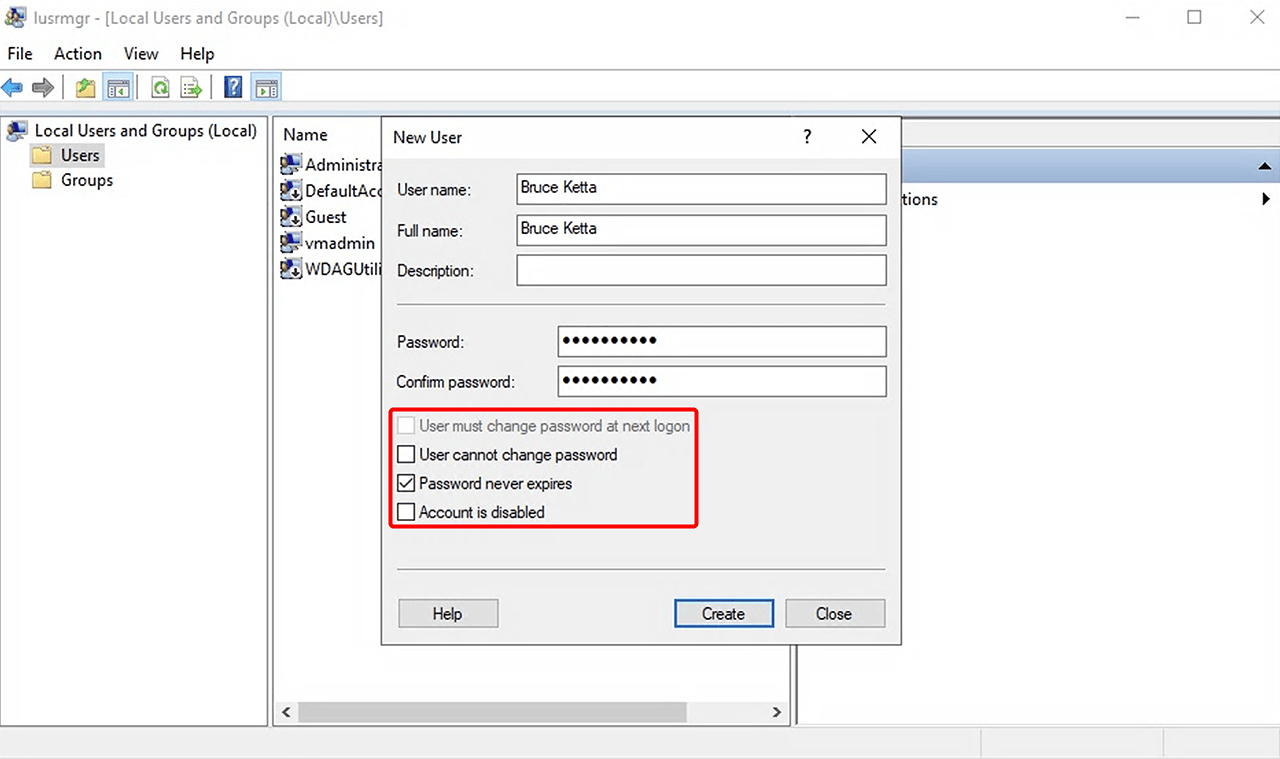
- Right-click on Users and then click on New User.

- Enter and remember a "User name", "Full name" and "Password". Also change the settings so that only "Password never expires" is selected. Click on Create and then on Close. The user is now created.
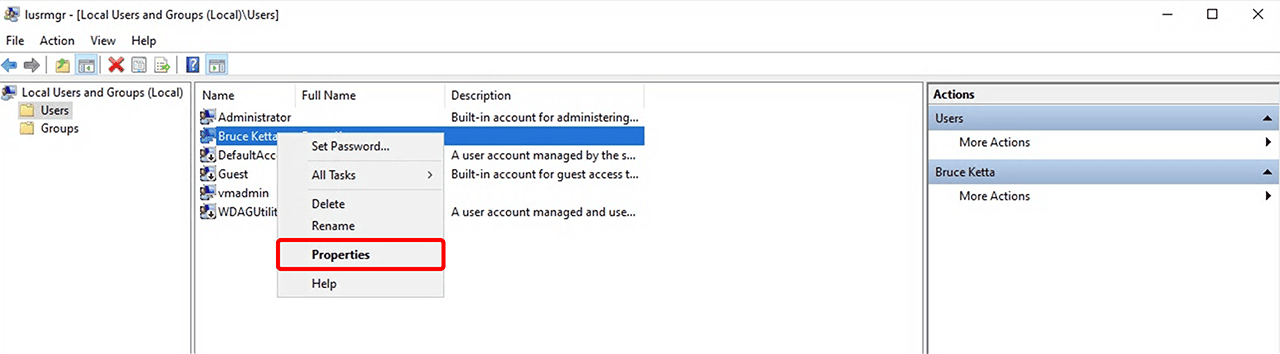
The created user has no administrative authorizations. If you want to give the newly created user administrative authorizations on the virtual machine, do the following:- Right-click on the user and then click Properties.
- Click on Member of and then on Add.

- Enter the text field
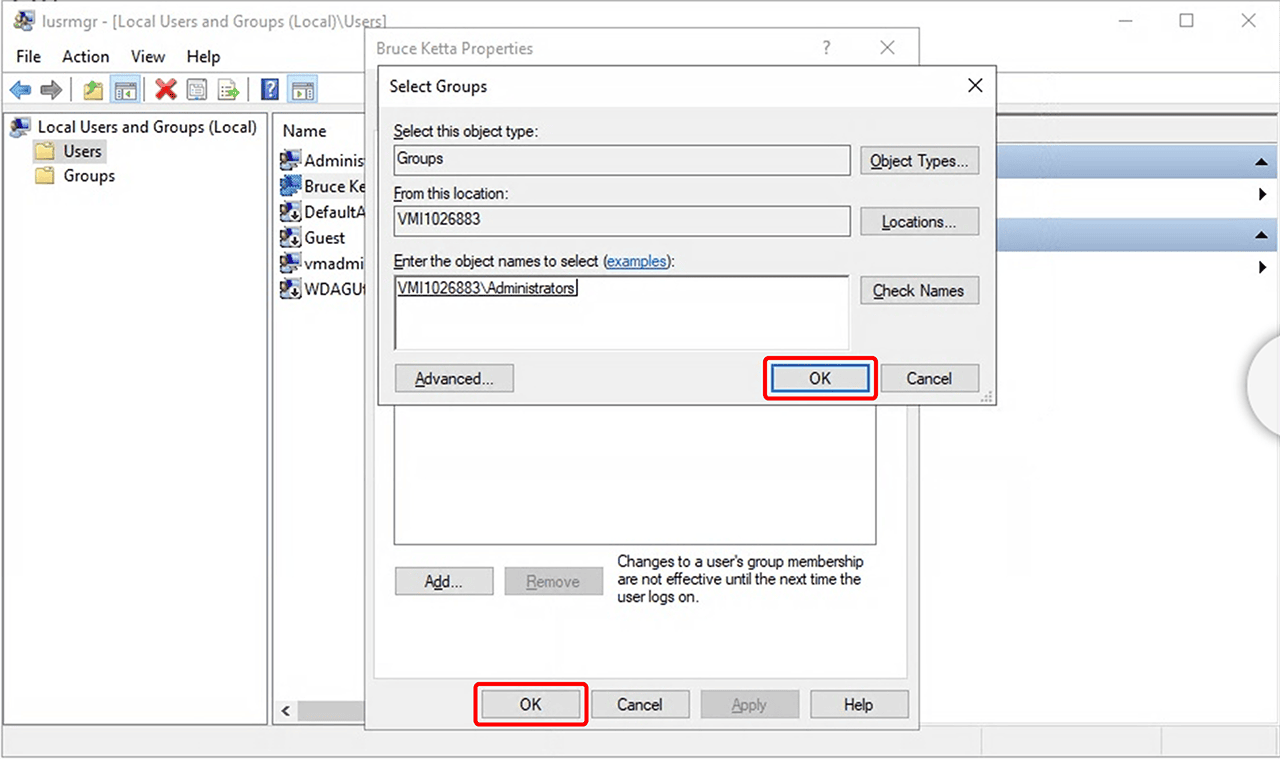
Administratorsand then click on Check Names. The complete path is inserted now.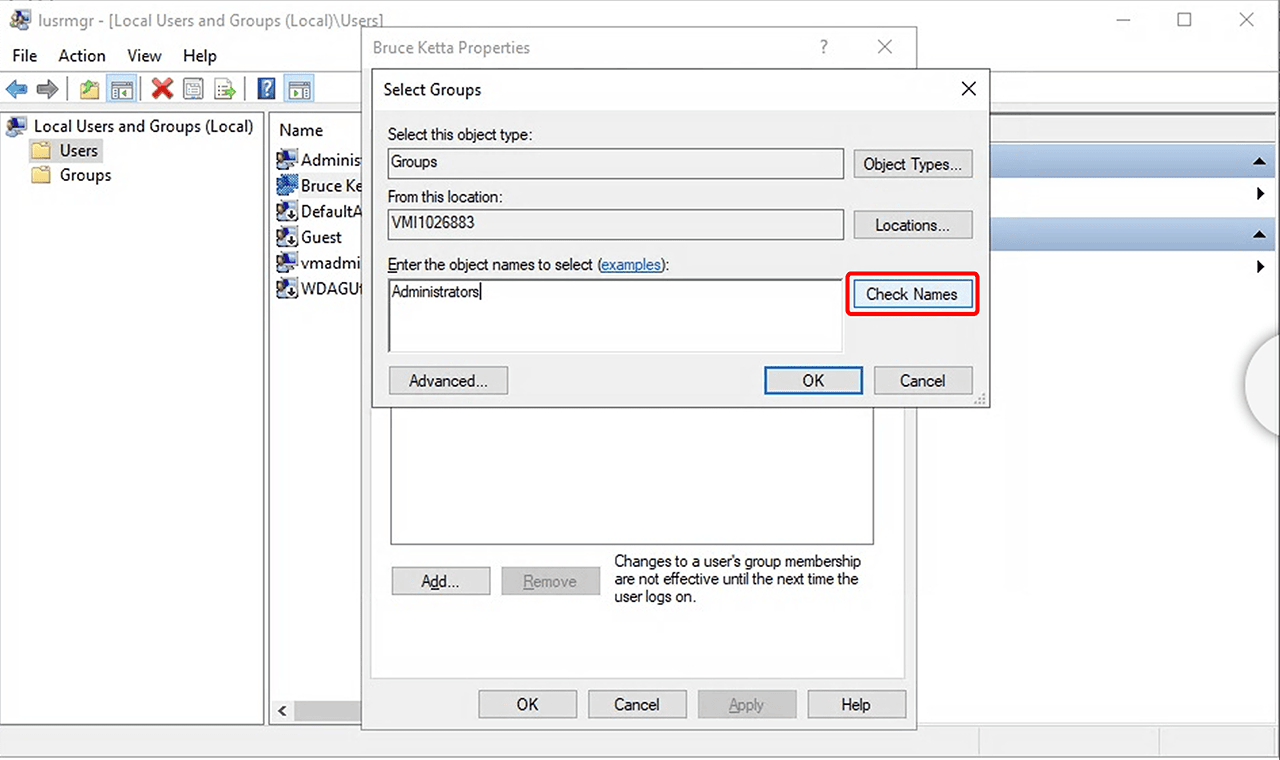
- Click on OK twice.
- Right-click on the user and then click Properties.
- Switch to the oneclick™ Admin.
- Go to the Users tab and create the user.
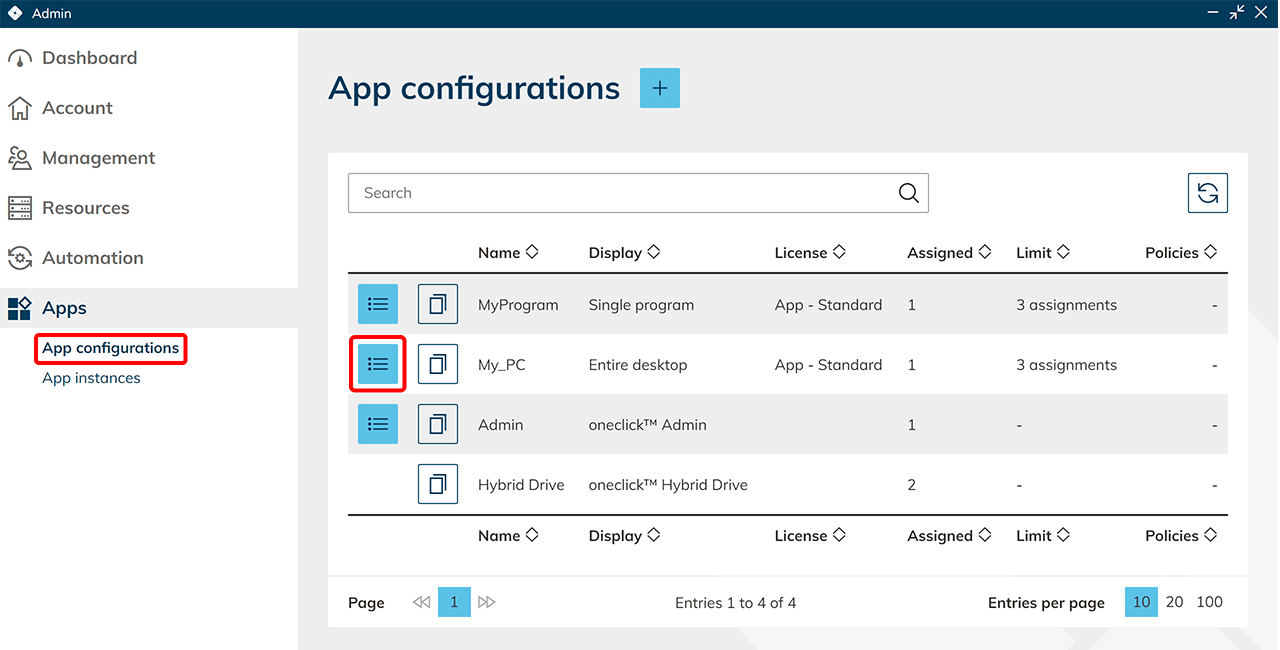
- Now go to the Apps tab and then to App configurations.
- Select your app configuration and click the List icon to get to the details page.
- On the oneclick™ Desk tile, click on the Pencil icon.
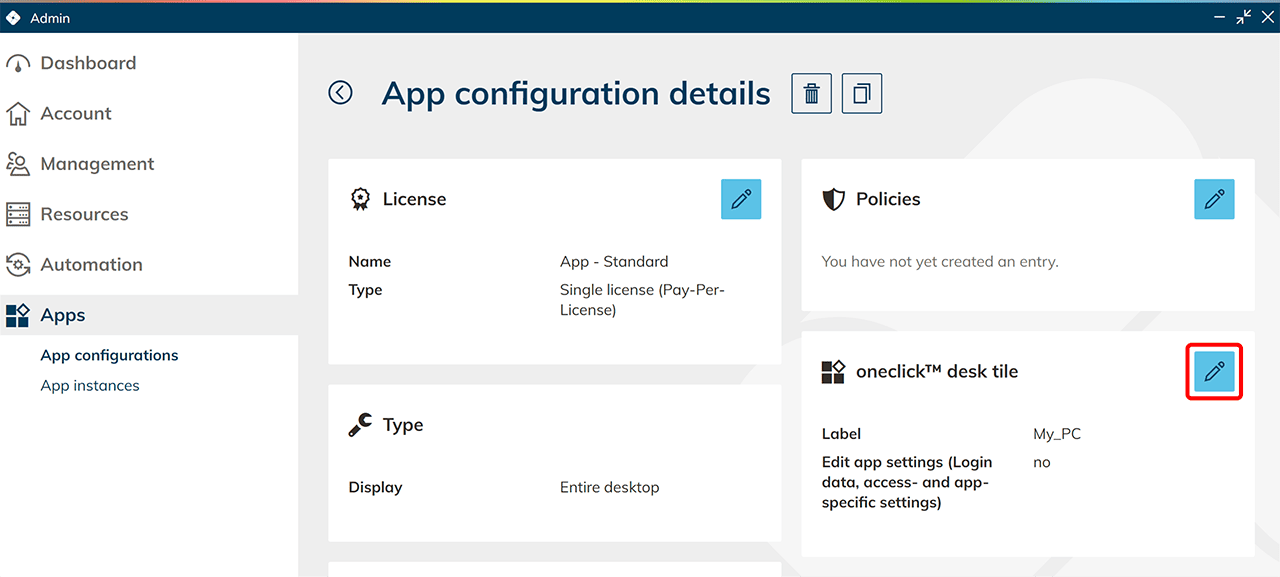
- Check if "Edit app settings" is disabled and click Save.
This guarantees that the user cannot see or enter the login information for the virtual machine.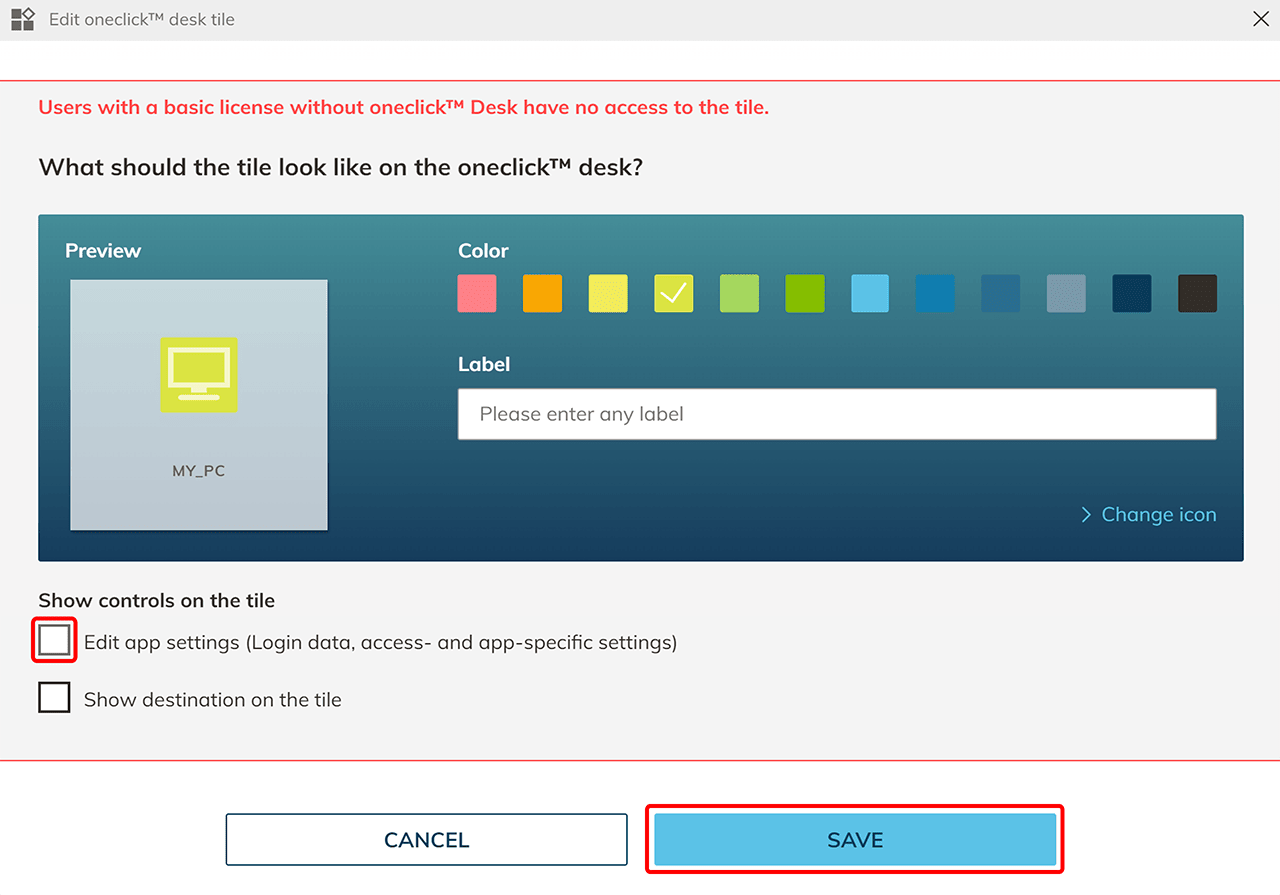
- Select your app configuration and click the List icon to get to the details page.
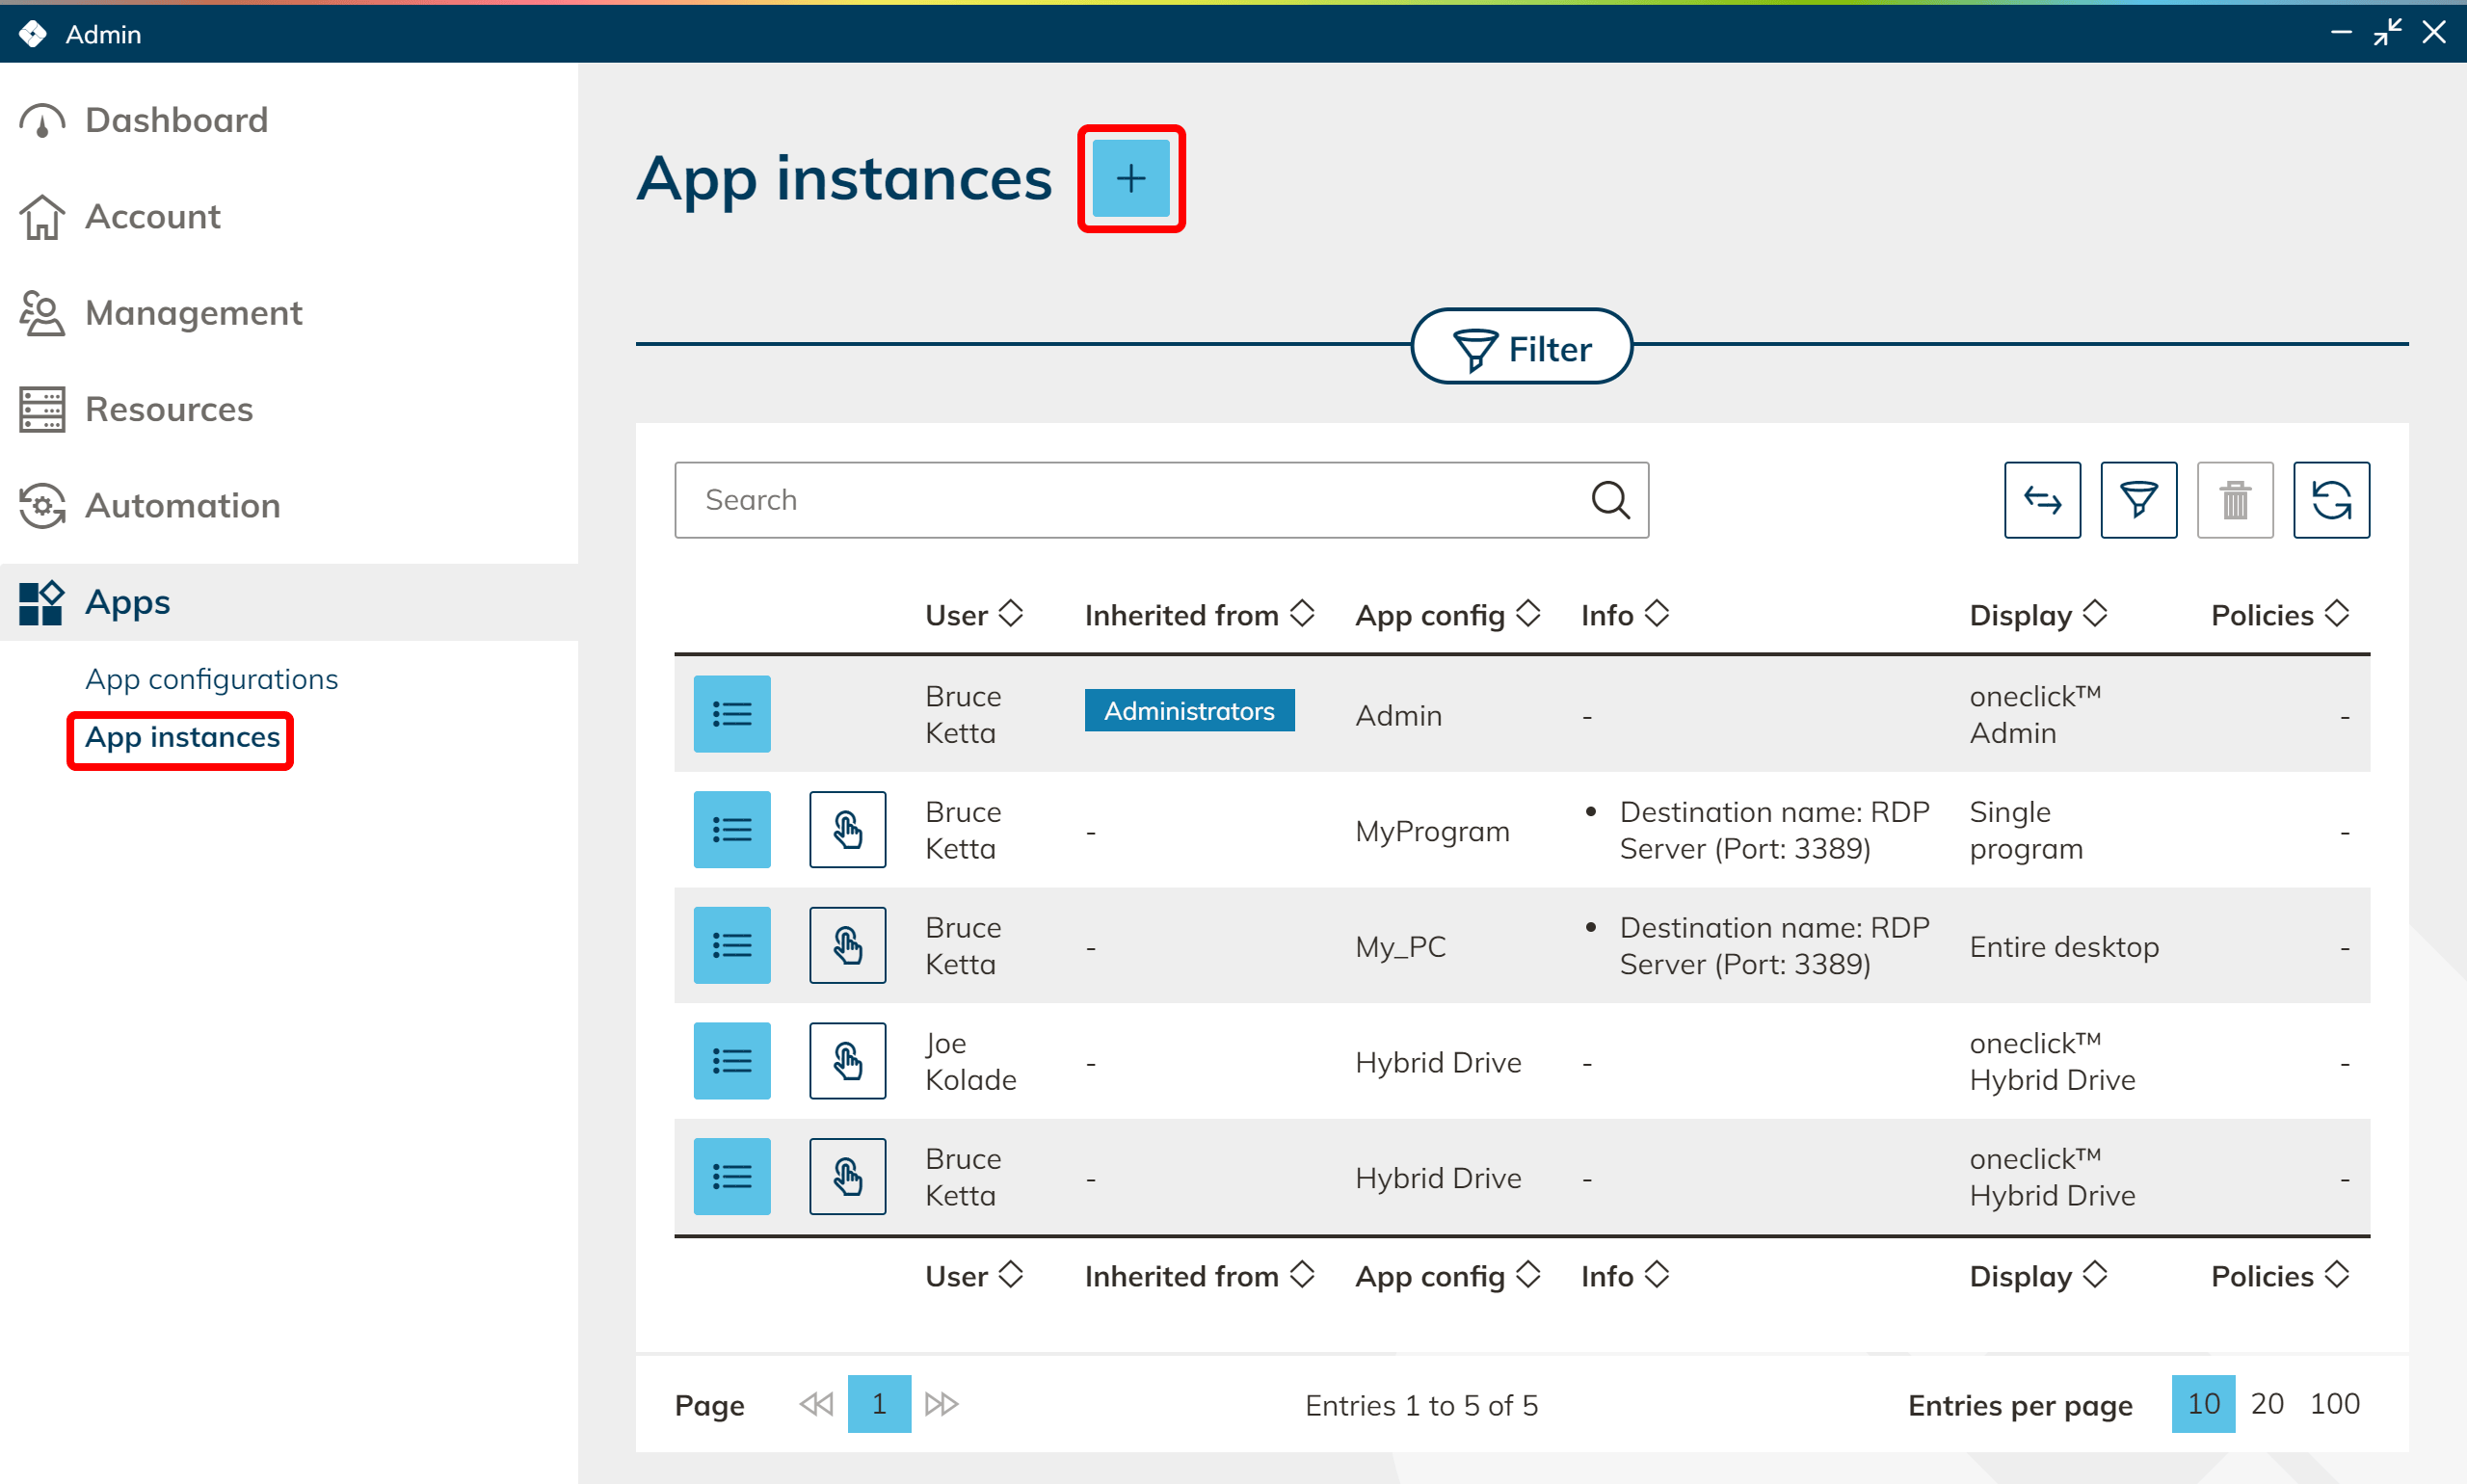
- On the Apps tab in the menu, click App instances.
- Click the Plus icon to create a new app instance.
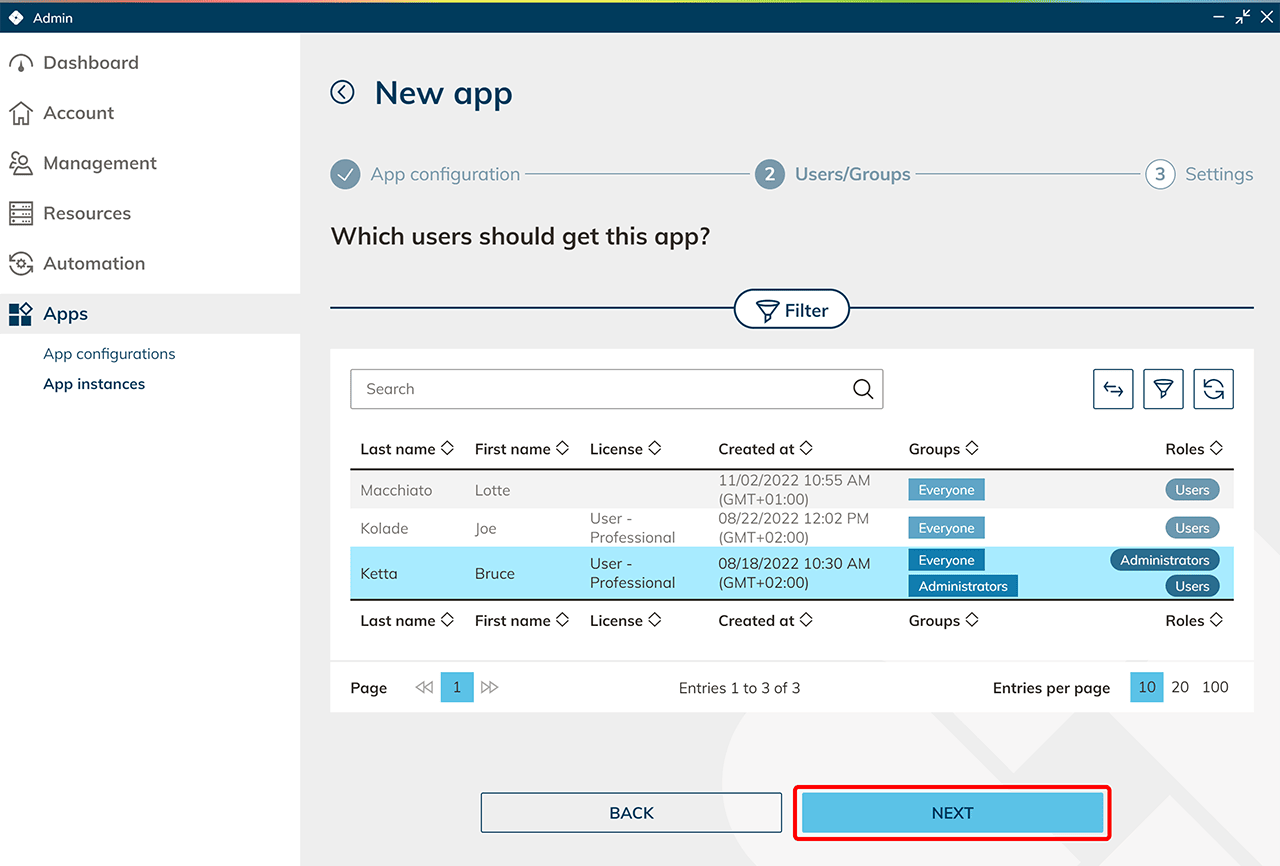
- Select the app configuration from which you want to create an app instance and click Next.
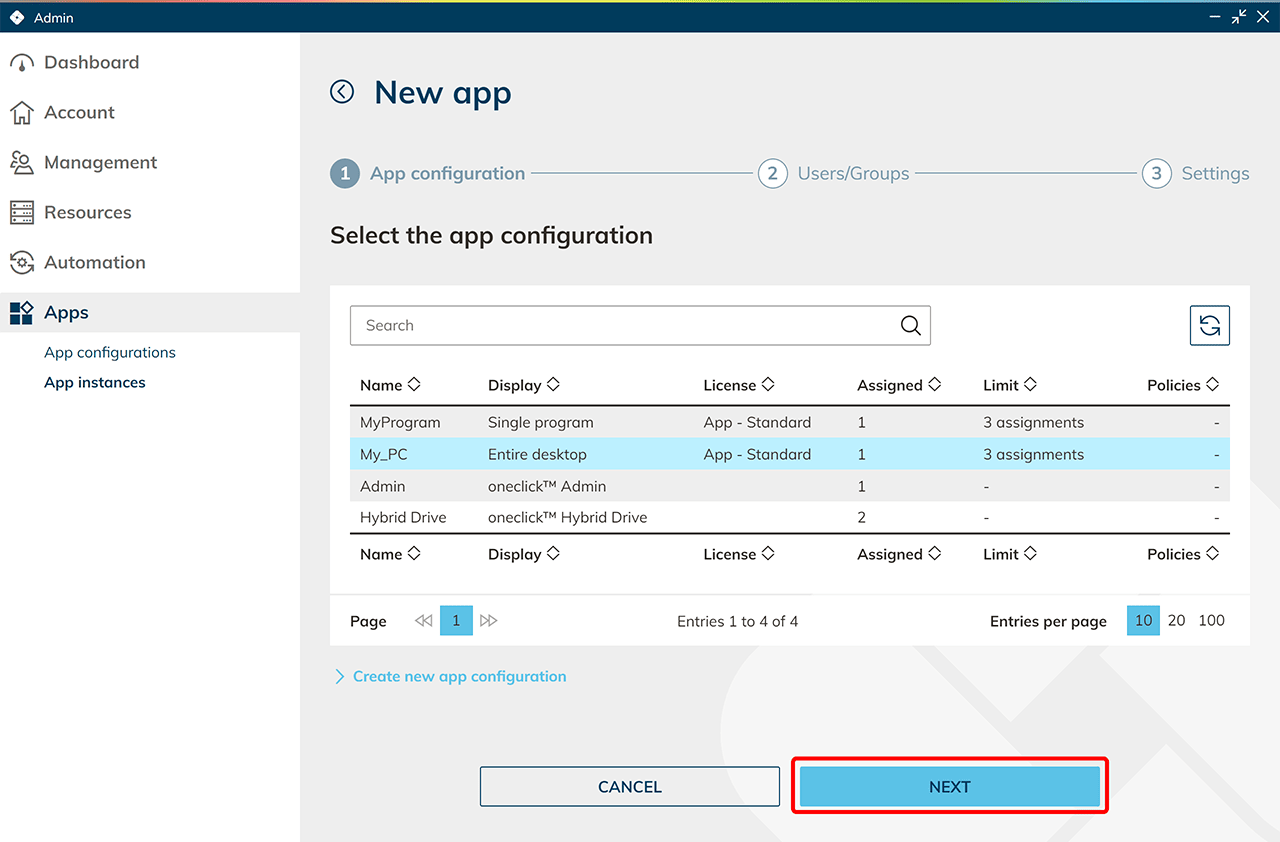
- Select your newly created user and click Next.
- In the next step, select the destination and enter the Username and Password you assigned on the virtual machine. Save your entries.
Your user will now be automatically logged in with these credentials when opening the app.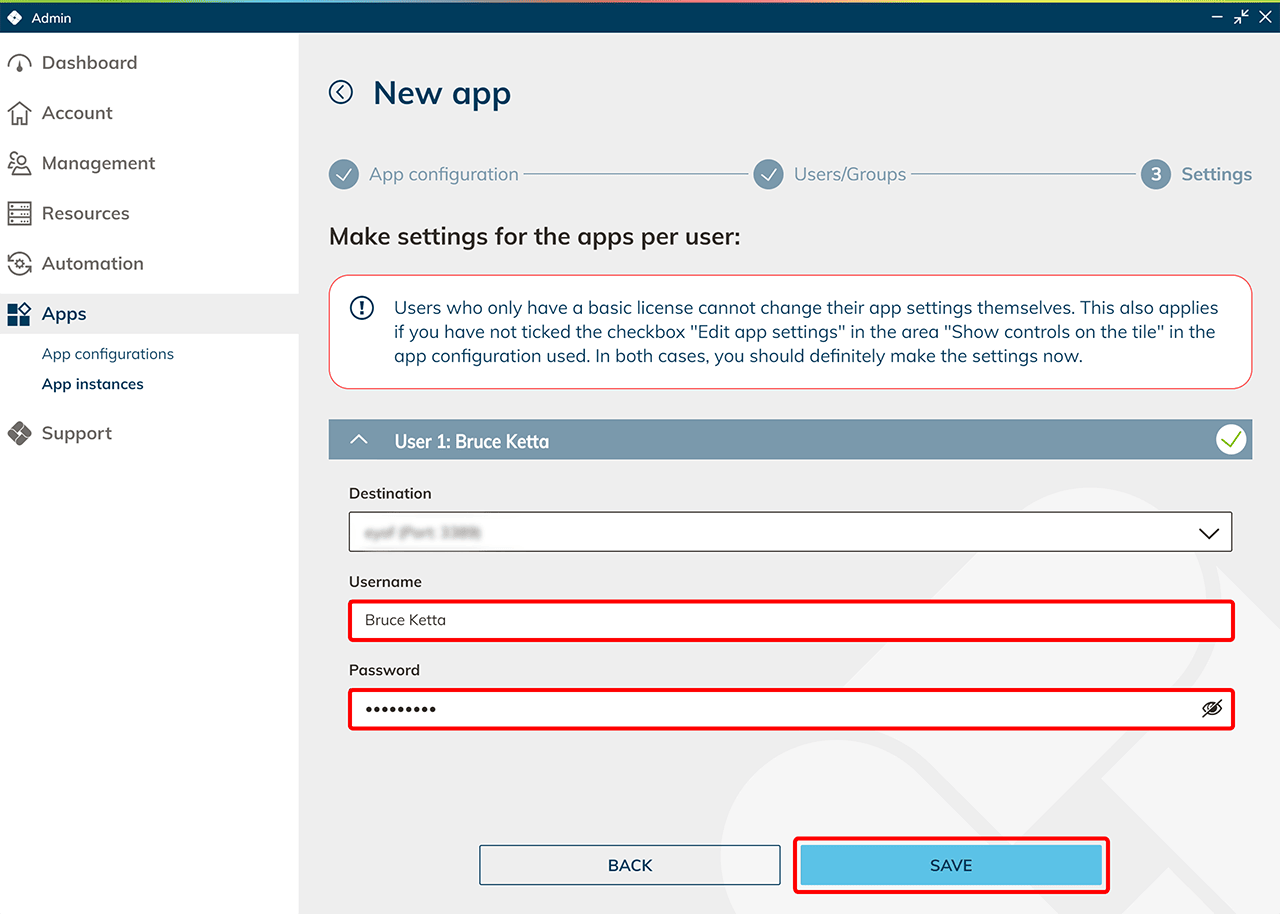
- Click the Plus icon to create a new app instance.