Activate webcam and audio
By default, audio and video transmissions from browser to server are not automatically forwarded due to security reasons. Carry out the following steps in order to use your microphone and webcam normally:
1. Activate WebRTC and enable outgoing UDP higher ports
For optimum performance, we generally recommend operation with WebRTC.
When using audio and webcam without WebRTC, transmission may be slower due to lower bandwidth sampling.
- Use this test to check whether WebRTC is active. WebRTC is automatically active if the firewall is set up correctly.
- Make sure that your firewall does not block outgoing UDP higher ports (1024–65535) and whitelist the IP addresses/DNS entries of the turn server on port 443 (TCP & UDP).
2. Necessary preparations at server side
First install the session host role on your server. Proceed as follows:
The Windows Server 2022 interface is shown here. To reach maximum efficiency of your system, we strongly recommend you to update to the latest version.
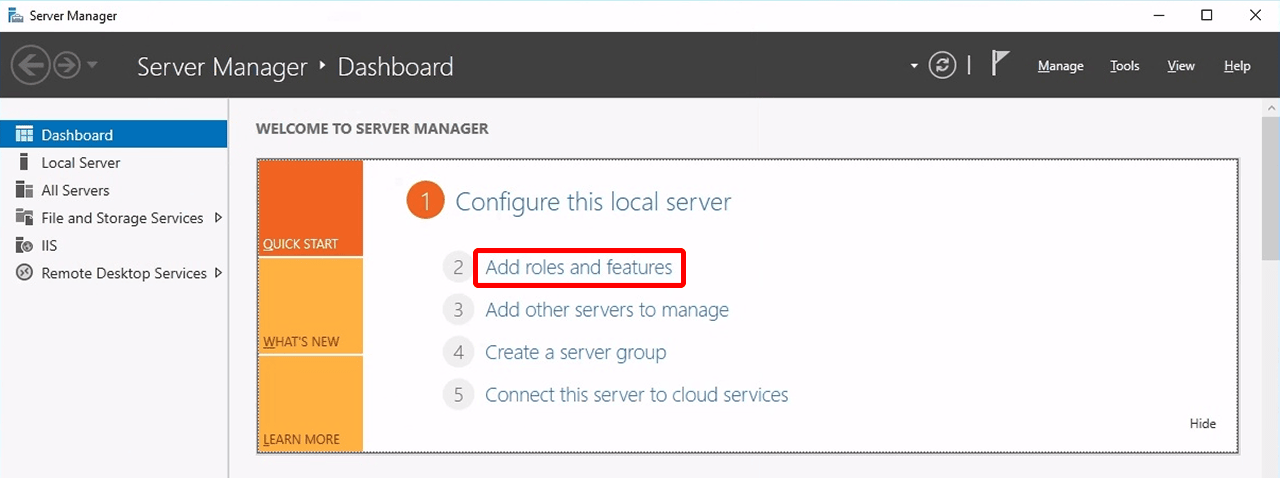
- Start the Server Manager and click on Add roles and features.
- Click on Next under "Preparation".
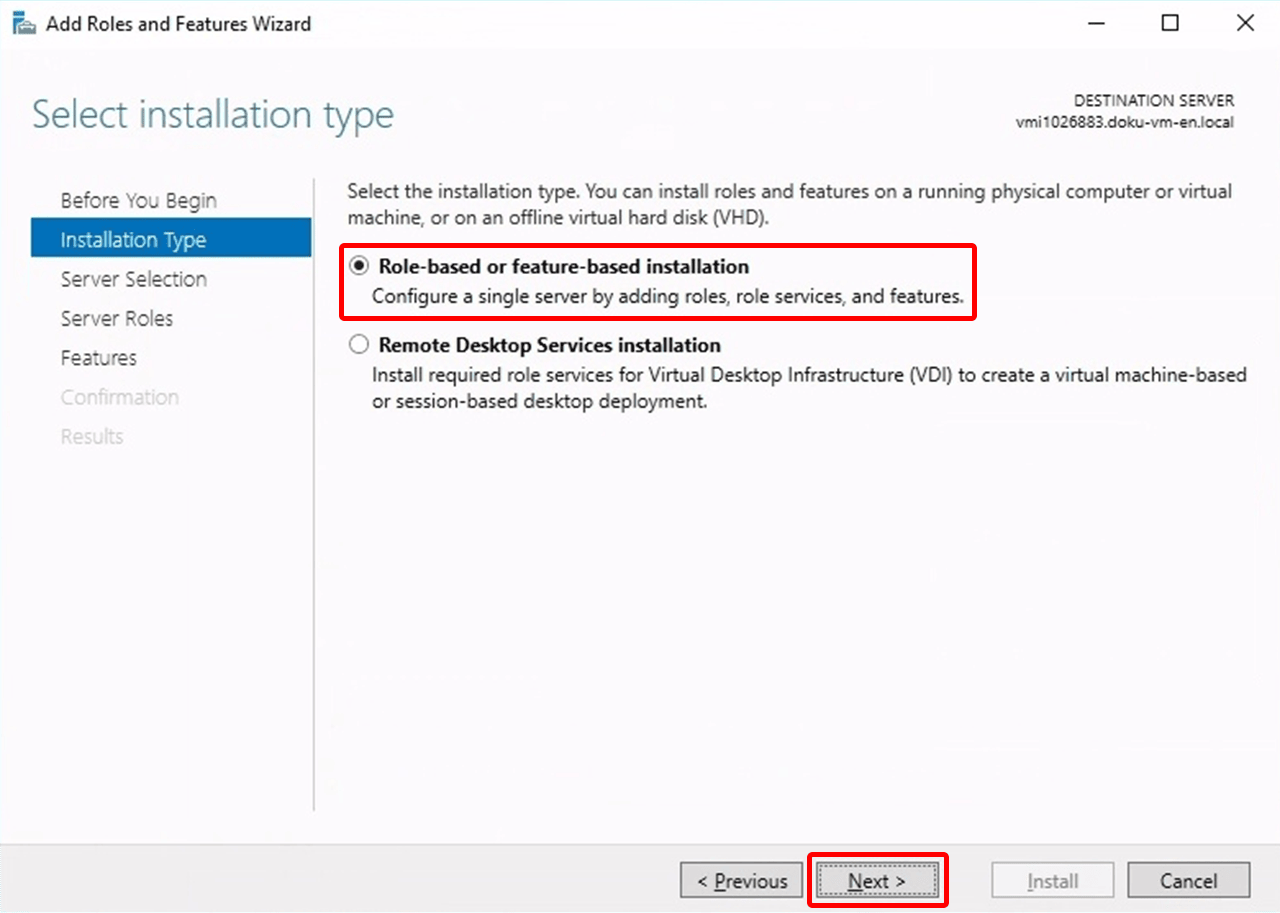
- Under "Installation Type", select Role-based or feature-based installation and click Next.
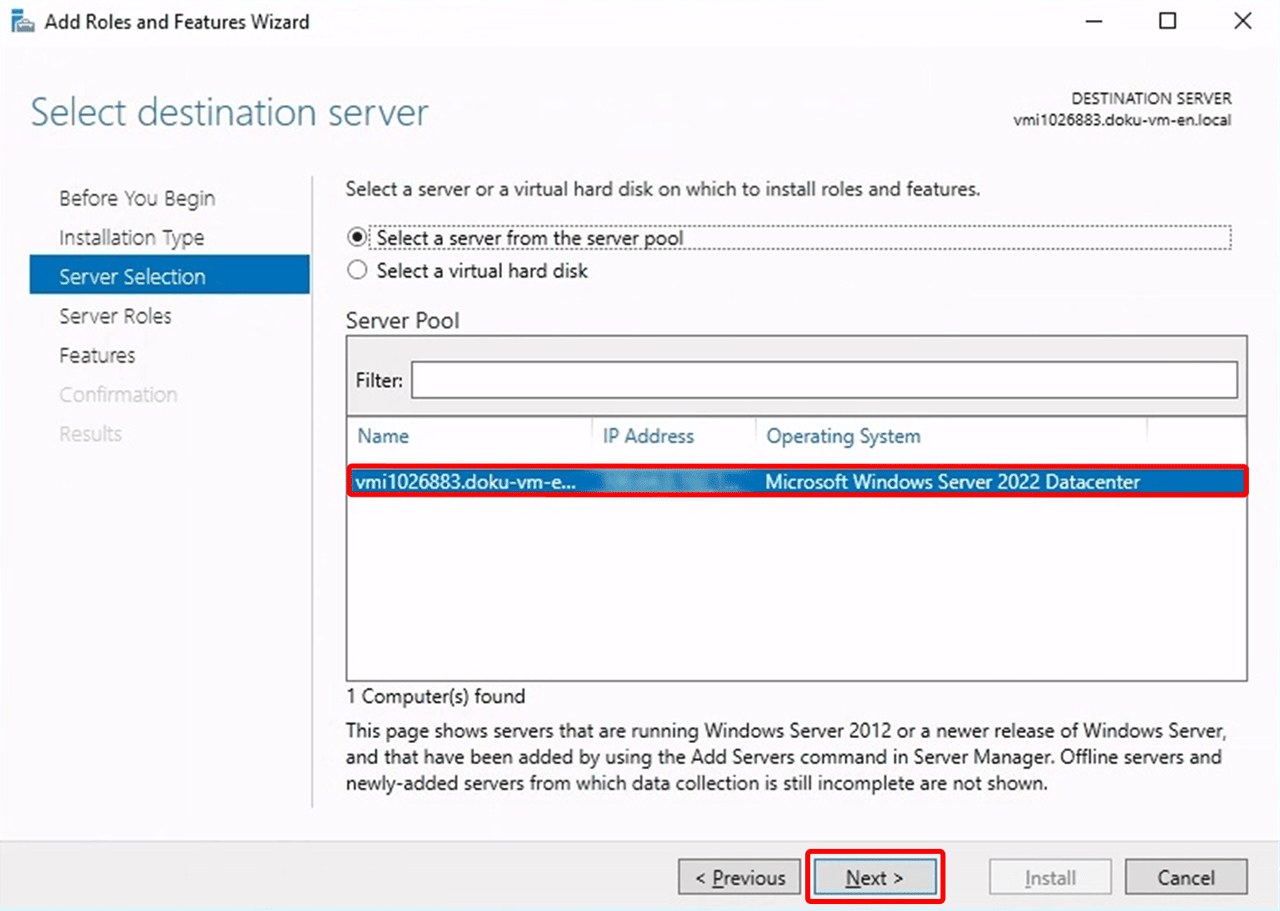
- In the "Server Selection" step, select the server destination and click Next.
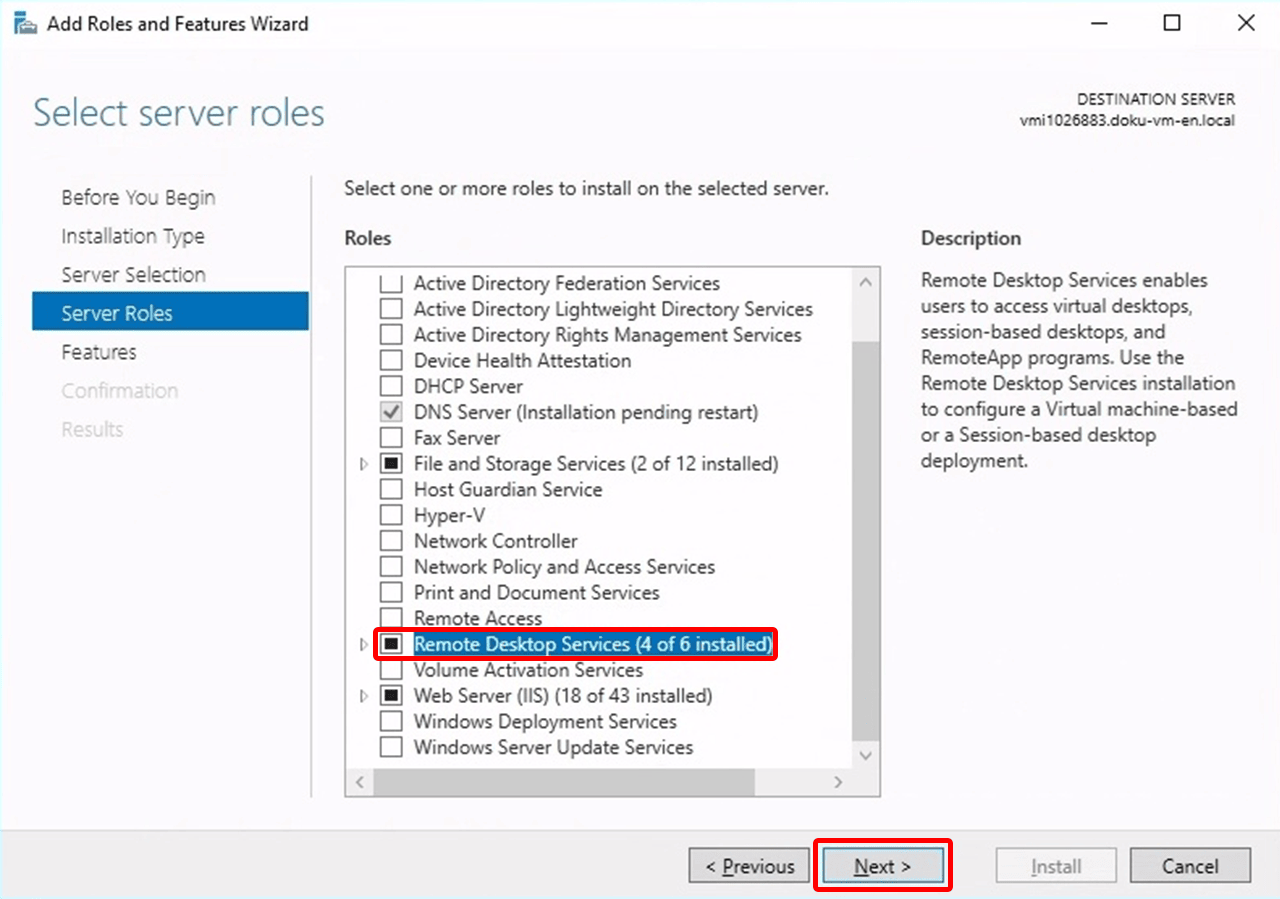
- In the "Server Roles" step, select Remote Desktop Services and click Next.
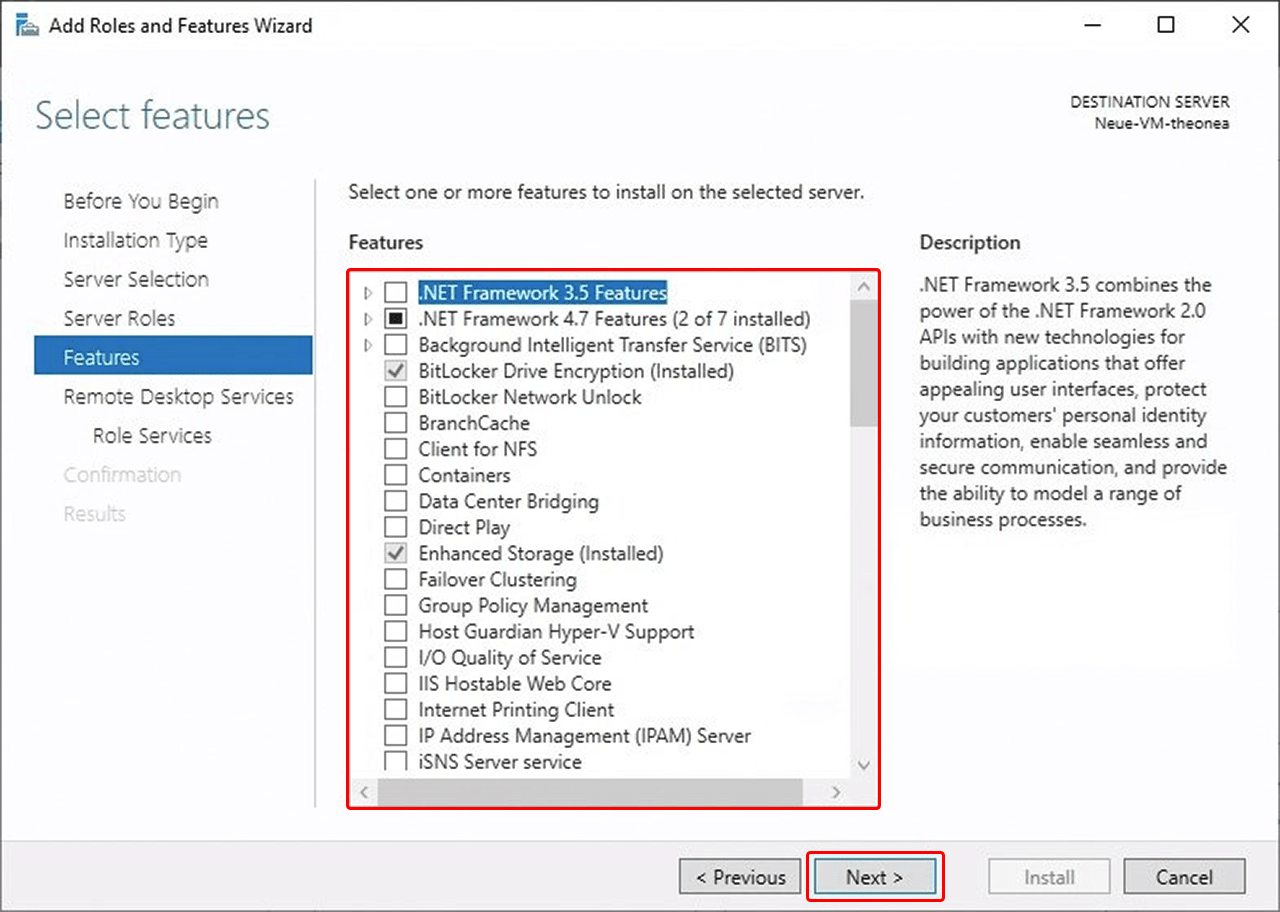
- If required, select "Features" and click Next.
- Click on Next under "Remote Desktop Services".
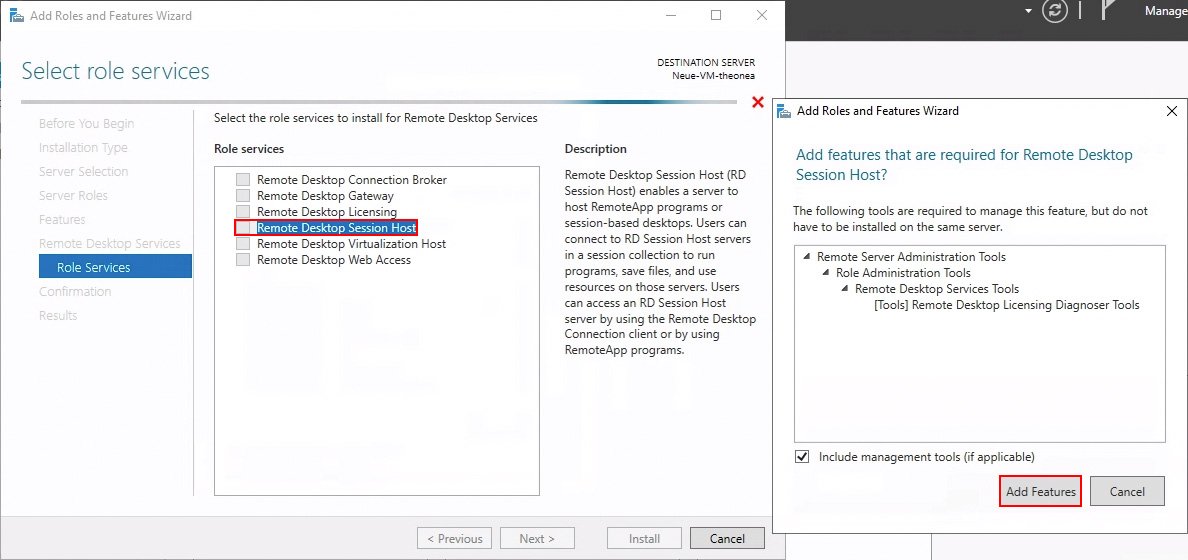
- Under "Role Services", check the box next to Remote Desktop Session Host. The wizard opens. Click on Add Features and then on Next.
- Under "Confirmation" click on Install.
- On the "Installation Status" page, click Close.
- Restart the server now. The session host role is installed.
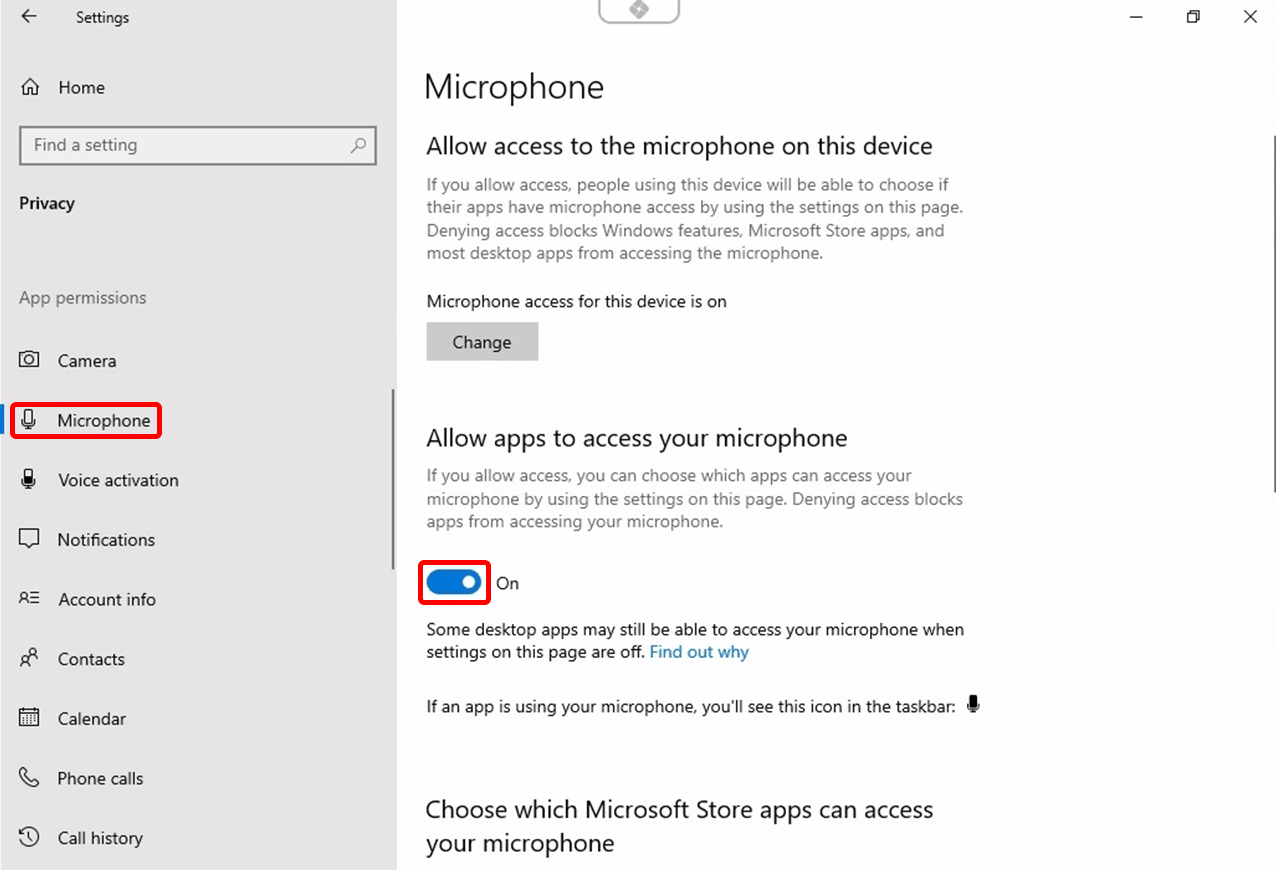
- Grant the necessary access permission for audio transmission. To do so, switch to this view for the user via Start > Settings > Privacy > Microphone:
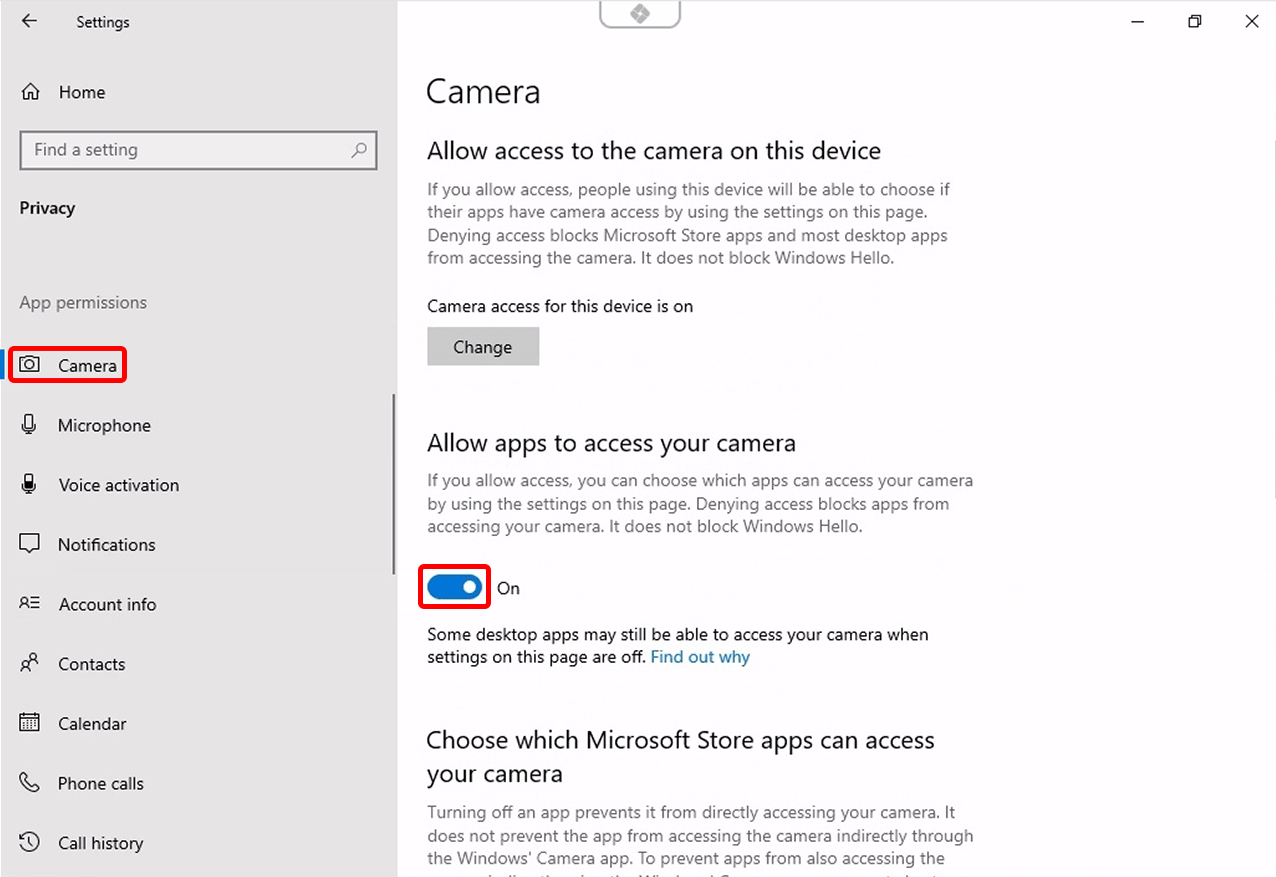
- To make the settings for your webcam, go to Start > Settings > Privacy > Camera:
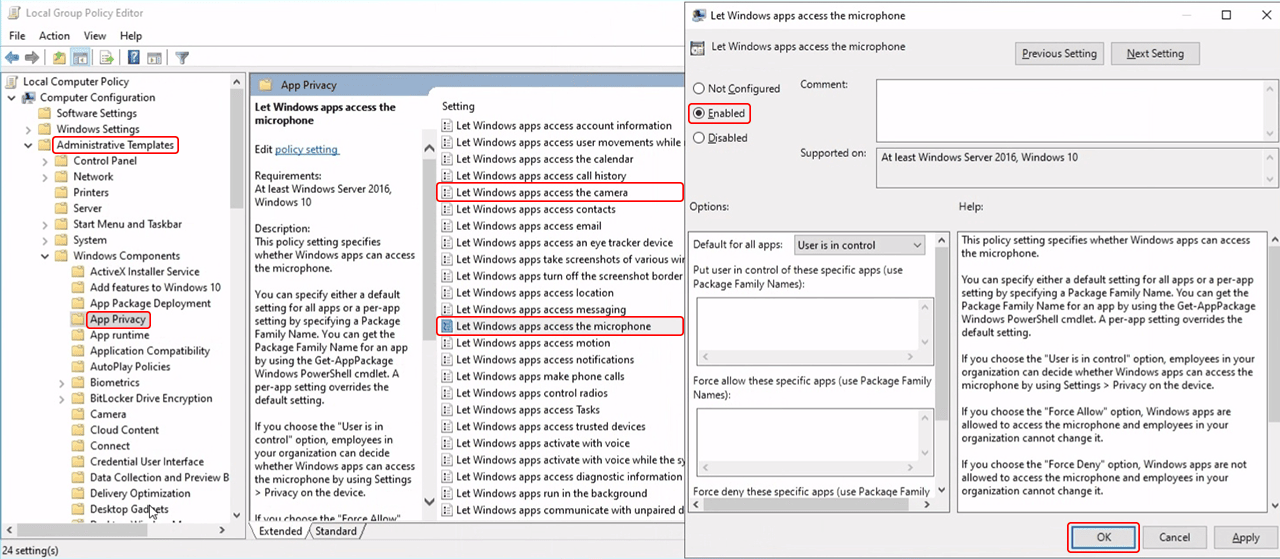
- To adjust the privacy settings at directory level, open the command line, enter the following command and press OK:
Then change the necessary settings.gpedit.msc
- Grant the necessary access permission for audio transmission. To do so, switch to this view for the user via Start > Settings > Privacy > Microphone:
3. Activate audio and webcam in oneclick™
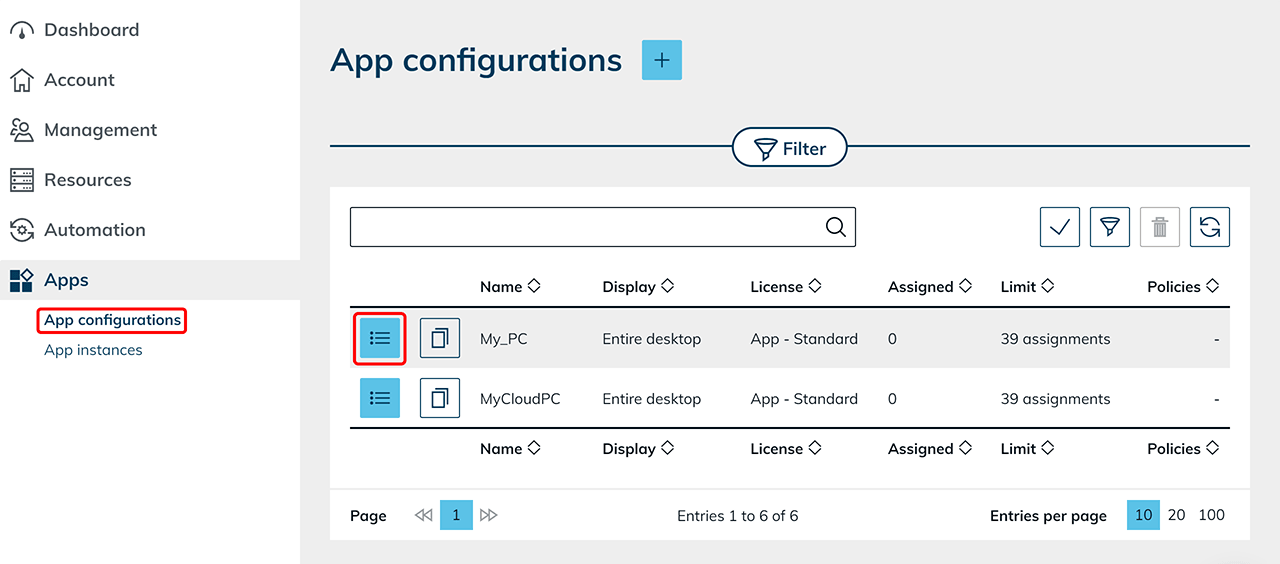
- In the oneclick™ menu, click on the "Apps" tab and then on App configurations.
- Select the app configuration in which you want to adjust the settings and click on the List icon.
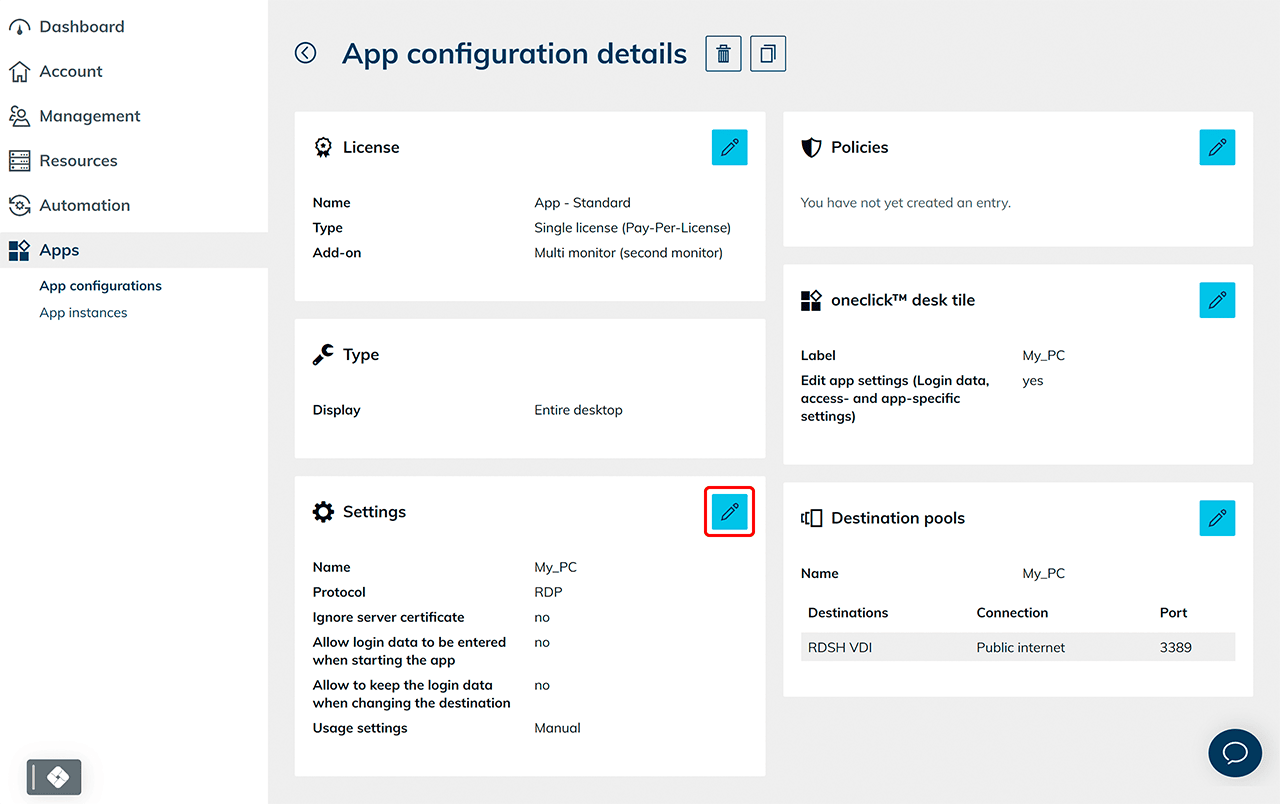
- Click on the Pencil icon in the "Settings" tile.
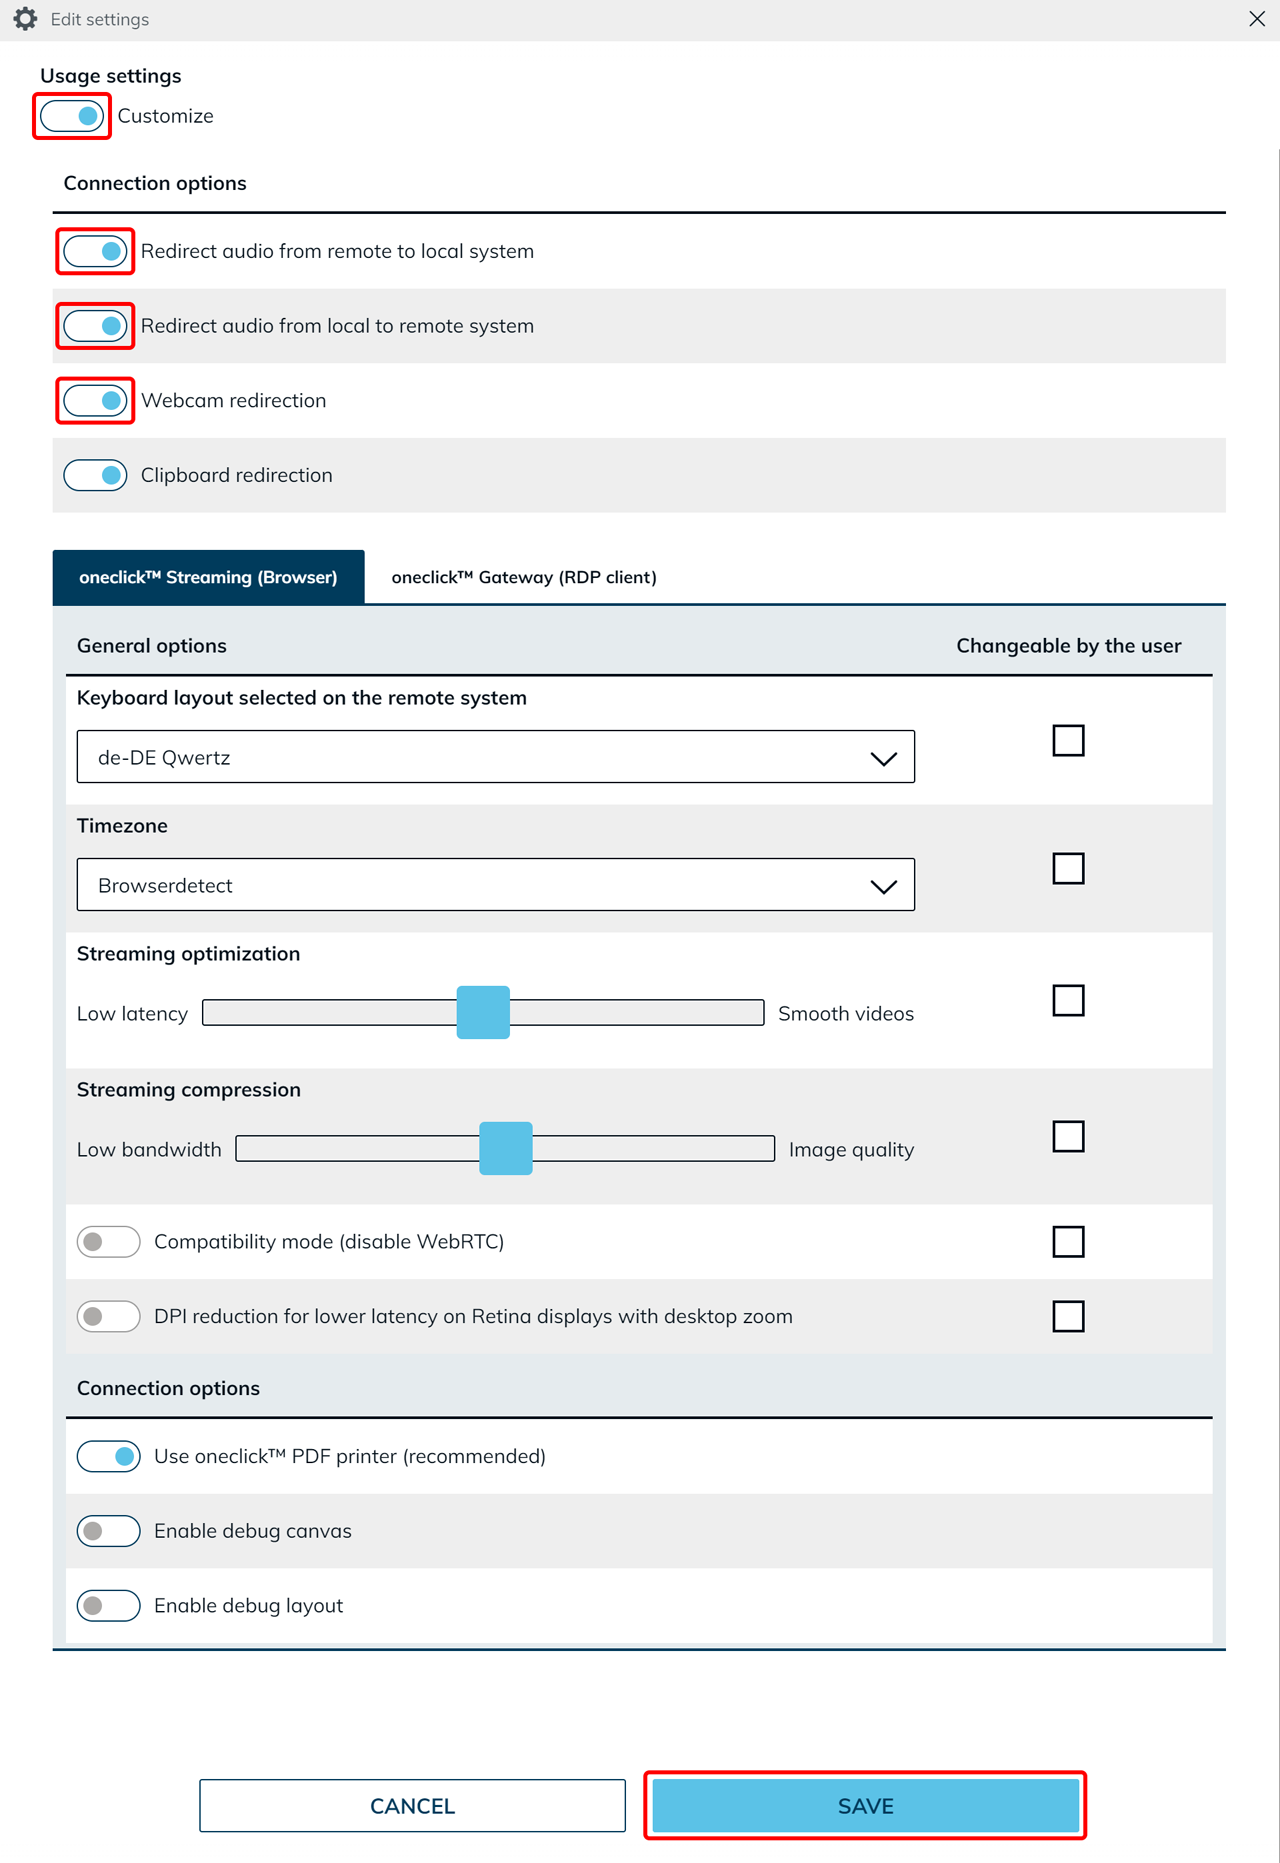
- Scroll further down and set the switch to Customize under "Usage settings".
- Activate the items Audio transmission from the server to the browser and Audio transmission from the browser to the server under "Connection options". By activating the switch next to Webcam transmission from the browser to the server, you also enable access to the camera.
4. Granting access authorizations in the browser
Normally, a pop-up window appears at the top left of the search bar in the browser asking for access authorization for audio, microphone or camera.
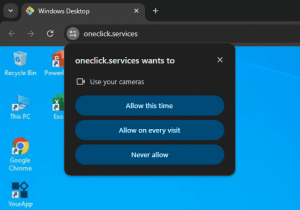
If this pop-up does not appear, follow our instructions to grant the required authorizations.
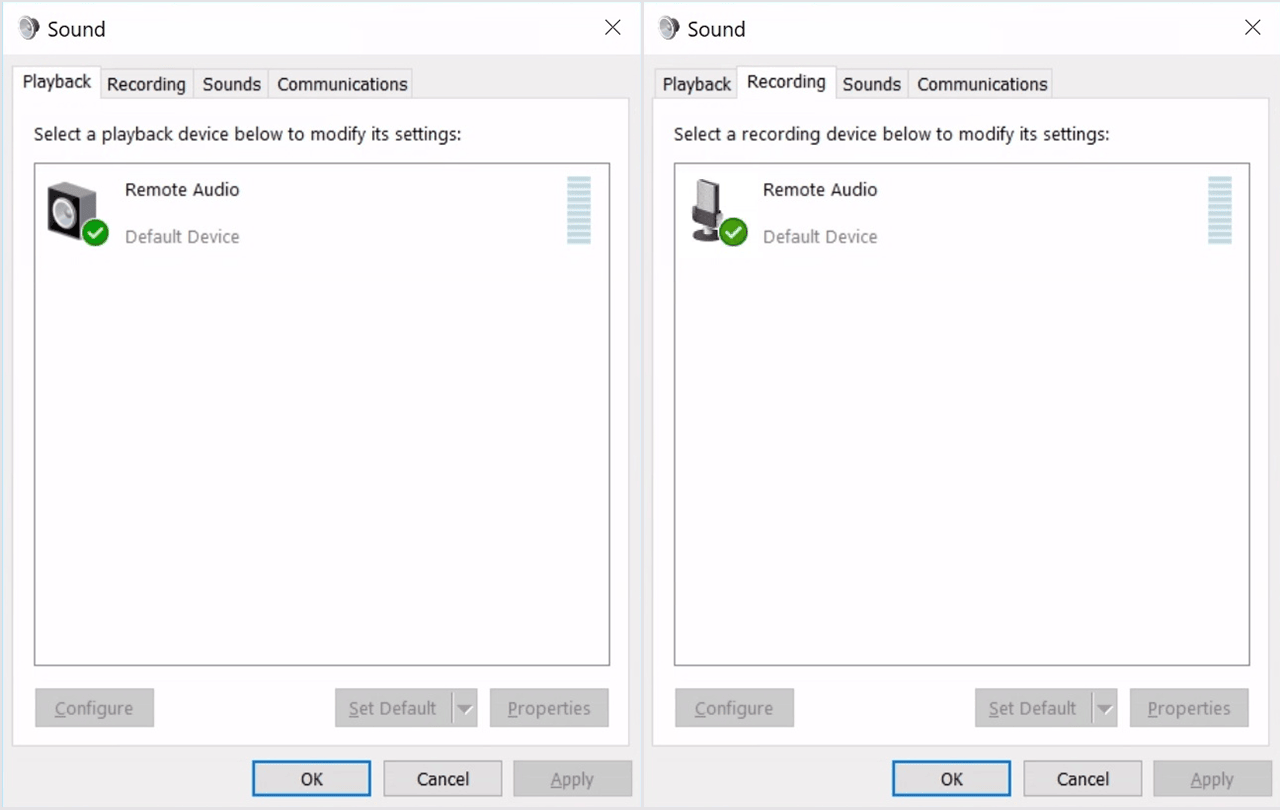
5. Enable remote audio on the Windows server
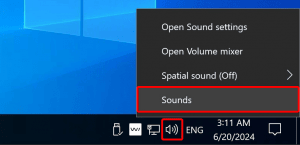
- Open the Windows server you are accessing via oneclick™ and right-click on the Sound icon in the bottom right-hand corner of the taskbar. Then click on Sounds.
- If you are prompted to activate the Windows audio service, confirm the prompt by clicking Yes.
"Remote Audio" is now available as a playback device and as a recording device.