Set up oneclick™ Customer admin
You have selected oneclick™ Customer admin under Marketplace. Now configure the license settings.
If you have not made this selection yet, first follow the steps in Request a Marketplace license.
Request a Customer admin license
- Enter a Name for the license and specify the desired Quantity.
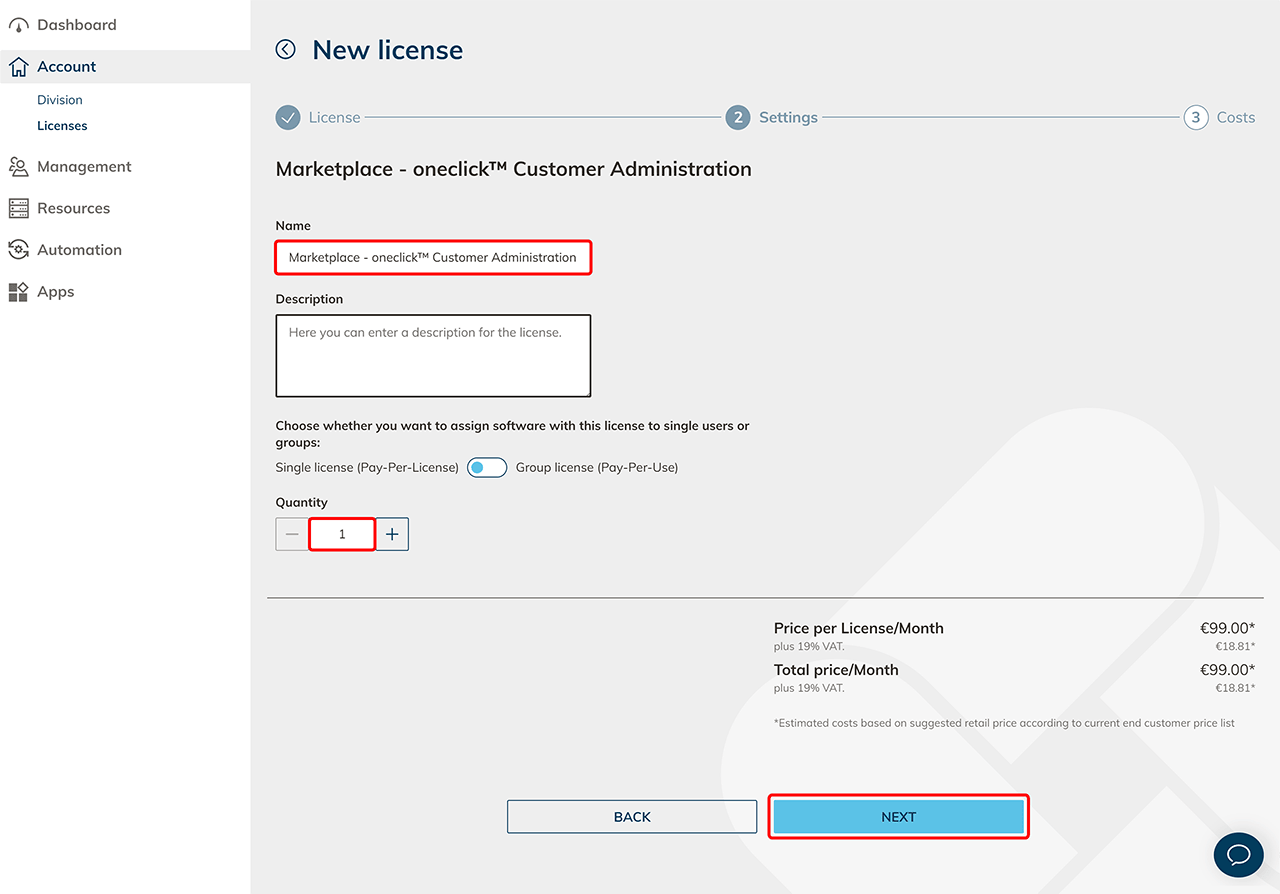
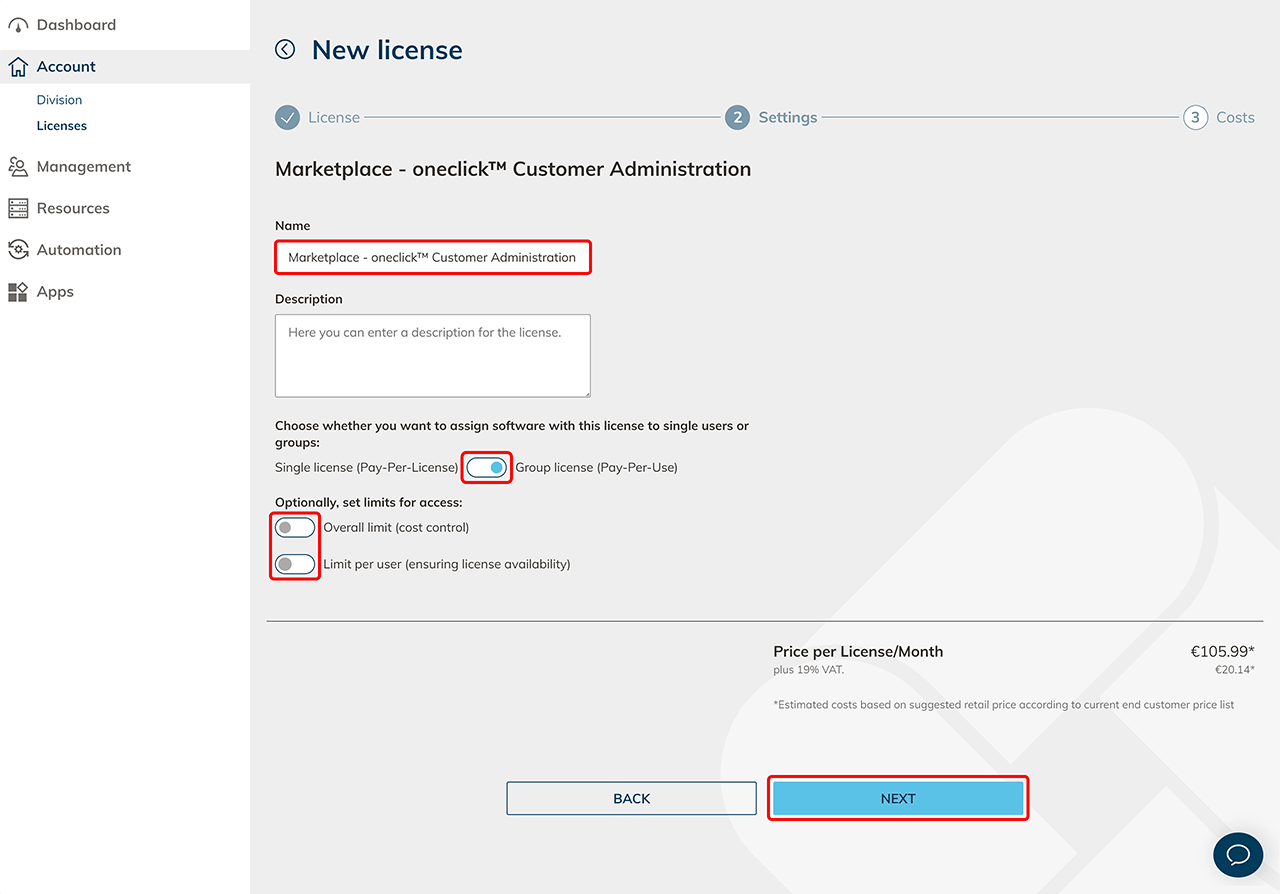
- If you selected a Group license, optionally set access limits.
- Click Next.
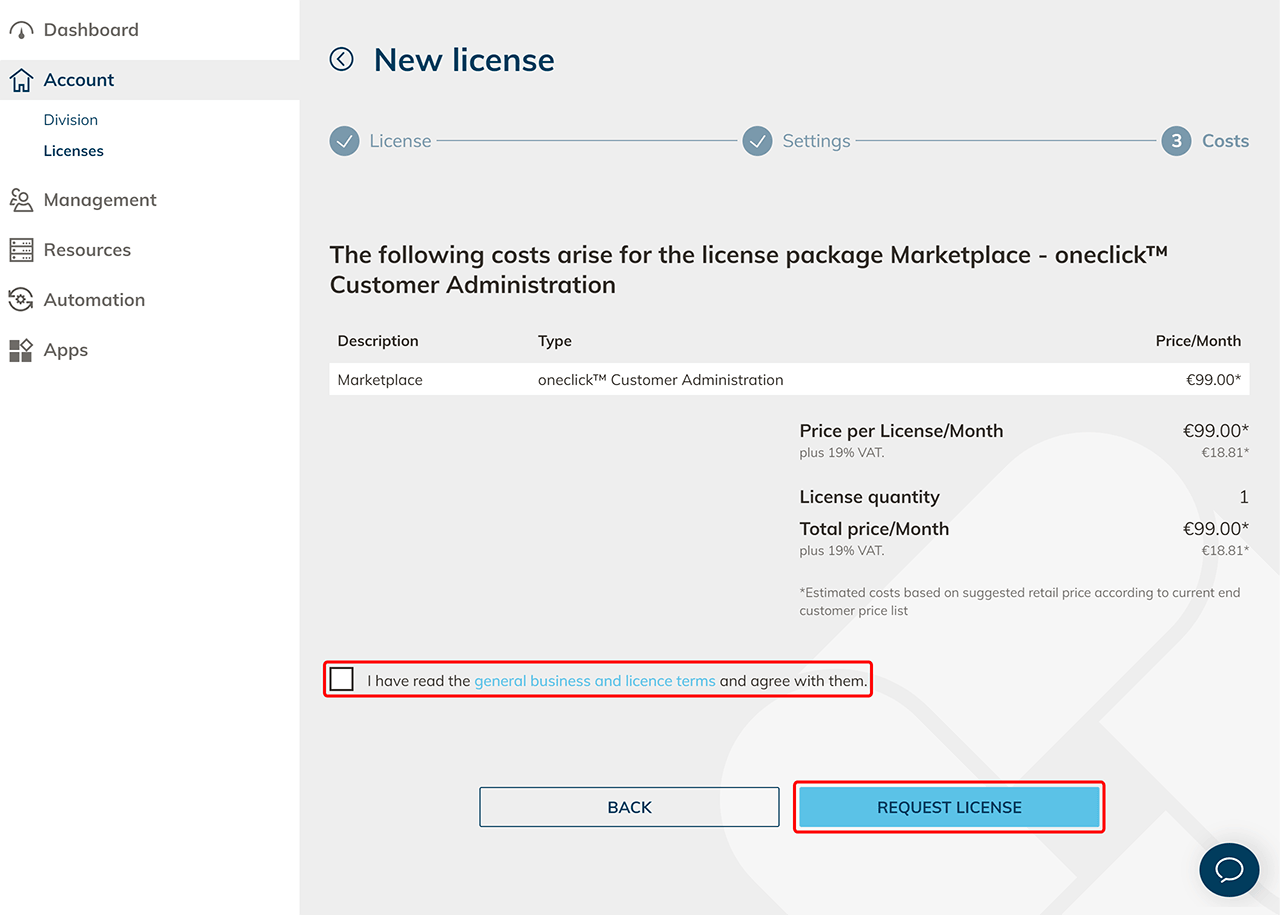
- Review the subscription term, cost overview, and displayed terms and conditions.
- Click Request License.
Create an app configuration
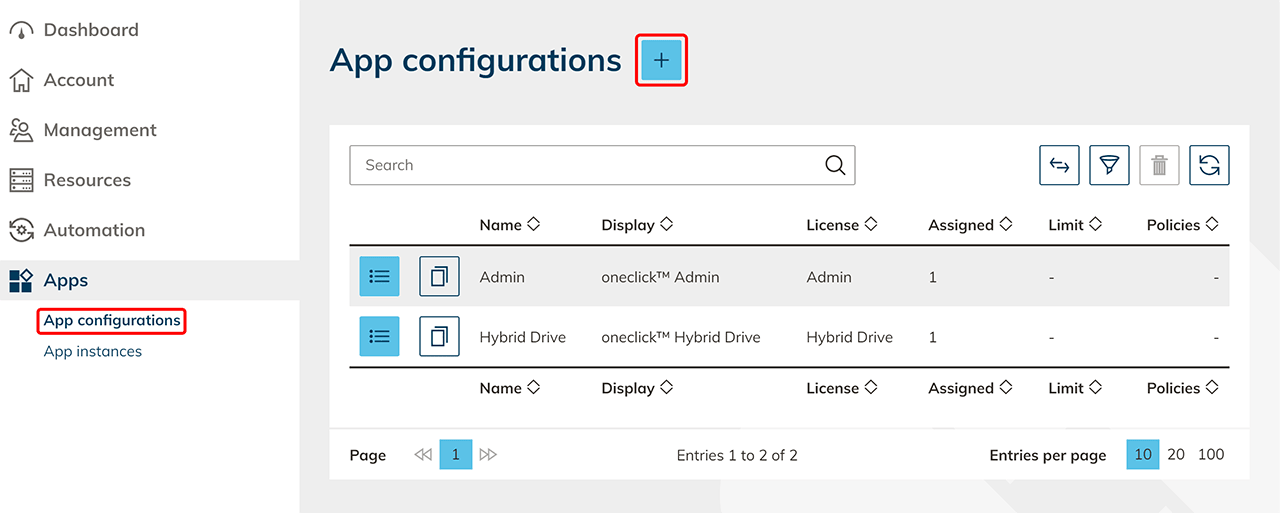
- Click Apps in the menu, and then click App configurations.
- Click the Plus icon.
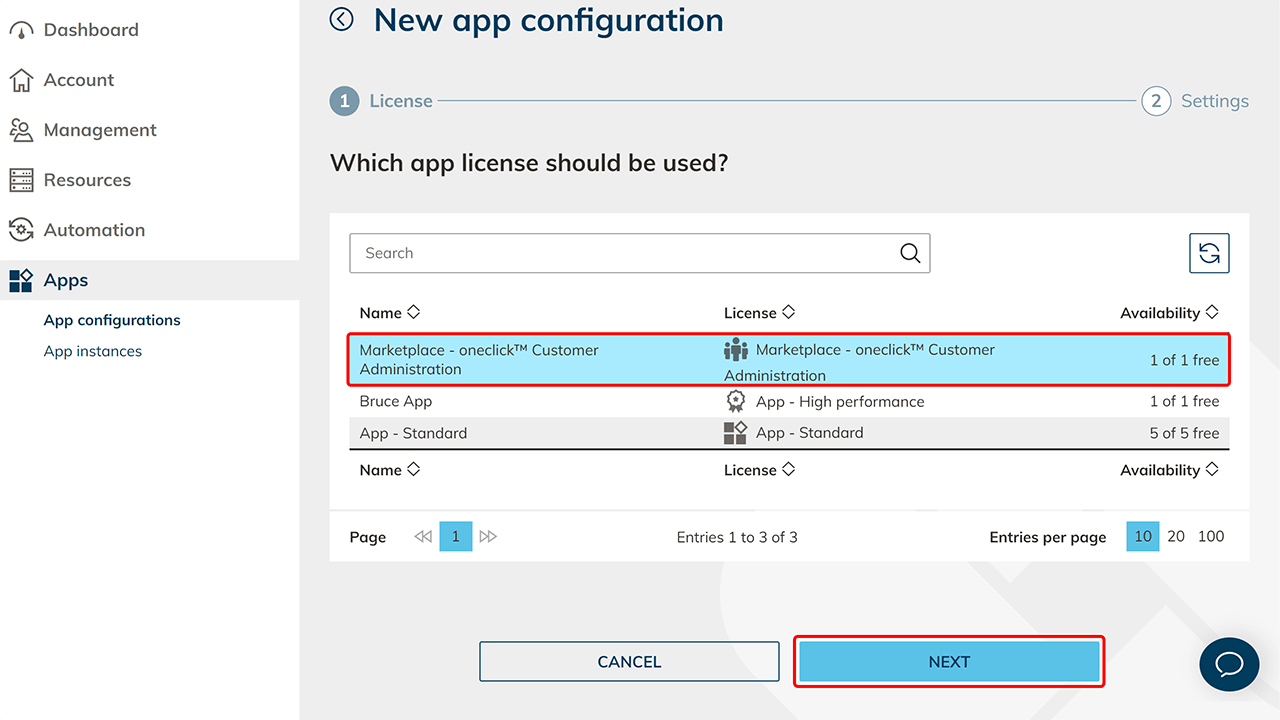
- Select your Marketplace license for oneclick™ Customer admin and click Next.
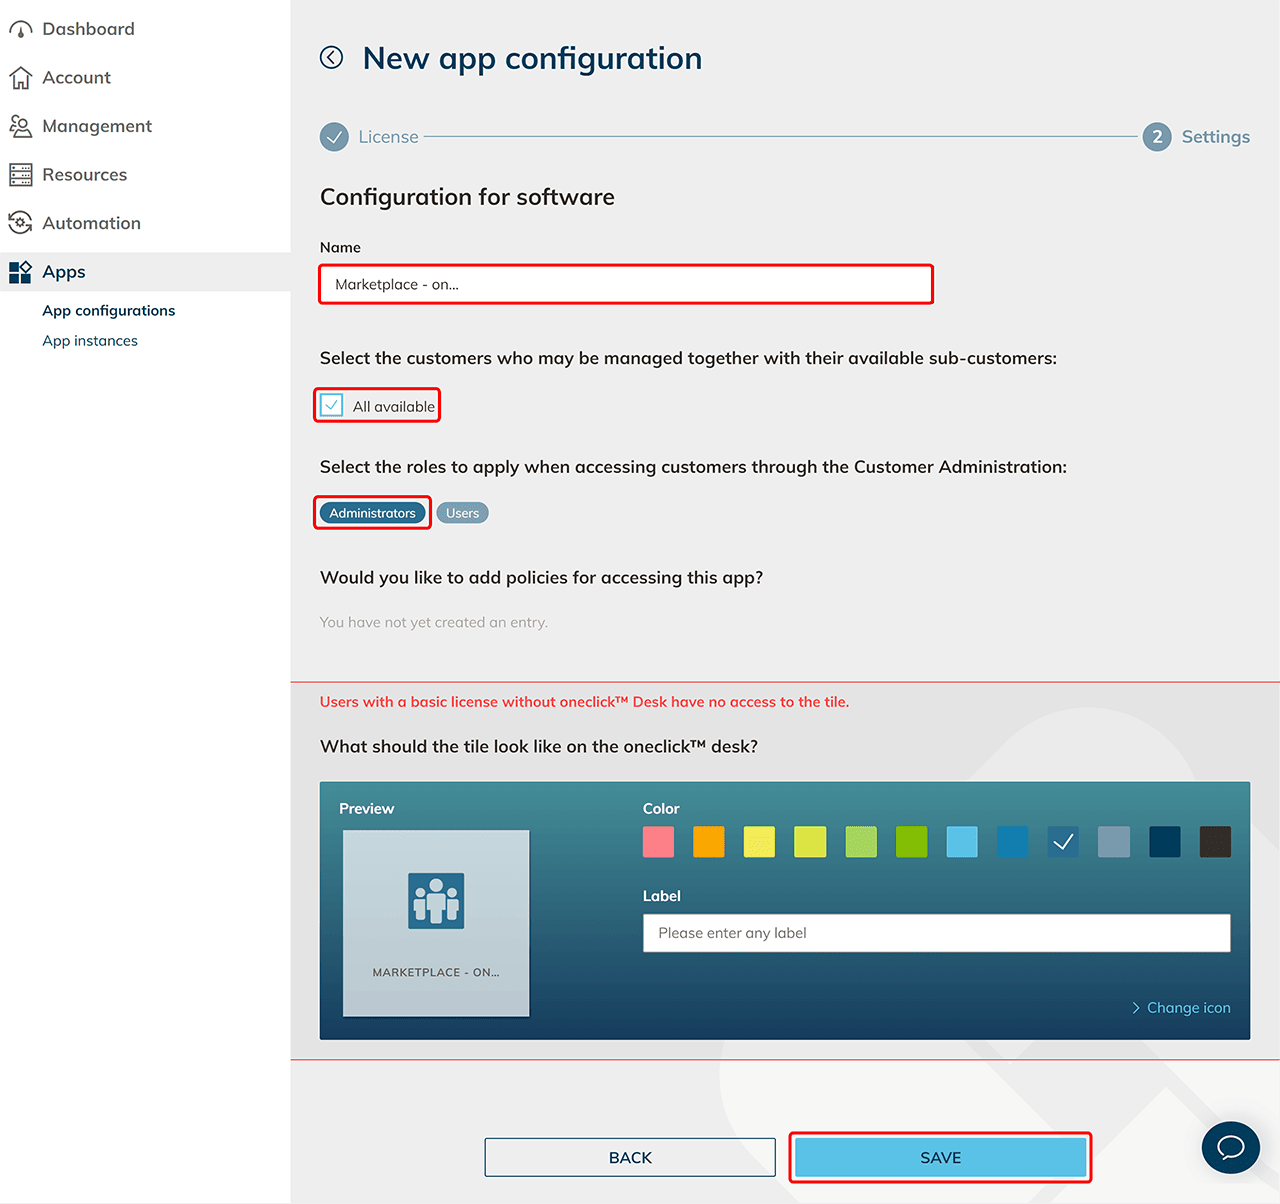
- Enter a Name for the app configuration and select All available if the user should be able to manage all customers.
- Select the Administrator role to grant the user all permissions of this role when accessing customers. For restricted permissions, select a role with the appropriate limitations. For more information, see Set up Customer admin with restricted permissions.
- Optionally, add policies, such as a second factor.
- Customize the app tile for the oneclick™ Desk if needed.
- Click Save.
Assign an app instance
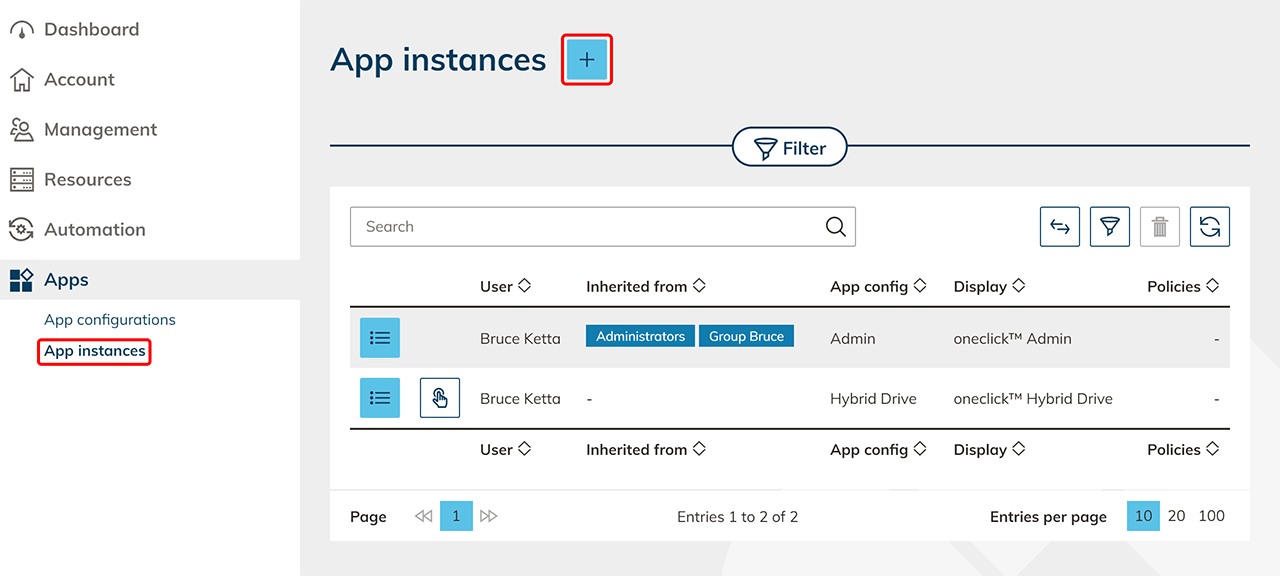
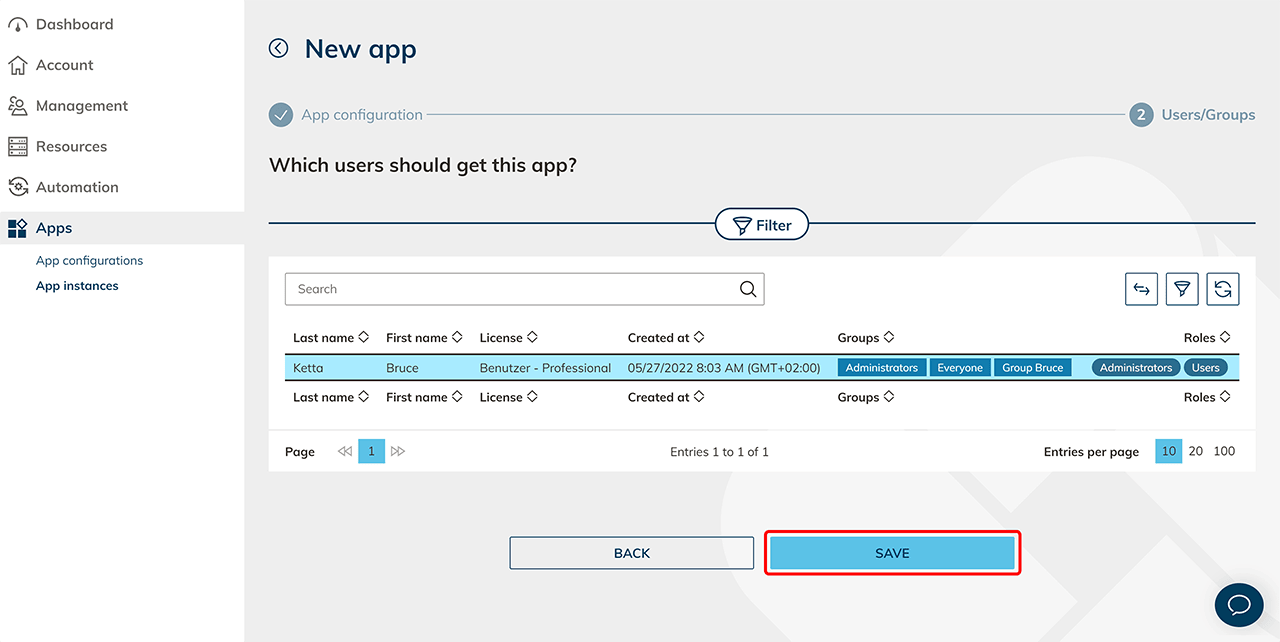
- Click App instances in the menu, and then click the Plus icon.
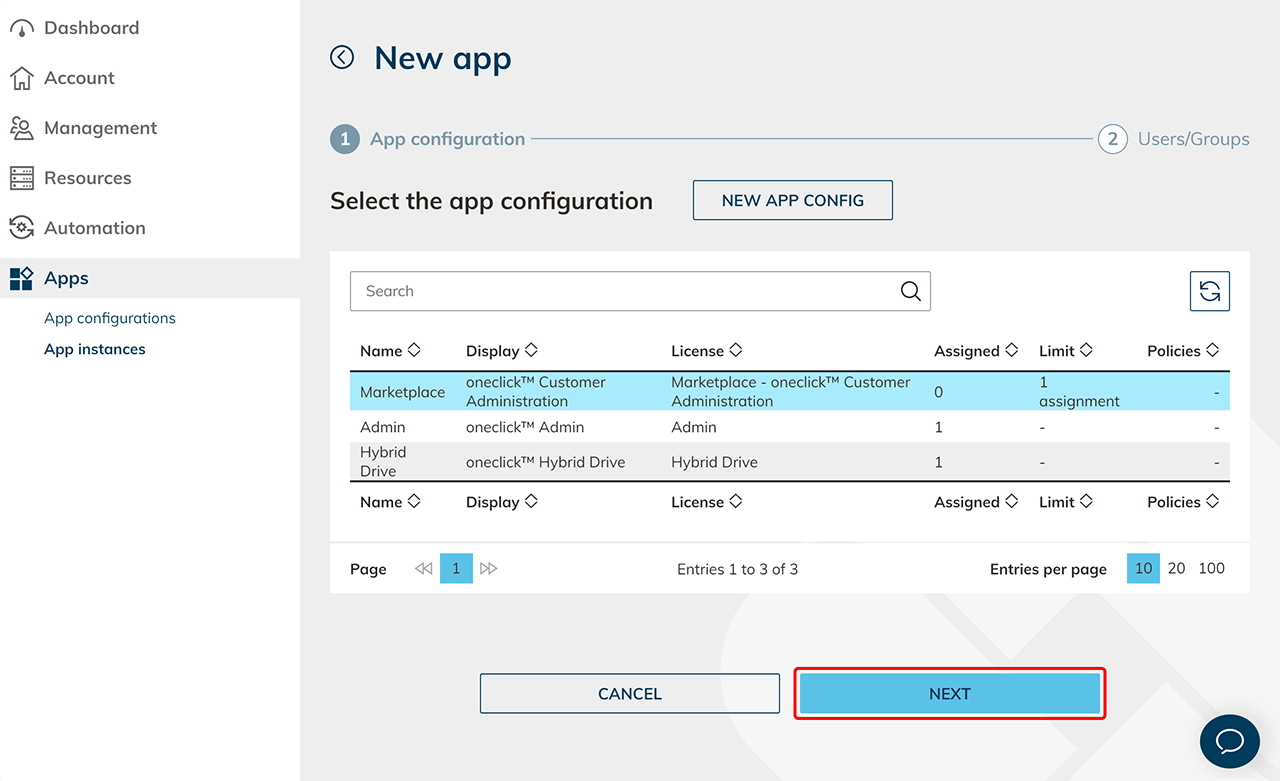
- Select the app configuration you just created and click Next.
- For a single license, select the user who should receive the app. For a group license, select the group.
- Click Save.
The Customer admin app is now available to the assigned users. You can use it to create customers.
The permissions of a Customer admin when accessing a customer are determined by the intersection of two roles: the role from the app configuration and the customer's Support role. A permission applies only if both roles grant it. For more information, see Roles.
Set up Customer admin with restricted permissions
A user who receives Customer admin needs administrative permissions in your division. You define these permissions in a role and assign them through a group:
- If the user is a full administrator who has also been assigned the regular Admin app, leave them in the default Administrators group. Its Administrator role grants all permissions. Assign Customer admin to the user as well.
- If the user should not be a full administrator or should not receive the regular Admin app, create a separate role and assign it to a separate group, even if the role grants the same permissions as the Administrator role. Do not modify the default Administrators group.
A Customer admin must retain the required administrative permissions. Otherwise, they cannot manage customers. If you want to restrict their permissions, limit the role in the app configuration, not their group membership. Only remove a user from the default Administrators group if you grant them the required administrative permissions through another group.
To give a Customer admin restricted permissions, for example access to all customers without permission to create or edit users:
- Create a role that contains only the required permissions. For example, remove the permissions to create, edit, and delete users.
- Create a group and assign the new role to it.
- When creating the app configuration, select this role instead of Administrator.
If you remove one of your own permissions as a Customer admin, you may no longer be able to grant it again using the same user account. This cannot necessarily be undone easily.