Bulk import for users
Have you already requested the number of user licenses you need?
Then you can transfer the data of your users by importing a CSV-file into oneclick™.
Requirements CSV-file
We prepared a CSV-file with sample data for you. Download the file. You can open, edit and save it in Excel.
- The column "Email address" is a required field and mandatory for a oneclick™ account to be created.
If you want to use Entra ID to log in, enter the Entra ID email address. - If you want to include mobile numbers, the value must be represented with country code (e.g. +49) and without space or separations in between. To ensure that the value is displayed correctly, you can insert an apostrophe before the + sign. It is located on the right side on the same key as the # sign. e.g. '+49123456789
If you want to use a 2-factor authentication through SMS, enter a mobile number. - In the Language field enter one of the given country codes.
German = de-DE
English = en-UK or en-US
Import user data
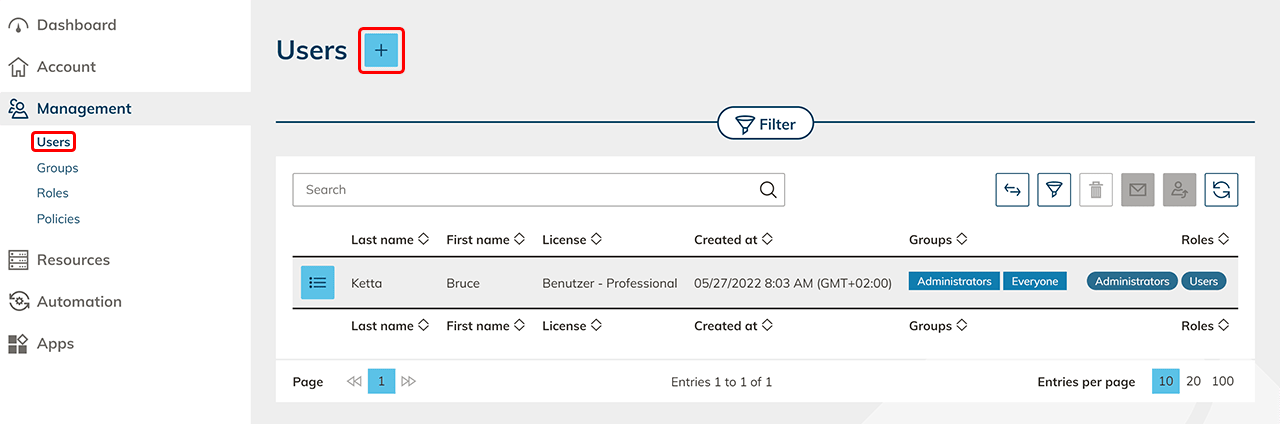
- Click on Users in the Administration tab.
- Click on the Plus icon to create new users.
- Click on CSV Import and then on Select CSV-file. In the new opened window you can select and open your CSV-file.
Check the box if your CSV-file contains a header line.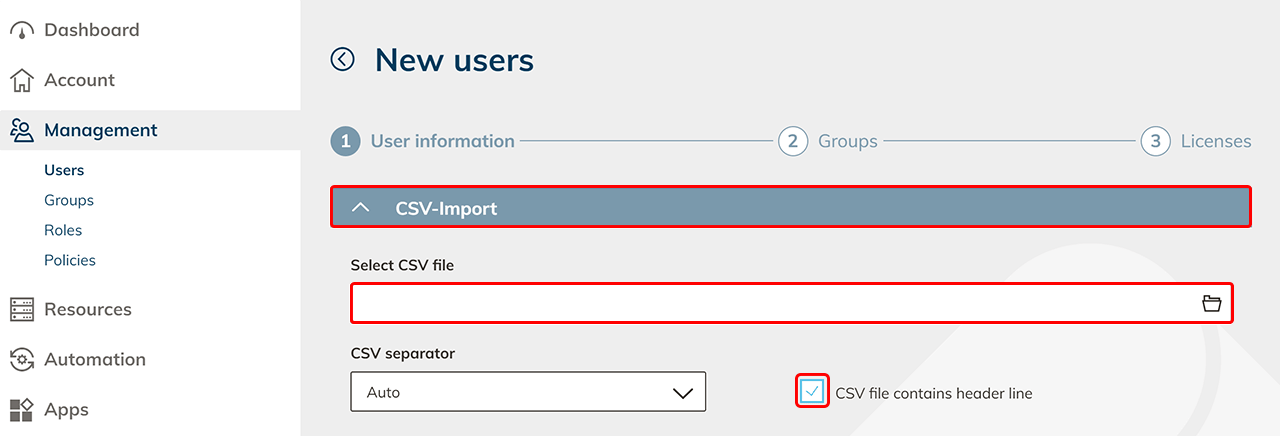
- Now assign the corresponding user fields to the columns of the CSV-file.
An import is only possible if the mandatory field "e-mail address" is assigned.
Clicking on an input field opens a drop-down list.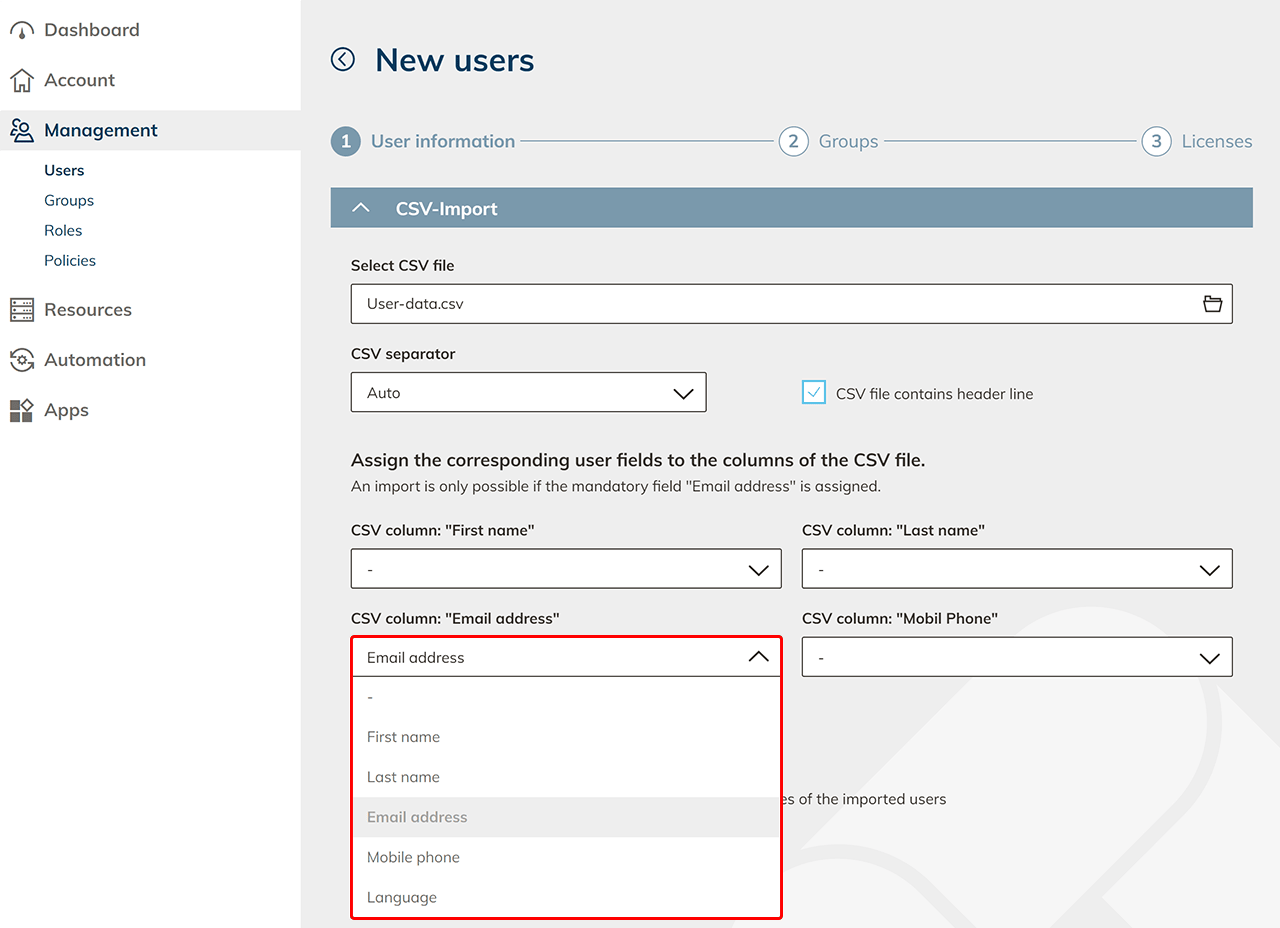
- Select "Send the oneclick™ registration link to the email addresses of the imported users" if you want your users to have immediate access to your workspace.
You can send the registration link later on as well.
Click on Import.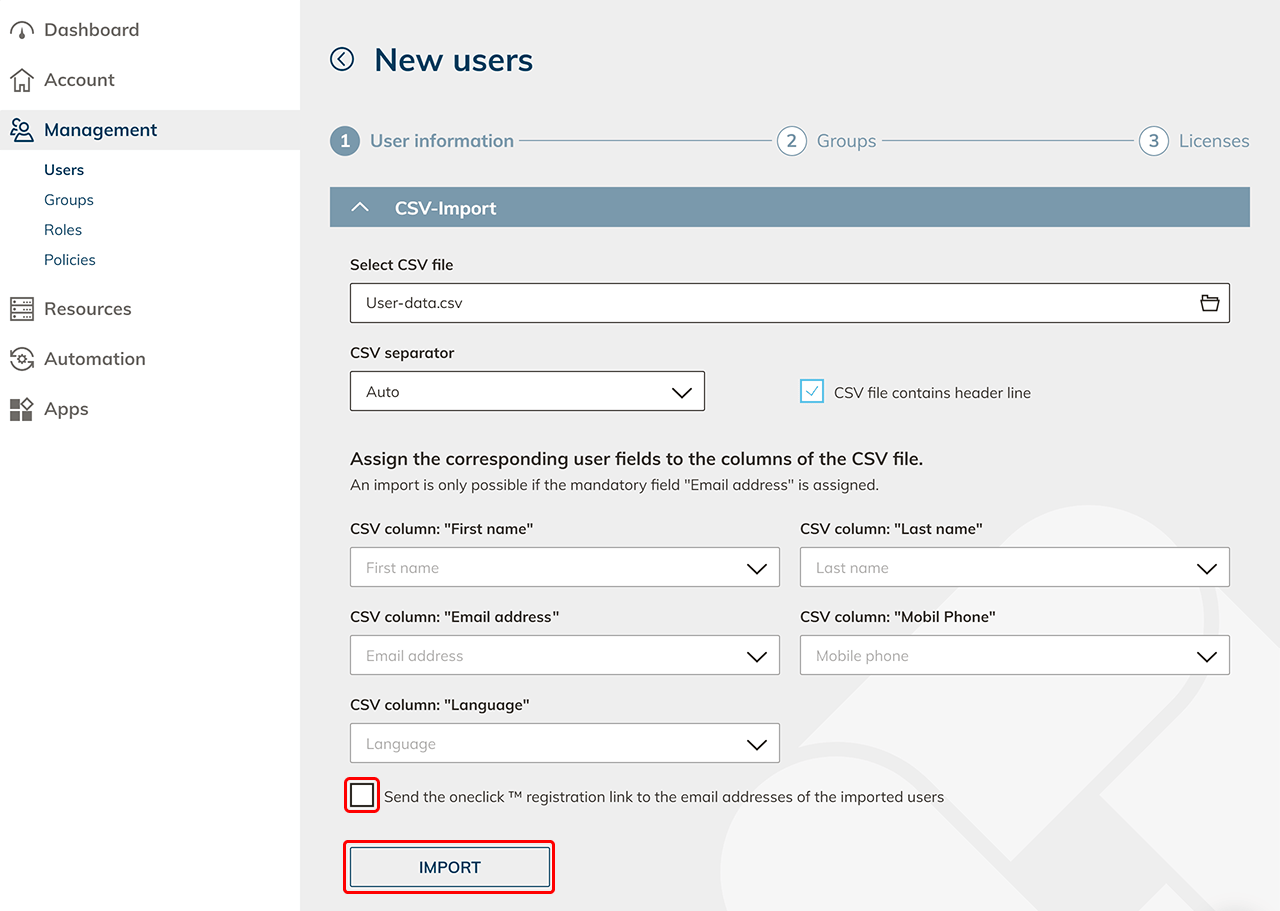
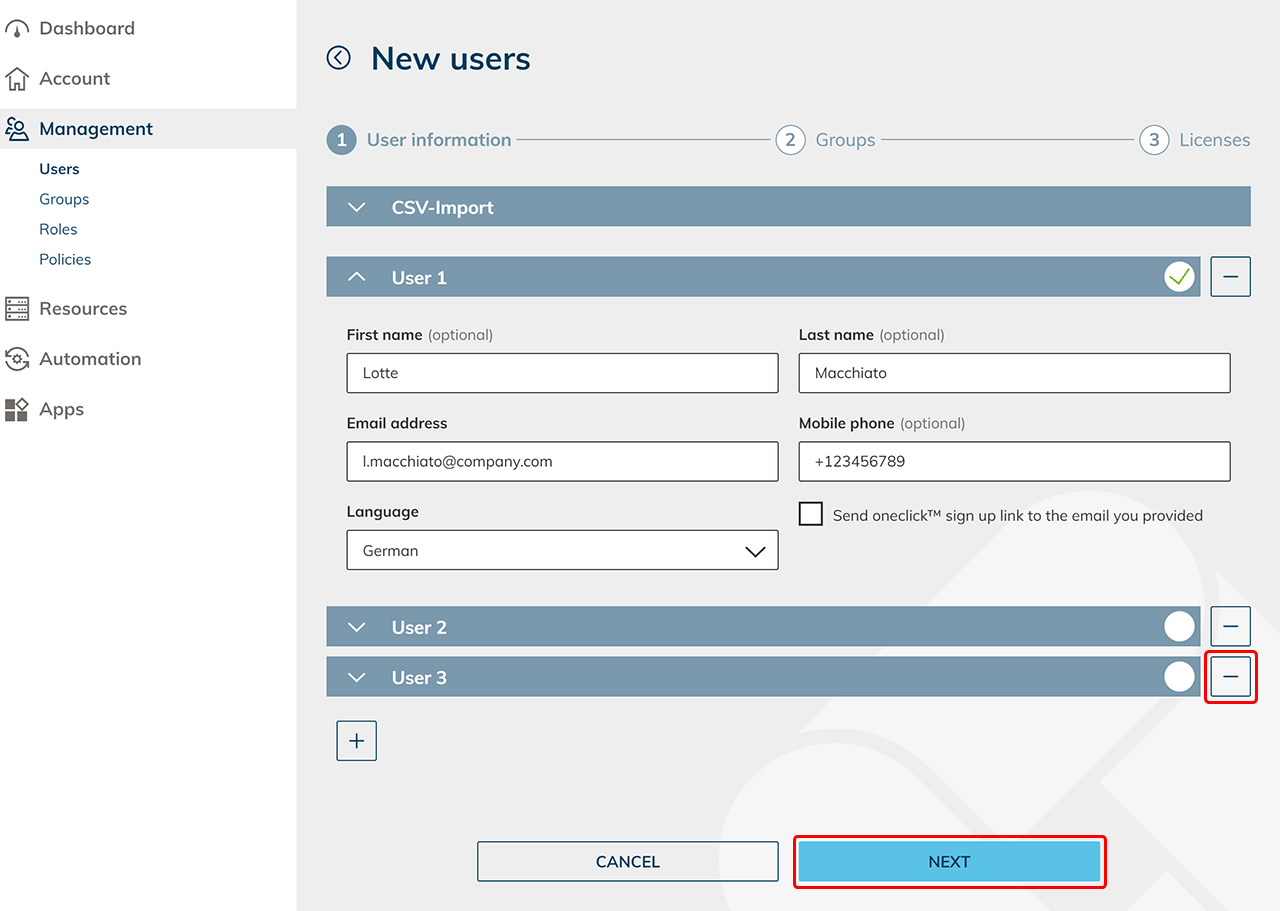
- If necessary, you can make changes to individual users. Unnecessary users can be removed by clicking on the minus sign. Click on Next.
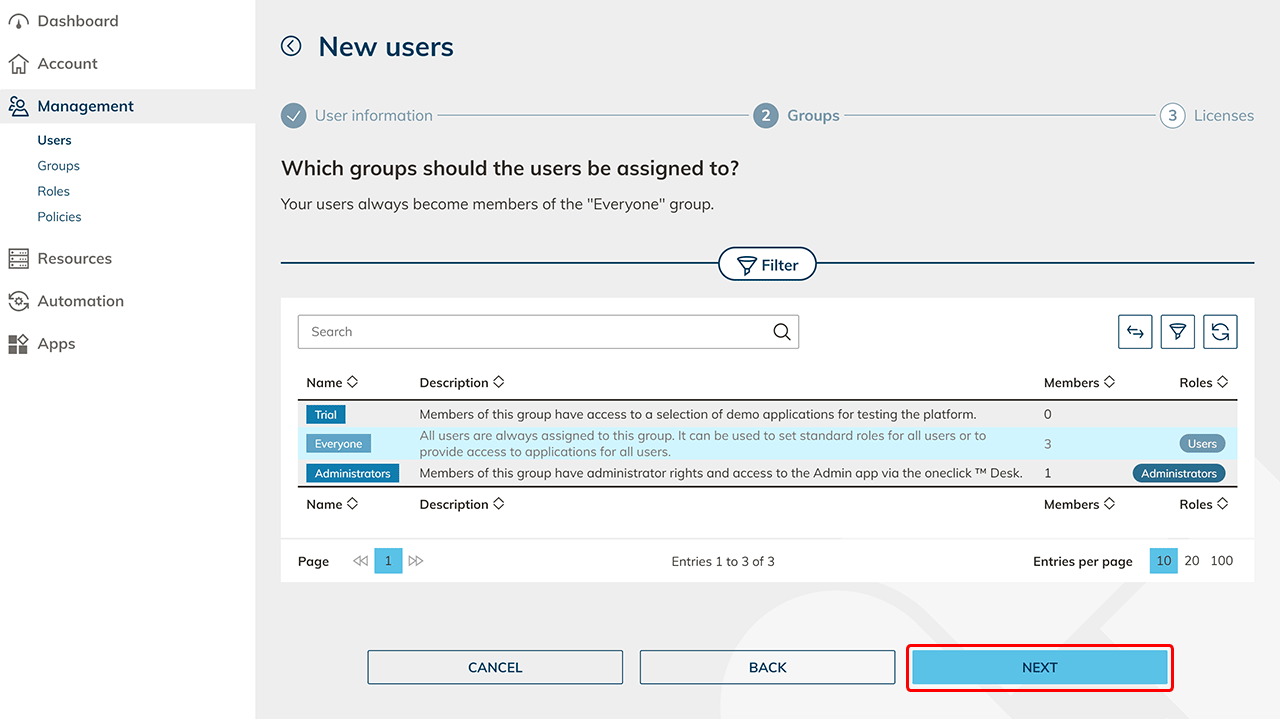
- In the next step you can assign groups to your users. Your users will always be automatically added to the "All users" group. Click on Next.
- Now select a user license and click Save.
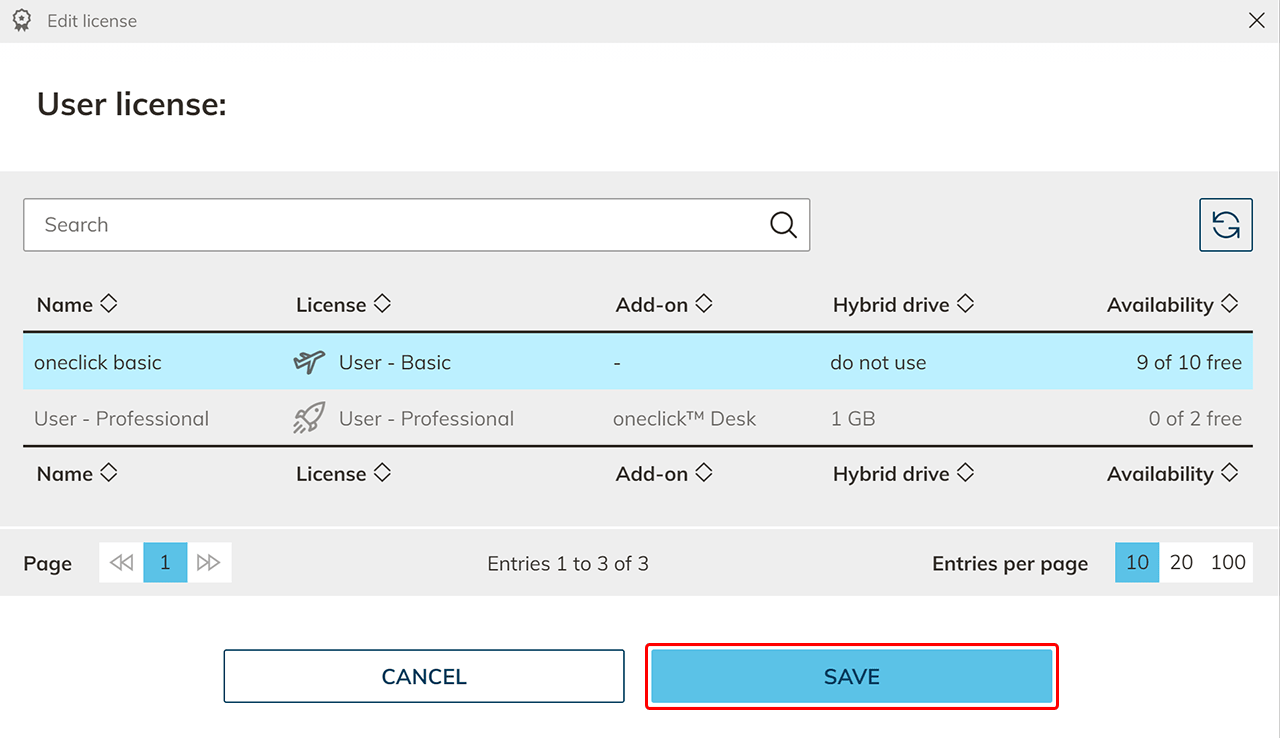
Your users have now been created. - Now you can organize your users into groups. Select policies, e.g. to perform a two-factor authentication before the oneclick™ Unified Workspace appears or to allow Login with identity provider.
- Alternatively connect on-Premises resources, cloud resources or web resources for your users to oneclick™ right away.