Import users from private AD
To import users from your private AD, mind the following steps in advance:
- Prepare your Active Directory: Among other things, enter an e-mail address for your users.
- Connect your private Active Directory in oneclick™: Your users will be read out.
- Your users can now log in to oneclick™ with their e-mail address and AD password.
- If you make changes in the Active Directory, do not forget to synchronize your AD in oneclick™.
Preparations in your Active Directory
- To import your existing AD users into oneclick™, you need an Active Directory set up on the Windows server.
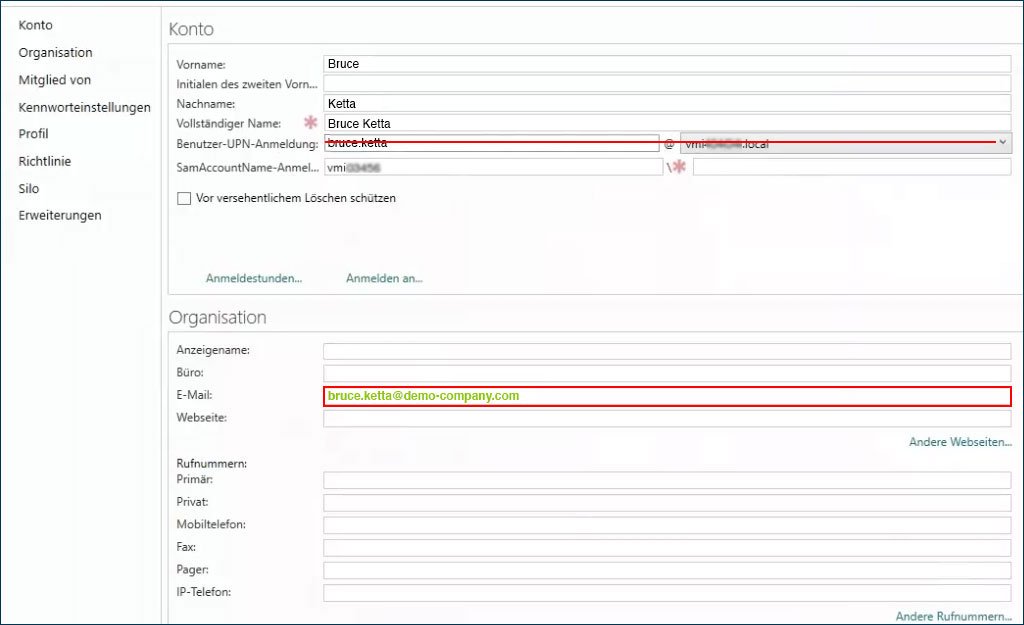
- In the "Organization" section, a publicly accessible e-mail must be entered in the "E-mail" field for all users to be imported (this includes the administrator). With this email the account of your user will be created in oneclick™. An e-mail entered in the "User-UPN-login" field will be ignored by oneclick™.
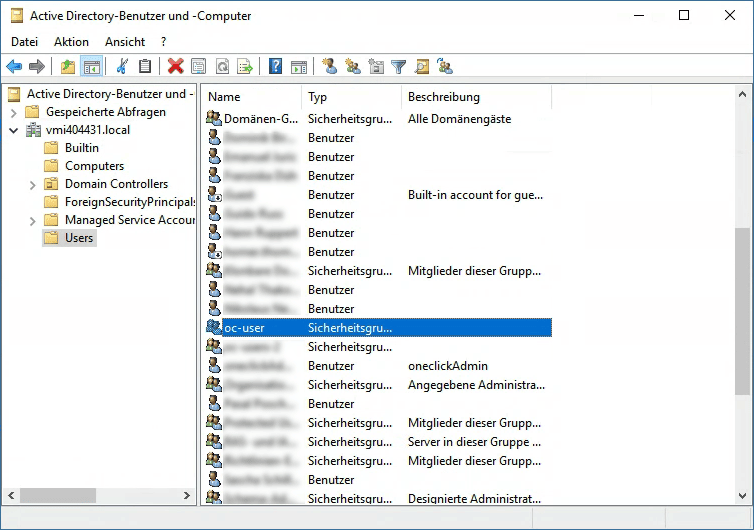
- Create a new group in your Active Directory that contains literally all users, that are to be imported into oneclick™. System groups of the Active Directory are not displayed in oneclick™. If you need a oneclick™ user license Professional for one part of the users and a oneclick™ user license Basic for the other part, we recommend putting the AD users in two different AD groups.
- Assign the AD group "Domain Users" to this new AD group as well as to other rights-groups if necessary.
- Select your created group.
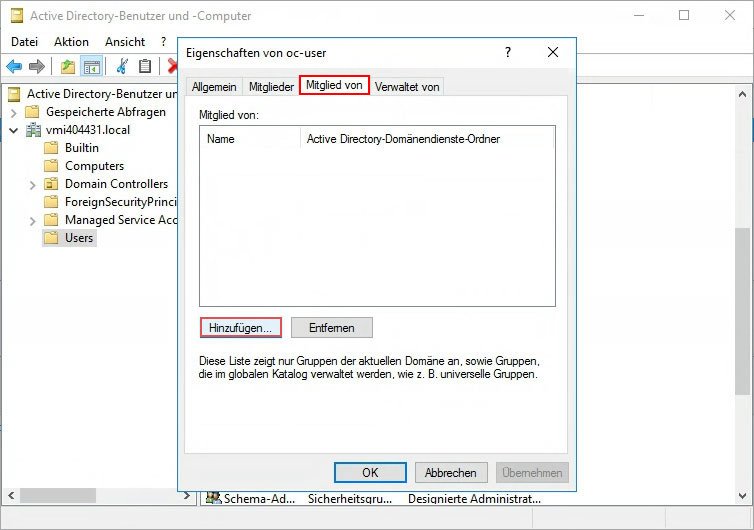
- Go to Member of and then to Add.
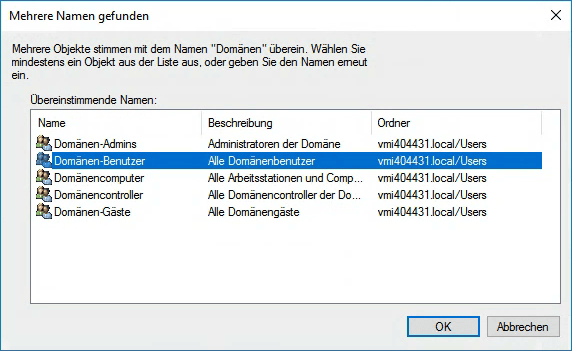
- Type the name of the group (Domain-user), then click Check Names.
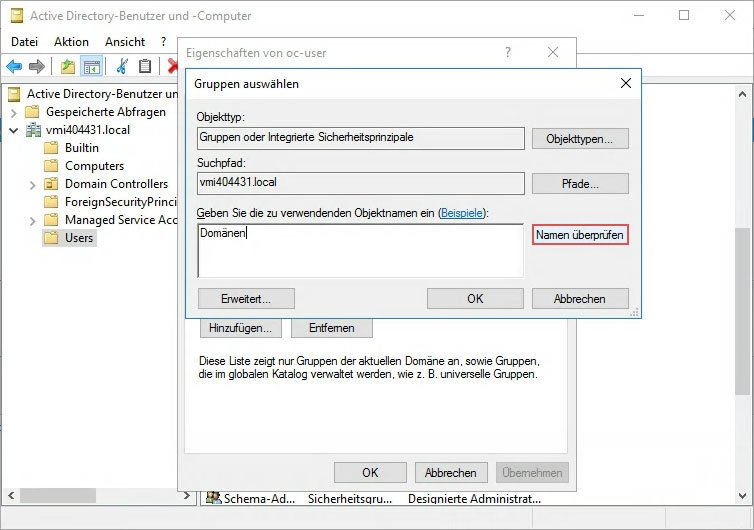
- Select the appropriate group (Domain-user), click OK, then click Apply and finally OK again.
Connect your Active Directory to oneclick™
- Now check how many user licenses you need and request them at the Licenses tab.
Alternatively, you can select the oneclick™ demo license (if available) at the last step of the AD import and assign the correct license to your users afterwards. - Optionally, create groups in oneclick™ to which you want the users of the AD groups to be assigned to.
By default, you can select the oneclick™ group "Administrator", for example. - To connect a private Active Directory, first you have to connect the resource (an own resource or cloud resource) to oneclick™ on which the AD is located. Make sure that you enter the correct port! This is usually "389" for LDAP and "636" for LDAPS but you can set this.
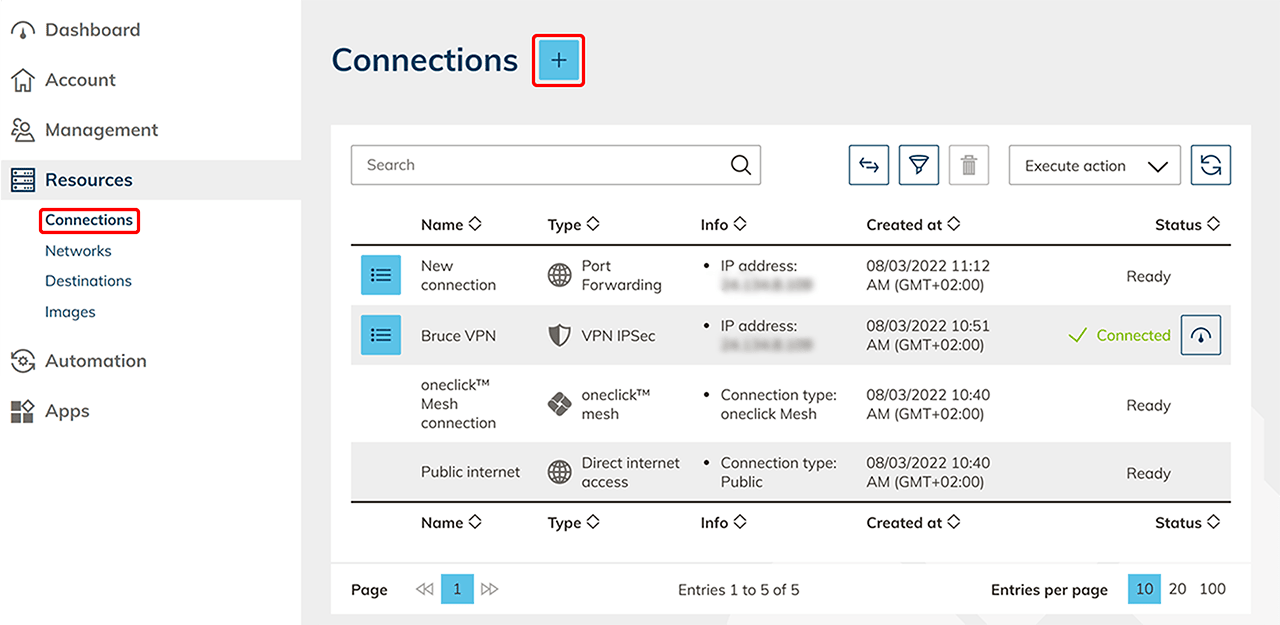
- Once the resource has been created in oneclick™, go to the Connections tab in the Resources menu item and click on the + Icon.
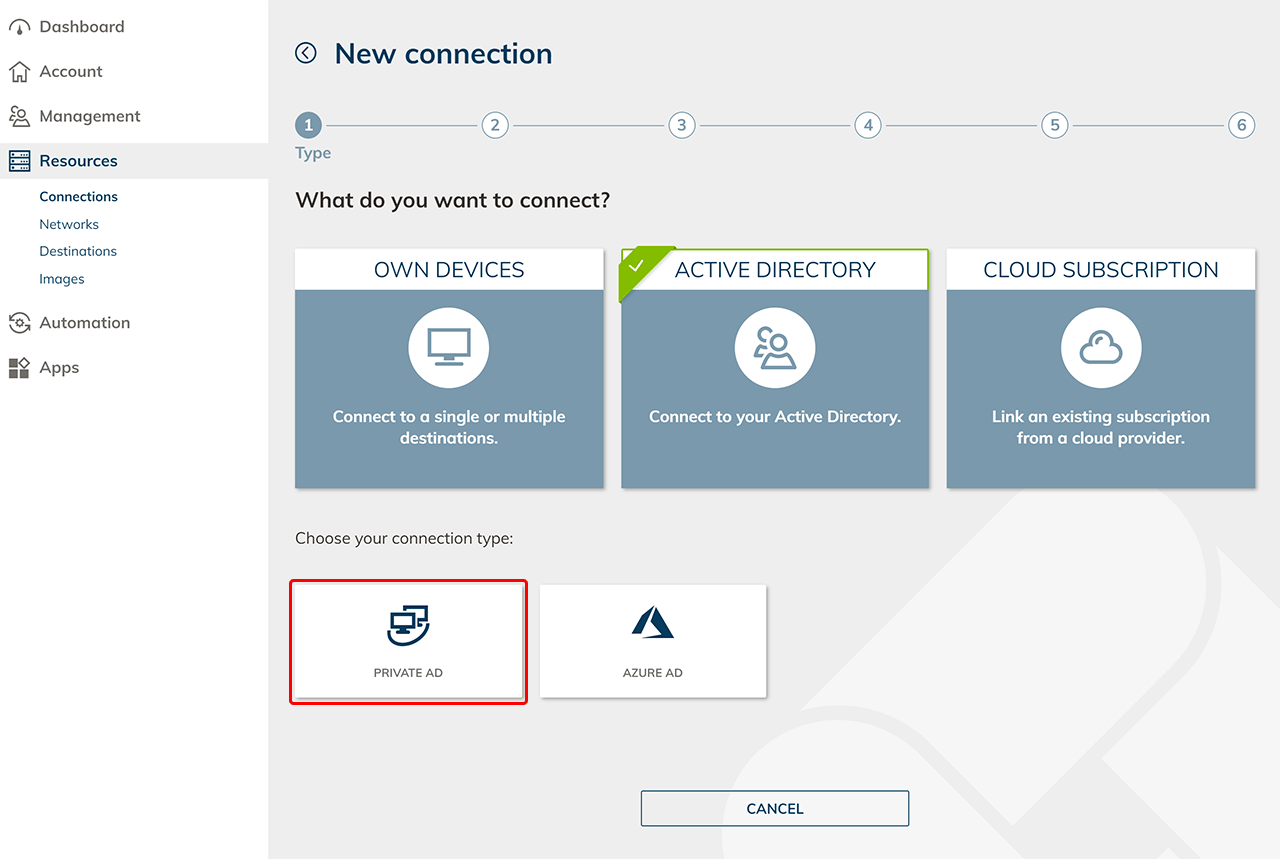
- Select Active Directory and then Private AD.
- Select the resource where your Active Directory is stored and click Next. Pay attention to the port. Usually port "389" is used for LDAP and port "636" for LDAPS if you have not set any other.

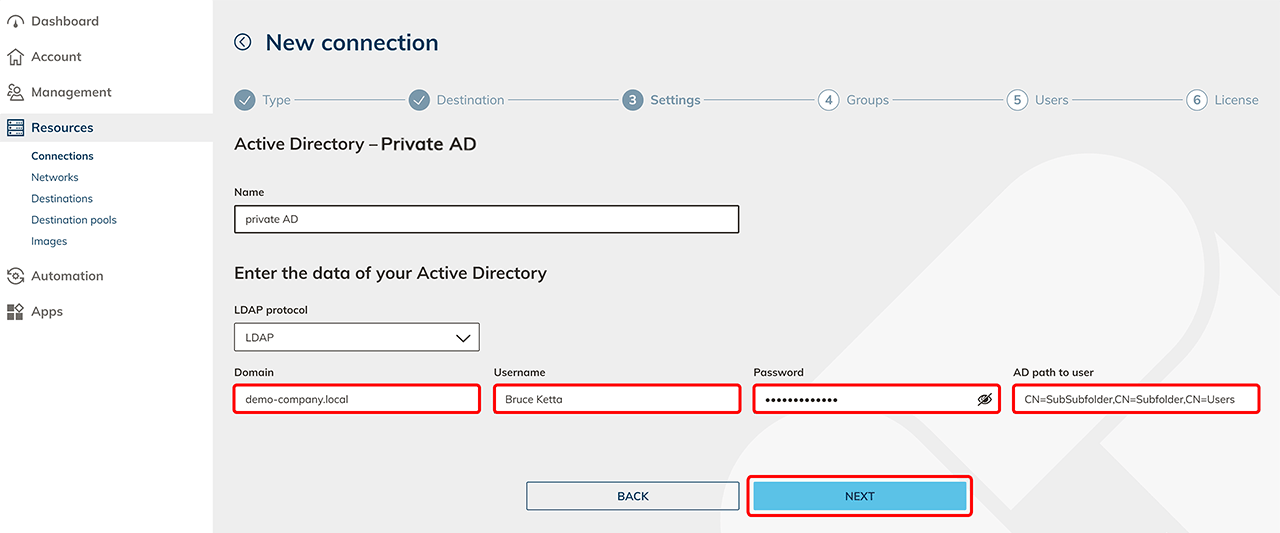
- Enter a name for the connection and select LDAP or LDAPS protocol.
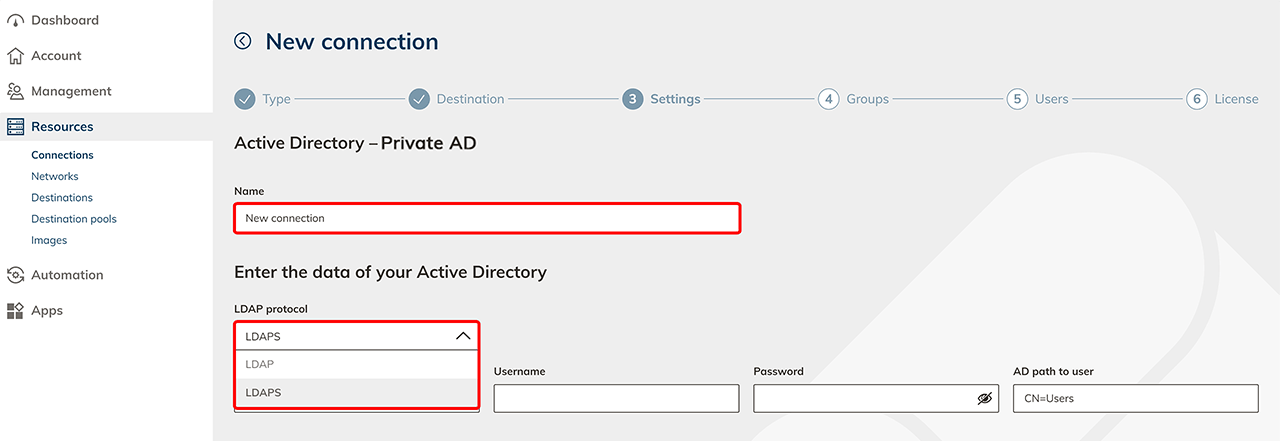
- Enter the domain, e.g. "demo-company.local" or "company.com".
- Enter the user name of an AD administrator, e.g. "Bruce Ketta".
- Enter the password of the administrator.
- Verify that the AD path to the user "CN=Users" is correct or enter the correct path without spaces, e.g. "CN=SubSubfolder,CN=Subfolder,CN=Users".
- Then click Next.
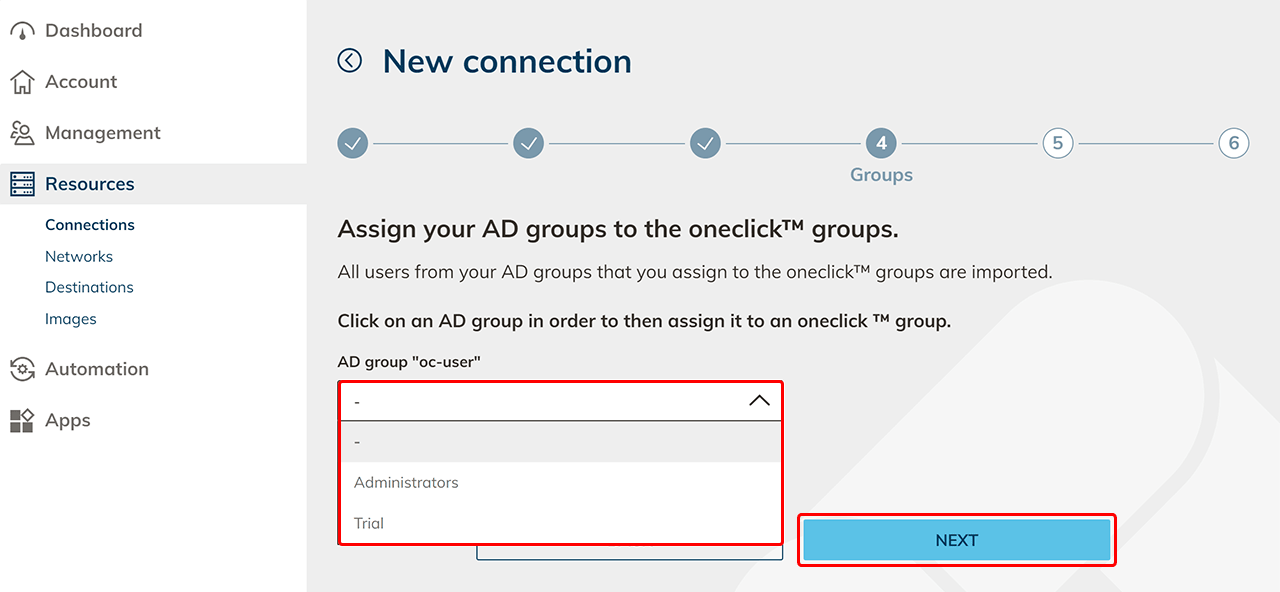
- In the next screen, all found AD groups are displayed. For each AD group you want to import, select a oneclick™ group. All users of your AD group will be imported to this oneclick™ group. Click on Next.
- Check the group assignment and the data of your users that will be imported tooneclick™. Click on Next.
- Status
 : This user has not been imported before and is being imported for the first time.
 - Status
 : This user has been imported before. The data in oneclick™ will be overwritten with the data from the AD. That user will not be created again.
 - Status
 : This user (his e-mail address) already exists in another division of oneclick™ and cannot be imported.
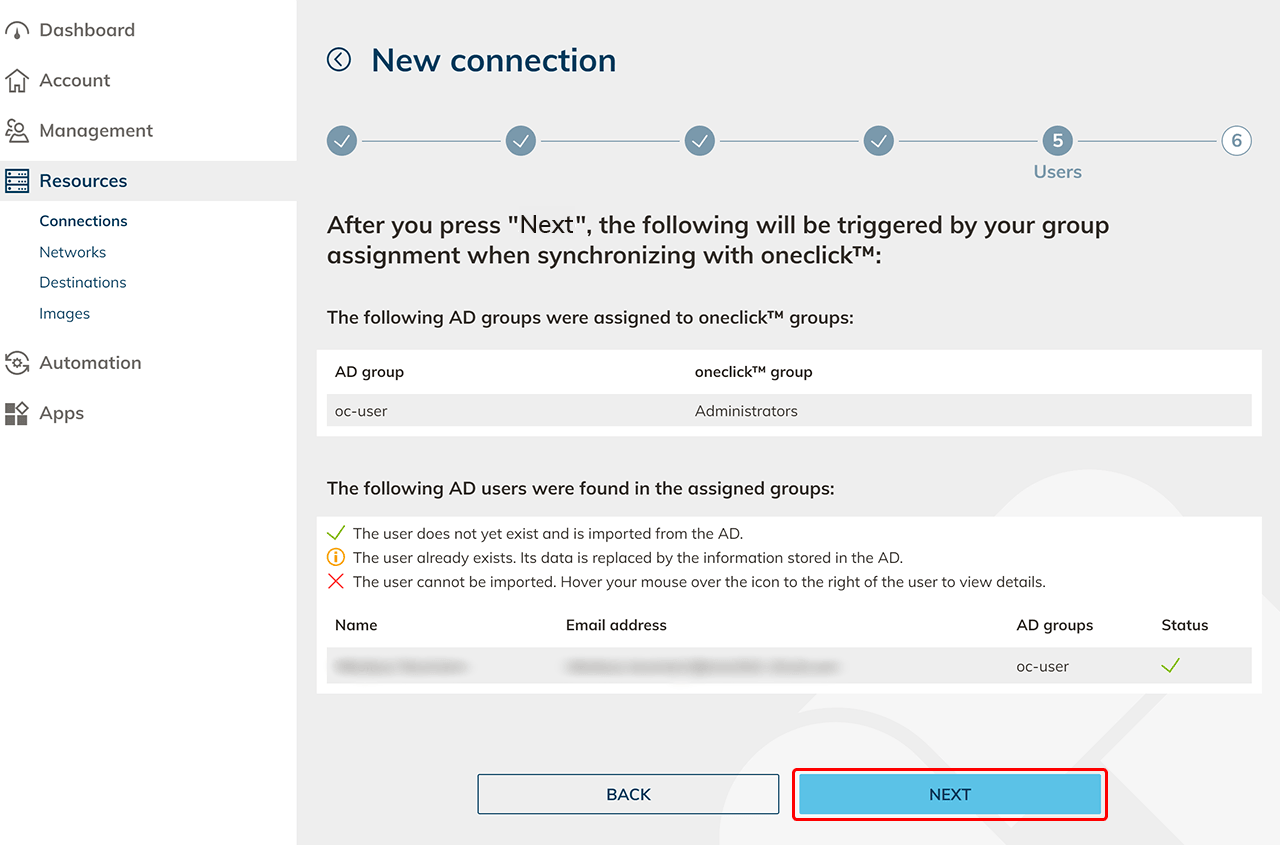
- Status
- Select a user license with a fitting amount and click Save.
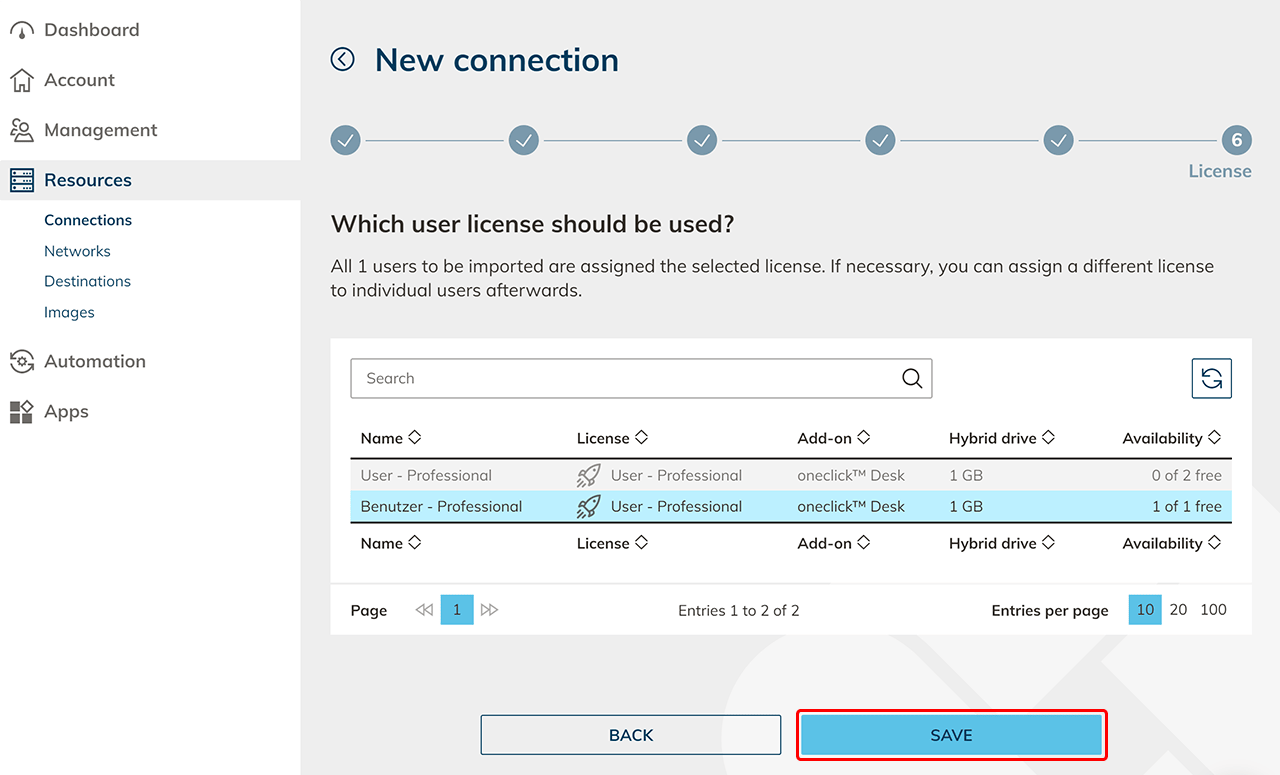
Your Active Directory is now successfully connected and your users have been imported.
Log in to oneclick™
Your users are created in oneclick™ with the email address stored in the AD. They must log in with this email address and can use the AD password or alternatively the password stored in oneclick™.
Your users will receive the oneclick™ password by getting a registration link or by using the reset password function.
Changes in the Active Directory
If you change any data in your AD, and you want it to take effect in oneclick™ you must synchronize your connected AD. Go to the syncronize article for that.