Users
-
Using the “Management” tab please click Users.
-
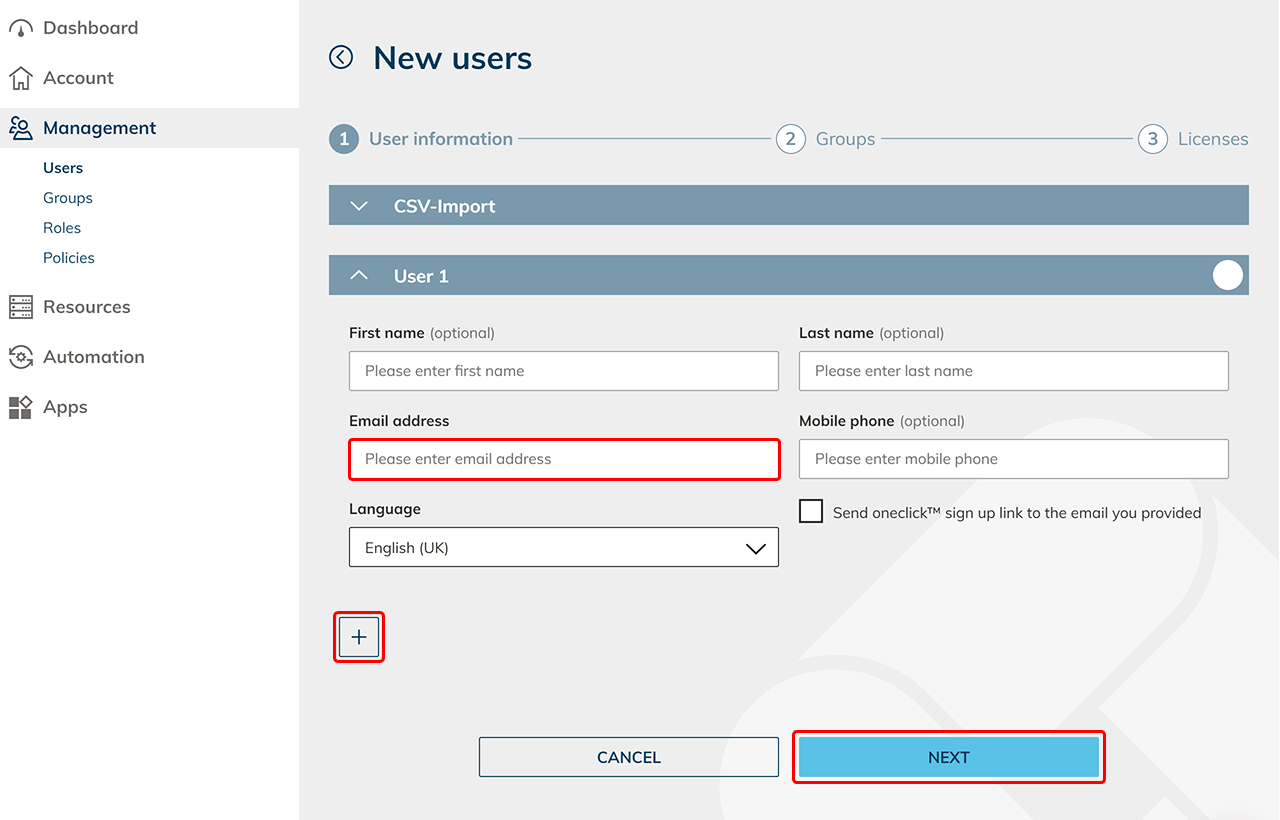
Next, click on the Plus icon to create a new user.

-
Now you can enter the data of your users.
- If you want to use Login with Entra ID, enter the Entra ID e-mail address.
- If you want to use 2-factor authentication via SMS, enter a mobile number.
- Select "Send oneclick™ sign up link to the email you provided" if you want your user to get immediate access to their account. You can also send the registration link afterwards.
-
By clicking on the Plus icon, you add additional users. Click Next.
-
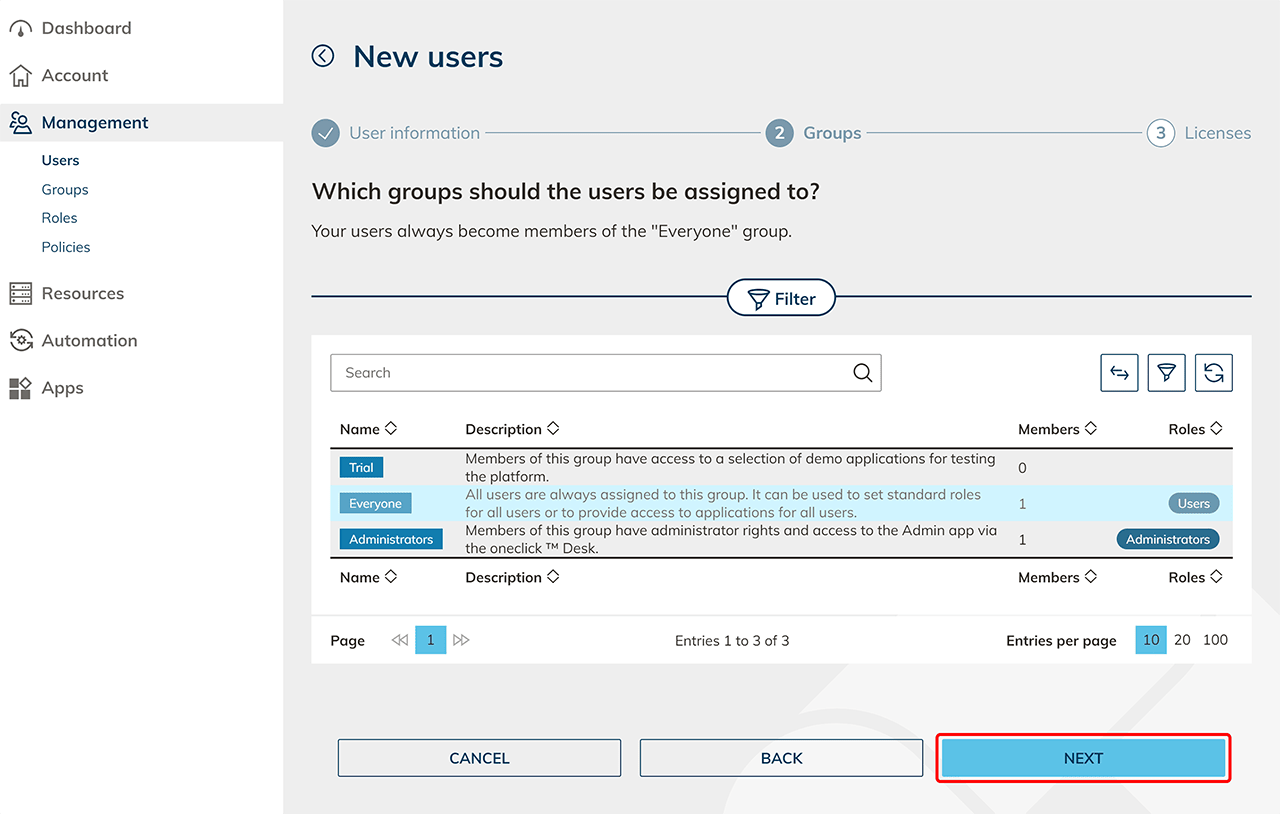
In the next step, you can assign groups to your users. Your users will always be automatically added to the "All Users" group.
- Select the "Demo" group if you want your users to get all the demo apps entered.
- Select the "Administrators" group if you want your users to receive the oneclick™ Administration. In combination with the demo license (point 6.), the user can upgrade independently via the oneclick™ Admin after the demo expires and activate a Professional user license.
-
Now select a user licence and click Save.
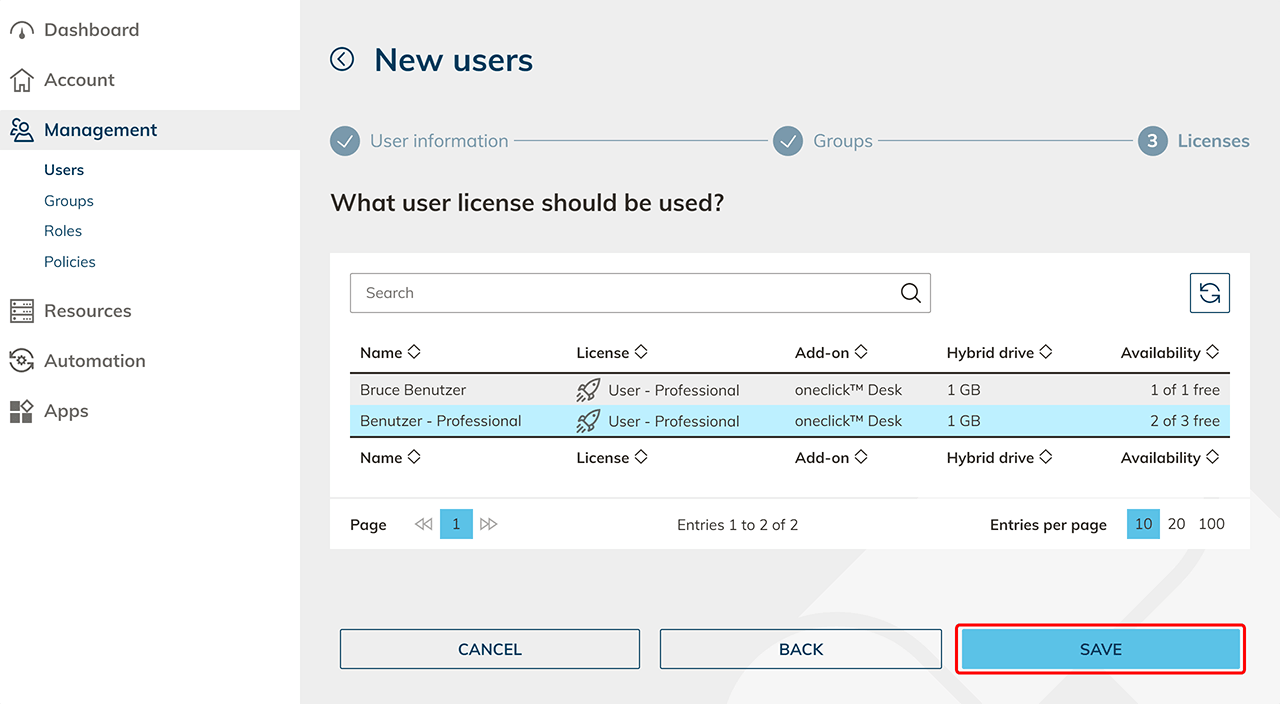
- Select the "Demo License" if your users want to try oneclick™ for free for one week. Your users will receive some information on notifications about the demo's functionality when they log in.
-
Your users are now created. Now set up resources and assign them to your users as apps.
-
Once you have everything set up, send the oneclick™ registration link to your created users.