Import users from private AD
Import users from your private Active Directory to use them in oneclick™.
Proceed as follows:
- Prepare your Active Directory.
- Connect your private Active Directory to oneclick™.
- Users then log in with their email address and AD password.
- Synchronize your Active Directory again after changes.
Preparations in your Active Directory
To import your existing AD users into oneclick™, an Active Directory must be set up on your Windows Server.
For all users to be imported (including the administrator), a publicly /en email address must be entered in the Email field. This email address is used to create the user in oneclick™.
An email in the "User logon name (UPN)" field is not considered by oneclick™.
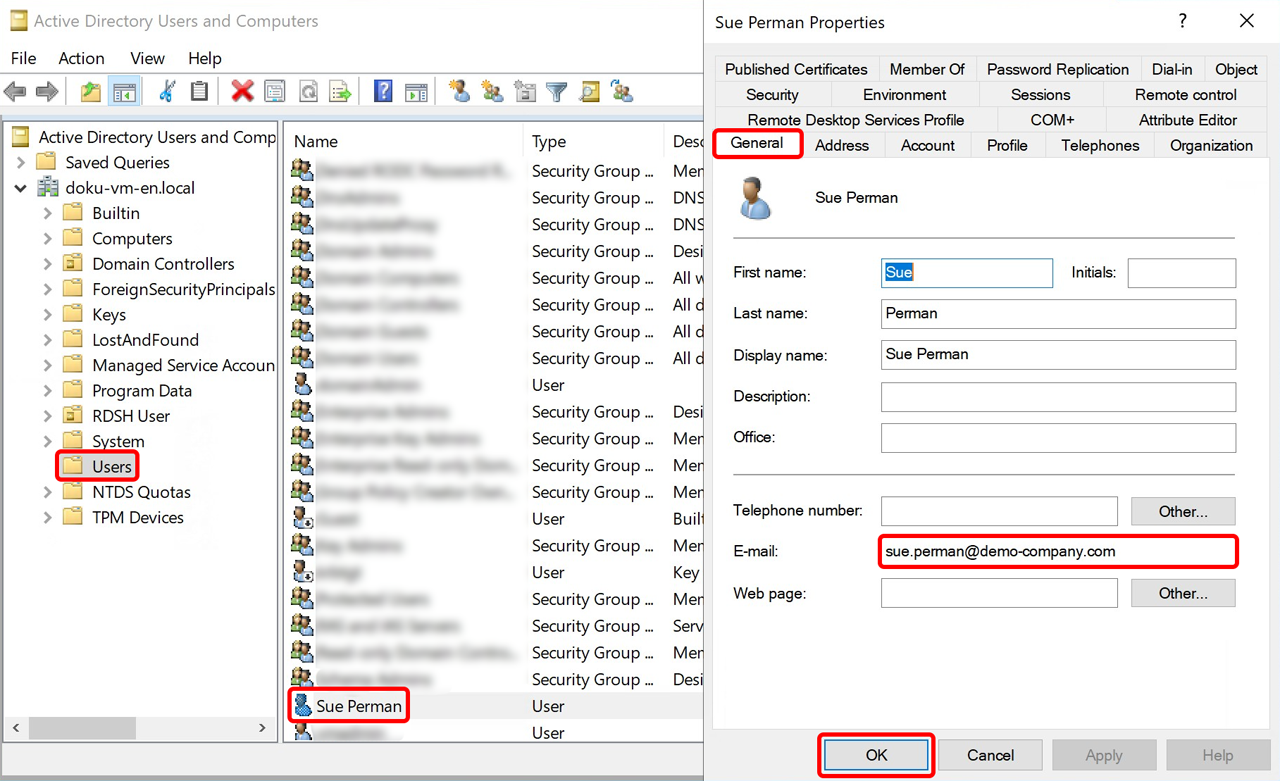
Add email address for users
- Open Active Directory Users and Computers.
- Navigate to your Organizational Unit (e.g. Users).
- Double-click a User.
- Open the General tab.
- Enter a publicly reachable email address in the E-mail field.
- Click OK.
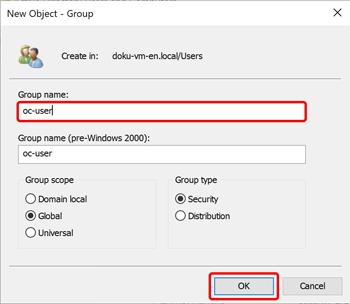
Create a security group for import
Create a new group in your Active Directory that contains only the users to be imported into oneclick™.
Do not use Active Directory system groups. These are not considered in oneclick™.
- Open the desired Organizational Unit (e.g. Users) on the left.
- Right-click in the right area.
- Select New → Group.
- Enter the desired name in the Group name field (e.g. oc-users).
- Click OK.
Add users to the group
- Double-click the newly created group.
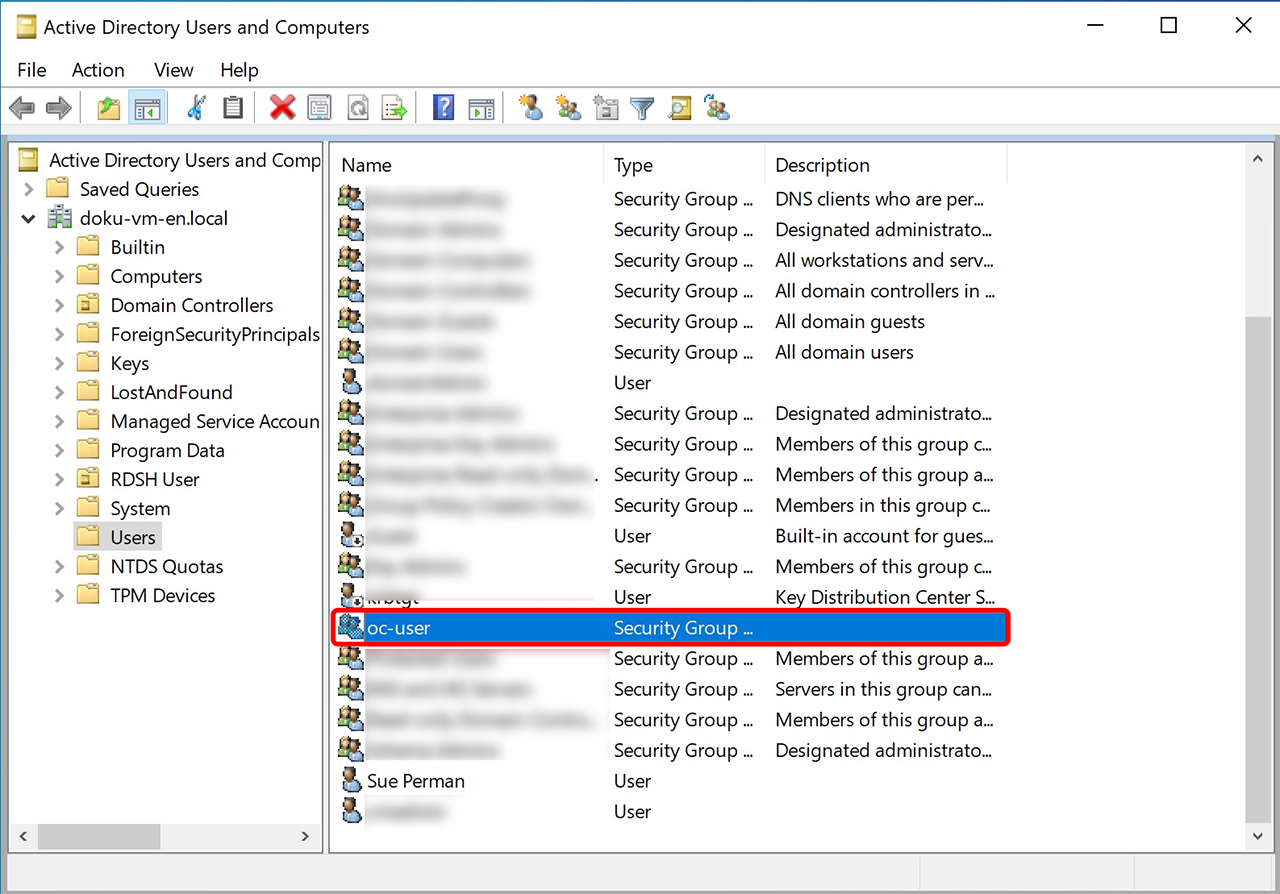
- Open the Members tab.
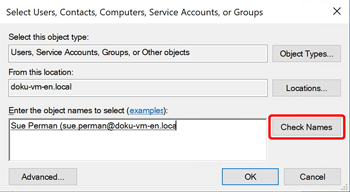
- Click Add.
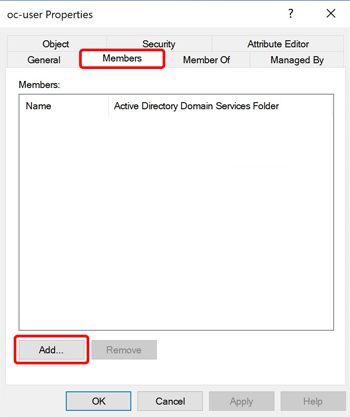
- Enter the desired users and click Check Names.
- Click OK.
Assign "Domain Users" group
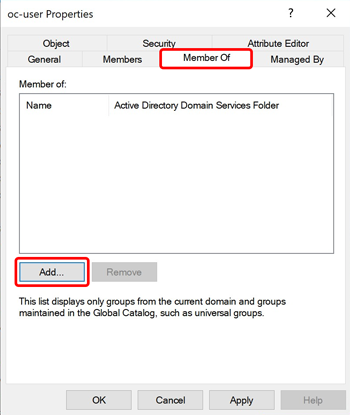
Assign the AD group "Domain Users" and, if required, additional permission groups to the new AD group.
- Open the group and switch to the Member Of tab.
- Click Add.
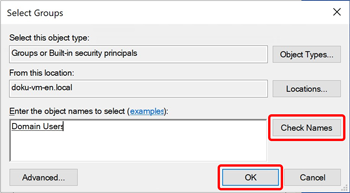
- Enter
Domain Usersand click Check Names. - Click OK.
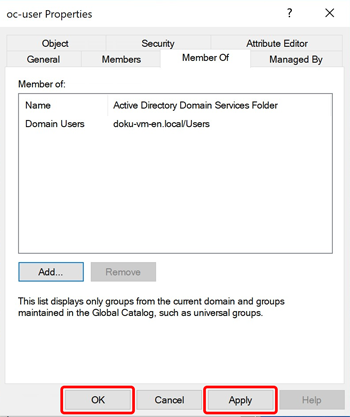
- Click Apply and then OK.
Connect Active Directory to oneclick™
- Check in advance how many user licenses are required and request them in the licenses section.
Alternatively, select a demo license in the final step of the import and assign the appropriate license later. - Optionally create groups in oneclick™ to which the users from the Active Directory should be assigned.
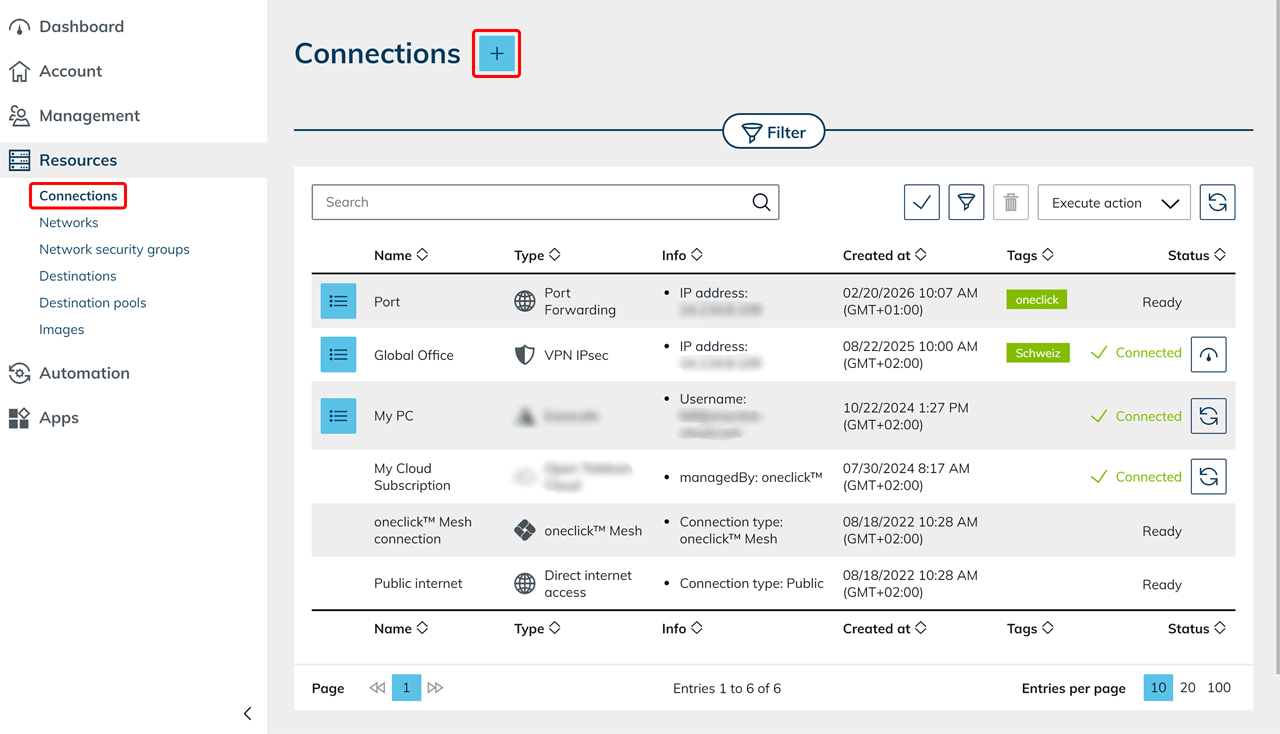
By default, you can select the oneclick™ group "Administrator". - Open the Resources menu and go to Connections, then click the Plus icon.
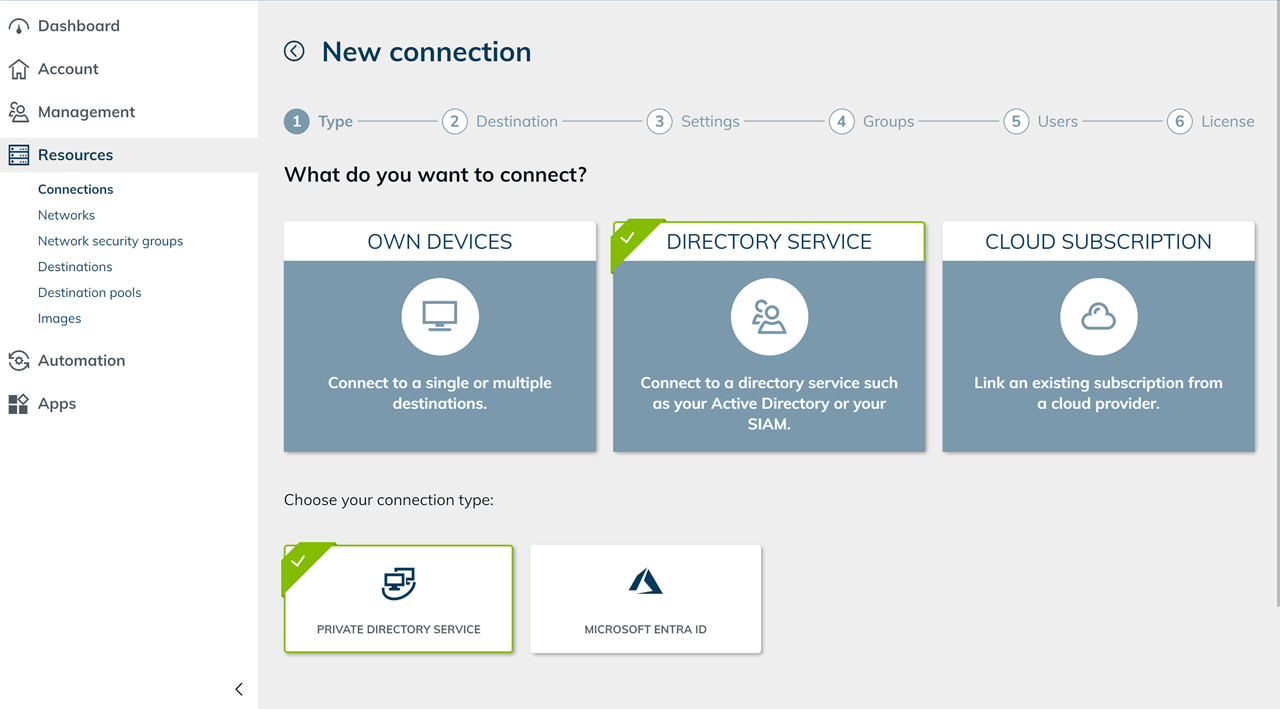
- Select Directory Service and then Private Directory Service.
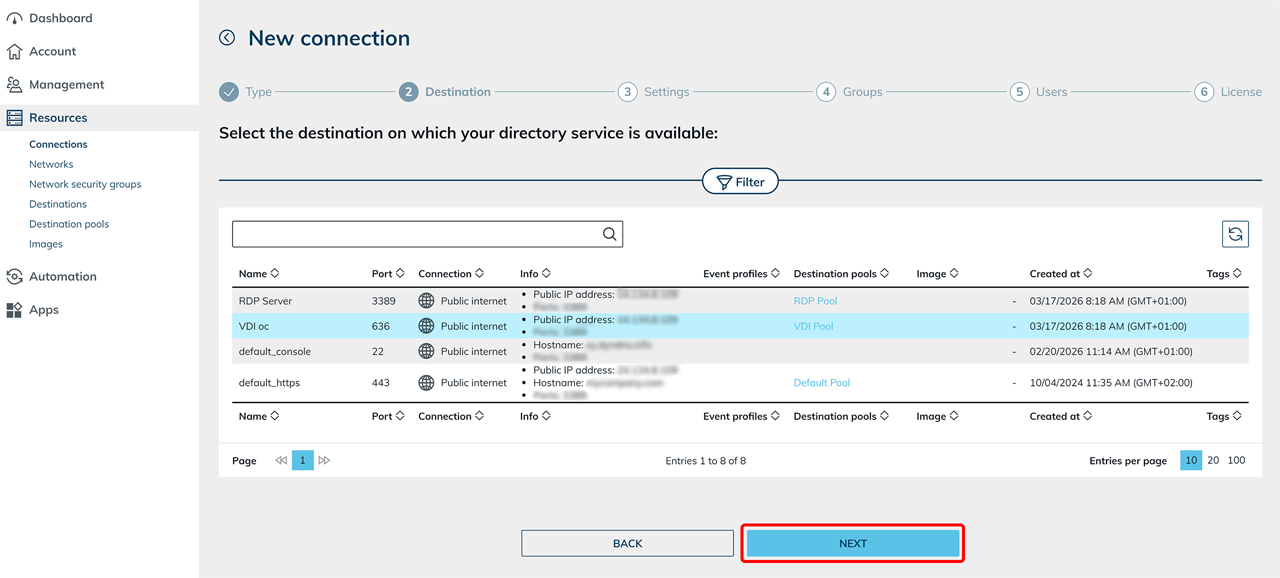
- Select an on-premises resource or a cloud resource where your Active Directory is located in oneclick™, then click Next.
Make sure to use the correct port:- LDAP: 389
- LDAPS: 636
- Enter a Name and select the protocol LDAP or LDAPS.
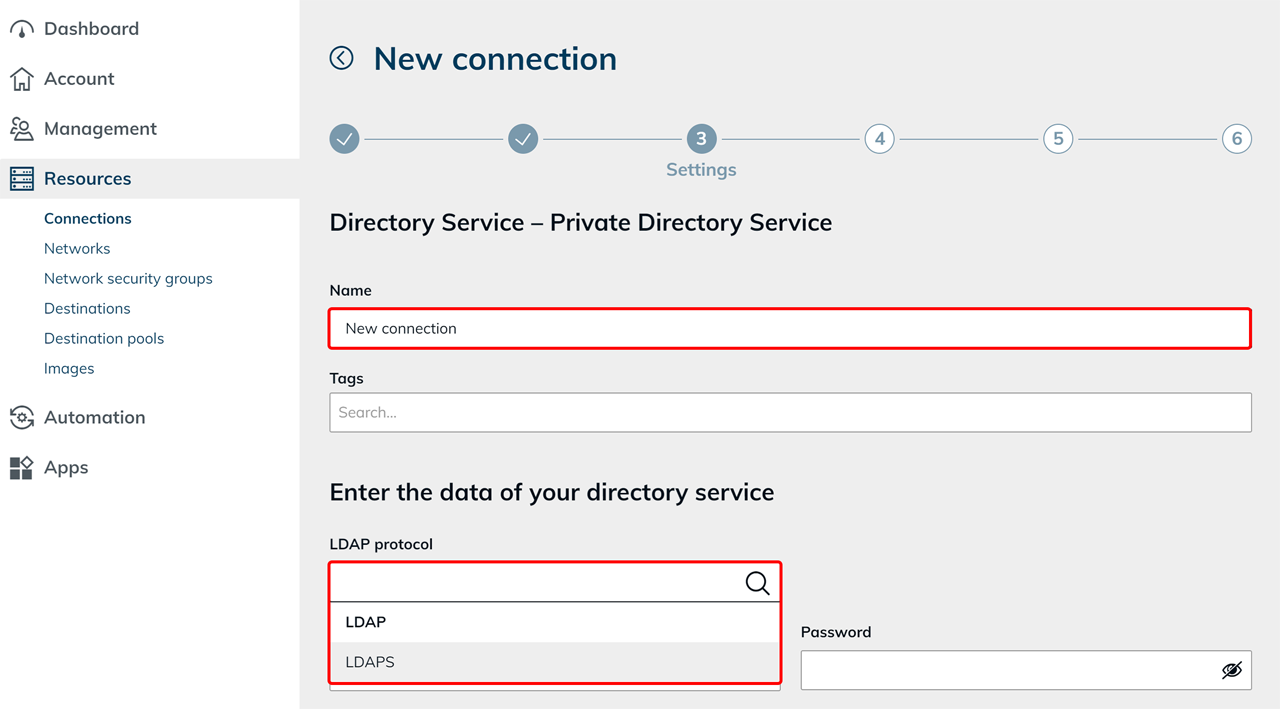
- Enter the User. Use a service user.
A standard domain user without special permissions (role "Domain User") is sufficient.
For security reasons, do not use an administrator account.
Use either:- the User, or
- the Distinguished Name (DN)
- Enter the Password of the service user.
- Verify the Base DN and optionally the Base DN for users.
Enter the values according to your Active Directory structure, e.g.:OU=UsersOu,DC=company,DC=local(without spaces). - Click Next.

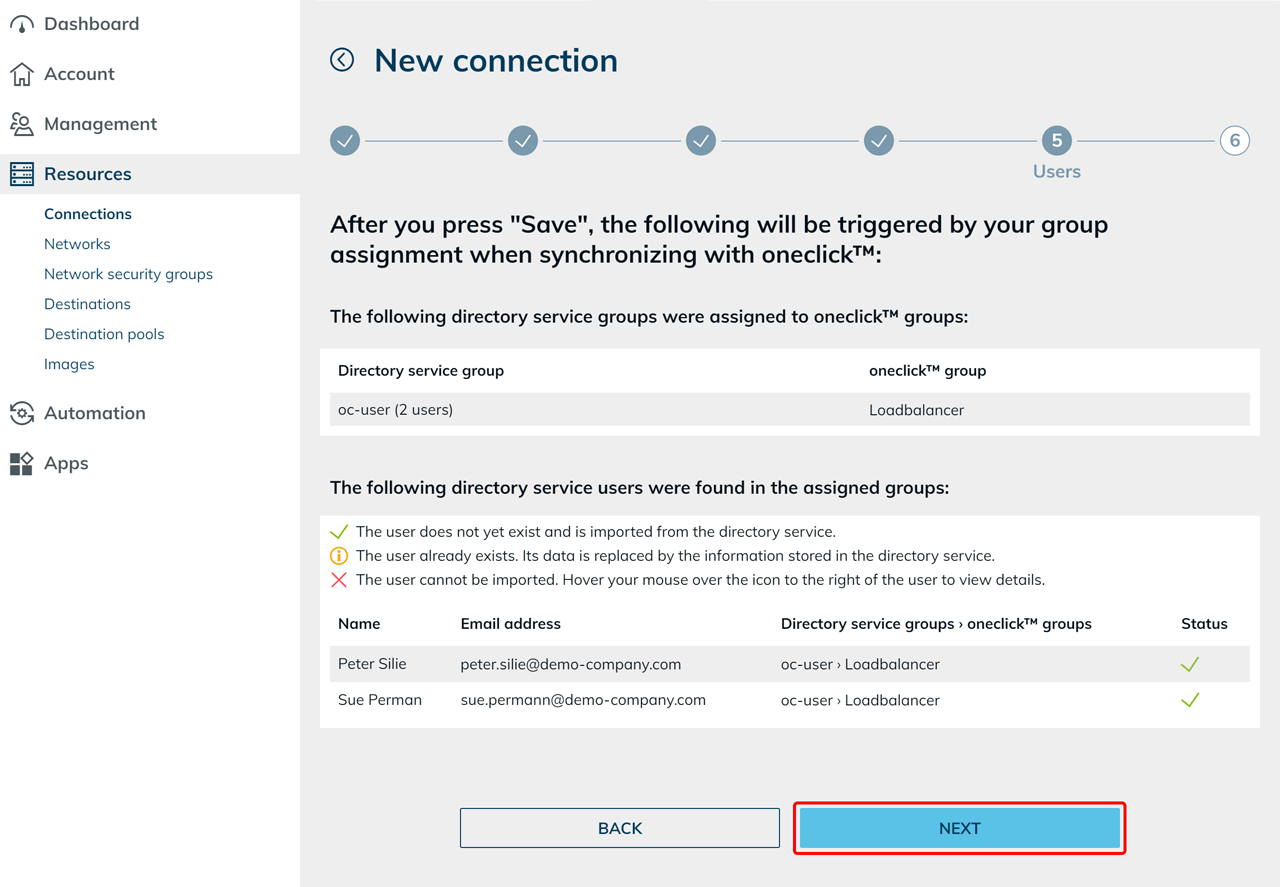
- In the next step, optionally enter specific directory service groups or leave the field empty and click Load directory service groups.
- Assign the directory service groups to the corresponding oneclick™ groups.
Click a Directory service group and select the appropriate oneclick™ group. - Click Next.

- Check the group assignment and the displayed user data.
You can see which users will be newly imported or updated.
Check the user status:
 This user has not been imported before and will be imported for the first time.
 This user has already been imported. The data in oneclick™ will be overwritten with the data from AD. The user will not be created again.
 The user (or their email address) already exists in a management unit of oneclick™ and cannot be imported.
- Click Next.
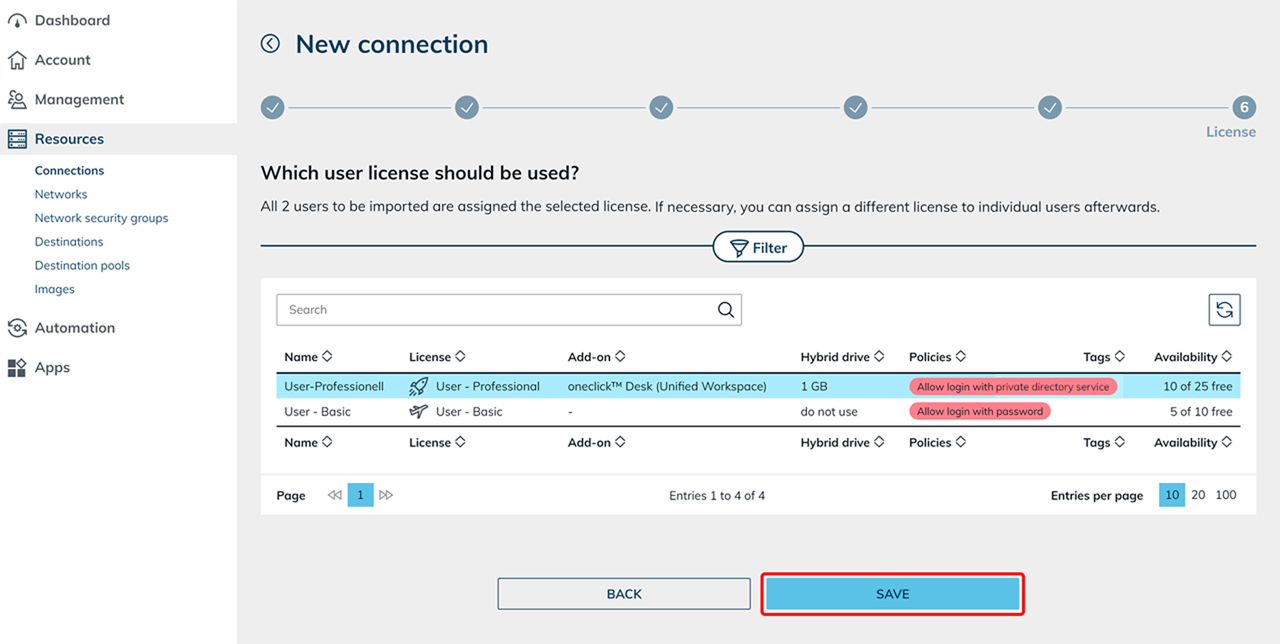
- Select a User license with sufficient capacity.
- Click Save.
 Your Active Directory is now connected and your users have been imported.
Log in to oneclick™
Your users are created in oneclick™ using the email address stored in Active Directory.
Users log in with this email address and their AD password.
Depending on the configuration, login with a oneclick™ password may also be possible.
For more information, see the article Login with AD credentials.
Changes in Active Directory
If you change data in your AD and want those changes to take effect in oneclick™, you must synchronize your connected AD.
See the article Synchronize connected Active Directory.