Import users from Entra ID
Connect Microsoft Entra ID to oneclick™
If you need a oneclick™ Professional user license for some users and a oneclick™ Basic user license for others, we recommend placing your Entra ID users in two different Entra ID groups. Alternatively, you can select the oneclick™ Demo license during the Entra ID import (step 16) and assign the appropriate license to your users afterward.
Check how many user licenses you need.
- Click Licenses in the menu.
- Optionally, create groups in oneclick™ to which you want to assign the users from your Entra ID groups.
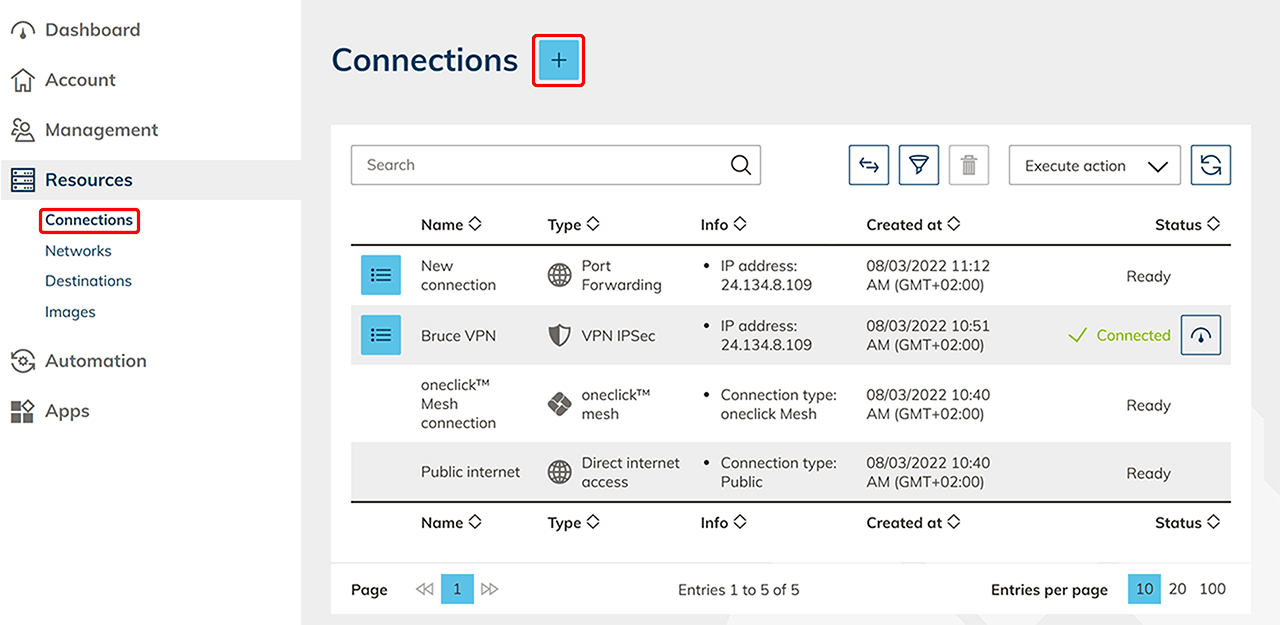
By default, you can select the oneclick™ groups "Administrator" and "Demo". - Click Resources in the menu, and then click Connections.
- Click the Plus icon.
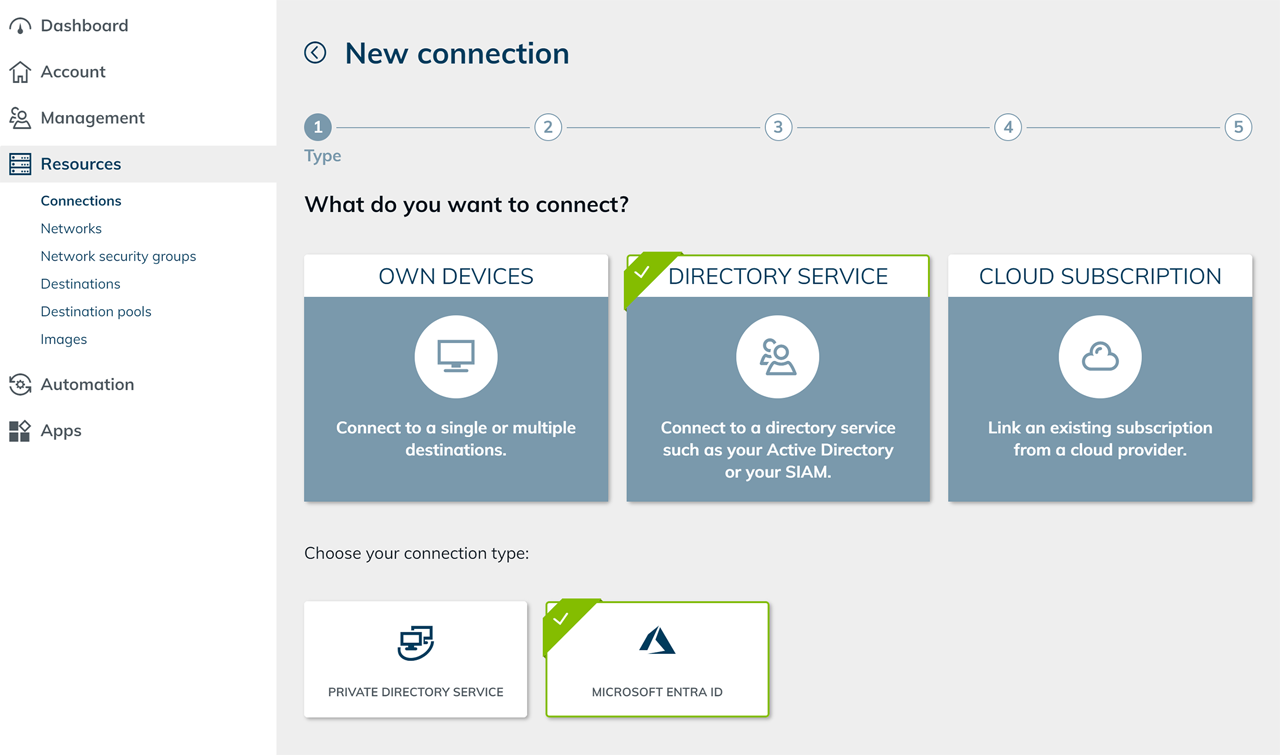
- Select Directory service, and then select Microsoft Entra ID.
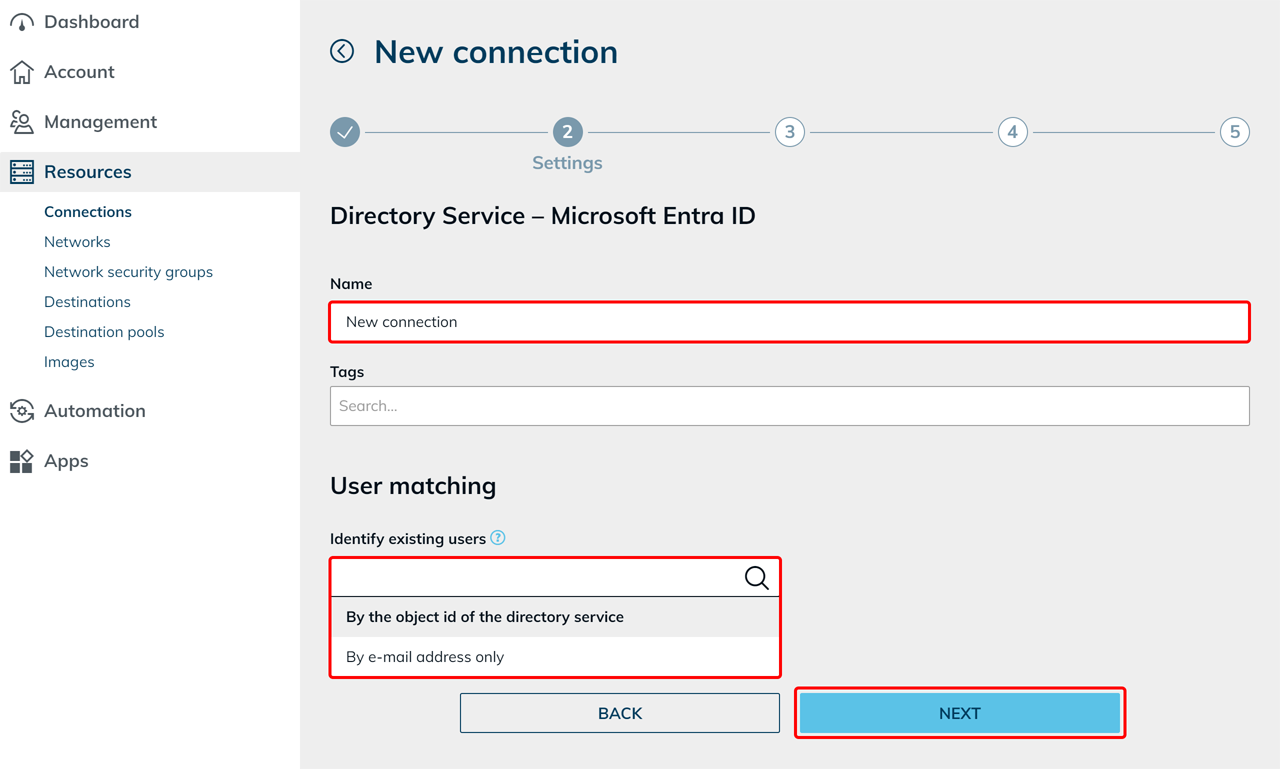
- Enter a connection name.
- Under User matching, specify how oneclick™ identifies existing users.
Under Identify existing users, select one of the following options:
- By the object id of the directory service: oneclick™ matches users based on the object ID. This is the default setting. The match remains in place even if the e-mail address changes in the directory service.
- By e-mail address only: oneclick™ matches users exclusively based on the e-mail address. For each unknown e-mail address, oneclick™ creates a separate user. This option is suitable, for example, if two directory services contain the same people and you want to manage them as separate users in oneclick™.
- Click Next.
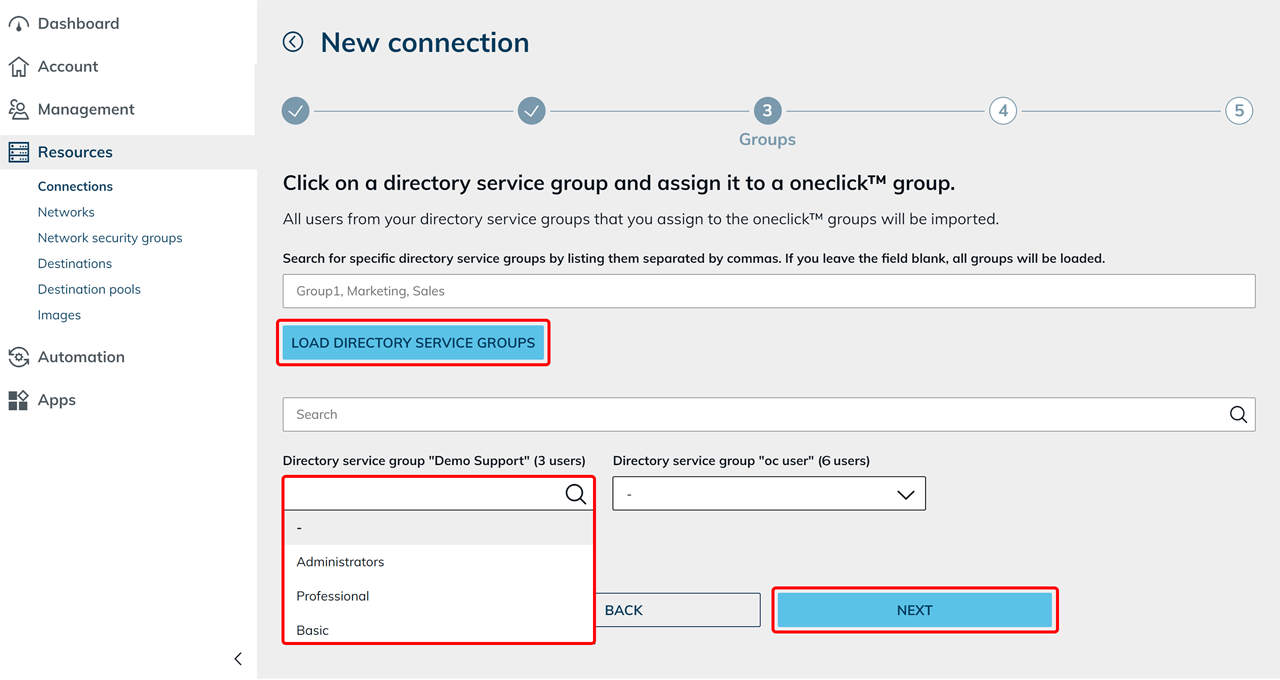
- Optionally, enter specific directory service groups or leave the field empty, and then click Load directory service groups.
- oneclick™ redirects you to Entra ID in a new window. Sign in with an Entra ID admin account that can grant consent (Global Administrator, Privileged Role Administrator, Cloud Application Administrator, or Application Administrator), click Accept, and return to oneclick™. For details, see the consent process and requested permissions.
The user performing the import must be signed in to oneclick™ with the e-mail address of their Entra ID administrator account. - oneclick™ displays all directory service groups found. For each directory service group you want to import, select a oneclick™ group. oneclick™ then imports the users from the respective directory service group into this group.
If you connect Microsoft Entra ID to write your oneclick™ users to the directory service, simply do not select a group here. - Click Next.
- oneclick™ opens another Entra ID sign-in window. Sign in again and then return to oneclick™.
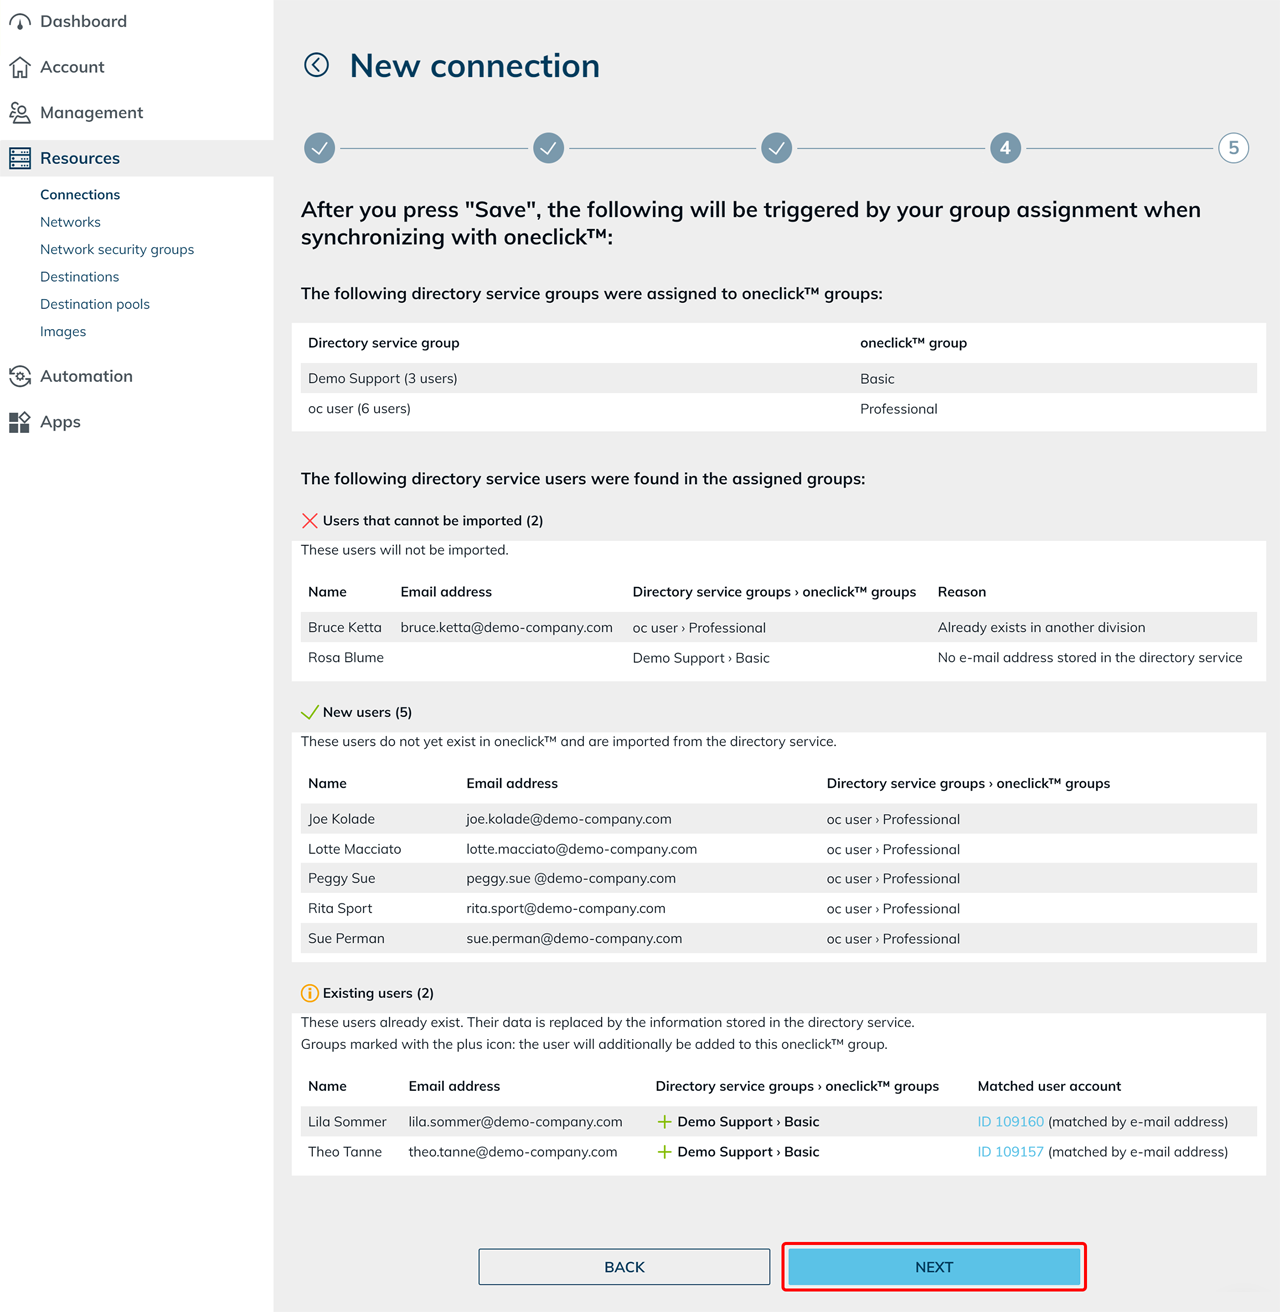
- Check the group assignment and the displayed user data.
The users are displayed in separate sections depending on their status. Each section shows the number of users it contains in the heading. Sections without users are not displayed.
- Users that cannot be imported: oneclick™ does not import these users. In the Reason column, you can see why the import is not possible, for example because no e-mail address is stored in the directory service or because the user already exists in another division.
- New users: These users do not yet exist in oneclick™. oneclick™ imports them from the directory service and creates them when you save.
- Existing users: These users already exist in oneclick™. Their data is replaced with the information stored in the directory service. In the Matched user account column, you can see the assigned oneclick™ user account and the basis for the match, for example the object ID or e-mail address.
A Plus icon before a group assignment indicates a new group assignment. When you save, oneclick™ also adds the user to the assigned oneclick™ group.
If the e-mail address in the directory service differs from the e-mail address of the existing user account, oneclick™ also displays the previously stored address. If saving changes the e-mail address of the existing user account, oneclick™ displays a highlighted warning. Check this warning before you continue.
- Click Next.
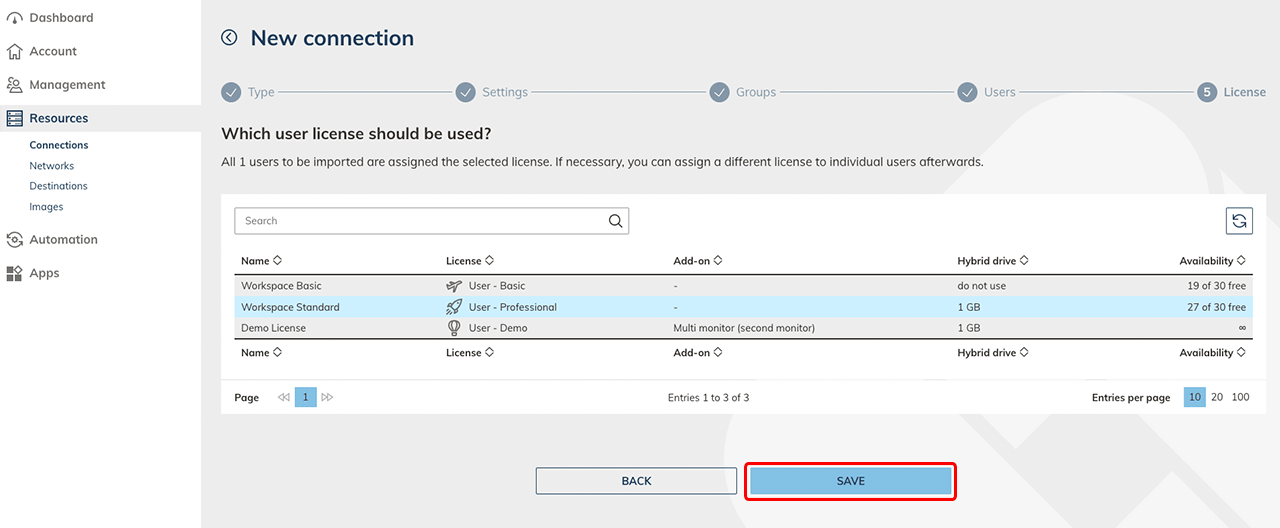
- Select a user license with sufficient capacity.
- Click Save.
Log in to oneclick™
Your users sign in with their Entra ID credentials by clicking Login with Entra ID on the login page. Users can sign in with a oneclick™ password only if the Allow login with password policy is enabled in the user license.
Changes in Microsoft Entra ID
If you change data in Microsoft Entra ID and want the changes to take effect in oneclick™, synchronize the connected directory service. For instructions, see Synchronize connected Active Directory.