Access via Remote Desktop Connection on Windows
To access your remote system using the “Remote Desktop Connection” app, you may need to complete a one-time setup, depending on how your Windows device has been prepared.
The exact procedure depends on whether your device has already been prepared by your administrator or whether you can perform the required installation yourself.
As an administrator, you can perform the initial setup centrally for all users using the provided PowerShell script. This script is not intended to be run by end users.
- Has your administrator already set up your device? In this case, start directly at step 2: Connect using RDP file.
- Are you configuring the settings on your system yourself? Start here at step 1:
1. Download and run setup file (optional)
- Click Download setup file.
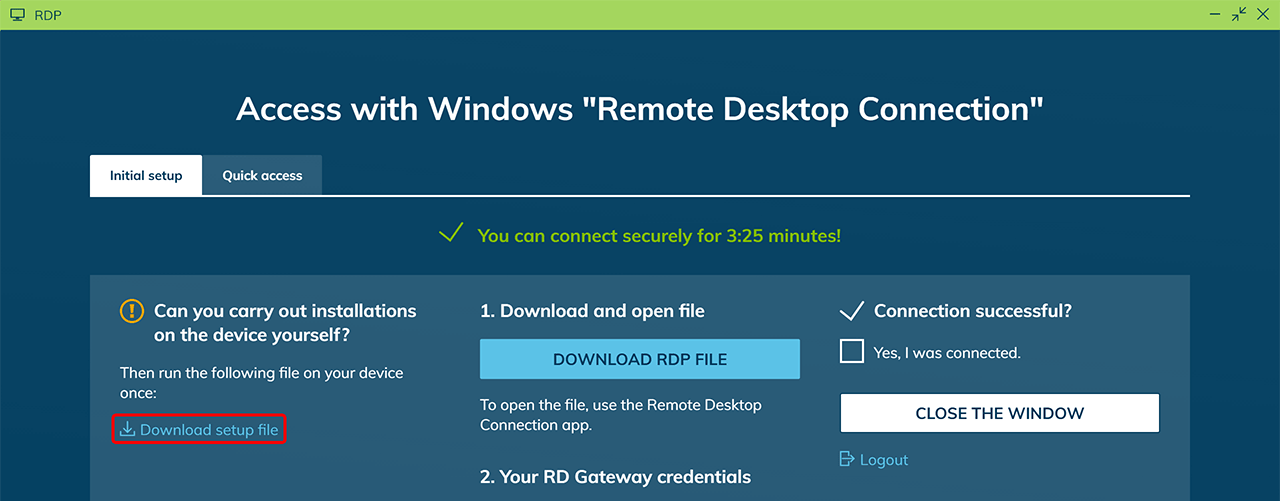
- Open the “Downloads” folder and double-click the file “oneclickGateway.exe” to start the installation.
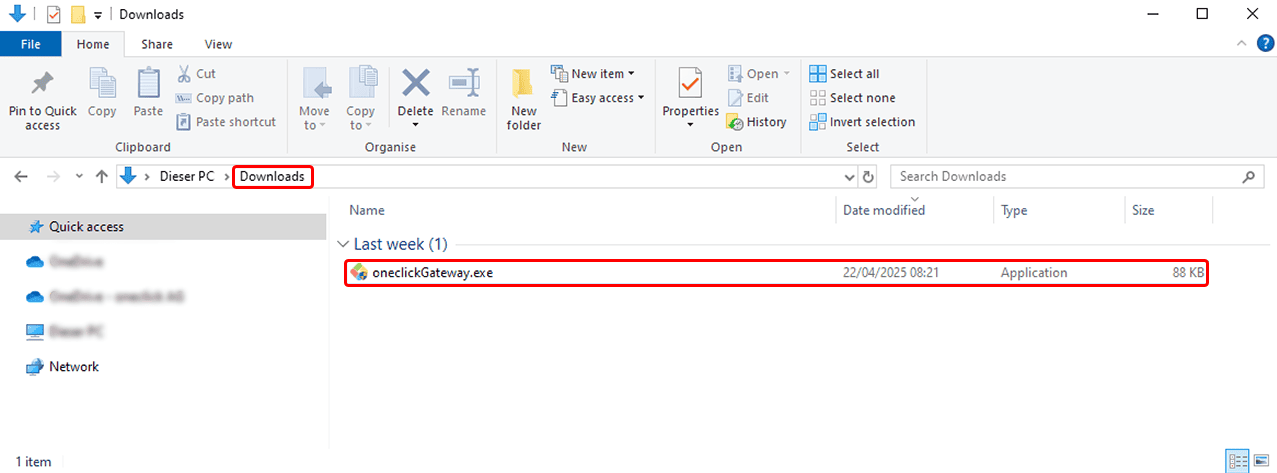
- Confirm the execution policy prompt with Yes and all further prompts with OK.
This configures the system to allow NTLM connections.
Your device is now prepared for access.
2. Connect using RDP file
- In the access window, click Download RDP File.
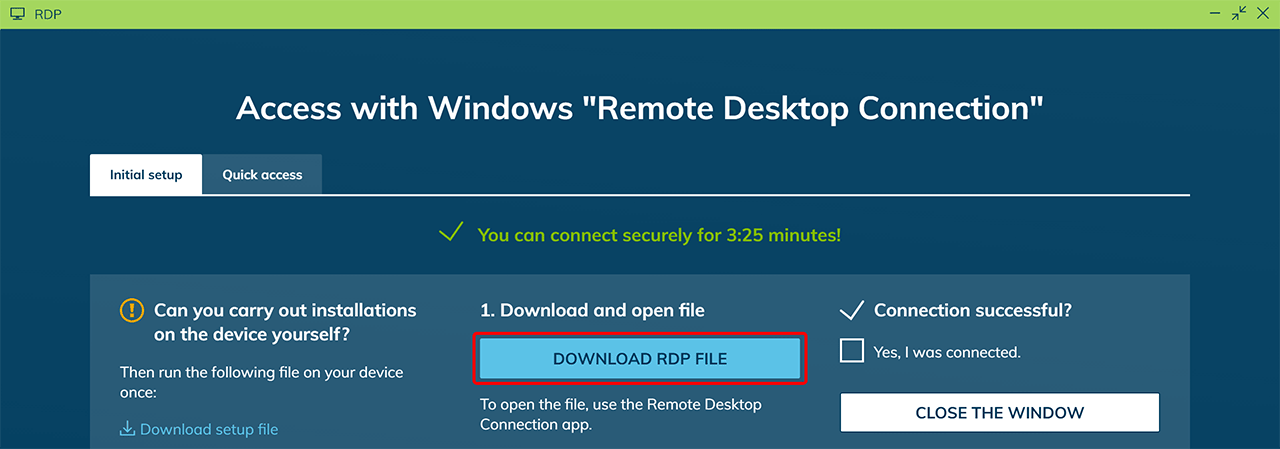
- Open the downloaded RDP file by double-clicking it.
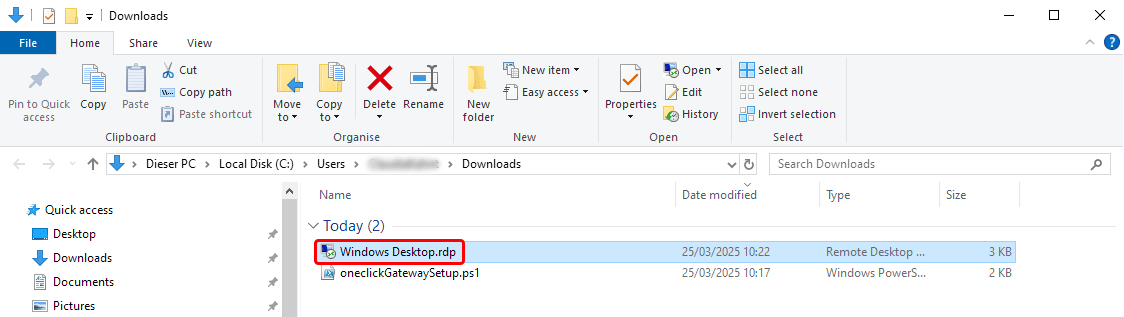
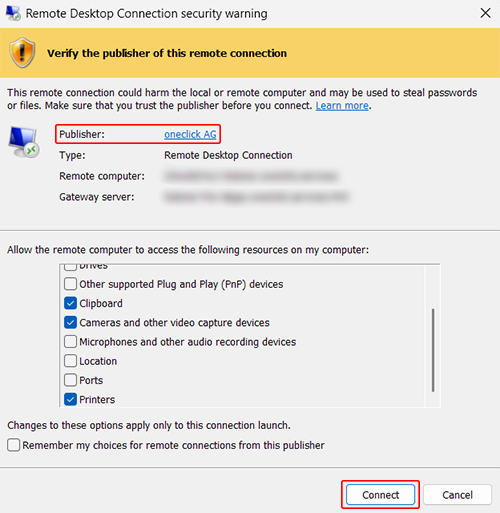
- If Windows displays the Remote Desktop Connection security warning, check that Publisher shows "oneclick AG".
- If needed, select the local resources you want to make available for this connection, such as Clipboard, Drives, Cameras, or Microphones. The selection applies only to this connection launch and does not change the saved RDP file.
- Click Connect.
3. Enter login credentials
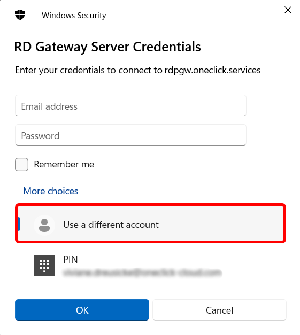
- When the first Windows security prompt asks for credentials, click More choices, and then click Use a different account.
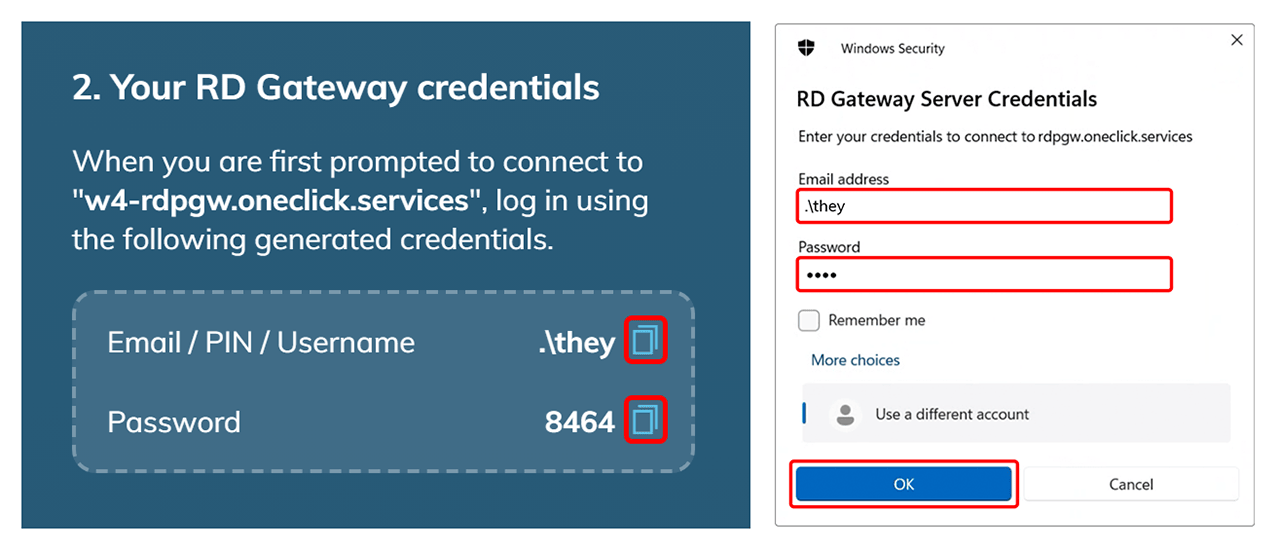
- Copy Username and Password from the access window and paste them into the corresponding fields.
- Click OK.
- Enter your credentials for the remote system in the second Windows security prompt. You can optionally save them.
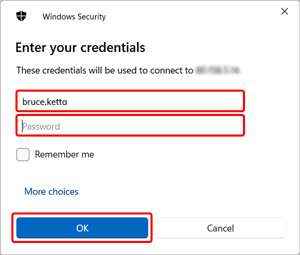
Note for domain environments: If the remote system is part of a domain, enter the username in the format DOMAIN\username (e.g. company\john.doe).
You can save the credentials for the gateway and remote system. Windows stores them in Credential Manager. Saving these credentials does not change the RDP file or its digital signature.
4. Were you successfully connected?
After a successful connection, select Yes, I was connected. The next time you start the app, oneclick™ automatically opens Quick access instead of Initial setup.

Then click Close the windows.
Connection fails?
If the RDP file opens normally but the connection cannot be established, start the app again in oneclick™.
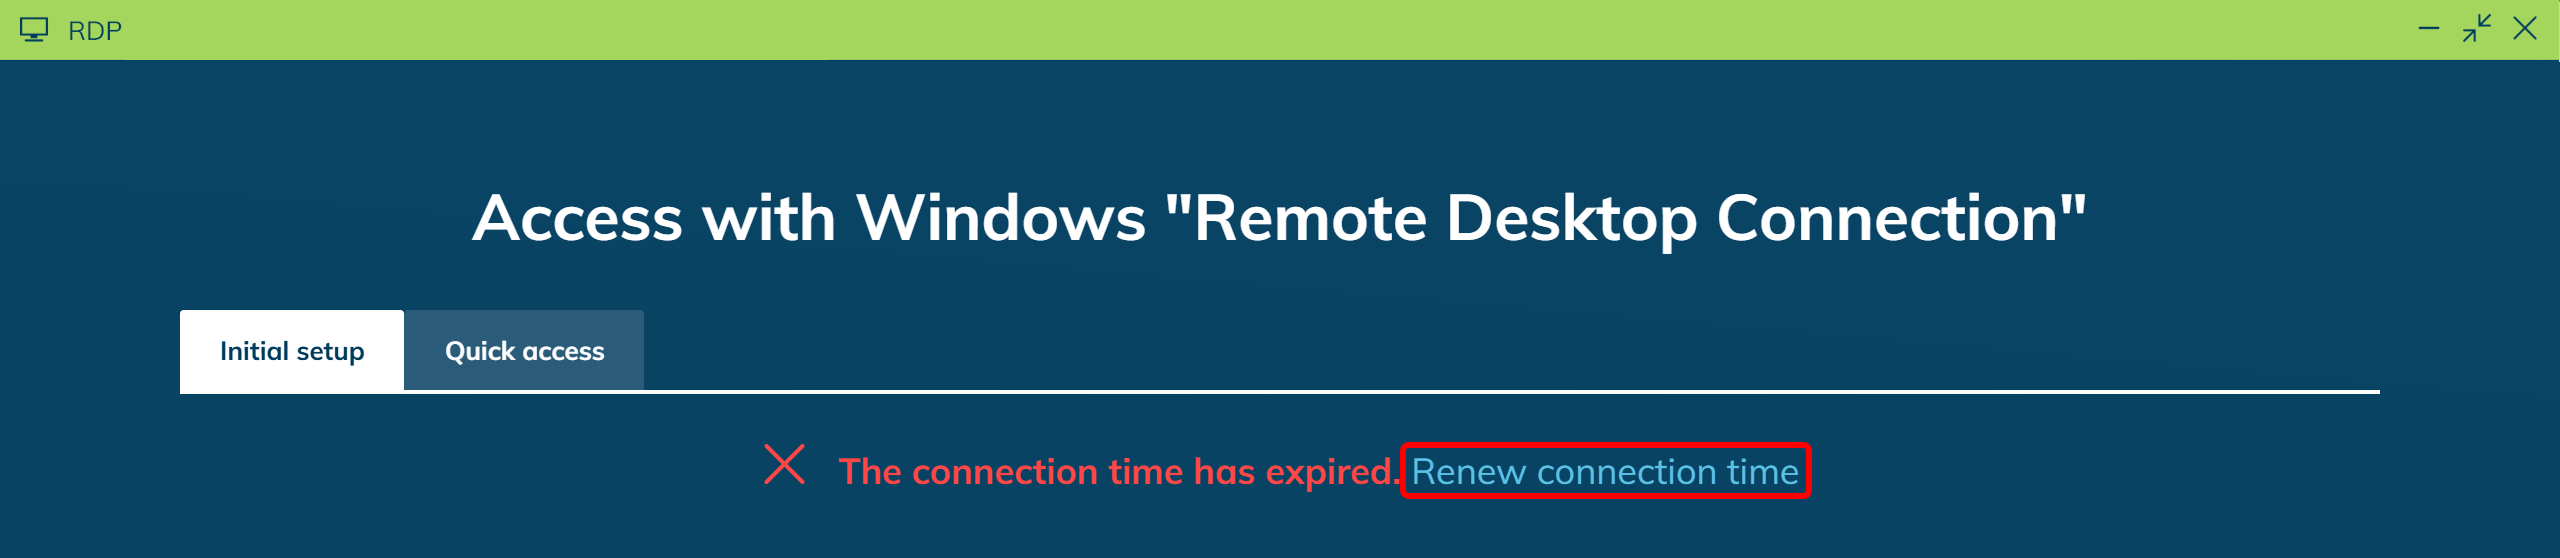
- If the access window indicates that the connection time has expired, click Renew connection time. oneclick™ renews the connection time. The credentials are valid again.
- Open the existing RDP file again.
You do not need to download the RDP file again.
For additional error patterns and solutions, see RDP access error.
5. Reuse the RDP file
You can reuse the downloaded RDP file for later connections.
- Start the app in oneclick™. This renews the connection time and makes the credentials valid again.
- Open the existing RDP file by double-clicking it within the connection time shown.
If you want to access the RDP file more easily, create a shortcut on your desktop.
Do not edit the RDP file manually. If you change signed settings and save the modified file, the digital signature becomes invalid. If Windows reports that the RDP file is corrupted, or if Connect is grayed out and cannot be clicked, download the RDP file again via oneclick™.