Working in the Secure Browser
With the oneclick™ Secure Browser, you open websites in a separate browser environment via oneclick™. Your administrator determines which websites and functions are available to you.
Start the Secure Browser
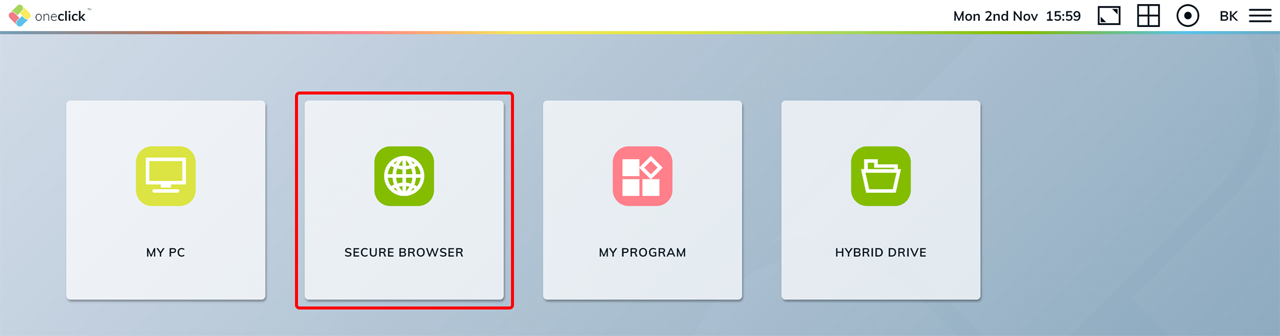
- Open the Secure Browser via your direct app access or via the app tile in the oneclick™ Desk.
- Log in when prompted.
- Wait until the Secure Browser has opened. Starting may take a moment.
Use the microphone and webcam
If your administrator has enabled the microphone and webcam for the Secure Browser, you can use them on websites, for example in a video conference.
- Allow your local browser to access the microphone and webcam for oneclick™ when it prompts you.
- Also allow access to the required devices within the Secure Browser when the website prompts you.
To learn how to check the permissions in your local browser, see Granting access permissions in the browser. If you want to use a different device, read Change microphone and camera in your browser.
Open and navigate websites
If your administrator has set a start page, the Secure Browser opens it automatically.
To open a different website, enter its address in the address bar.
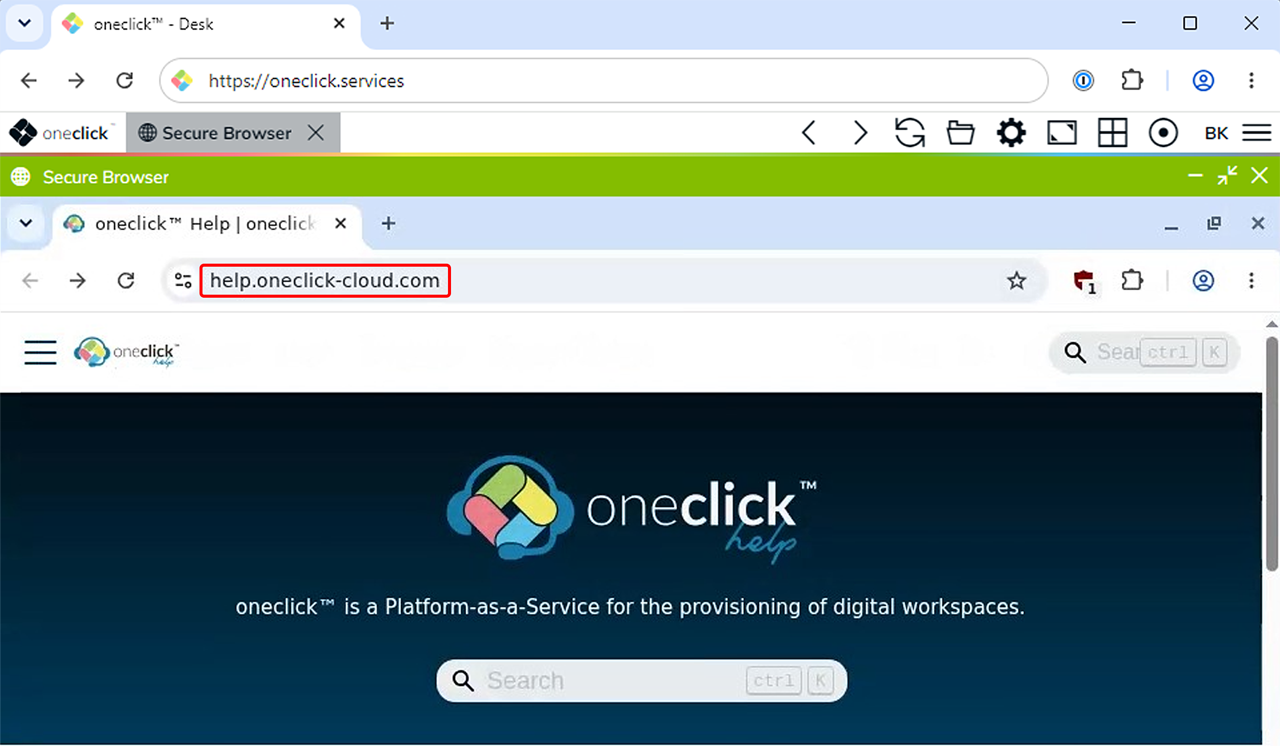
If you cannot open a website, your administrator may have restricted access. Contact your administrator if you need access to the website.
Back, forward, and refresh
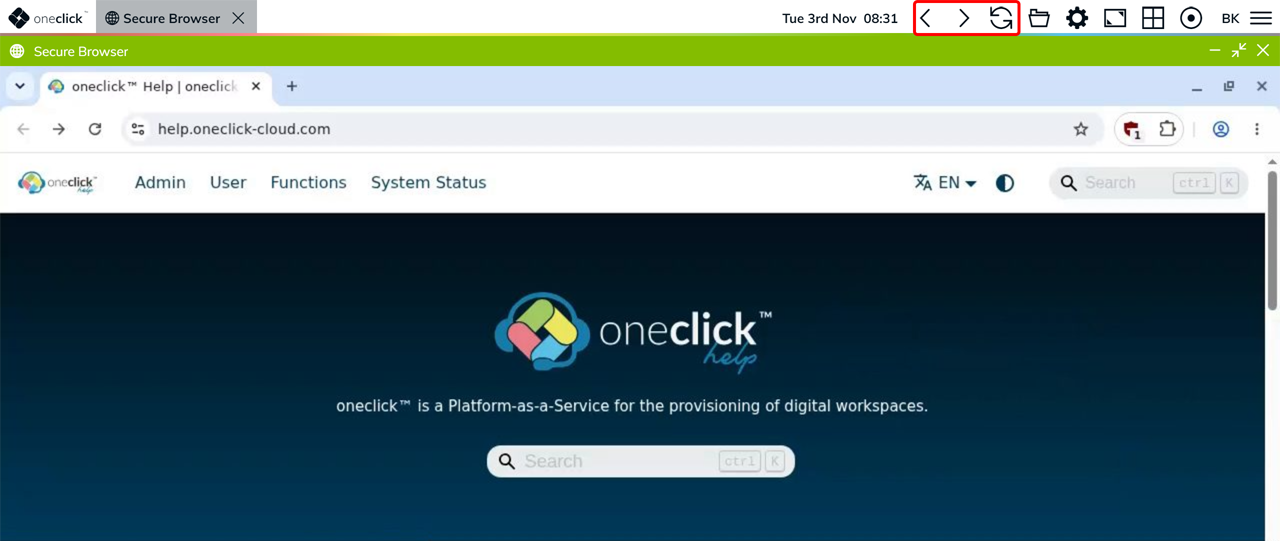
You can use the oneclick™ menu to navigate the history of the current browser tab.
- Click the Back icon or Forward icon to switch between previously visited websites.
- Click the Refresh icon to reload the current website.
Upload and download files
In the Secure Browser, websites cannot directly access files on your local device. Using file transfer, you first provide the required files in Hybrid App Share on oneclick. You can then select them on a website, for example as an attachment.
Upload files
- In the oneclick™ menu, open file transfer via the Folder icon.
- Click Upload data and select the desired file from your local device. Alternatively, you can drag and drop the file into the upload area.
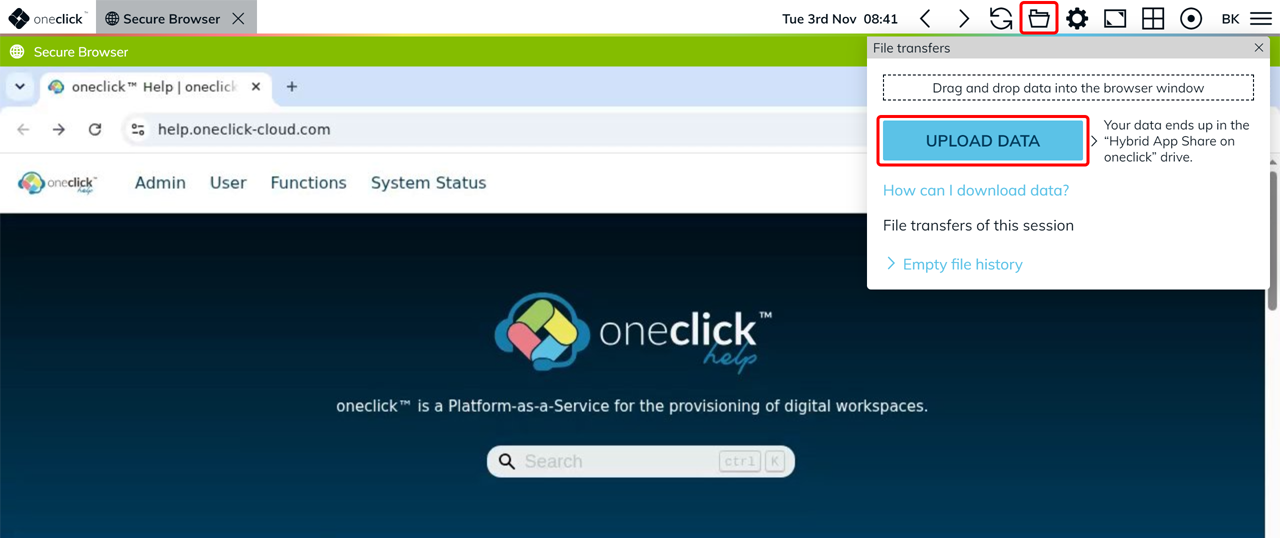
- The file is then available to you in Hybrid App Share on oneclick.
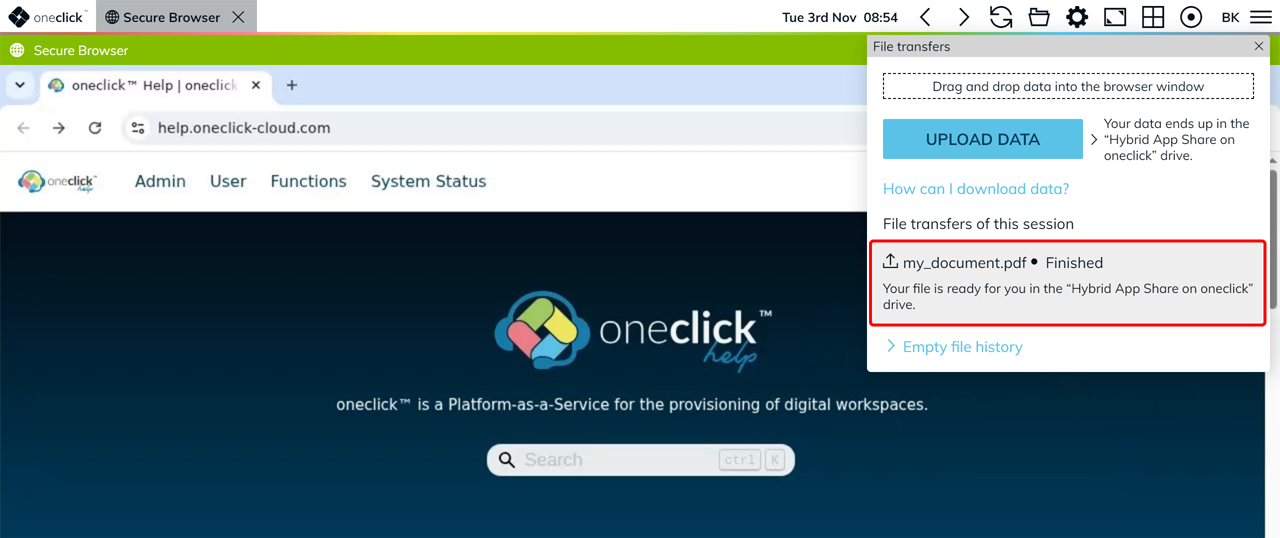
- If you want to add a file on a website, open the file selection there.
- In the file dialog, select Hybrid App Share on oneclick.
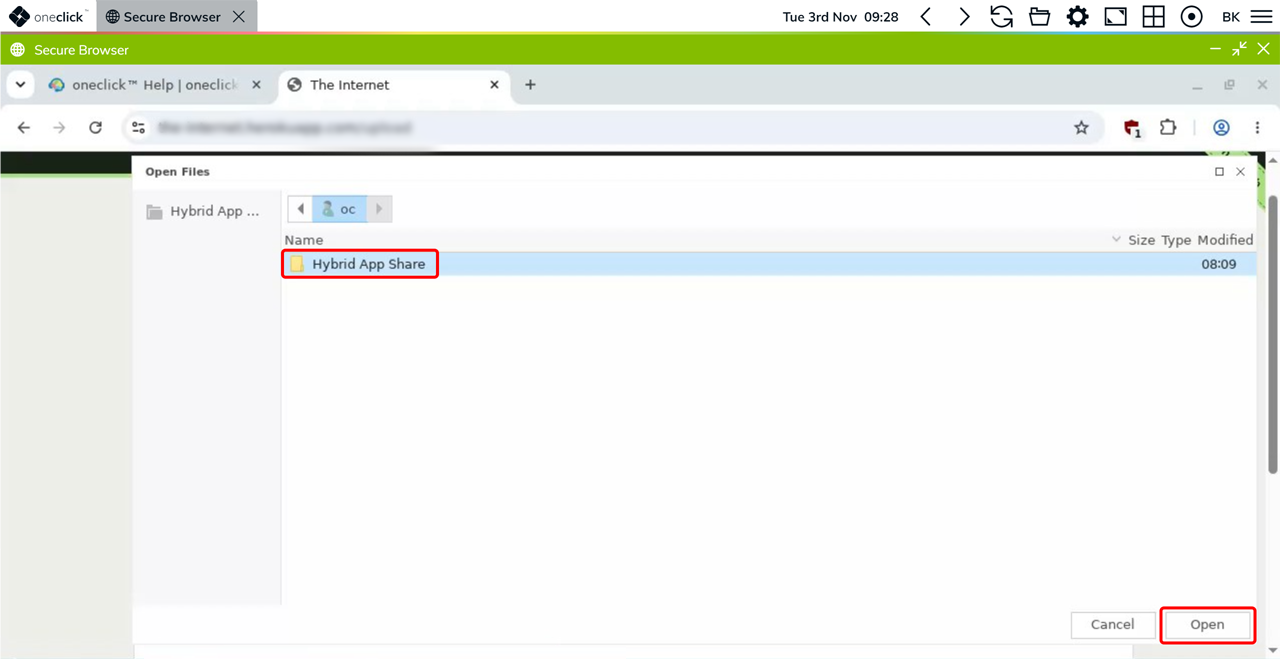
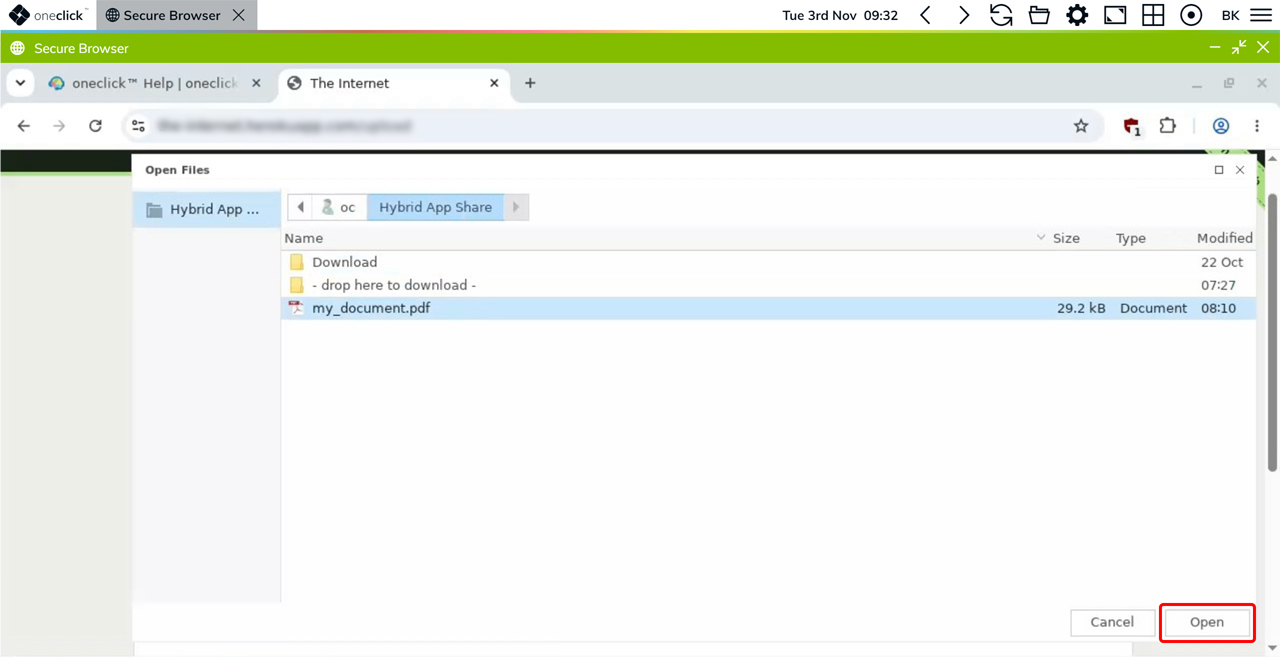
- Select the desired file and click Open.
Download files
- On the desired website, click the Download link or the Download icon.
- In the Save File dialog, the location Hybrid App Share appears with the folder - drop here to download -.
- If required, enter a different file name and click Save.
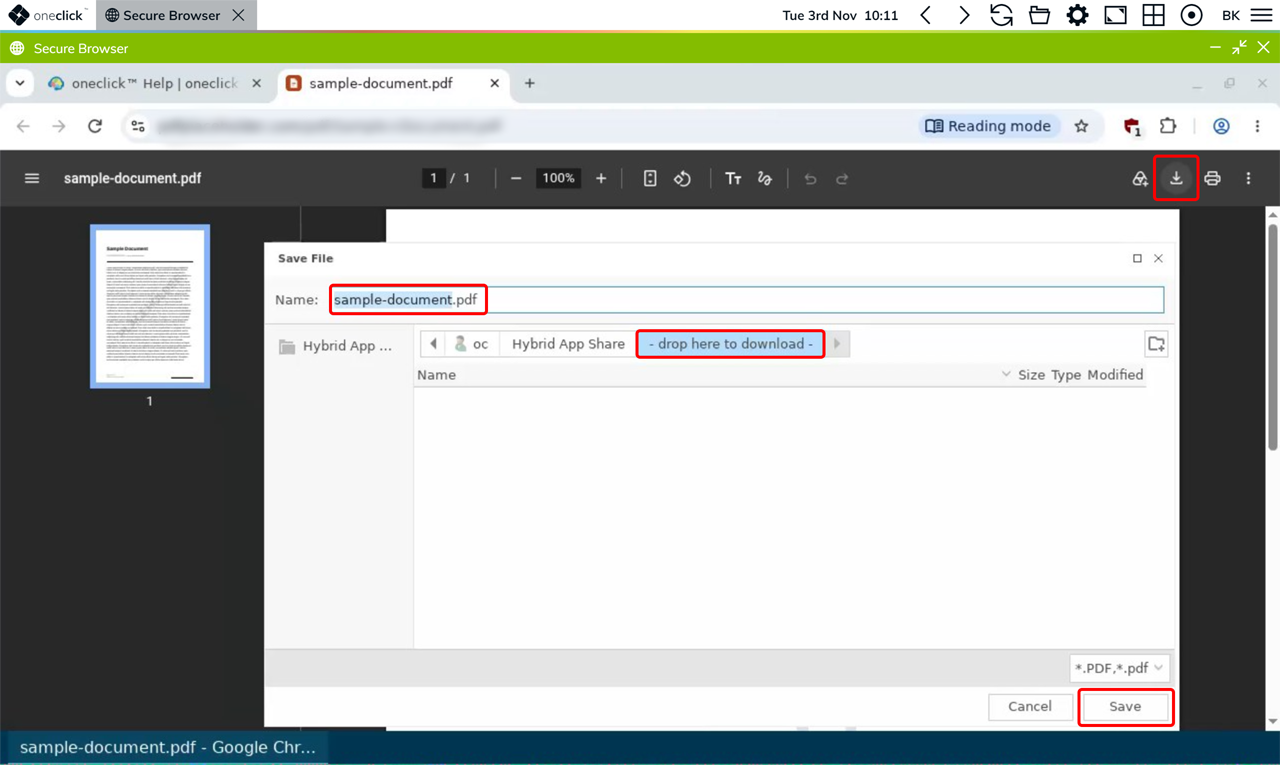
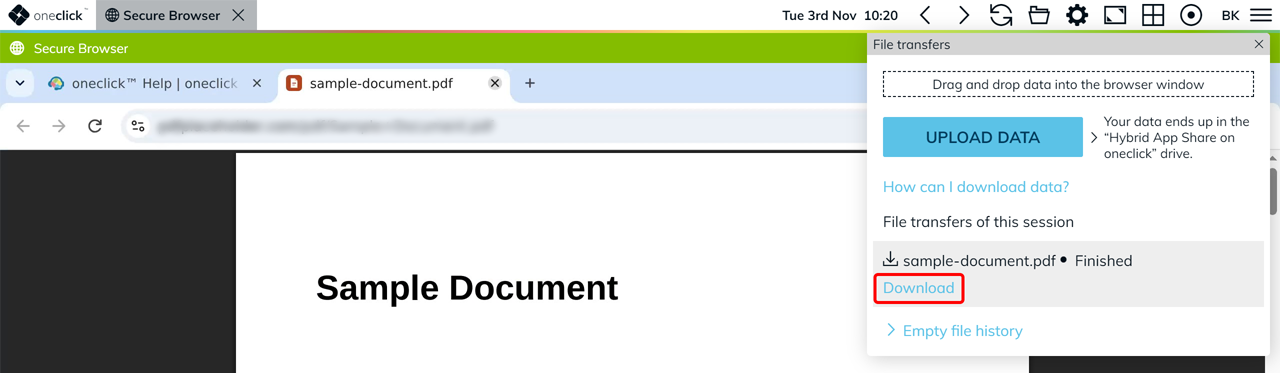
- File transfer in the oneclick™ menu opens automatically and shows the file under File transfers of this session. At the same time, your local browser downloads the file.
- By default, your browser saves the file in the Downloads folder on your local device. Depending on your browser settings, you can select a different location.
- To download the file again, click Download next to the desired file under File transfers of this session.
Your administrator determines whether you can upload and download files and print. Without oneclick™ Hybrid Drive, you need file storage for the session, which your administrator enables. If uploading is disabled, the Upload data button is not available to you. If downloading is disabled, you cannot download files from websites. Contact your administrator if you need these functions.
Print from the Secure Browser
If your administrator has enabled the print function, you can save websites from the Secure Browser as a PDF file on your local device and then print them.
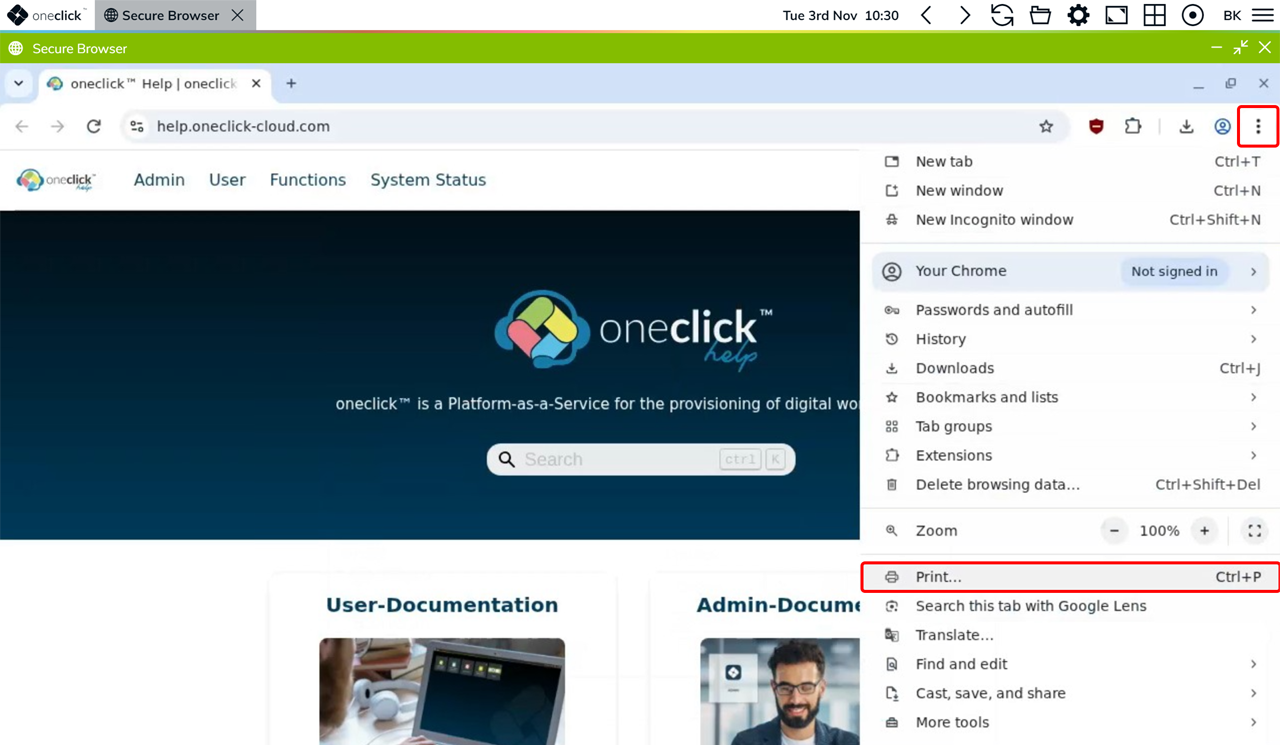
- On the desired website, click the Three-dot icon and then Print.
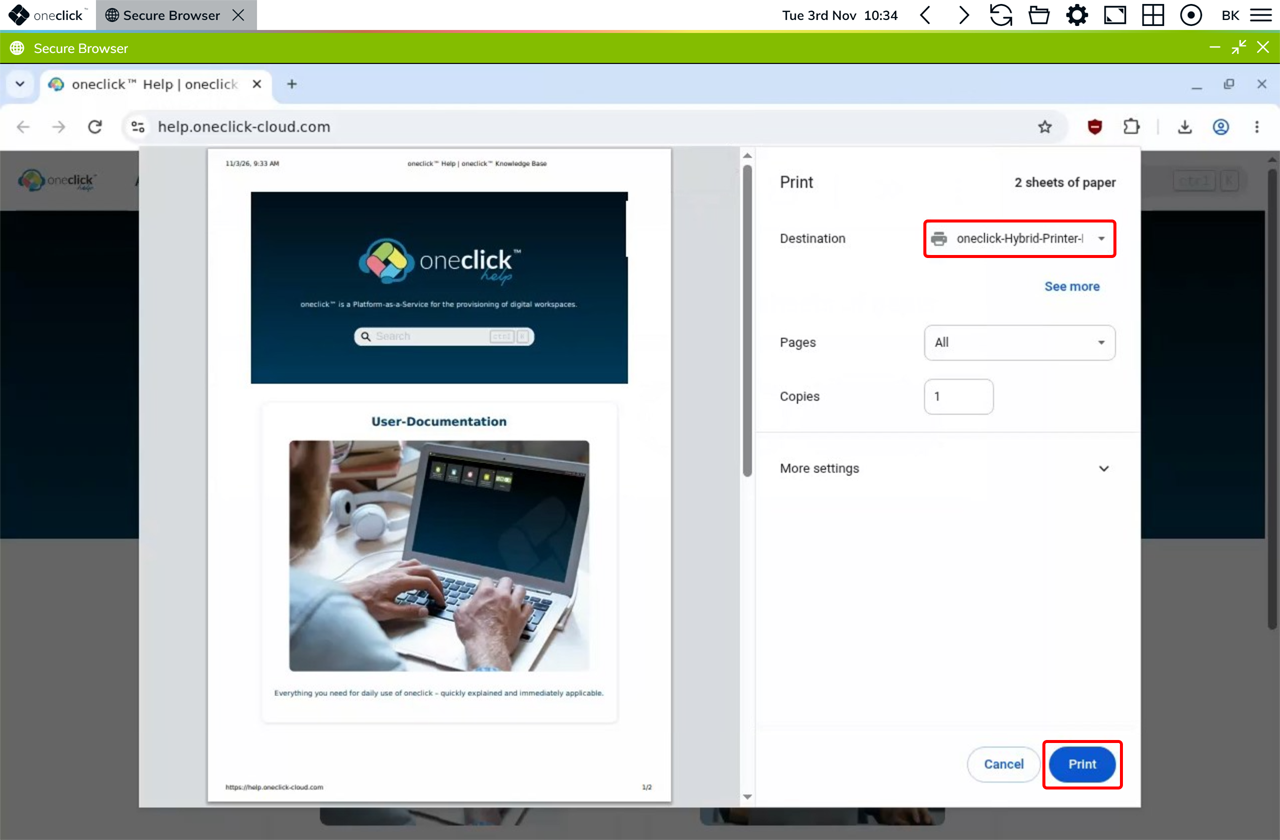
- In the print dialog, select the printer oneclick-Hybrid-Printer-PDF-Download and click Print.
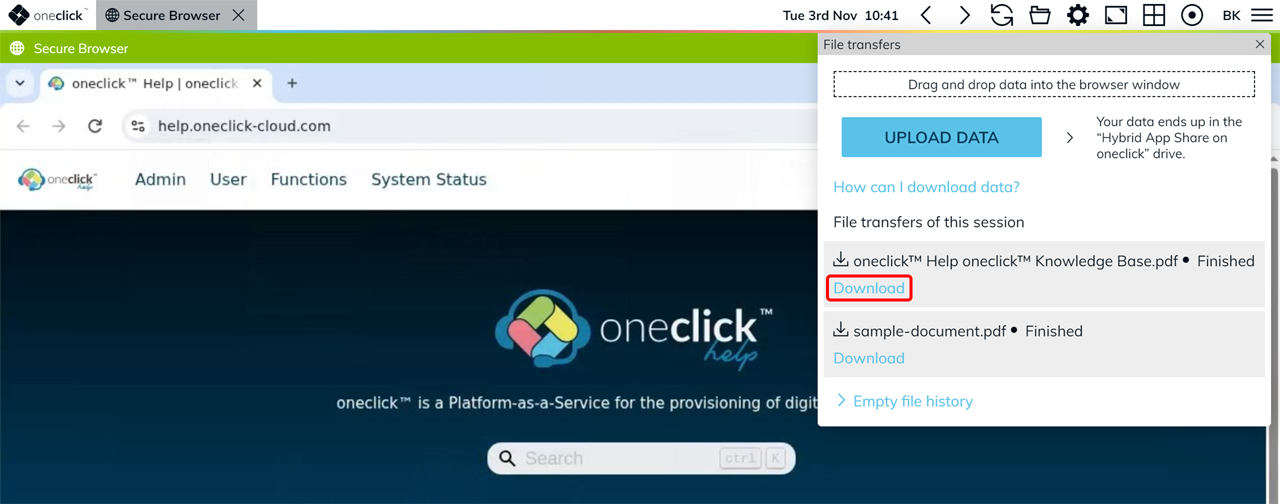
- File transfer in the oneclick™ menu opens automatically and shows the created PDF file under File transfers of this session. At the same time, your local browser downloads the PDF file and saves it in the Downloads folder by default.
- Open the PDF file on your local device and print it.
- To download the PDF file again, click Download next to the desired file under File transfers of this session.
Clipboard: copy text and images
You can copy and paste text and images via the clipboard between your local device and the Secure Browser in both directions. In Firefox, you can only transfer text, not images.
How to check whether the clipboard is enabled:
- In the oneclick™ menu, click the Gear icon.
- Check whether the Clipboard menu item is displayed at the top. If it is missing, your administrator has not enabled the function. Contact your administrator if required.
- Click Clipboard. A green Checkmark icon with the message "Clipboard is allowed" indicates that your local browser allows access to the clipboard.
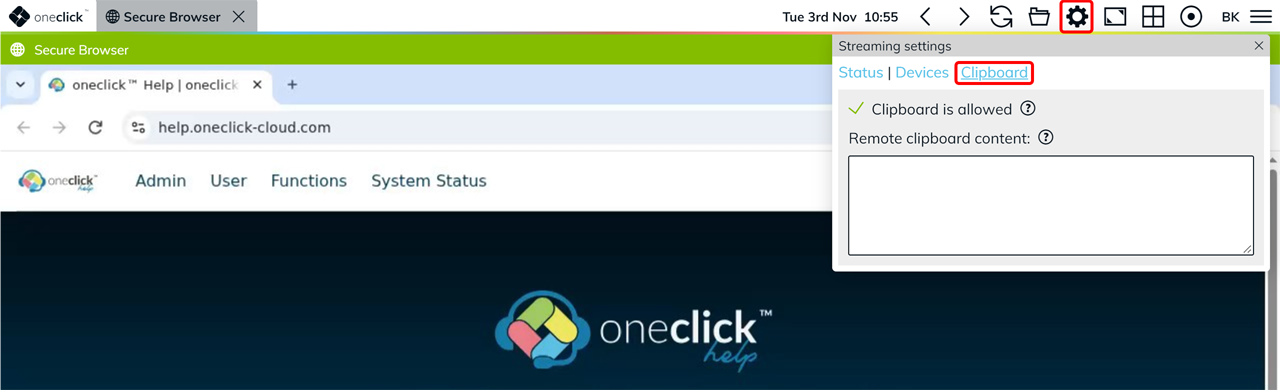
If your local browser blocks access to the clipboard, see Granting access permissions in the browser to learn how to allow access.
You transfer files via file transfer, not via the clipboard.
Close the Secure Browser
Save your entries on the respective website before you close the Secure Browser.
Close the browser tab or the window using the X icon to disconnect.

Your administrator determines how long your session remains open after closing. If you open the Secure Browser again within this time, you can continue your previous session.
After this time has elapsed, a new session starts. Whether you need to log in again on previously visited websites depends on your administrator's settings and the respective website.
To log out of oneclick™, click Logout in the oneclick™ menu.
If you want to continue your session for longer or keep your logins on websites, contact your administrator.
If the Secure Browser does not start
First, try to start the Secure Browser again. Log in when prompted. If the start still fails, contact your administrator.