VPN IPsec
Over VPN IPsec, you connect an entire local network to oneclick™. This allows applications provided via oneclick™ to access internal systems and services as if they were in the same network.
This type of connection is particularly suitable when multiple destination systems or infrastructure services (e.g. file servers, databases, or Active Directory) need to be used.
We assume that your VPN device meets the technical requirements for a connection to oneclick™.
Performance note
In a site-to-site VPN connection, data is transferred between oneclick™ and your local network over the WAN. If the application and the files are located at different sites, this may result in longer loading and saving times, depending on the available bandwidth and latency.
To connect an entire network with multiple devices to oneclick™, follow these steps:
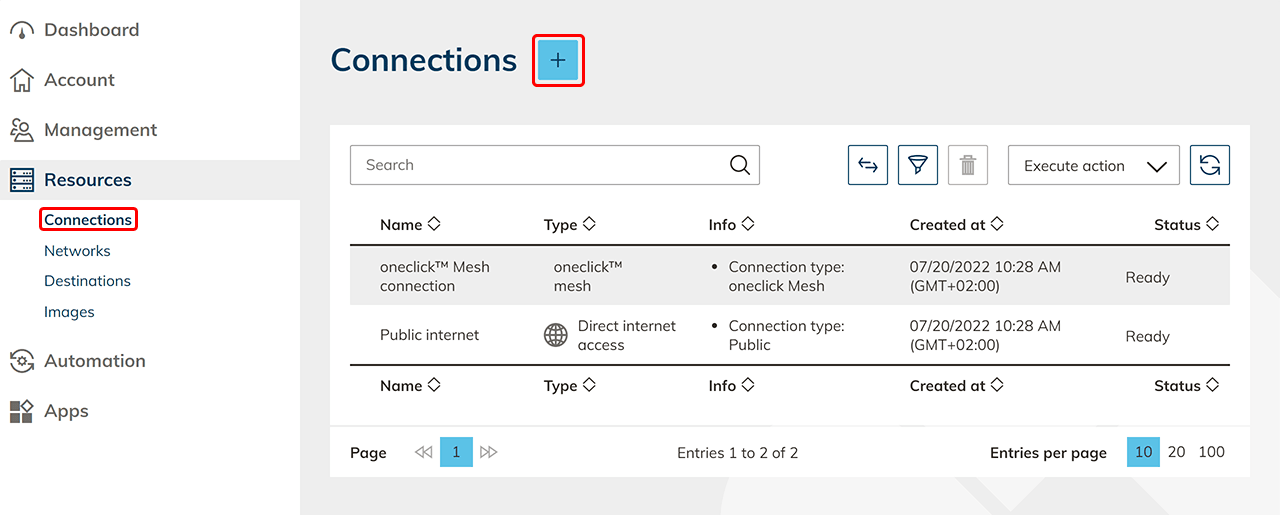
1. Create connection
- Click in the menu item Resources on the tab.
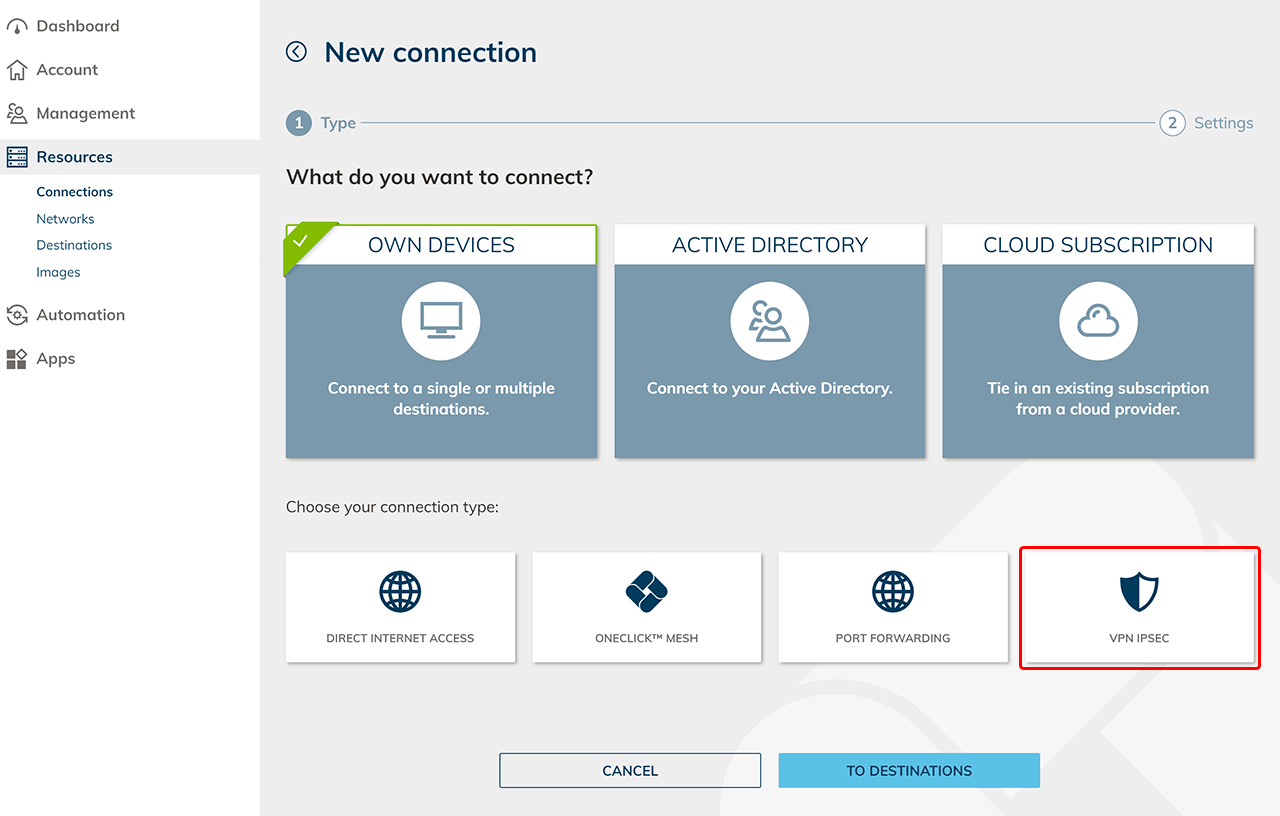
- Click on the Plus icon to open the mask where you can connect your own resources.
- Select the VPN IPsec tile under My Devices.
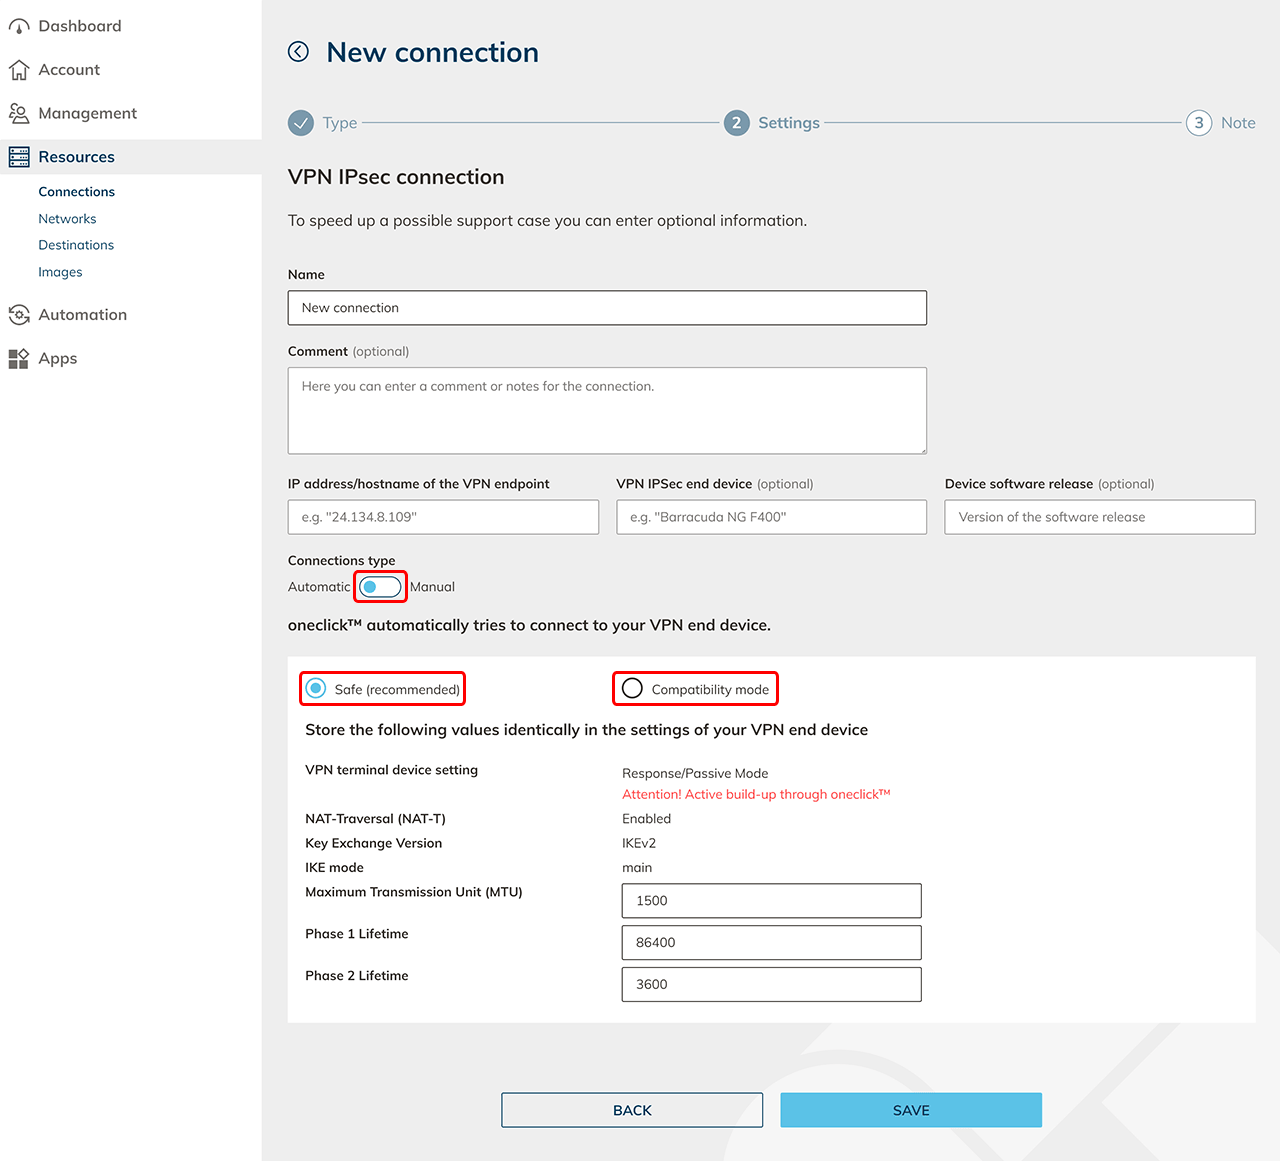
- Give the new connection any name and enter the IP address or DNS of the VPN end device.
Optionally, make entries in the fields VPN IPsec end device and Device software release.
- Select the automatic or manual connection type.
- In automatic mode, you can choose between Secure (recommended) with IKE version 2 and Compatibility mode with IKE version 1. Here, oneclick™ automatically tries to establish a connection with your VPN end device. You can enter the MTU packet size and the lifetime for phase 1 and 2.
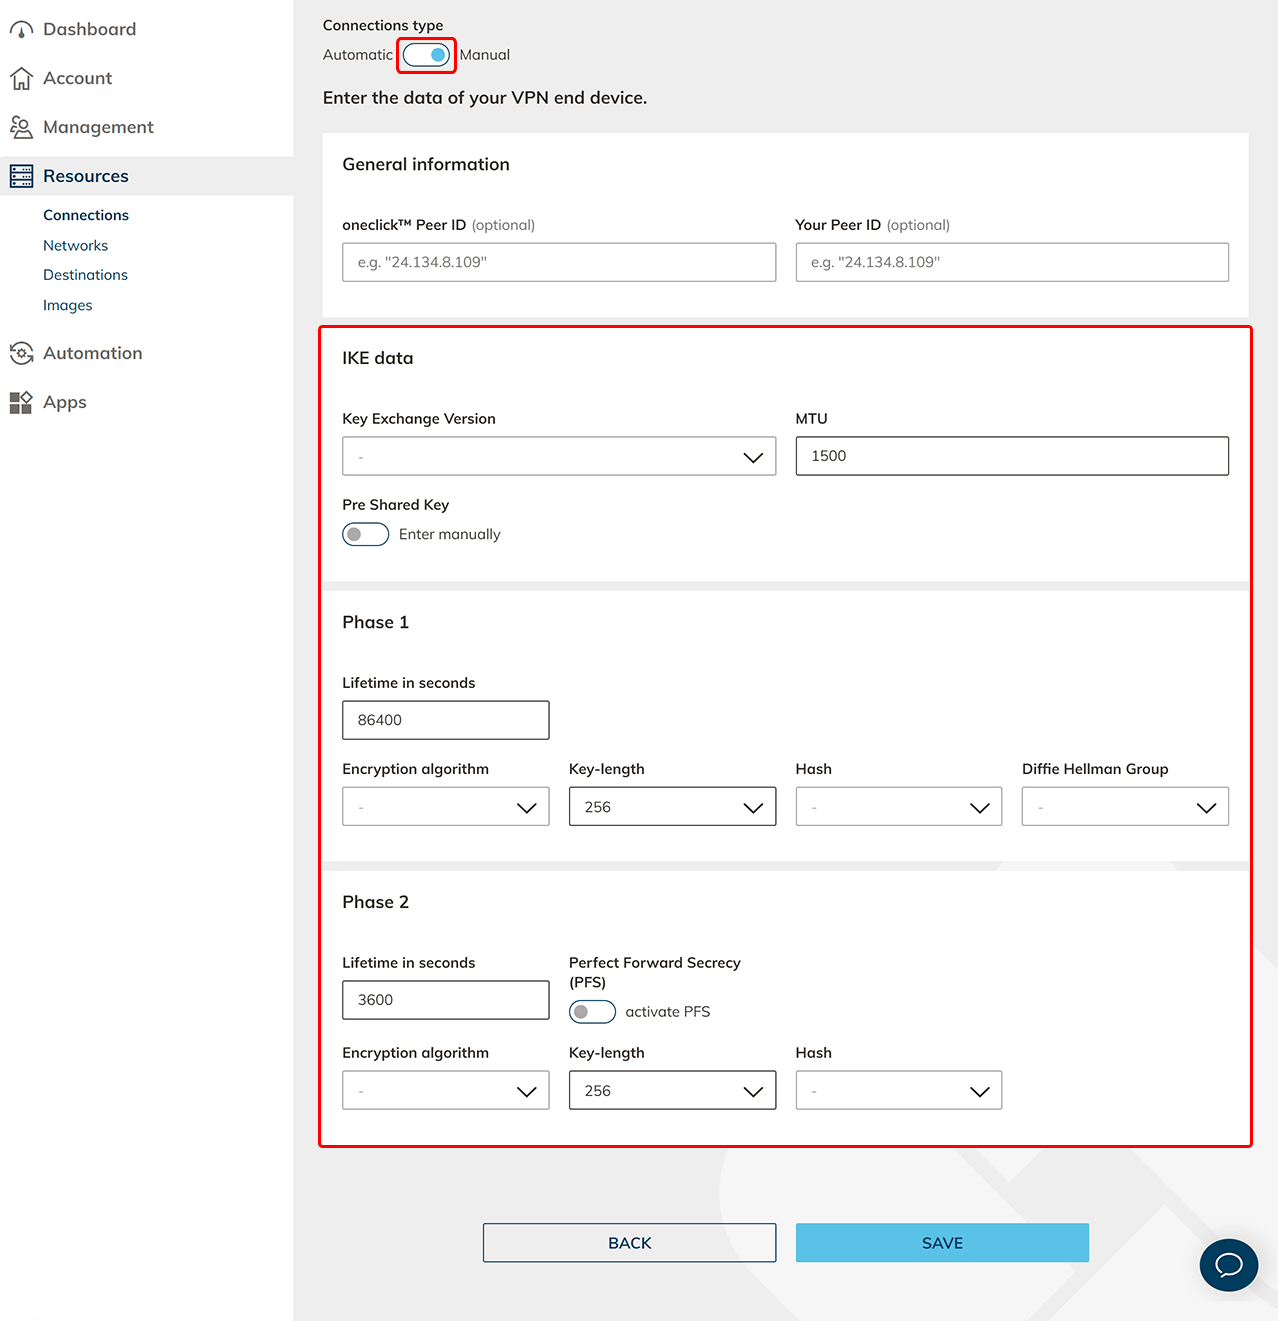
- In manual mode, you can directly enter and select the appropriate data from your VPN end device:
- General information, such as the oneclick™ Peer ID, your Peer ID.
- Your IKE data: The Key Exchange Version, MTU and optionally the Pre Shared Key.
- For Phase 1: The lifetime in seconds, the encryption algorithm, the key-length, the hash and the Diffie Hellmann group.
- For Pase 2: The lifetime in seconds, optionally the Perfect Forward Secret, the encryption algorithm, the key-length and the hash.
- In automatic mode, you can choose between Secure (recommended) with IKE version 2 and Compatibility mode with IKE version 1. Here, oneclick™ automatically tries to establish a connection with your VPN end device. You can enter the MTU packet size and the lifetime for phase 1 and 2.
- Then click Save.
- If you have your network data, create a network immediately and take the direct path via the To Networks button.
If you do not have any network data yet, you can download the PDF and make the settings already contained in your VPN end device.
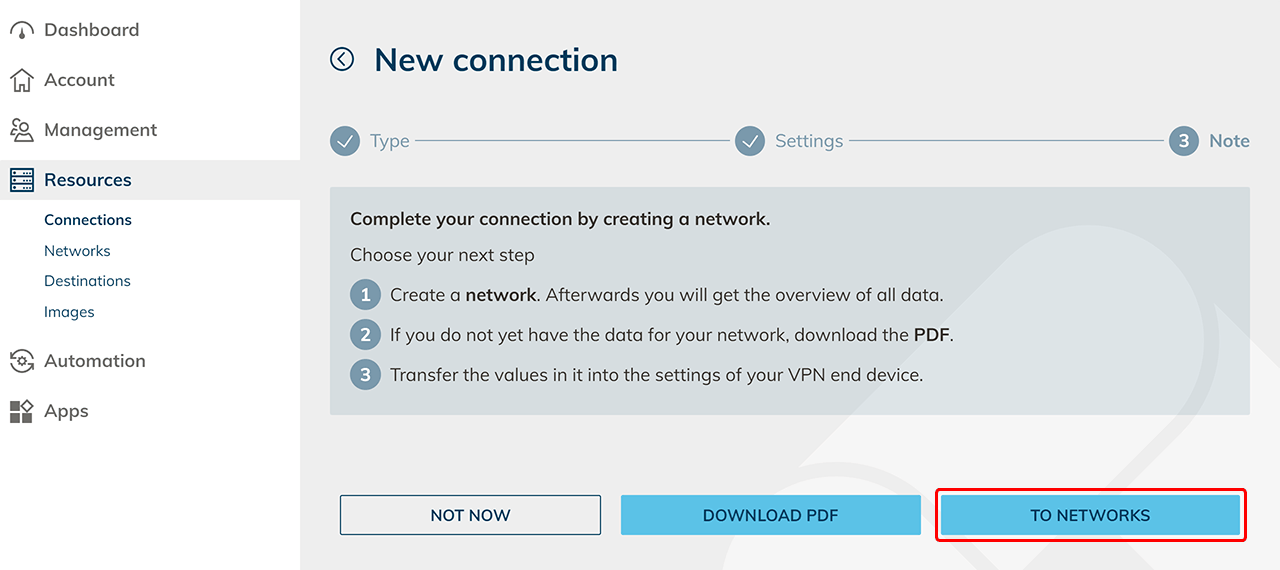
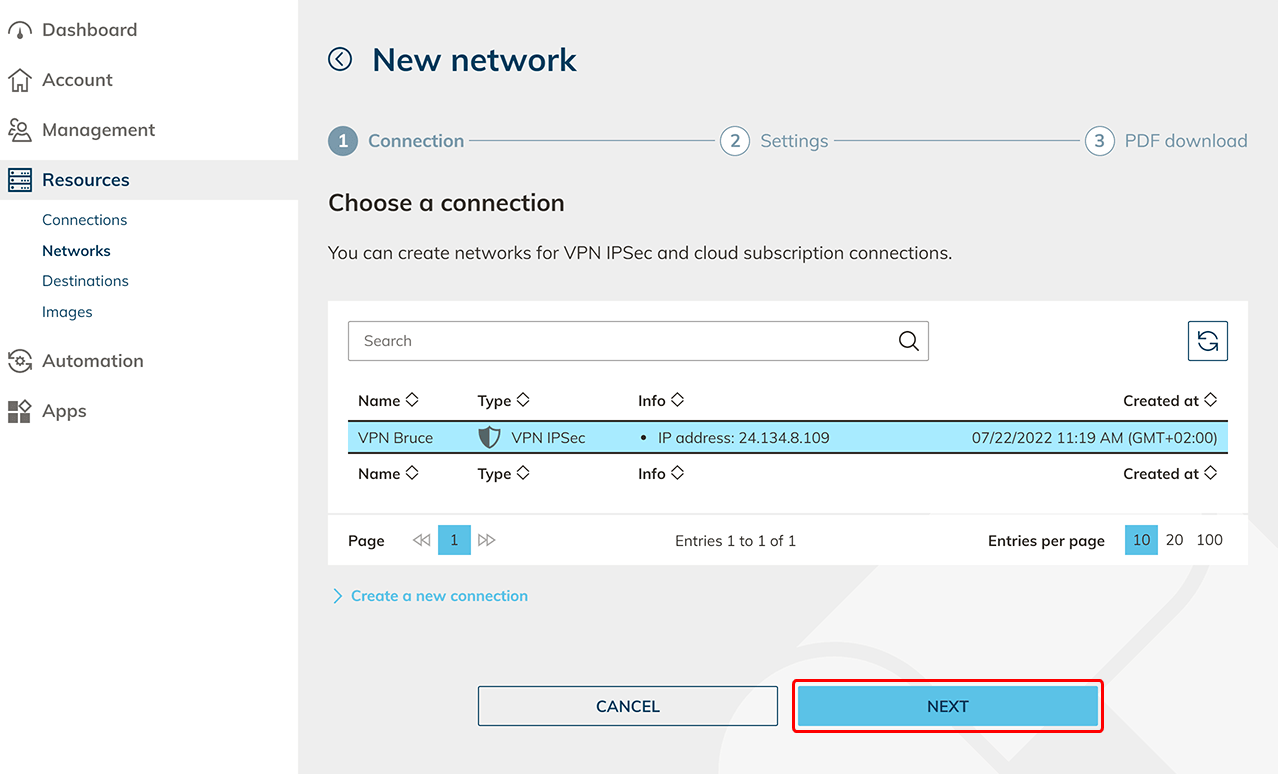
2. Create network
-
Click on the Plus icon in the network menu item to create a new network.

-
Select the VPN IPsec connection you just created and click Next.
-
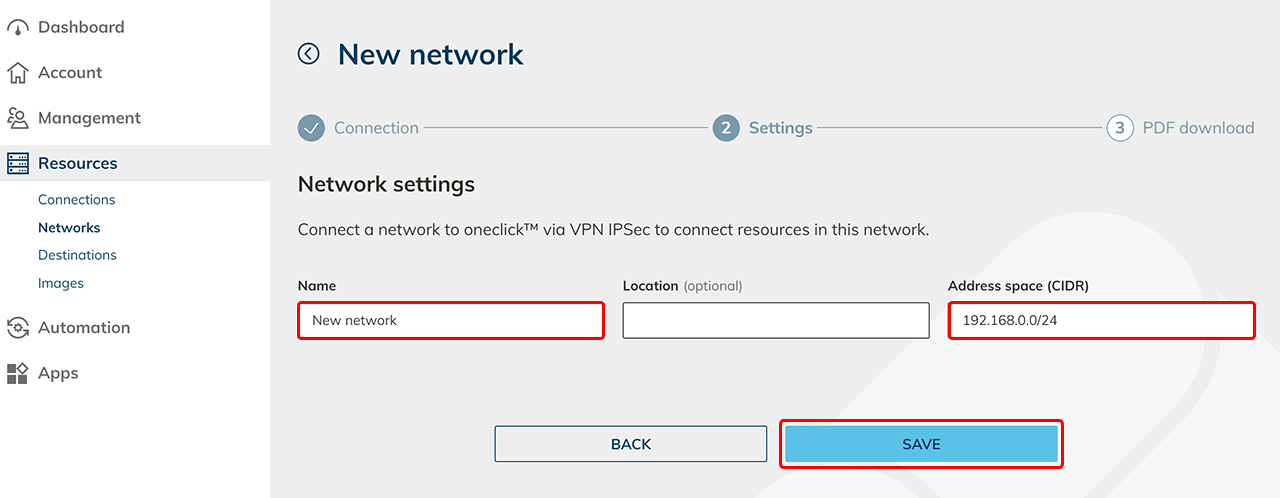
Give the network a name of your choice. Optionally, enter a location, for better overview in tables, and the address space (CIDR) and then click Save.
-
Download the PDF and transfer the values in it to the settings of your VPN end device.
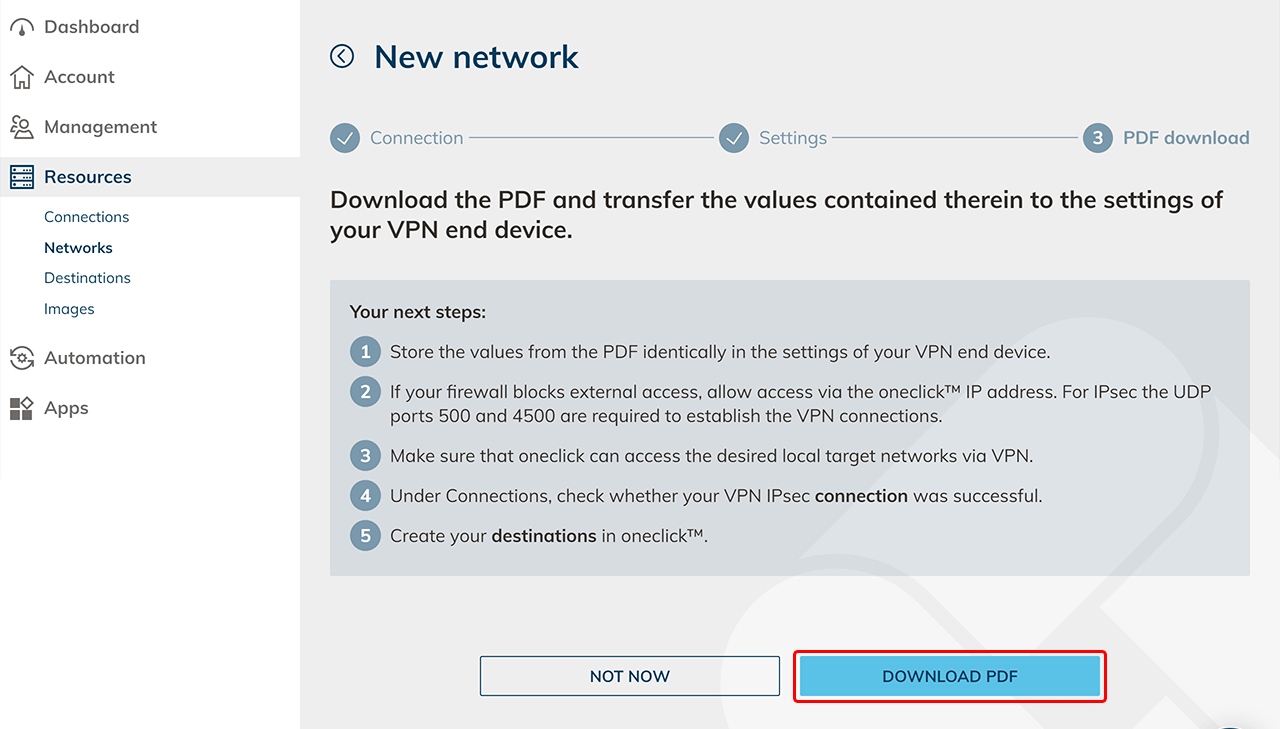
Proceed according to the following steps on the page of your VPN end device:
- Store the values from the generated PDF identically in the settings of your VPN end device.
- If your firewall blocks external access, allow access via the oneclick™ IP address. To establish the VPN connection, UDP ports 500 and 4500 are required for IPsec
- Ensure that oneclick™ can access the desired local destination networks via VPN
-
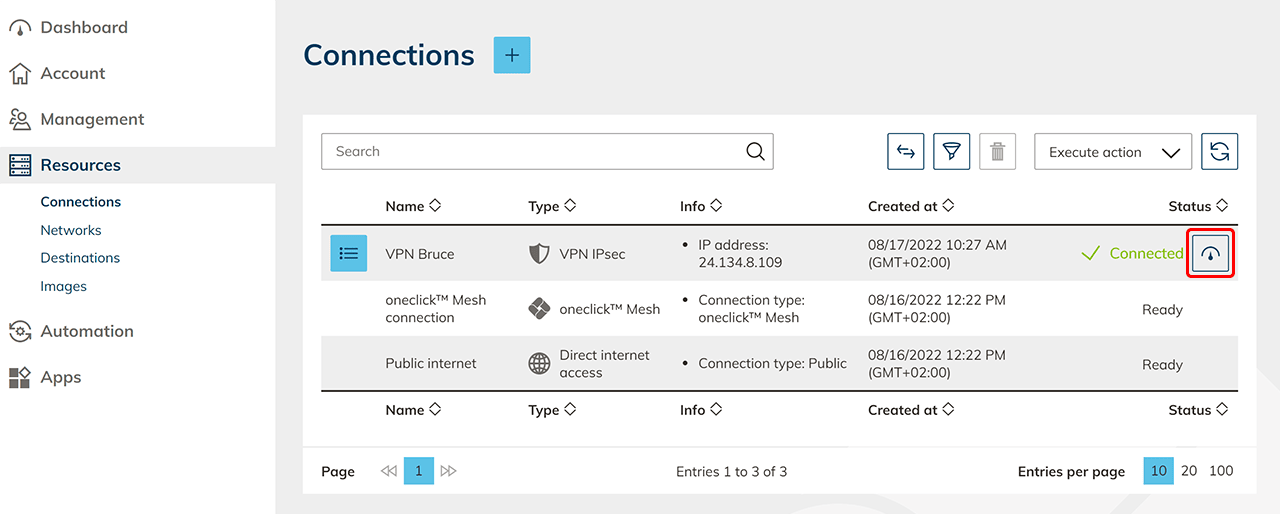
Check in the Connections item if the connection was successful.
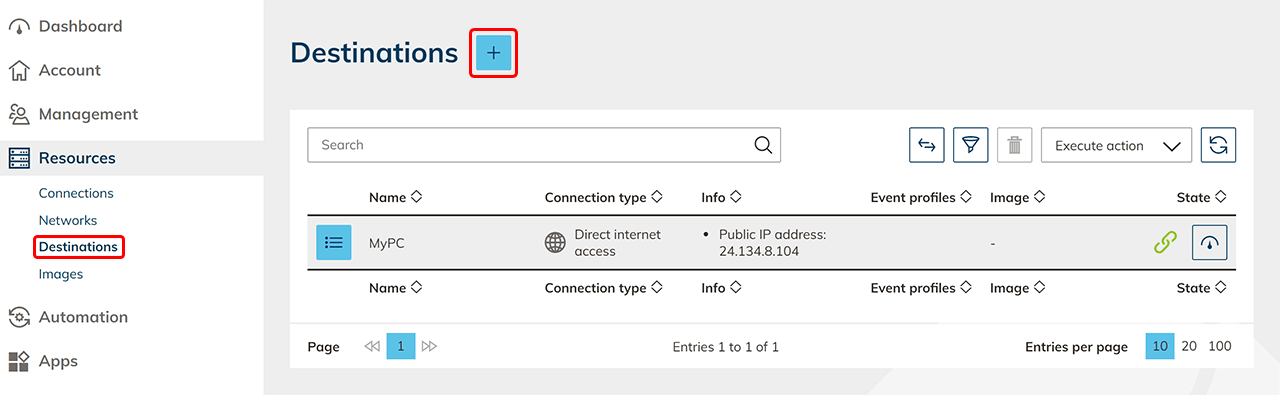
3. Create destination
- In the Resources menu item, click the Destinations
- Click on the Plus icon to create a new destination.
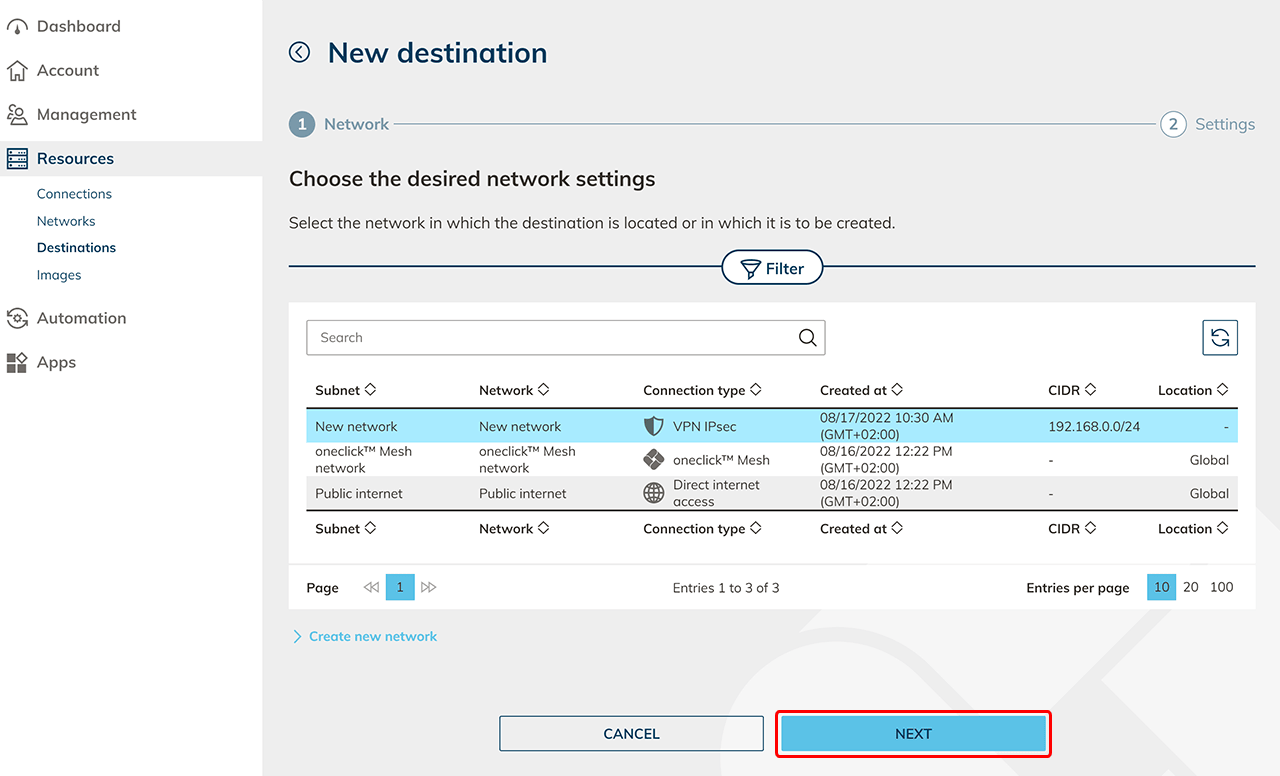
- Select your created network for VPN IPsec connection and click Next.
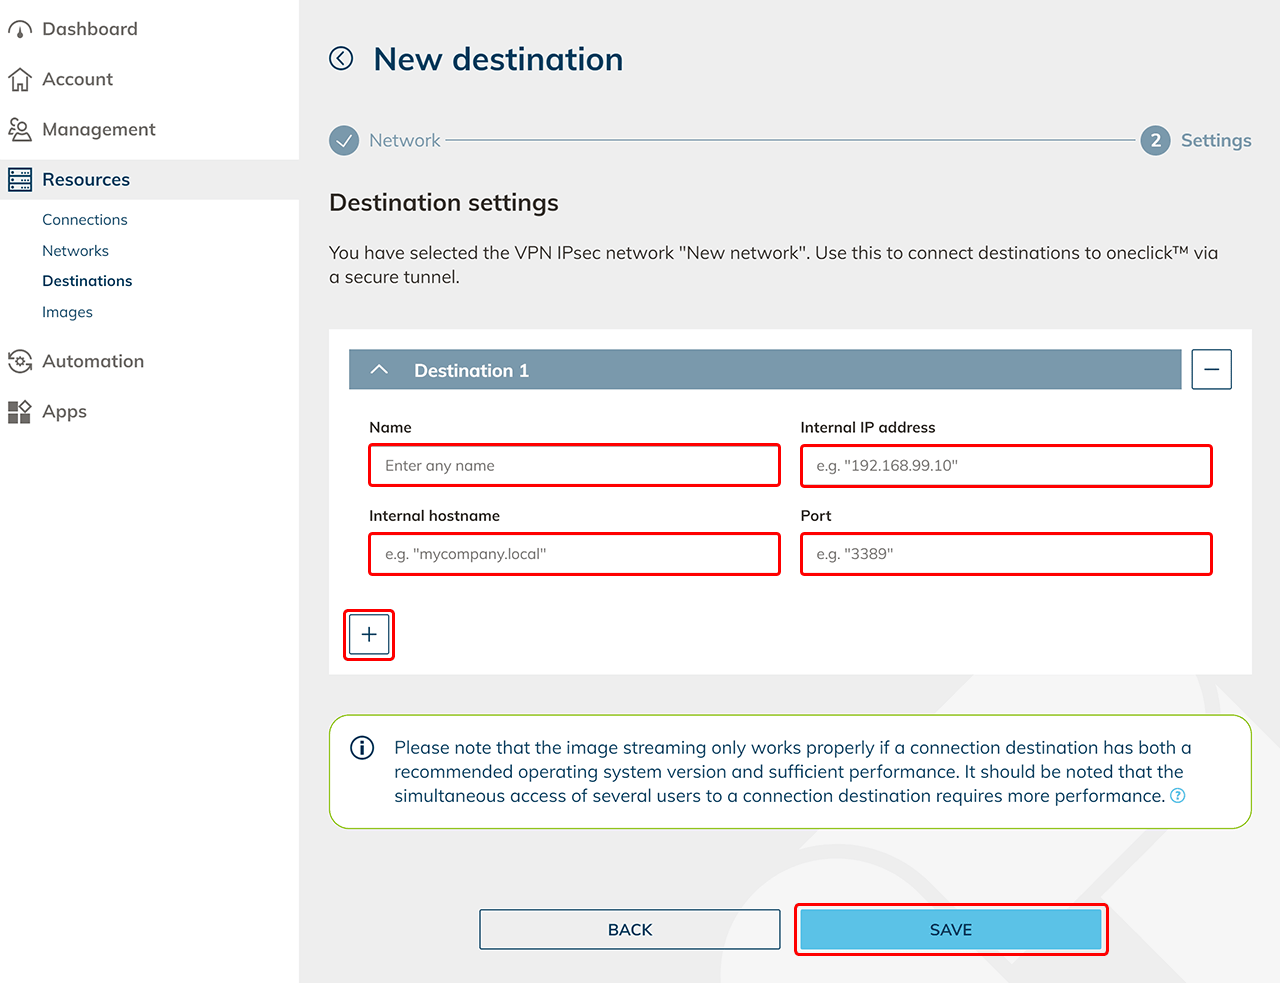
- Specify a descriptive name, the internal IP address or internal hostname, and the port on your destination system.
- Click on the Plus icon to create more destinations. Click on Save.
4. Create destination pools
Next, create a destination pool in which you can include one or more destinations that belong together. This step is not necessary if you want to connect an internal website or a private Active Directory.
5. Check connectivity and assign apps in oneclick™
Click on the check status icon in the row to check the connectivity. 
For more information on restarting and checking your VPN connection, see Reinitialize and Check Connection.
If you want to access the destination via oneclick™ streaming, then configure app access and create app instances for your oneclick™ users.
6. Send oneclick™ registration link
Once you have completed all the steps above, you can give your users access to oneclick™ by sending the registration link.