Connect end devices (Windows/Mac)
Local Windows or macOS devices can be integrated into oneclick™ as destinations.
Depending on the operating system, the connection is established via RDP or VNC.
A prerequisite is that the device is reachable through a suitable network connection (e.g., public IPv4 address with port forwarding, port forwarding, or VPN-IPsec connection).
Protocol overview
Windows
- Incoming connections: RDP
- Default port: 3389/TCP
macOS
- Incoming connections by default: VNC (Screen Sharing)
- Default port: 5900/TCP
- Incoming RDP connections are possible with additional RDP server software
The Microsoft Remote Desktop app enables outgoing RDP connections to other systems and is not relevant for integrating a Mac as a destination.
1. Determine the device IP address
Determine the local IPv4 address of the device that will be connected.
This address is required if port forwarding is configured on the router.
Windows
- Open the Command Prompt (cmd).
- Run the command
ipconfig. - Note the IPv4 address of the active network adapter.
macOS
- Click the Apple icon and open System Settings.
- Select Network.
- Select the active network connection (e.g., Wi-Fi or Ethernet).
- Click Details.
- Open TCP/IP.
- Note the IPv4 Address.
If the device is to be integrated as a destination, also enable:
System Settings → General → Sharing → Screen Sharing.
2. Port forwarding on the router
Configure port forwarding on the router for the device to be connected.
The following steps show the configuration using a FRITZ!Box as an example.
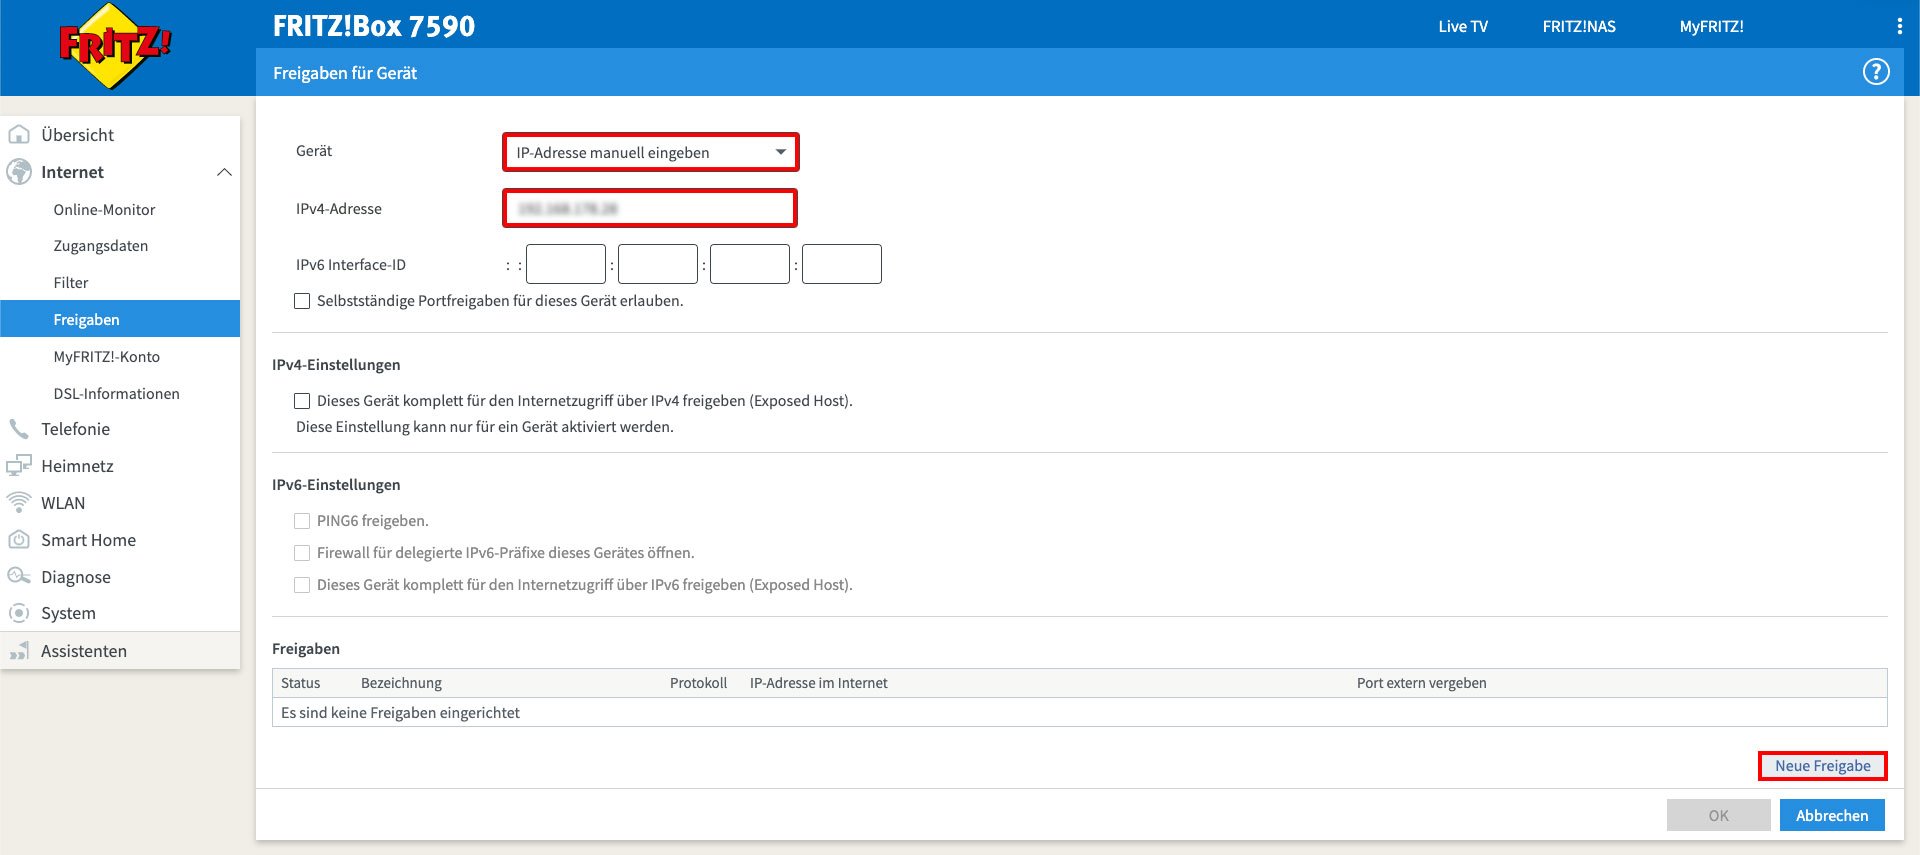
- Log in to the FRITZ!Box.
- Open Internet and then select Permit Access.
- Click Add Device for Sharing.
- Under “Device”, select Enter IP address manually.
- Enter the previously determined local IPv4 address.
- Click New Sharing.
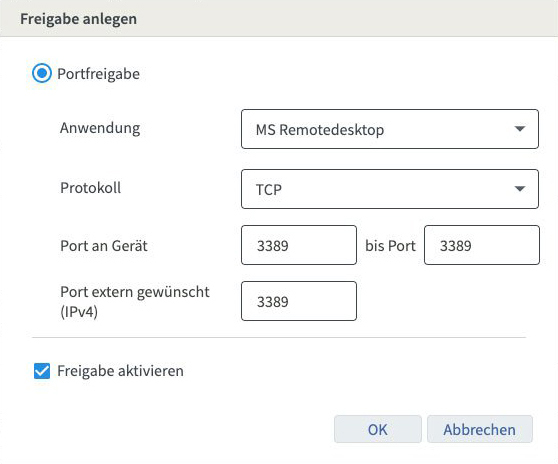
Windows (RDP)
- Application: MS Remote Desktop
- Protocol: TCP
- Port to device (internal port): 3389
- External port: freely selectable (default: 3389)
The external port defined here must later be entered in oneclick™.
macOS (VNC)
- Application: Other application
- Protocol: TCP
- Port to device (internal port): 5900
- External port: freely selectable (default: 5900)
The external port defined here must later be entered in oneclick™.
Click OK to save the configuration.
The configured port forwarding entry will then appear in the overview.
The Pencil icon can be used to adjust the name of the sharing entry afterwards.
If multiple devices should be connected, configure a separate port forwarding rule for each device. Use different external ports (see Step 3.6).
3. Connect end devices in oneclick™
After the network connection has been configured (e.g., via router port forwarding as described in section 2, via port forwarding, or via a VPN-IPsec connection), the device can be created in oneclick™ as a destination.
For oneclick™ to establish a connection, the device must be reachable through this network connection.
If a dynamic public IP address is used, a public hostname (e.g., via a DynDNS service) should be used so that the system remains reachable under a fixed name.
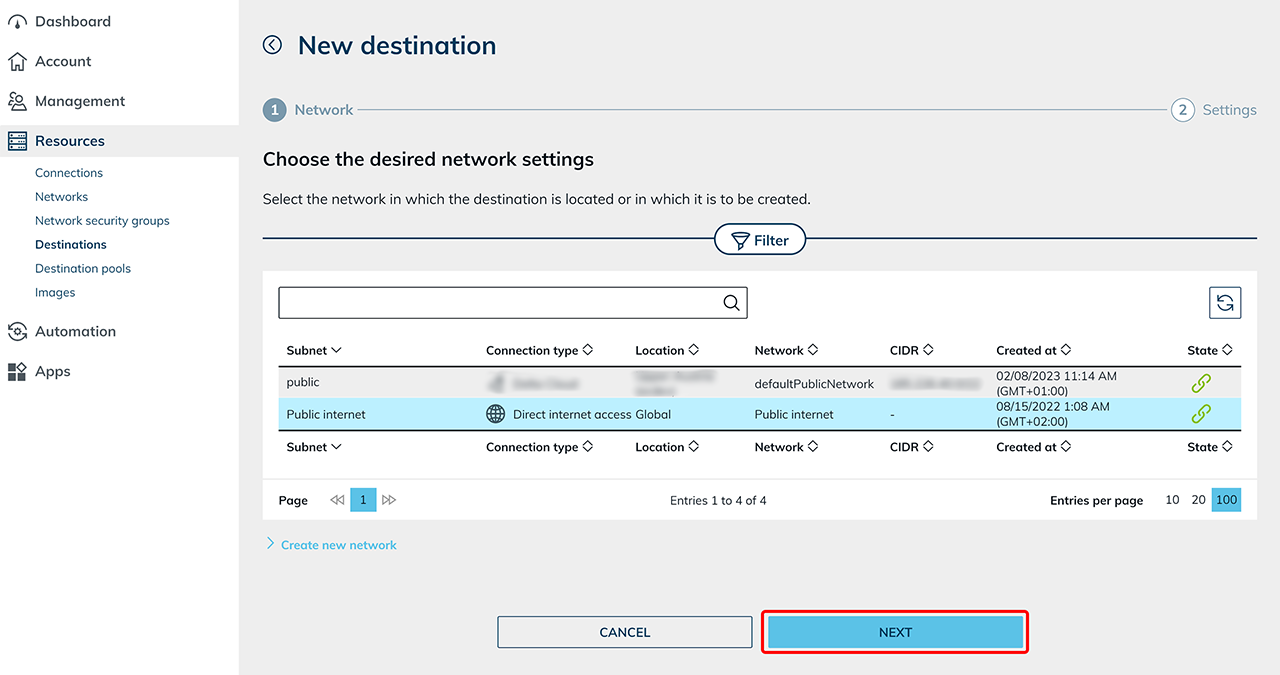
- Click Resources and then Destinations.
- Click the Plus icon to create a new destination.

- Select the network to which the device should be connected.
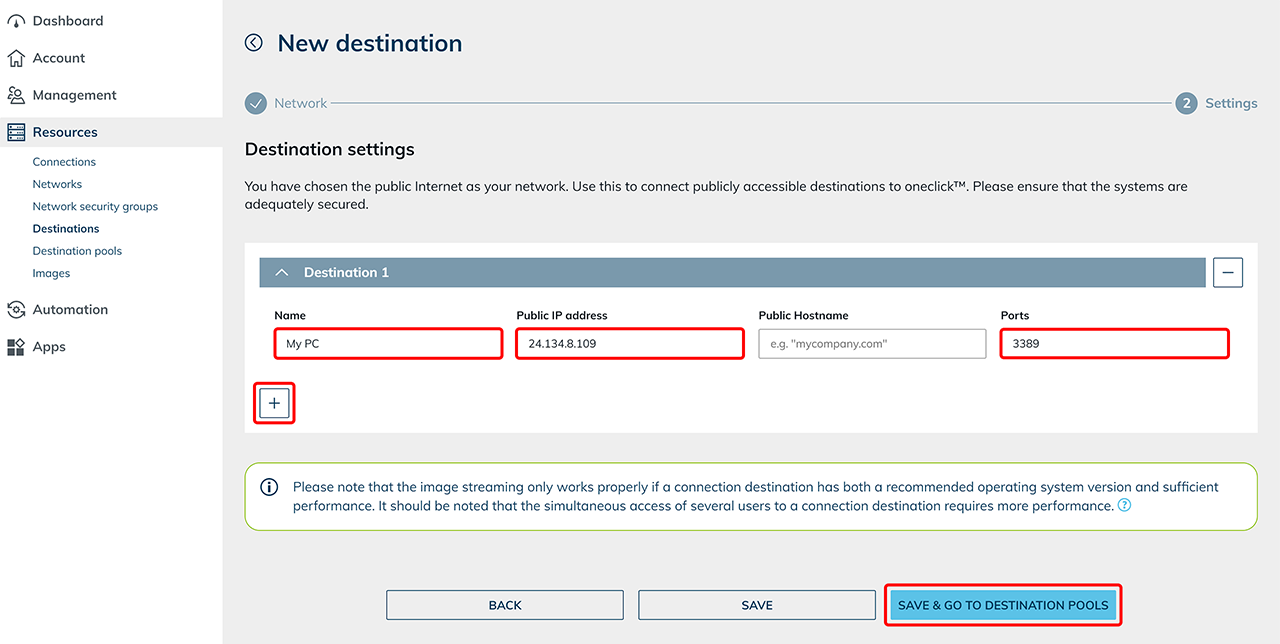
- Assign a unique Name that allows clear identification.
You must be able to recognize this destination name later. - Enter either the Public IP address or the Public Hostname in the corresponding field.
When using a dynamic public IP address, a public hostname (e.g., via DynDNS) should be used. - Enter the external port through which the destination is reachable.
If multiple destinations use the same internal port (e.g., 3389), a separate external port must be configured on the router for each device (e.g., external port 3390 forwarded to internal port 3389). - Click the Plus icon below the input fields to add another destination within this network.
- Click Save.
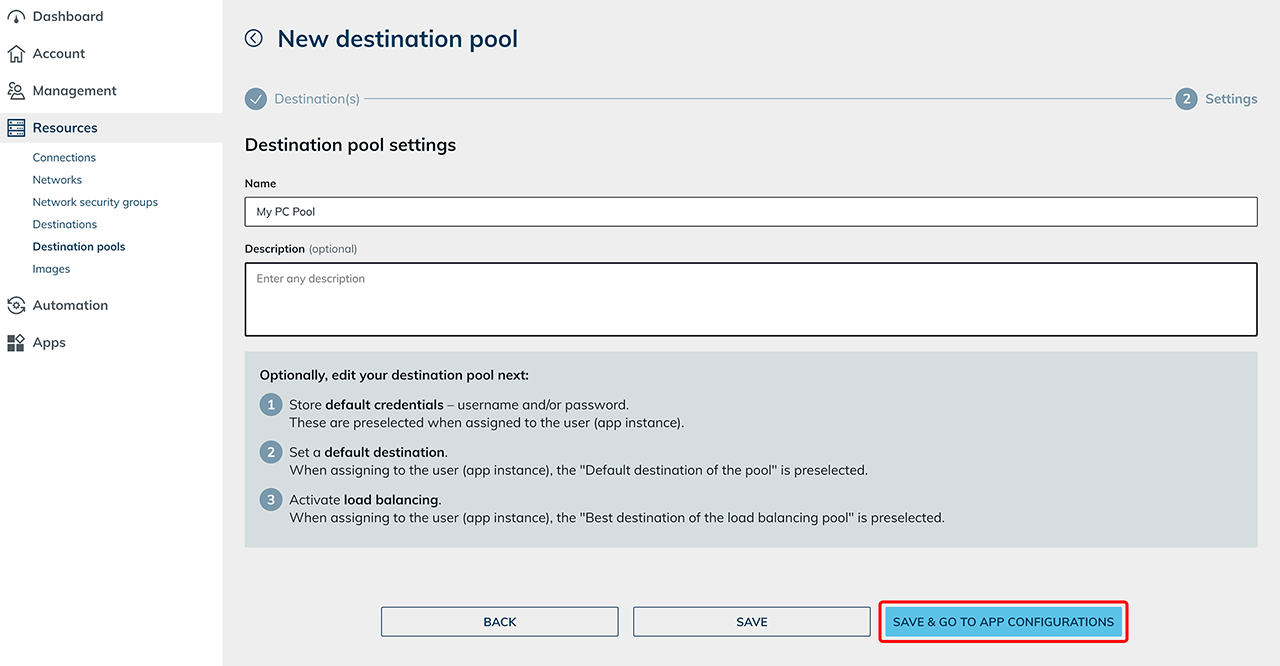
- Then create a destination pool and assign the destination to this pool.
If multiple devices are to be connected, create each device as a separate destination.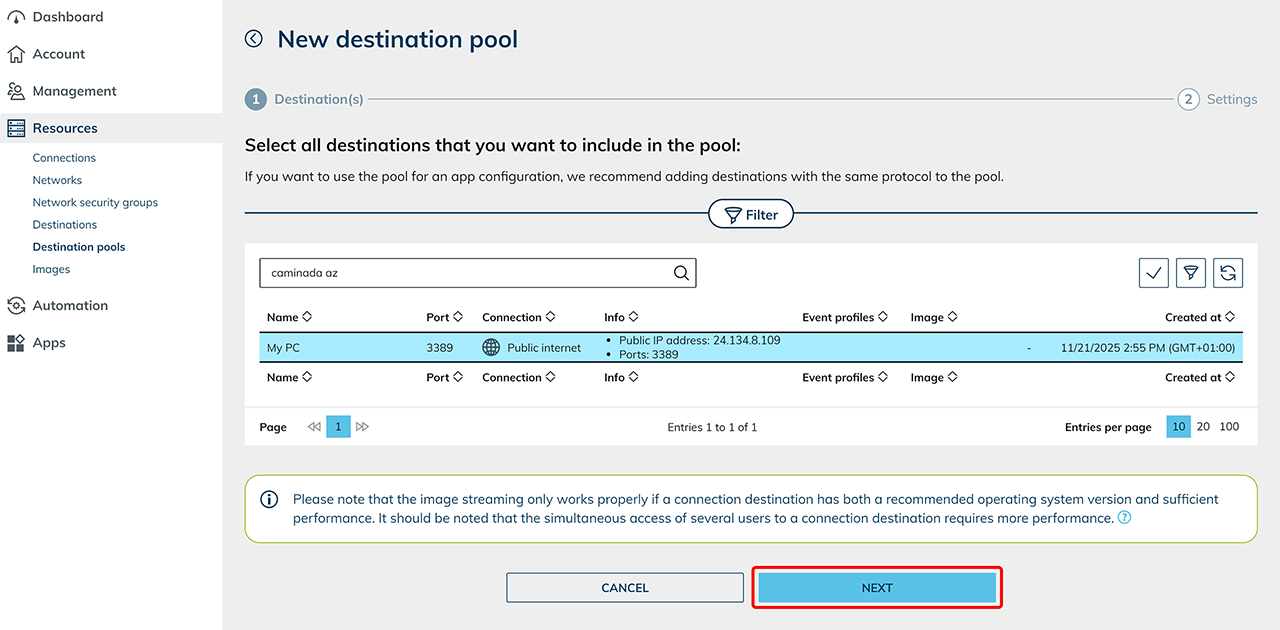
If your firewall restricts access to specific source IP addresses, the oneclick™ IP addresses must be added to the allowlist.
The current IP addresses can be found in the article Allowlisting oneclick™ IP addresses.
4. Assign the destination to oneclick™ users
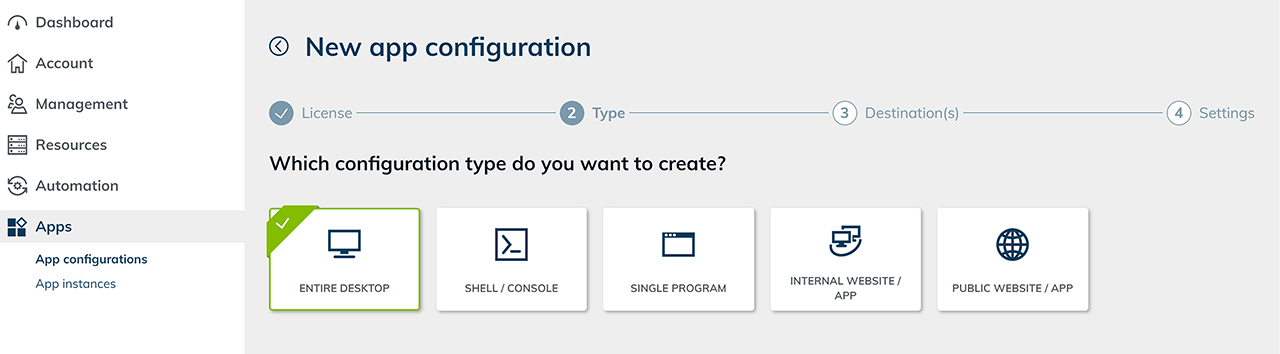
- Create an app configuration and select an app license.
- In the next step, select the option Entire Desktop.
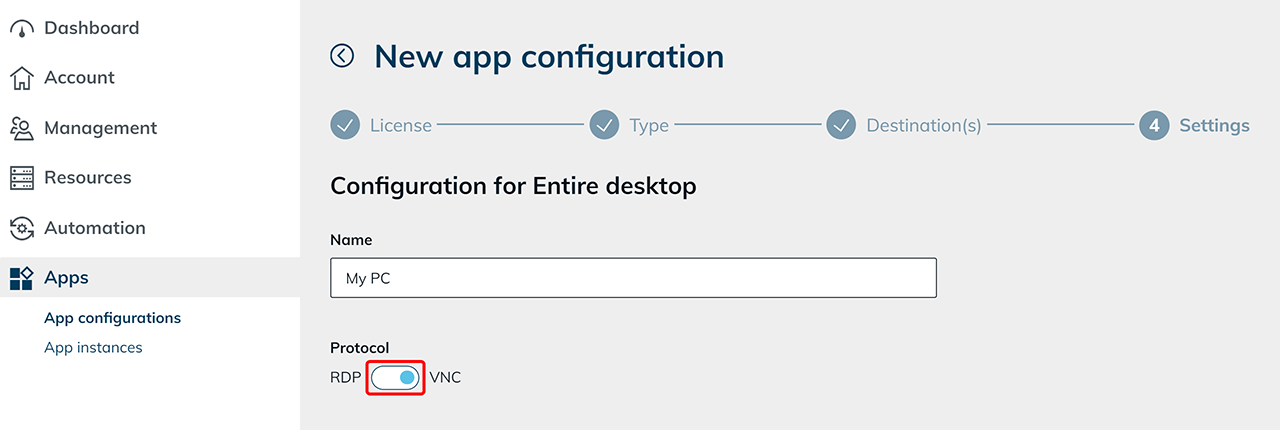
- Check the protocol:
- For Windows destinations, the default setting RDP remains.
- For macOS destinations, switch the protocol to VNC.
- Then create an app instance for your user and assign it.
The device must be powered on and reachable in order to establish a connection.