Enable UDP hole punching with hardware firewall
Do you want to include multiple clients/servers in the oneclick™ Mesh network while using a hardware firewall?
To ensure that the connection is established correctly via the oneclick™ Mesh Client, you must perform the following steps:
1. If you are already using the Mesh Client: delete the device’s IP addresses in the firewall
2. Enable UDP hole punching in your firewall (or disable symmetric NAT, PAT, overload NAT, dynamic NAT, or port randomization)
3. Whitelist oneclick™ IP addresses
4. Configure port forwarding when using multiple clients
5. Check connectivity in the oneclick™ Admin
6. If you are already using the Mesh Client: Restart the oneclick™ Mesh Service
1. Delete the device’s IP address in the firewall (optional)
If you are already using the Mesh Client and want to enable "UDP hole punching" afterwards, you must delete the device’s IP address in the firewall, enable UDP hole punching, and then restart the oneclick™ Mesh Service on the Windows device.
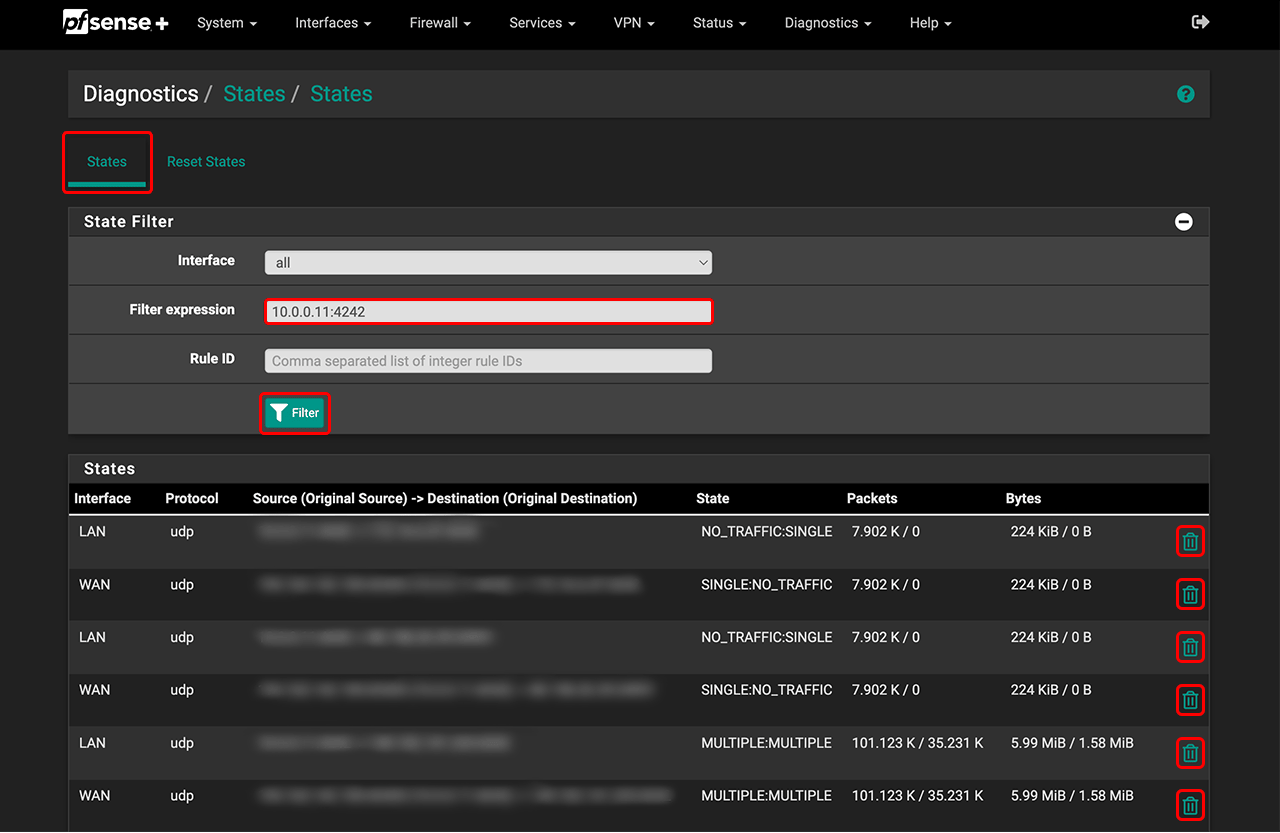
- Go to your firewall, select Diagnostics in pfSense Plus, and then States.
- All connections are listed here. Under “Filter expression”, enter the IP address of your device and the corresponding port, e.g., 10.0.0.11:4242. Then click Filter.
- Delete all displayed entries by clicking the trash can icon to the right of each entry.
2. Enable UDP hole punching
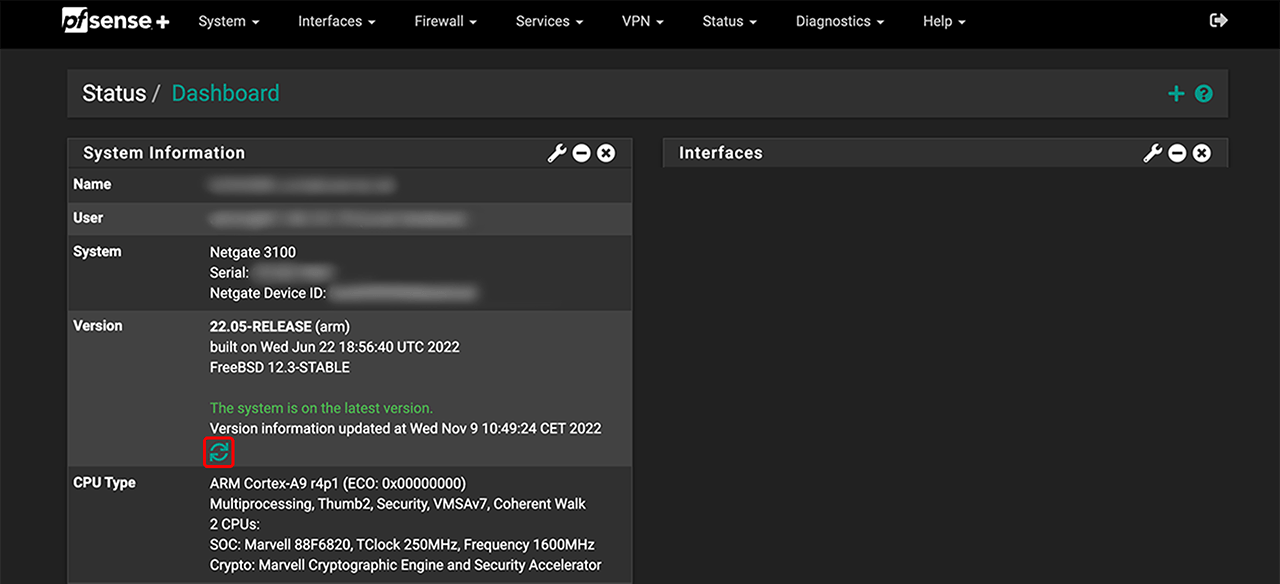
Below are the settings we tested with a pfSense Plus firewall (Contabo server / system: Netgate 3100 / version 22.05-RELEASE (arm).
- Log in to your pfSense Plus firewall.
- On your dashboard, verify your current software version. Click the update icon.
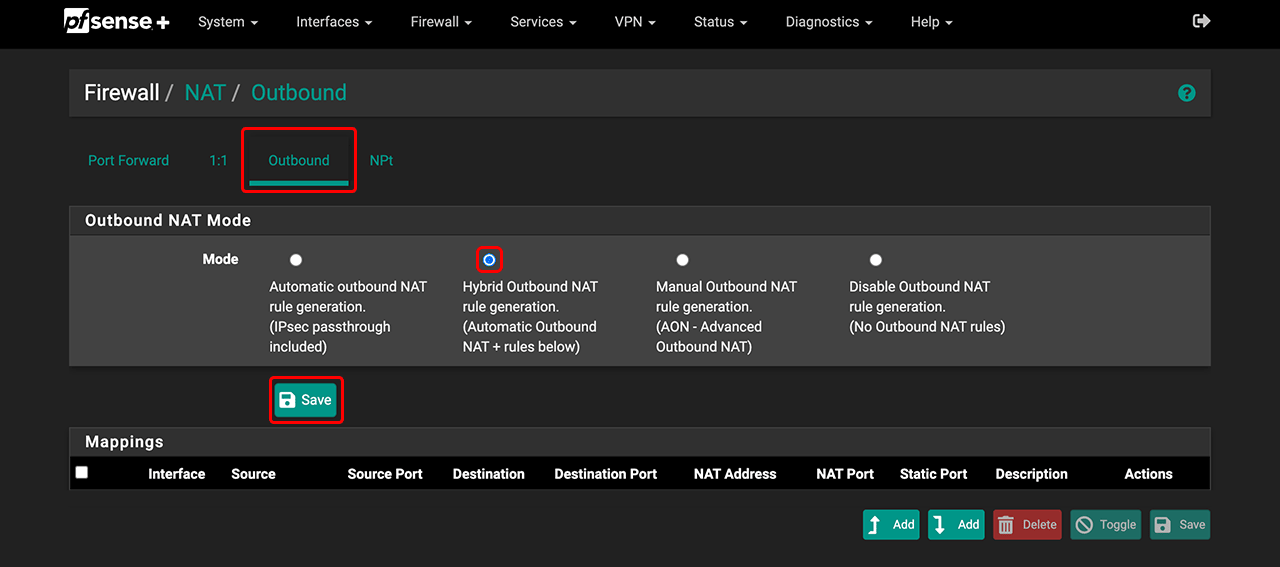
- In the Firewall tab, go to NAT.
- Click Outbound, select Hybrid Outbound NAT rule generation, and click Save.
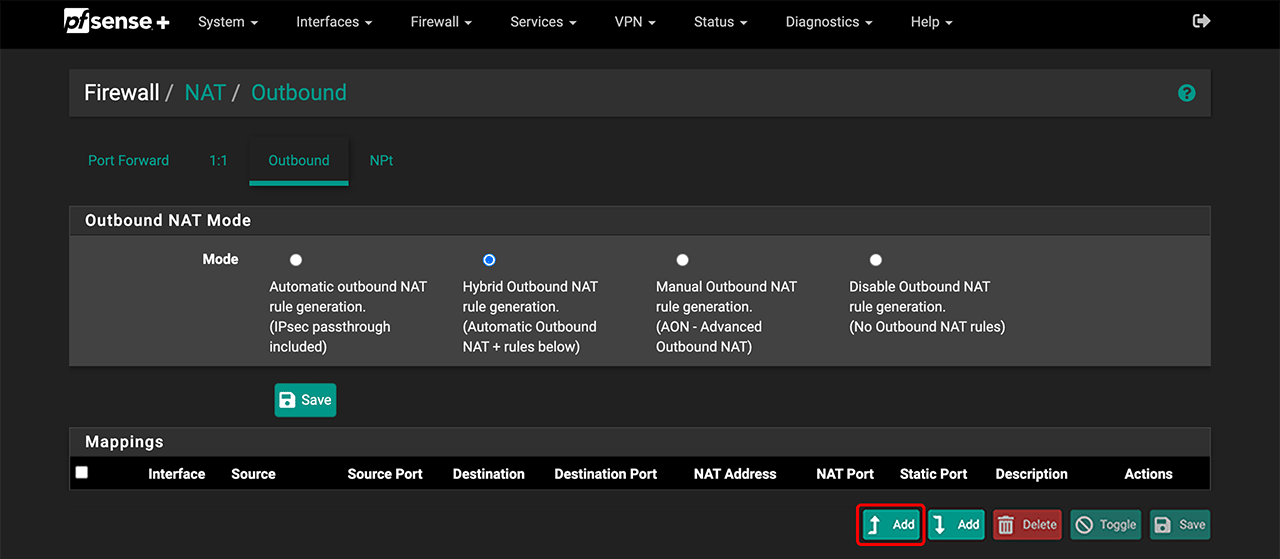
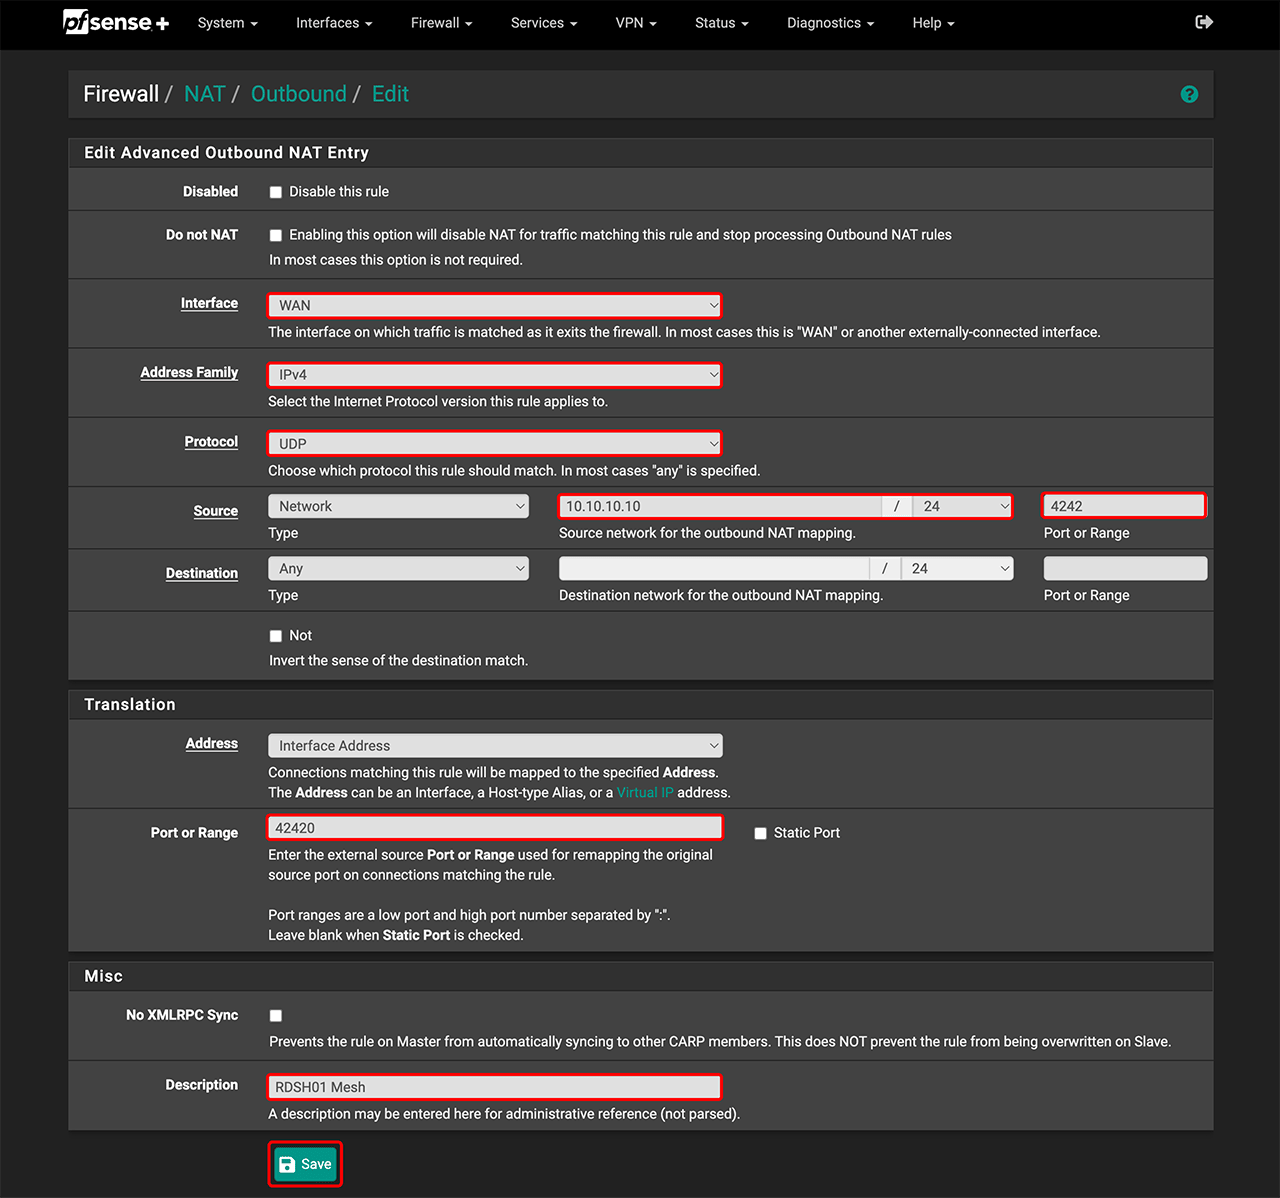
- Under “Mapping”, enter the data for each client you want to connect to oneclick™ that is located behind your firewall.
- Click Add.
- Under Interface, select WAN.
- For Address Family, select IPv4.
- For Protocol, select UDP.
- In the “Source” section, choose Network as the type and enter the internal IP address of your device.
- Enter port 4242.
- In the “Translation” section, enter the port for NAT. We recommend numbering NAT ports sequentially, e.g., 42420, 42421, etc. Start with 42420.
- In the “Div” section, you may enter a description, e.g., RDSH01 Mesh.
- Click Save.
- Click Add.
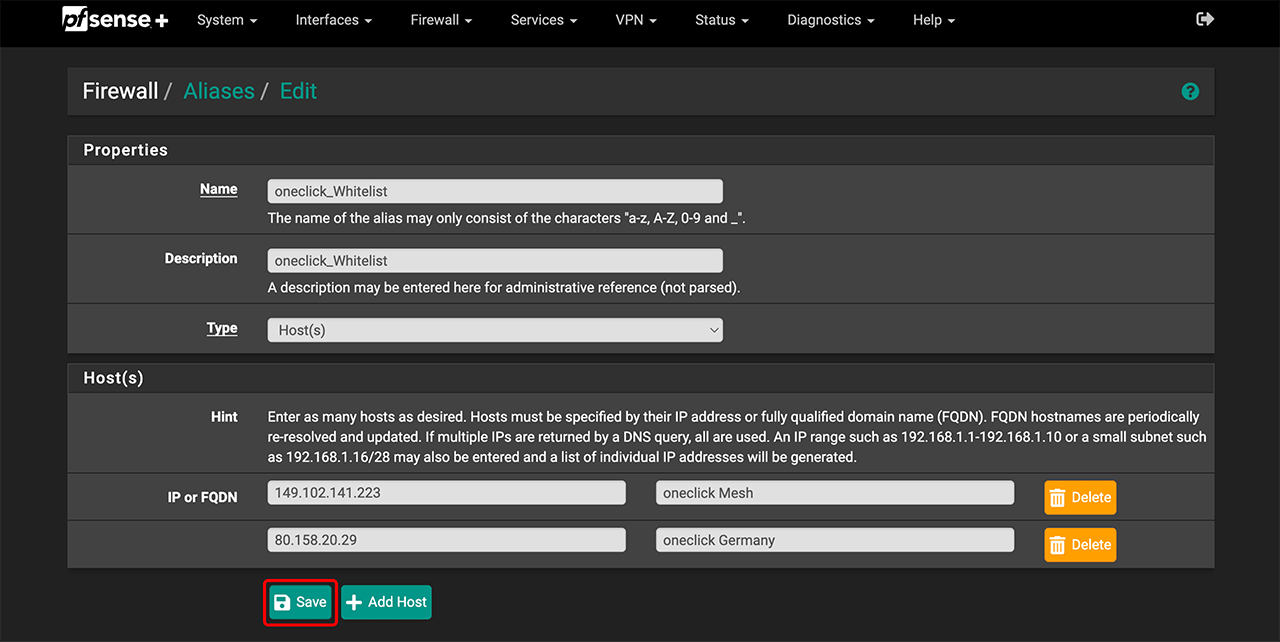
3. Whitelist oneclick™ IP addresses
- In the Firewall tab, go to Aliases.
- Select All and click Add.
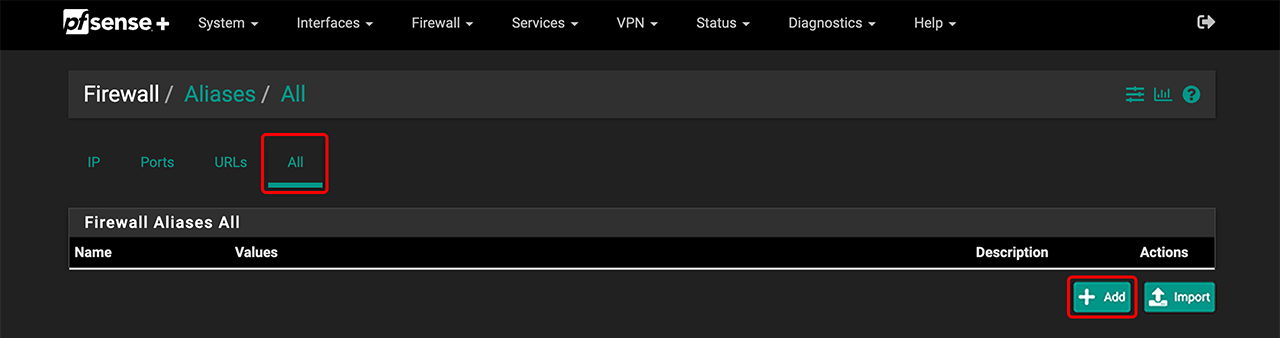
- Enter a name and description, e.g., oneclick_Whitelist.
- For “Type”, choose Host(s).
- Enter the IP addresses for oneclick™ Mesh and the outgoing IP address for your data center.
- Click Save.
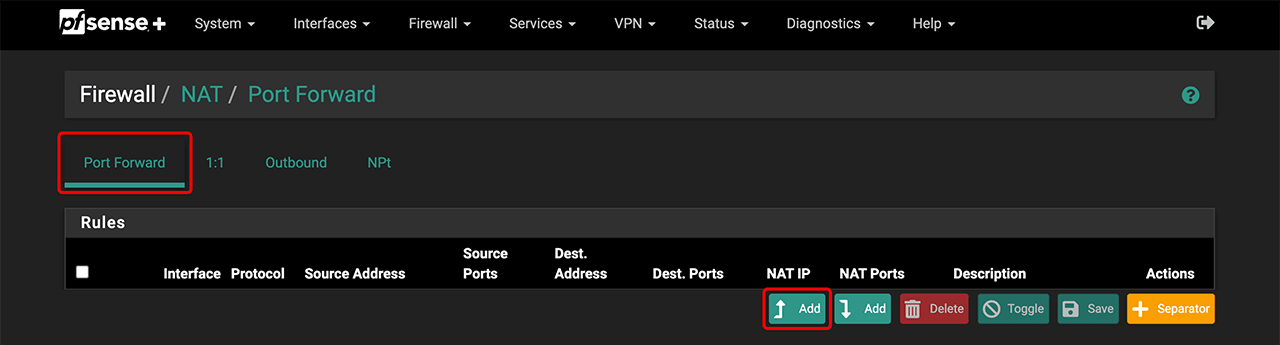
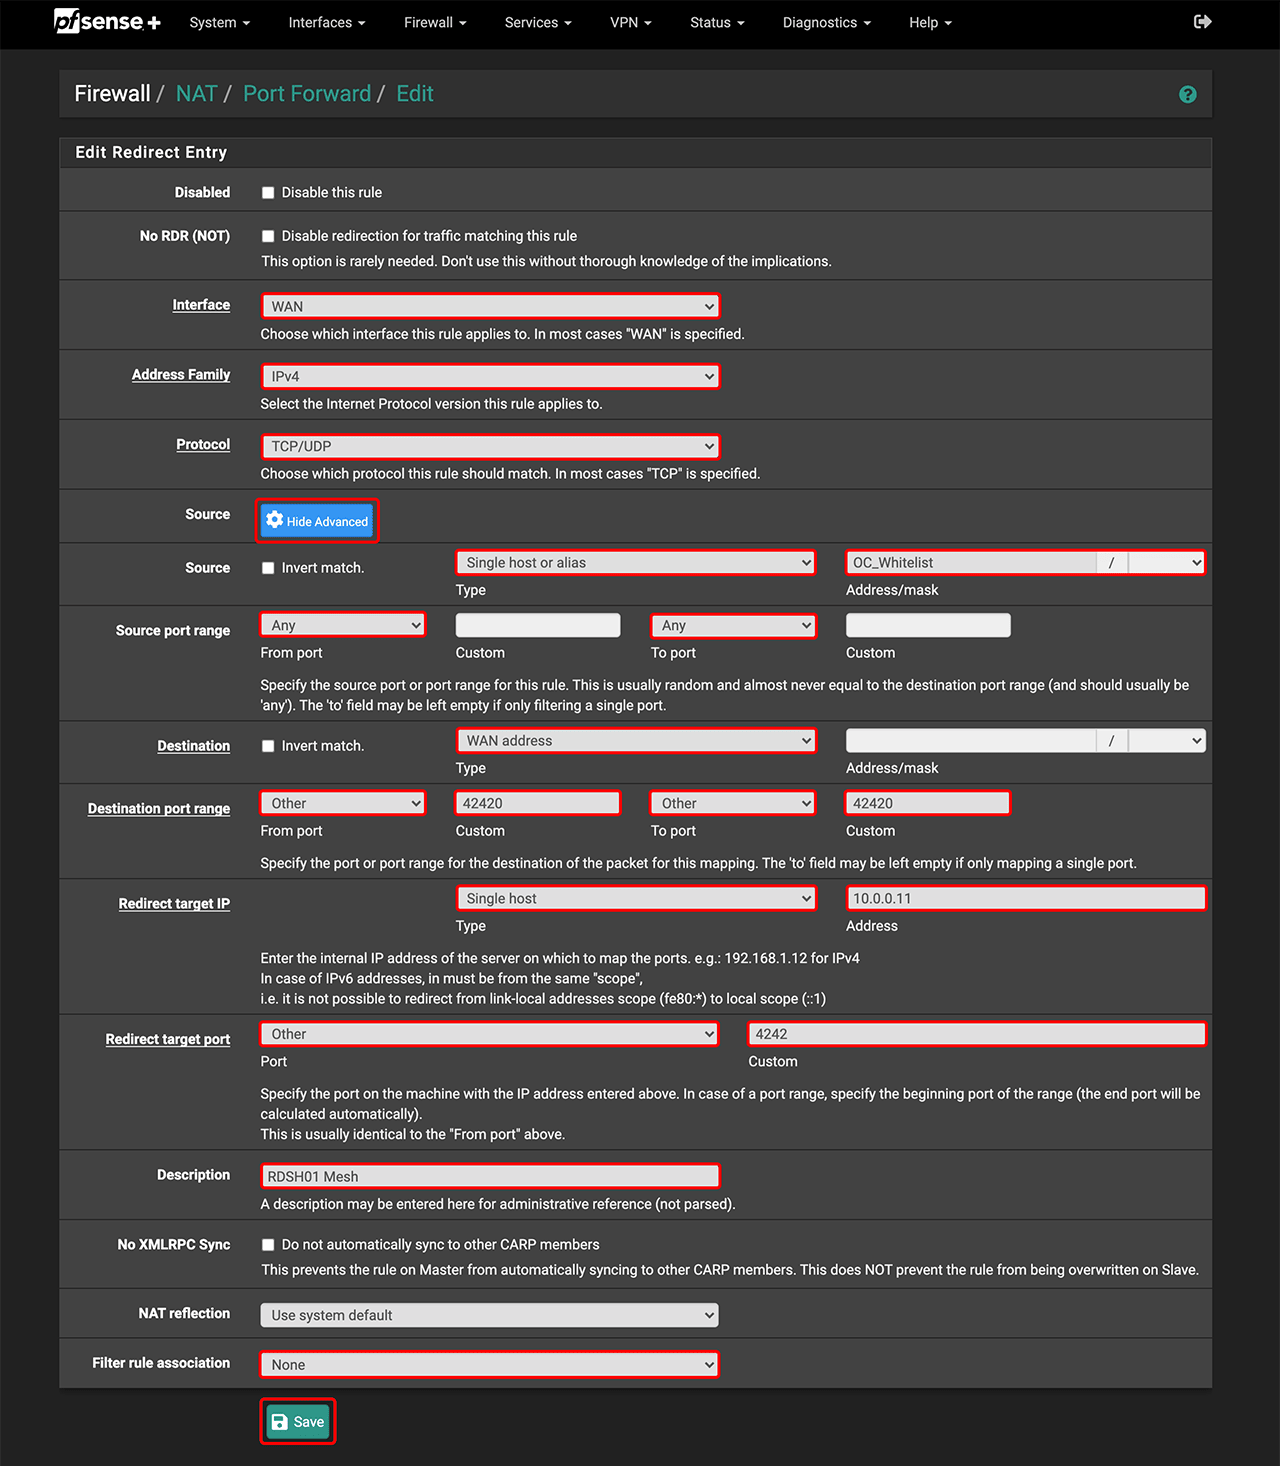
4. Configure port forwarding when using multiple clients (optional)
- In the Firewall tab, go to NAT.
- Select Port Forwarding and click Add.
- Under Interface, select WAN.
- For Address Family, choose IPv4.
- For Protocol, select TCP/UDP.
- Under “Source”, click Display Advanced.
- In the “Source” section, choose Single host or Alias and enter the oneclick_Whitelist address.
- Set Any for the “Source port range”.
- For “Destination”, select the WAN address.
- For “Destination port range”, choose Other and enter your translation port, e.g., 40420.
- For “Redirect target IP”, choose Single host and re-enter the internal IP address of your device.
- For “Redirect target port”, choose Other and enter 4242.
- For clarity, you can reuse the same description as in “Mapping”, e.g., RDSH01 Mesh.
- Under “Filter rule association”, choose None.
- Click Save.
5. Check connectivity in the oneclick™ Admin
- Your device will now appear in the destination system list. Click the synchronization icon in the row to verify connectivity.
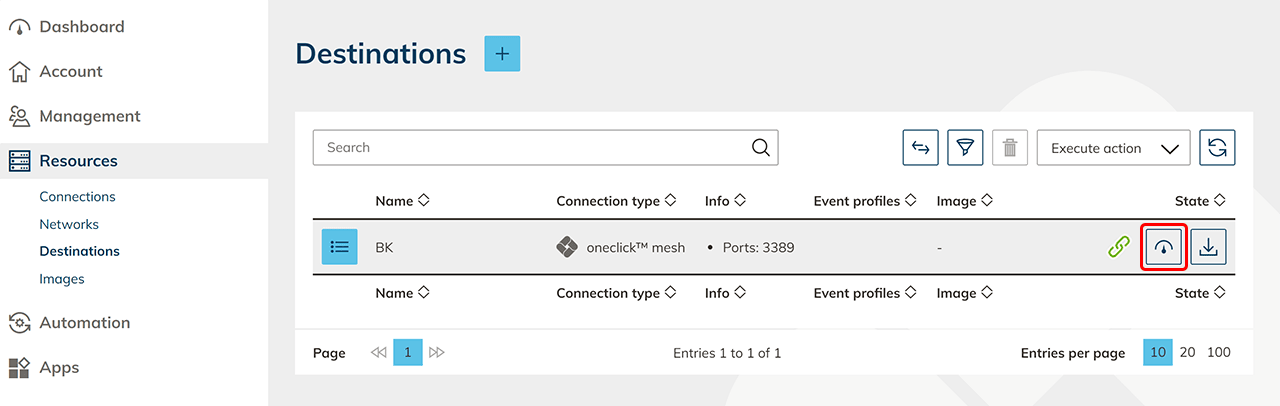
- Create an app configuration to configure access to your destination…
- …and then create an app instance for your oneclick™ users.
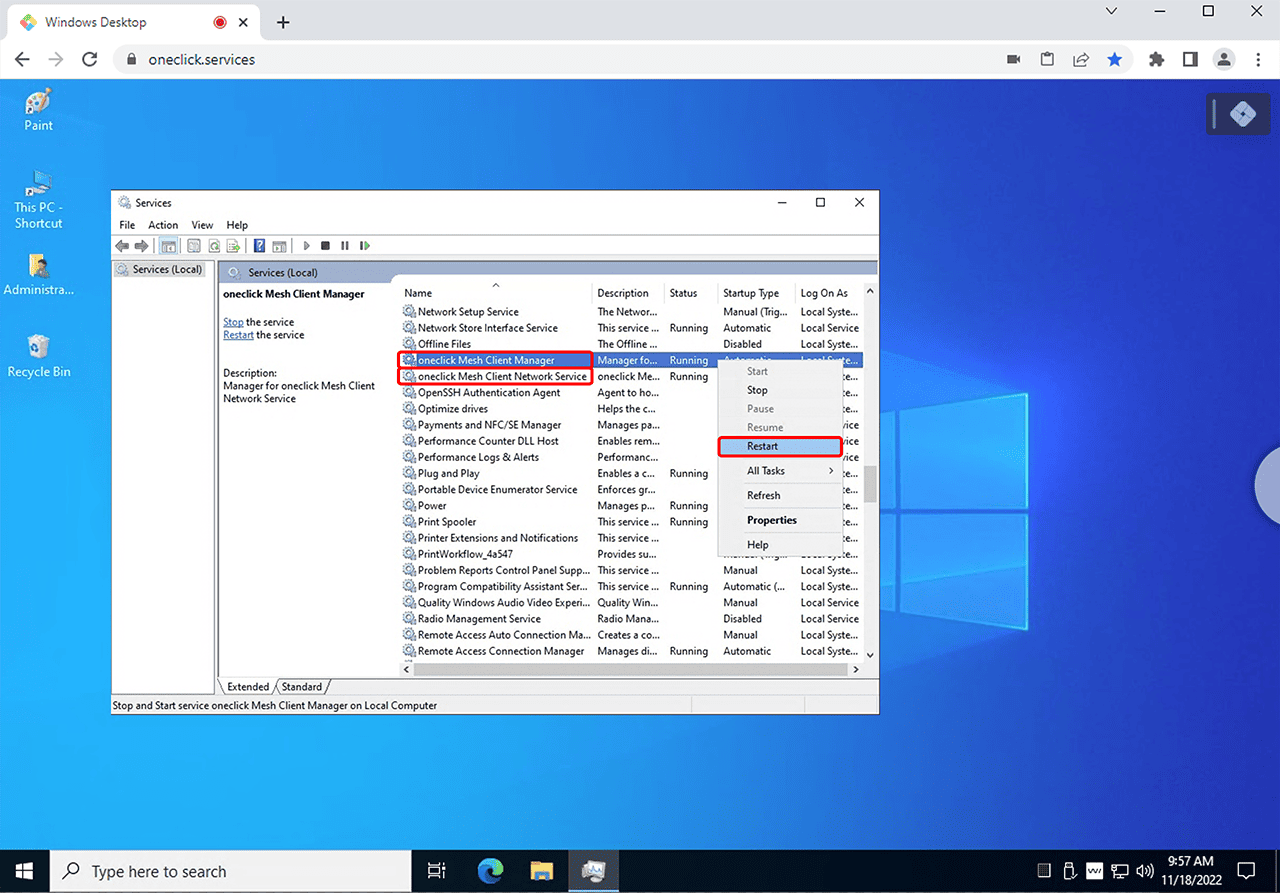
6. Restart the oneclick™ Mesh Service (optional)
You are already using the Mesh Client and have deleted the device’s IP address from your firewall (step 1). After enabling "UDP hole punching", restart the oneclick™ Mesh Service on the Windows device or delete the Mesh Client and reinstall it.
- Search for “Services” in the Windows start menu and open it.
- In Services, locate “oneclick Mesh Client Manager” and “oneclick Mesh Client Network Service”.
- Right-click one of the entries, select Restart, and repeat this for the second entry.
Alternatively, you can delete the Mesh Client and reinstall it.