Connect cloud resources
Using the oneclick™ Cloud Manager you can automatically create, read, and manage infrastructure from cloud providers supported by oneclick™ and grant your users access to it. You can see which cloud providers are enabled when connecting, as described in section 1.3.
Link or create a cloud subscription
Create a new cloud subscription via oneclick™
You do not have your own cloud subscription, but would like to create cloud resources directly in oneclick™? Then start with the cloud subscription licenses. Here you can create a subscription directly via oneclick™.
1. Link your own cloud subscription
Do you already have your own cloud subscription and possibly resources you want to pull from it?
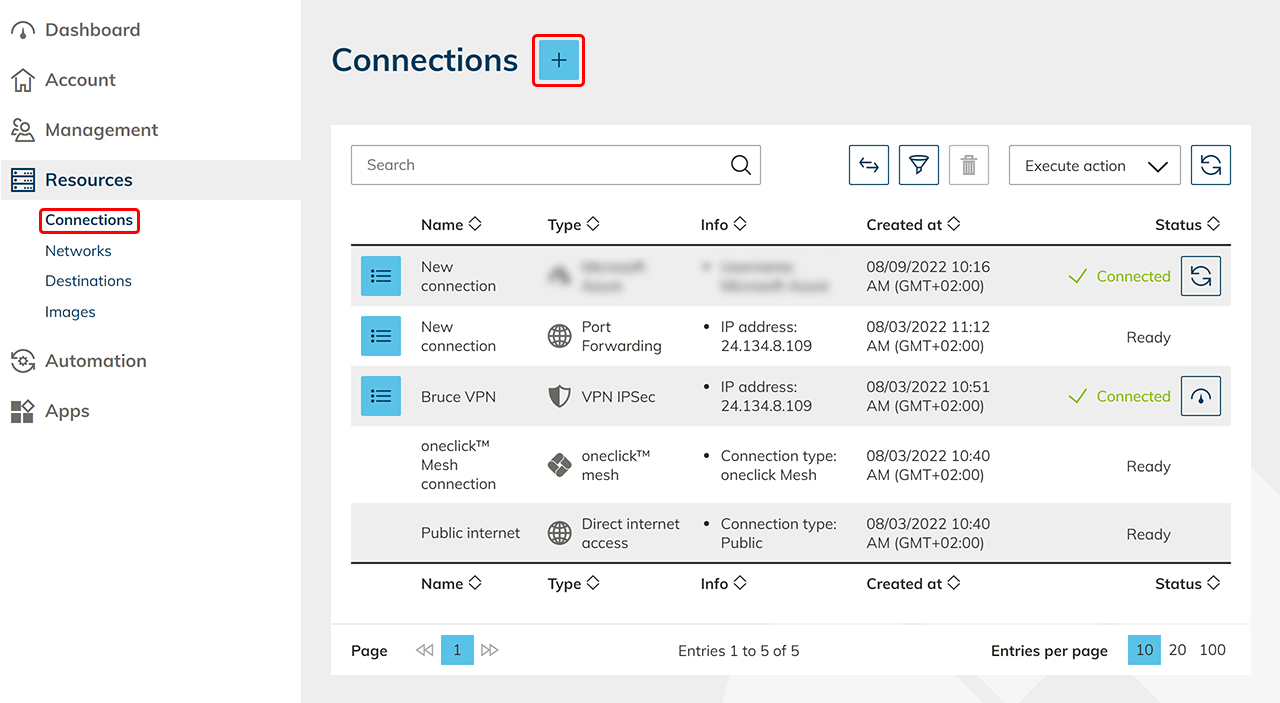
- Start in the Resources tab in the Connections item.
- Click on the Plus icon to create a new connection.
- Select the Cloud Subscription tile and choose the appropriate cloud provider.
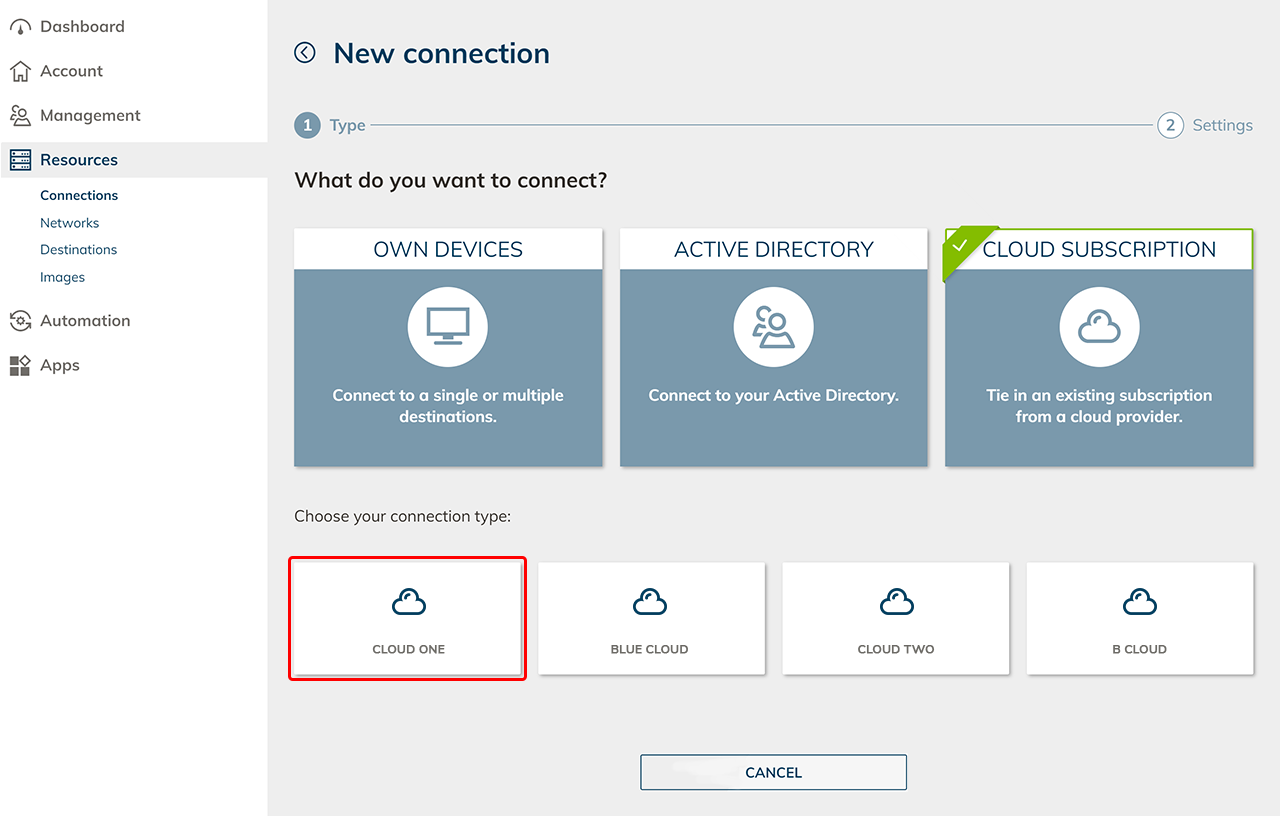
- You will need the data of your cloud subscription. Follow the link to the article of your cloud provider to do so.
- Give the connection any name, enter your subscription credentials and click Save.

- Your subscription is now connected. Existing networks and VMs are automatically read out and stored in the Resources tab under the corresponding item. If supported byyour cloud provider, oneclick™ will also read out all existing network security groups (NSG) in your subscription.
2. Create network and select location
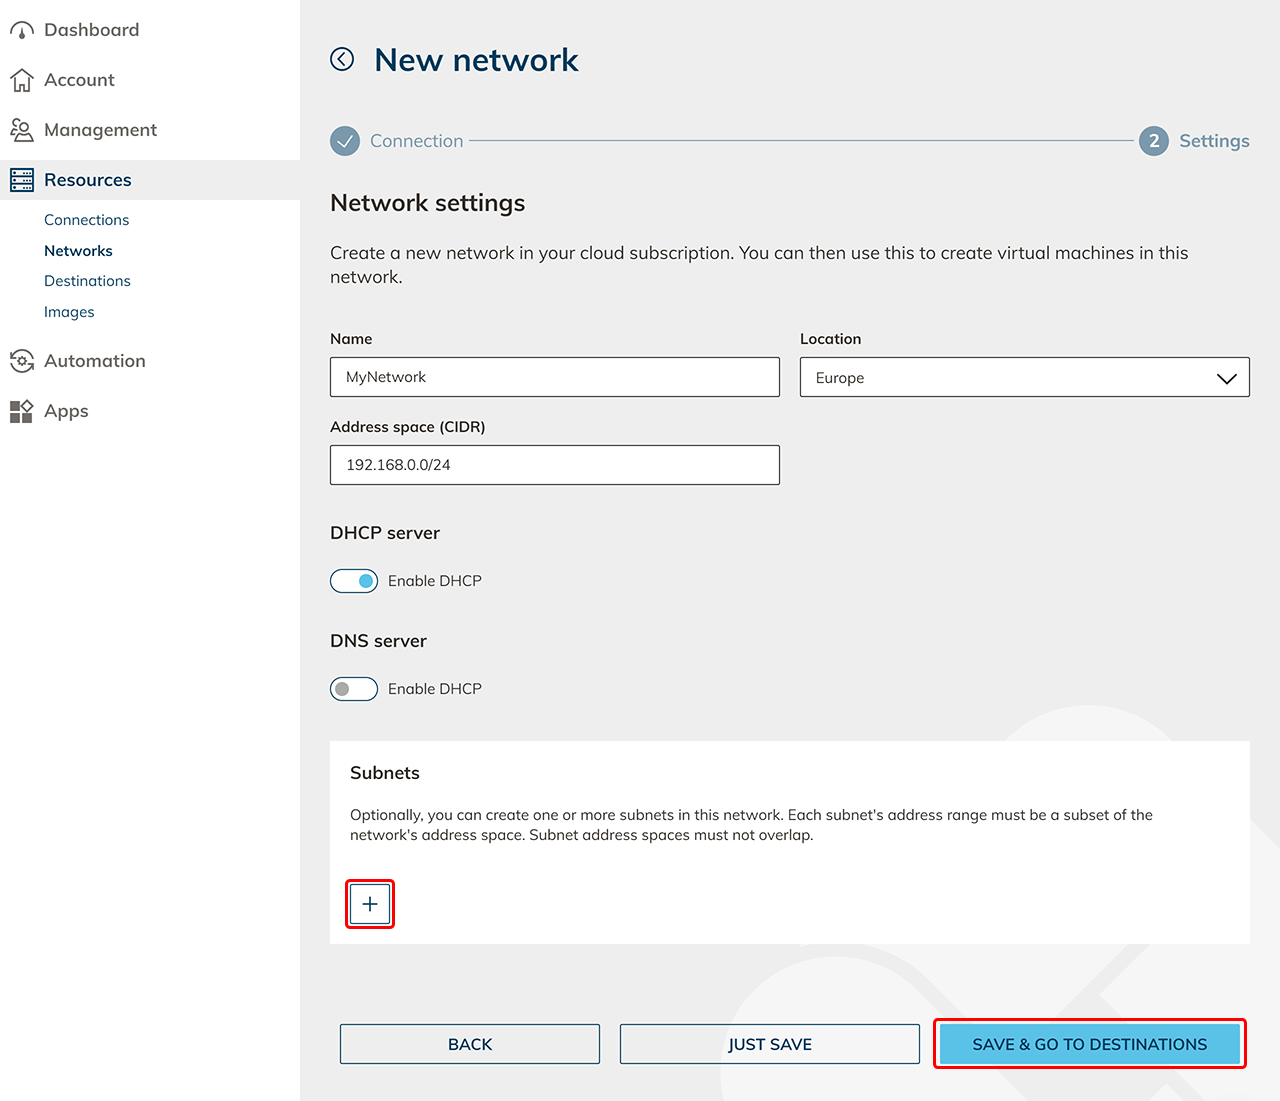
Networks that already exist in your cloud subscription are automatically read out by oneclick™ and will appear in the displayed list. Carry out the following steps to create a new network:
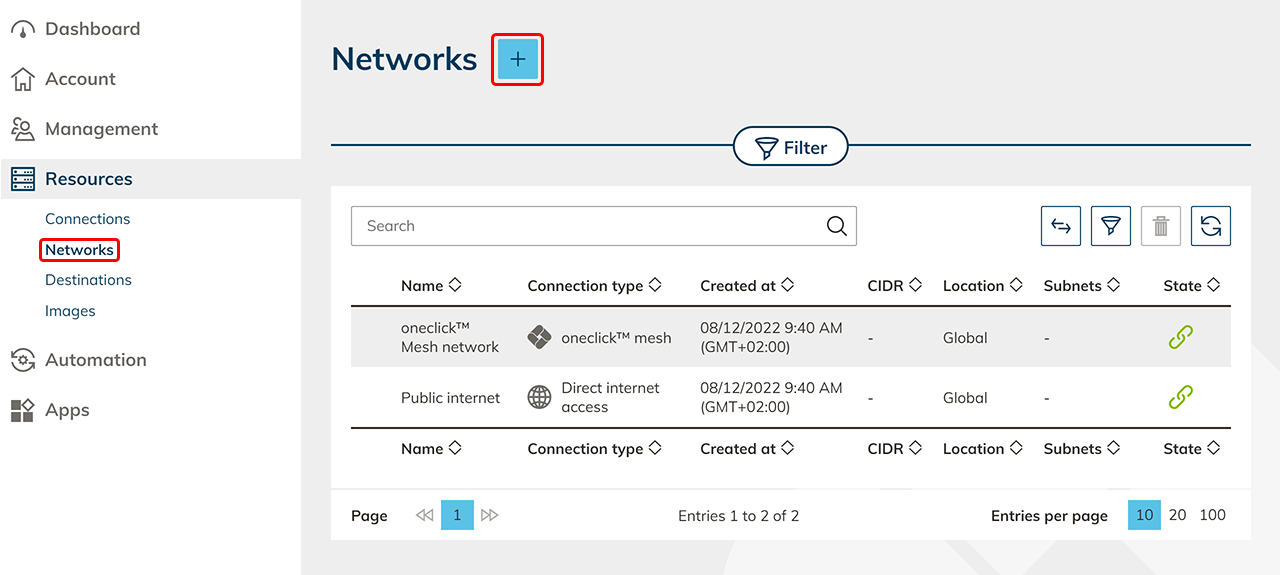
- In the Resources tab click Networks.
- Click on the Plus icon to create a new network.
- Select your connection and click Next.
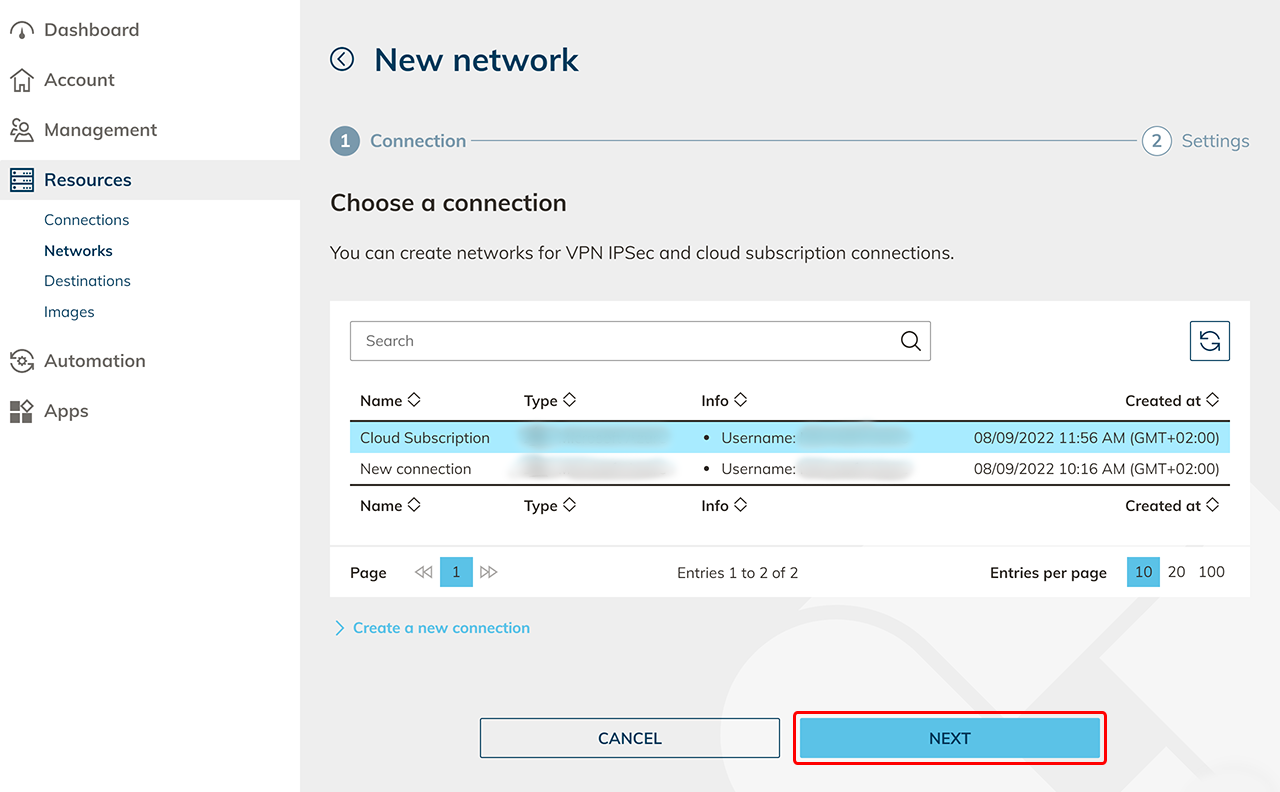
- Name your network, select the location where you want to build your infrastructure and enter the network's address space.

- Optionally, you can create subnets with some cloud providers.
- Save your entries.
3. Create network security groups (NSGs) (optional)
If supported by your cloud provider, NSGs that are already existing in your cloud subscription, for example, are automatically read by oneclick™ and can be selected when creating or editing a destination.
If not supported by your cloud provider, you may not be able to create your own NSGs.
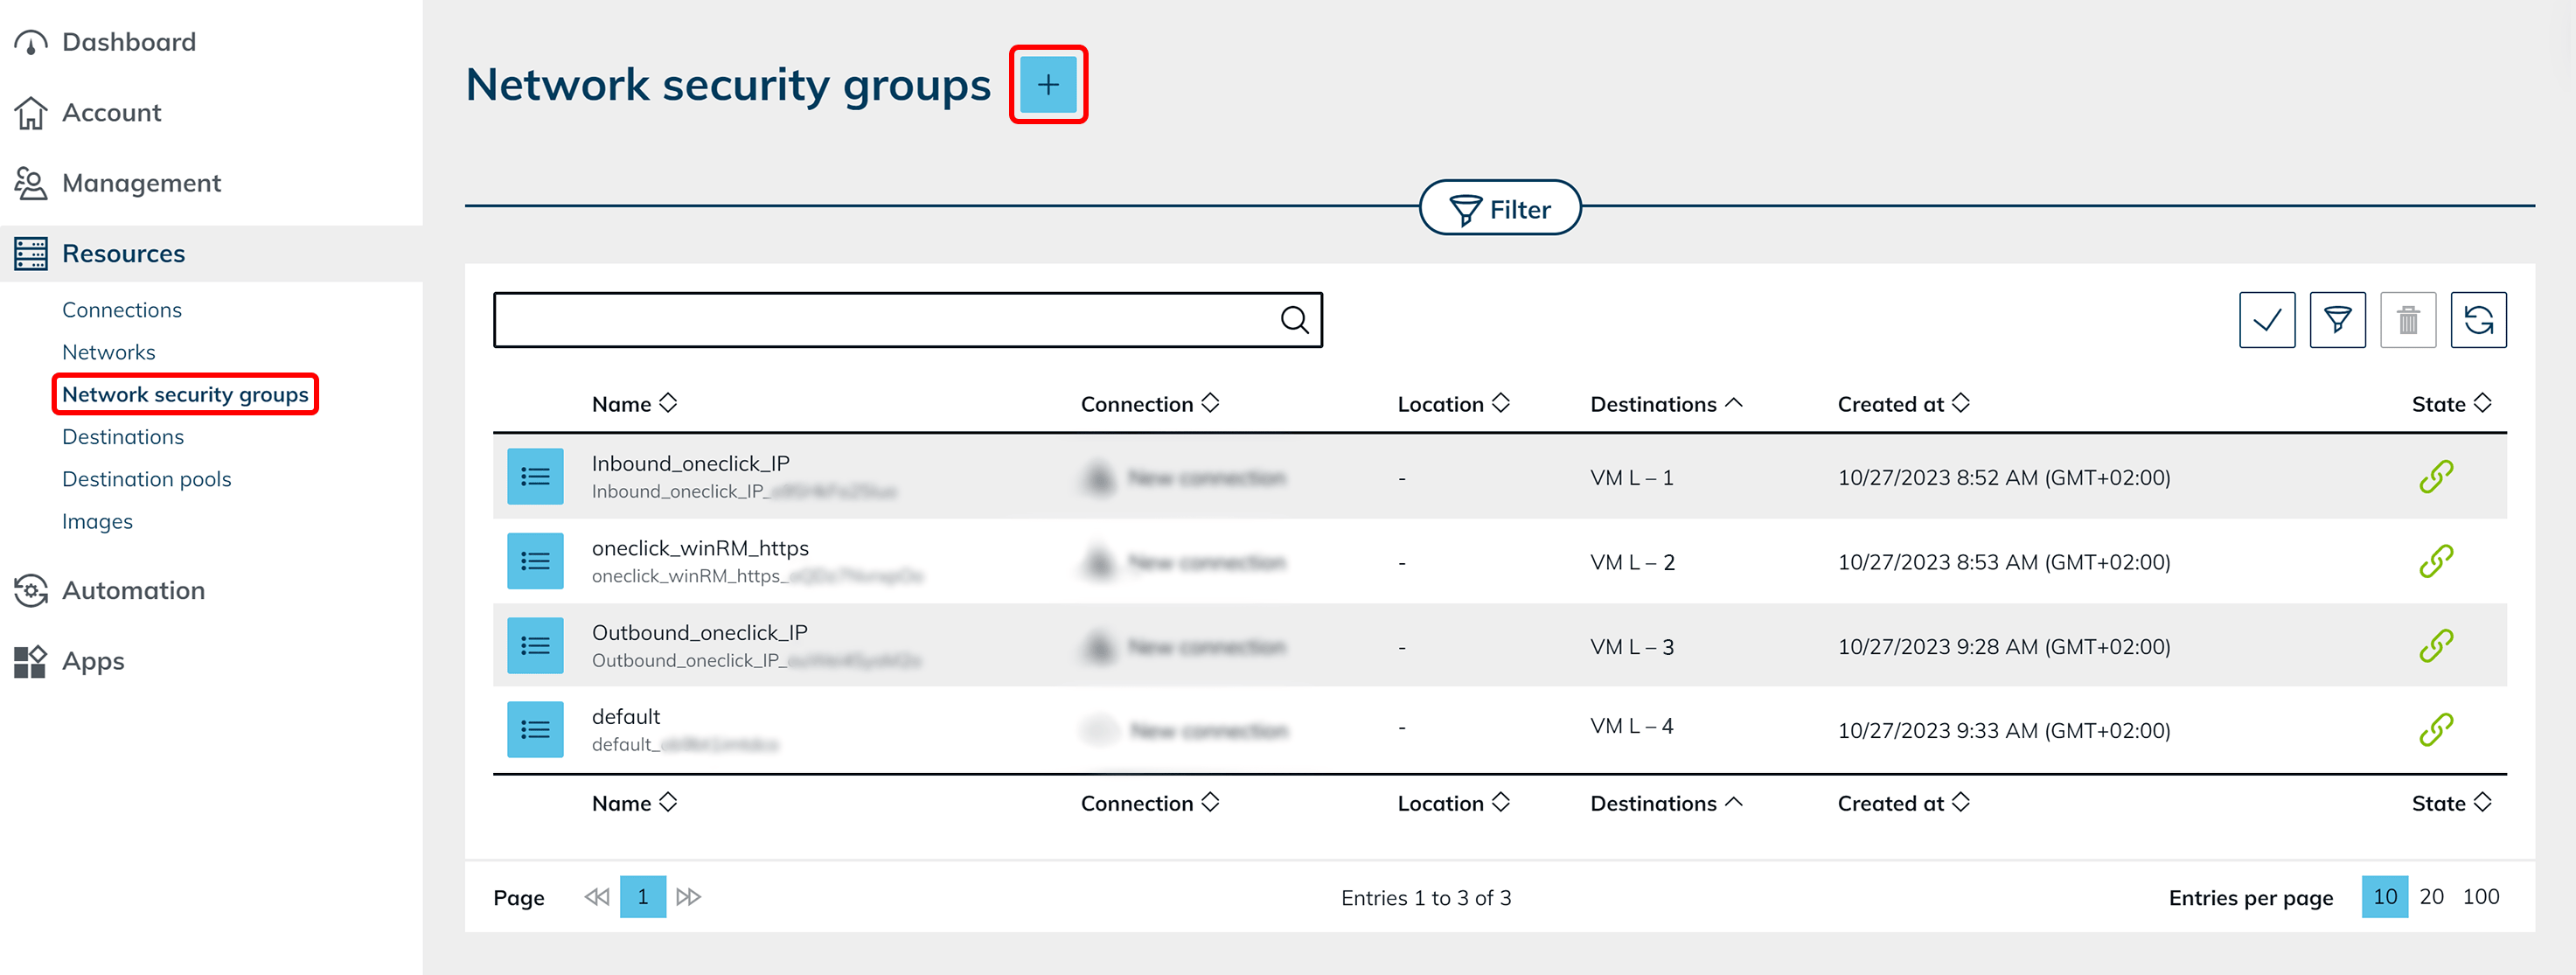
- In the Resources tab, switch to the sub-item Network security groups.
- To create a new NSG, click on the Plus icon in the upper area.
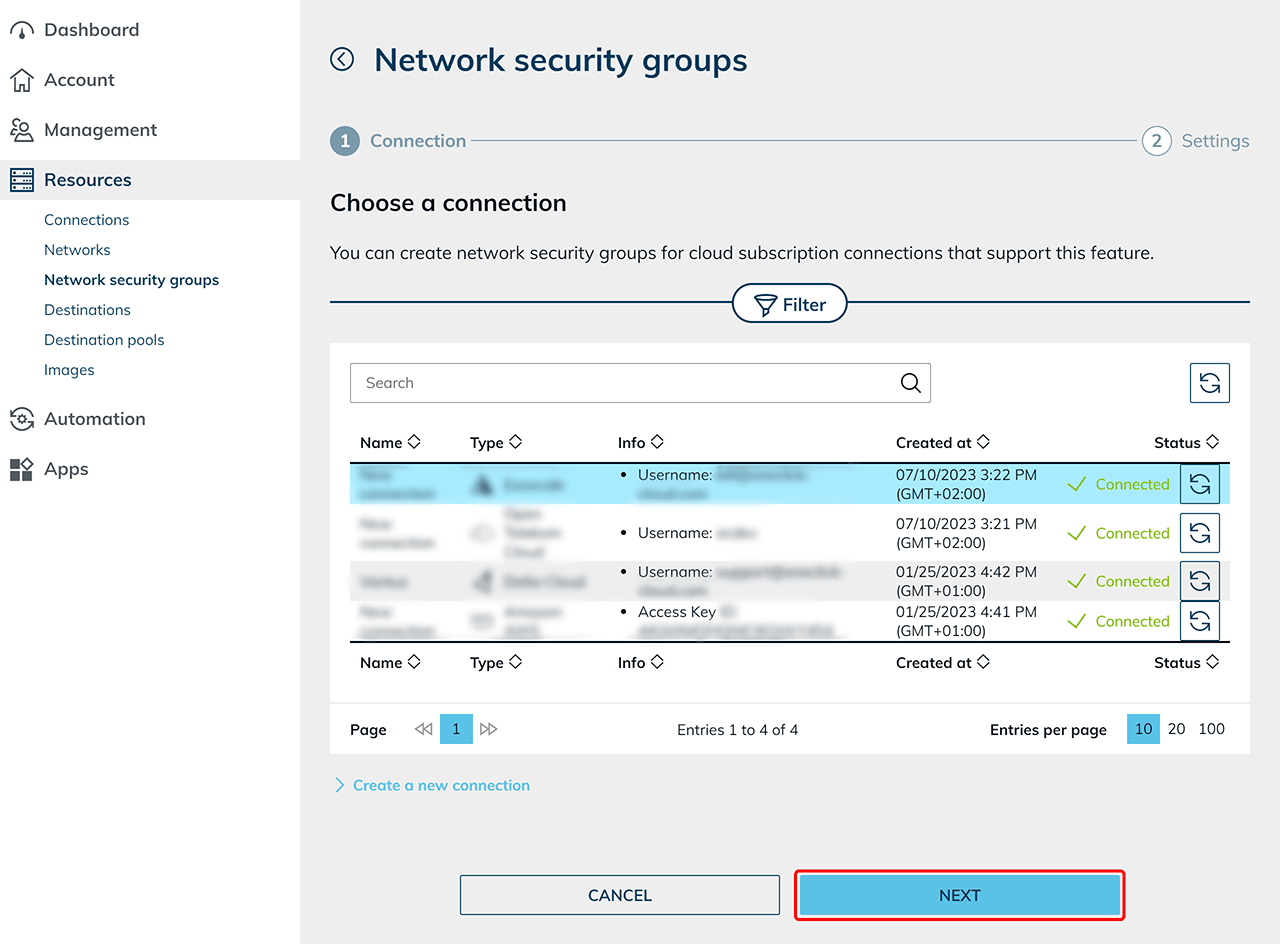
- Select the connection for which the group is to be created and click Next.
- In the next step, enter a name and select a suitable location.
Optionally, you can also add a description here.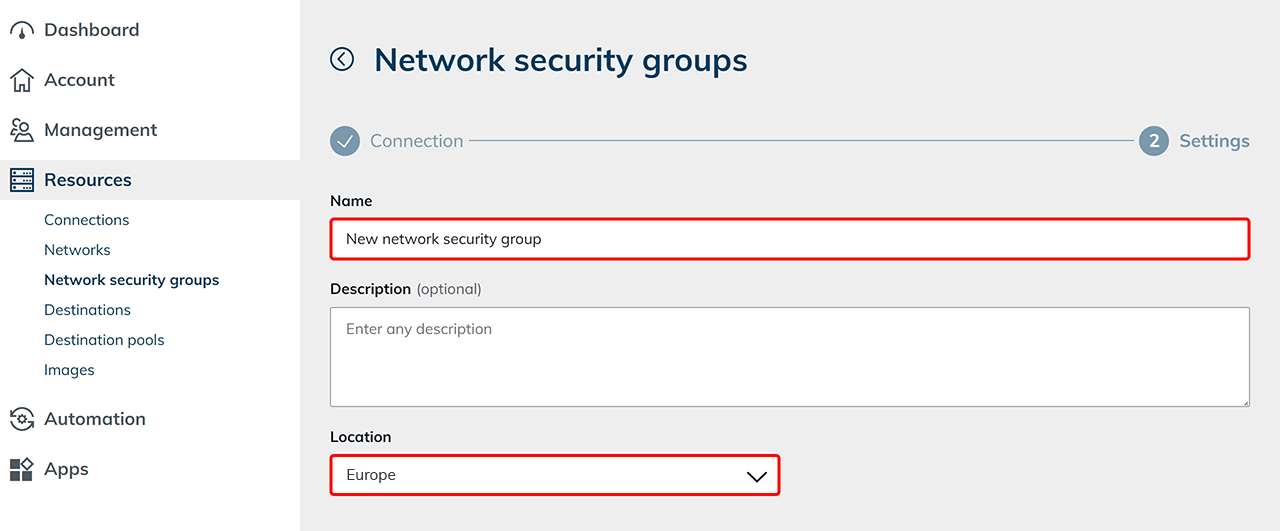
- Now create the firewall rules that should apply to this network security group. You can add any number of rules for both incoming and outgoing data traffic using the Plus icon. Please note that in order to connect with oneclick™, the corresponding firewall rules must be added for both incoming and outgoing data traffic (if not already done by the cloud provider itself) to make access is possible.

oneclick™ supports the TCP and UDP protocols. If you have other protocols in use, you have to configure them via the console of the cloud provider. Other protocols won’t be displayed or executed in oneclick™. - Save your entries.
4. Create cloud destination
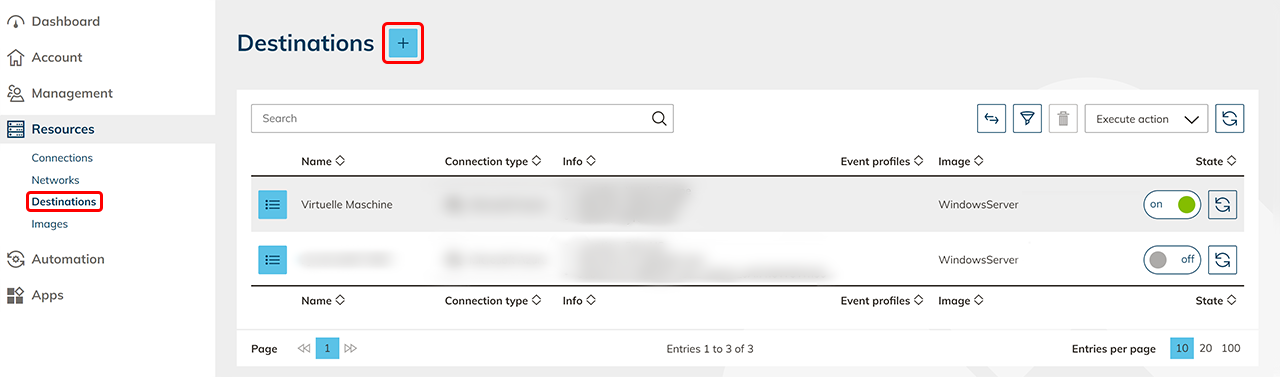
Cloud destinations that already exist in your subscription are automatically read out by oneclick™ and specified in the displayed list. Carry out the following steps to create a new cloud destination:
-
Go to Destinations and then click on the Plus icon to create a new destination.
-
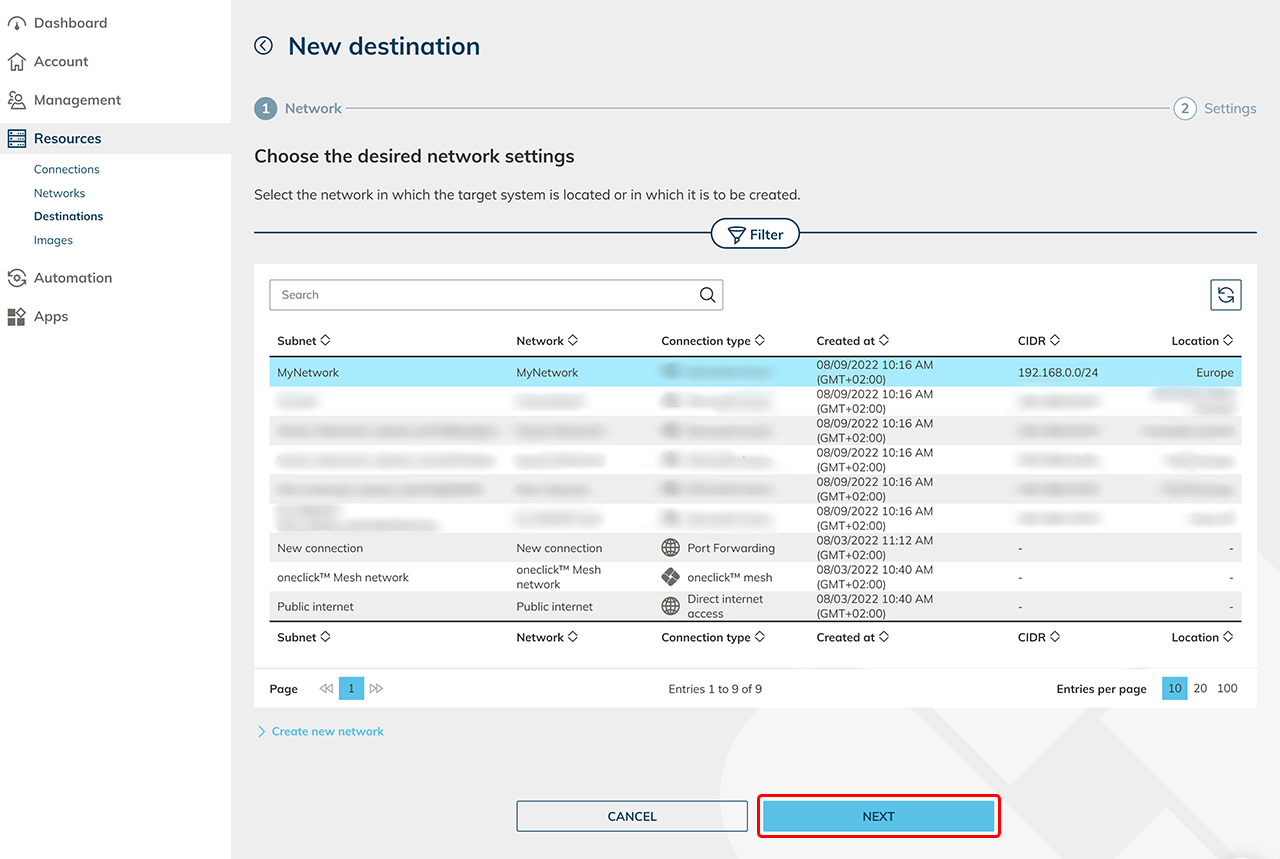
Select the previously created network.
-
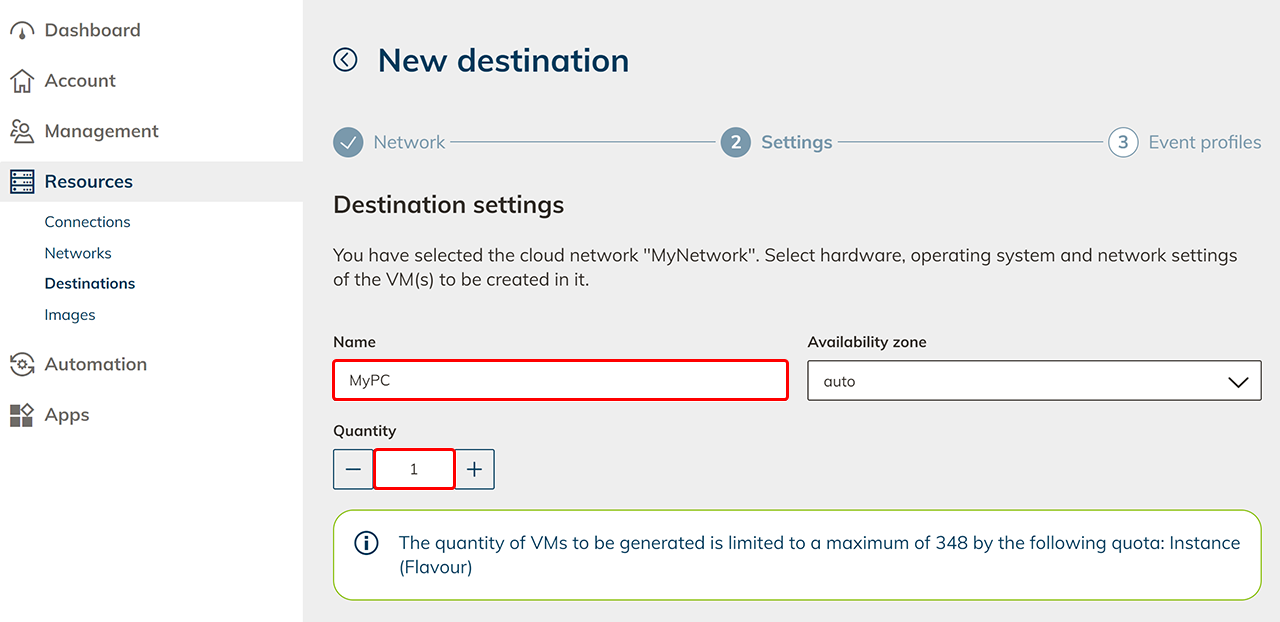
Make all the settings for the virtual machine you want to create.
Please note that individual points may vary depending on your cloud provider or subscription and may therefore not be available in your view.Designation of the VM
Give your VM a meaningful name. Creating multiple virtual machines with identical settings, these will be numbered consecutively by adding a number at the end of the name, e.g. VM - 1, VM - 2.
You can optionally display this name for your users.Select availability zone
With some cloud providers, you can select the availability zone in which the VM is to be created.
For better reliability, you can ensure that you create one server in one zone and the other in a different one.Select quantity
Select the number of identical infrastructure to be created.
Select instance
Filter the list with the various instances by selecting an application area. Select any suiting instance.
- The number of instances that can be created varies depending on the amount of your available quota. The quota limits RAM or CPU, for example. Therefore, you cannot create as many larger instances as smaller ones.
- Which instances can be selected depends on your subscription, the selected location and a previously selected image.
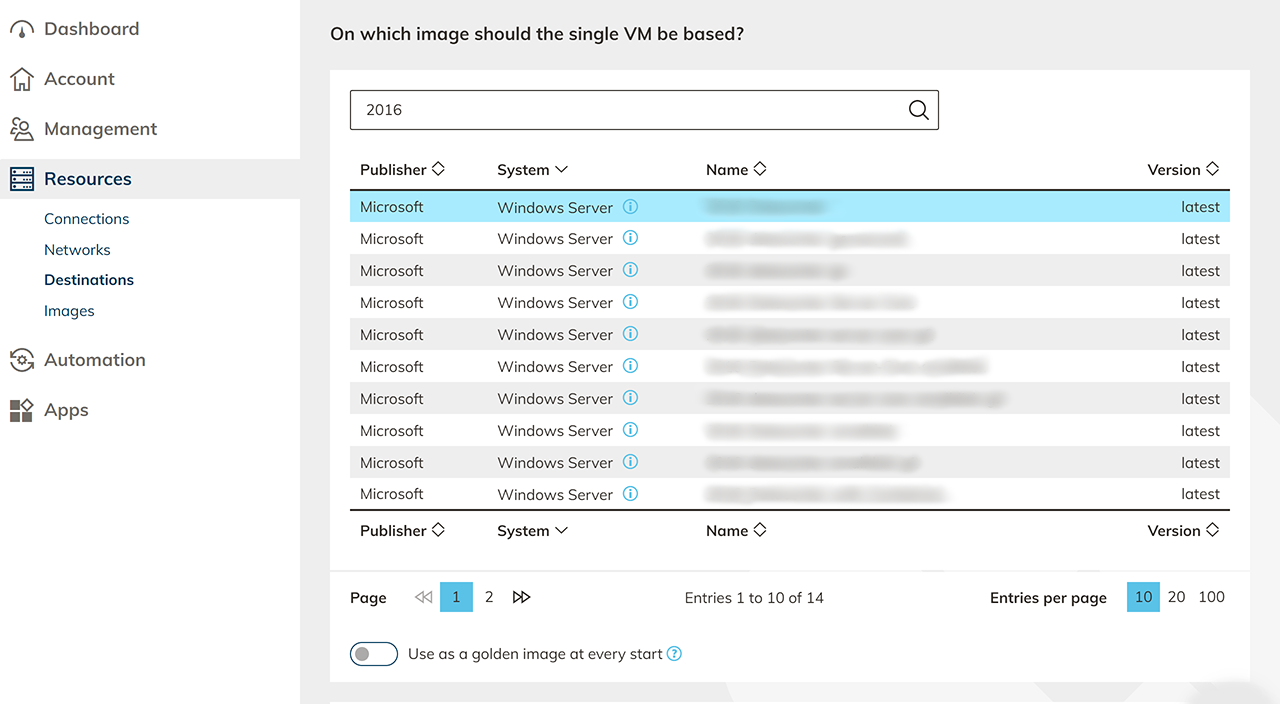
Select image
Select an image with which the instance is to be equipped.
- The images available for selection depend on your subscription, the selected location and your chosen instance.
- If you have generated your own image in advance, you can select it here.
- Optionally, you can choose whether you want to use the golden image function every time you are starting the virtual machine. The original state of the image is restored by switching the VM off and on again.
Select disk type and size
Select the disk type and the disk size and make optional network settings.
If you do not assign a public IP address, your VM can only be accessed from the internal network. This is useful for a pure database server, for example. If you still want to access this VM, you can, for instance, use a gateway server or another VM with a public IP address (jump host) and then optionally install the oneclick™ mesh client for direct access via oneclick™.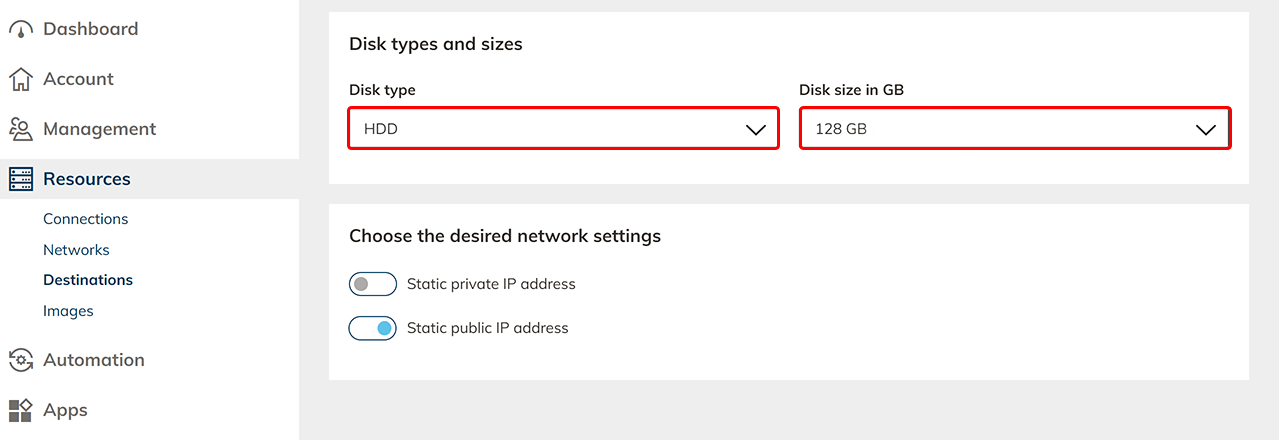
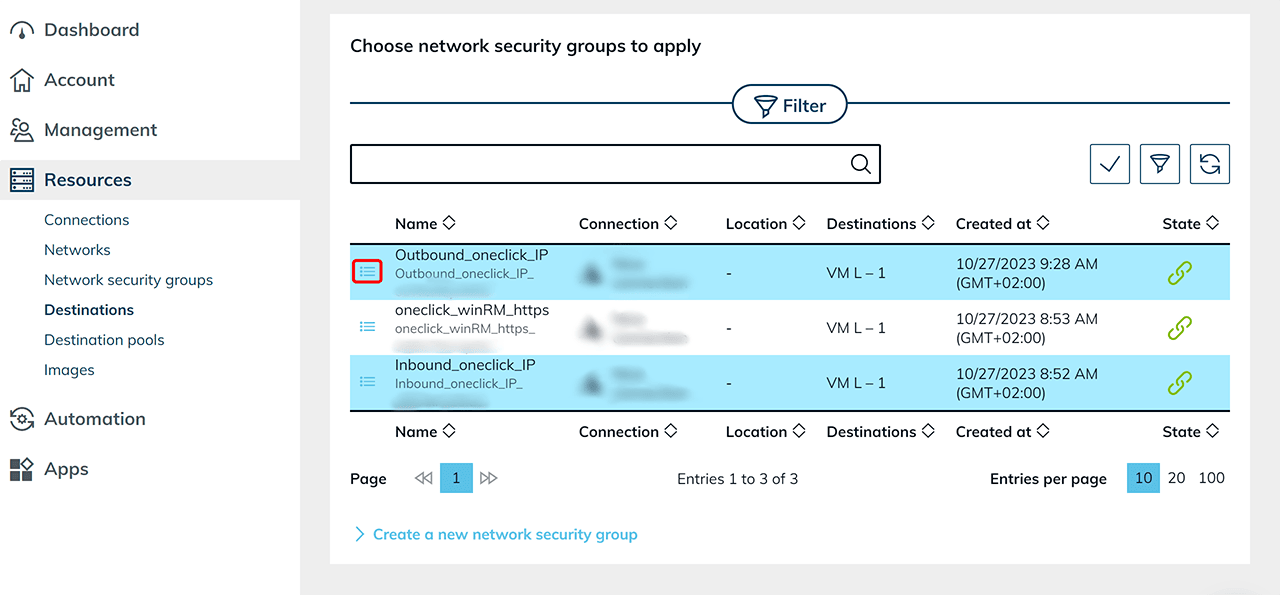
Select network security group (NSG) or adjust firewall rules
Select network security group (NSG)
If supported by your cloud provider, you can select one or more NSGs here. Click on the List icon to go to the details page of the corresponding NSG: Check whether access is authorised by oneclick and whether your cloud provider requires a rule for outgoing traffic.
Adjust firewall rules
A oneclick™ firewall rule is automatically added depending on the image selection for the oneclick™ IP addresses. This rule allows oneclick™ to connect to the VM. If wanted, you can add further firewall rules.
 oneclick™ supports the TCP and UDP protocols. If you have other protocols in use, please configure them via the cloud provider's console. Other protocols won‘t displayed or processed in oneclick™.
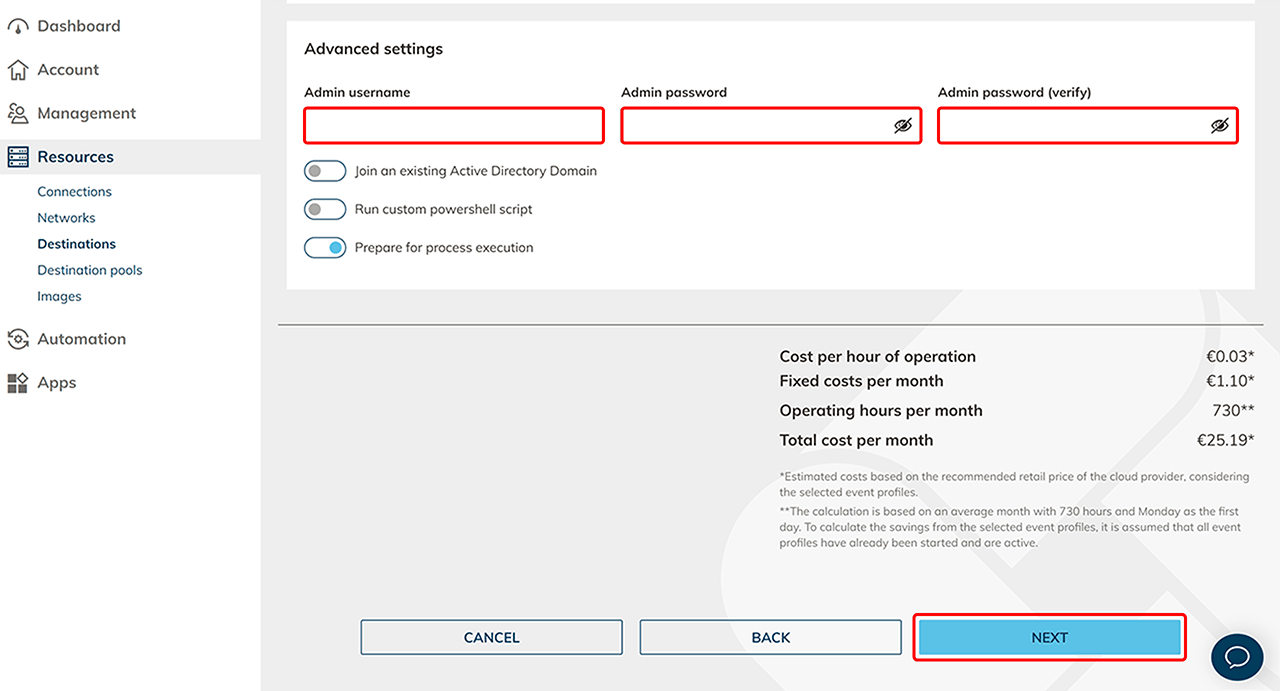
Advanced settings
Assign initial admin login data and remember it. You will need to enter it later when creating the app instance.
 Optionally, with some cloud providers you can join an existing Active Directory with this VM or run a user-defined PowerShell script directly on a VM with a Windows environment.
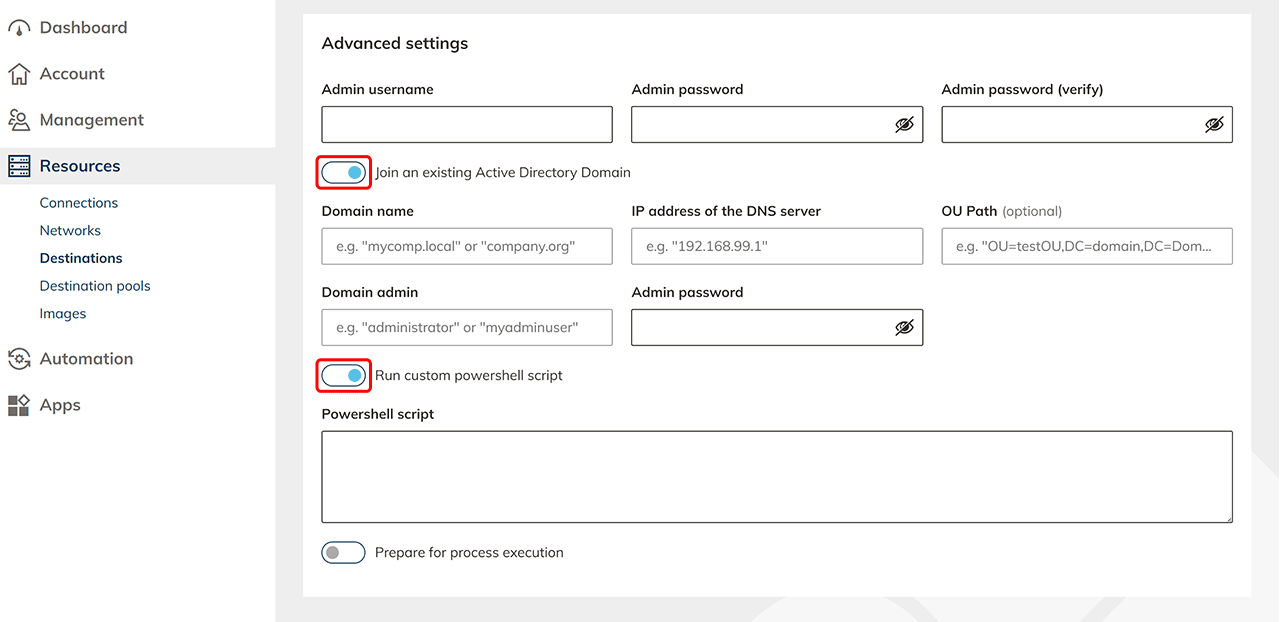
Please note that the runtime of the script is limited to 15 minutes. If a restart is carried out during this time, the runtime begins again. To prevent your script from being executed again after restarts, it should check whether an execution has already taken place and save after each execution that the script has already been executed. The IsDone and SetDone functions are available for this purpose and can be used as follows.if (!(IsDone("mytask"))) {
Write-Host "running mytask"
SetDone("mytask")If you want your script to be executed again after a restart, do not use functions such as restart computer or shutdown for the restart. Instead, you can use the function RestartRerun. For VMs with a Linux environment, a bash script can be executed as an equivalent.
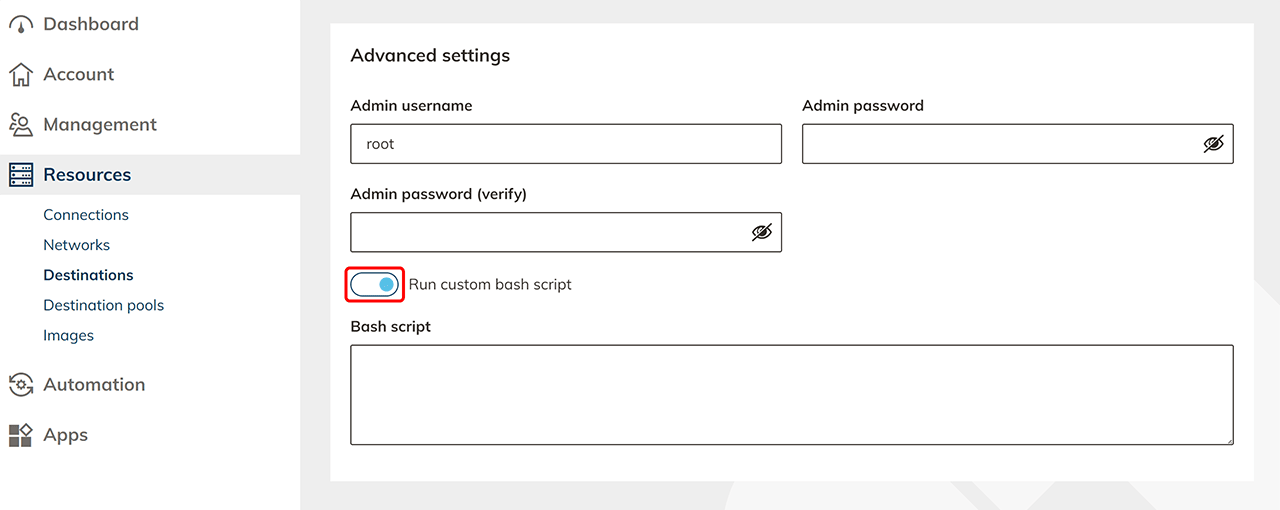
Preparing your resource for process execution is activated by default. To be able to use the process function via oneclick™, WINRM is activated on your resource. If you do not want to use this function, deactivate it and an estimated price per month will be displayed. Click on Next.
The prices displayed are updated on an ongoing basis. The official prices of the respective cloud provider are always relevant for billing.
-
Select one or more event profiles to be used for this infrastructure. Click on Save.
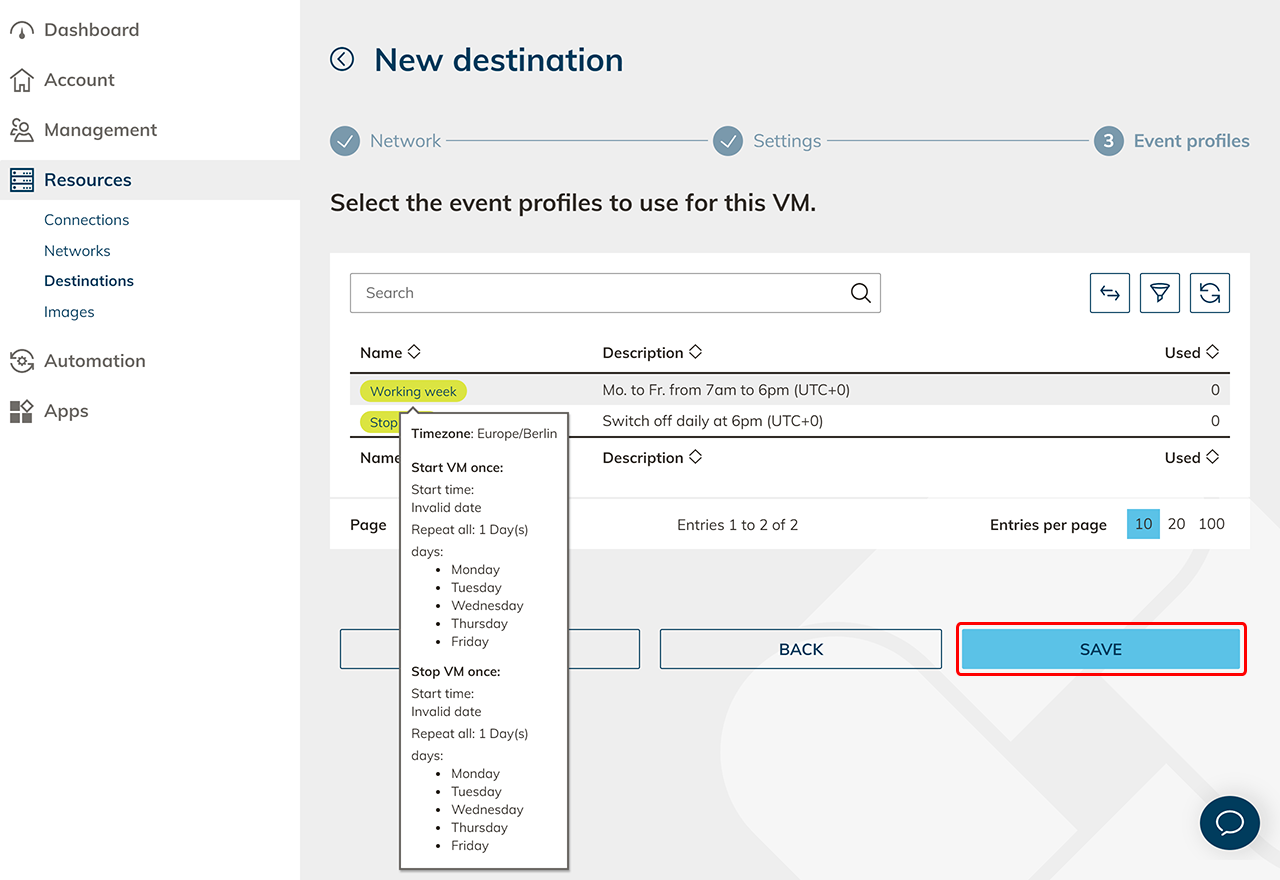
Your virtual machine will now be created. The process may take some time.
As long as the virtual machine is still being created and the loading icon is displayed, do not press the synchronization button, as this could damage the newly created virtual machine.
If you want to create more than 20 identical single VMs, it is usually worth setting up RDSH roles on an appropriately equipped virtual machine with Microsoft Server as an operating system and creating a shared RDS environment.
5. Create a destination pool
You can tell that the virtual machines have been created by the on/off switch that appears on the right in the destination‘s row.
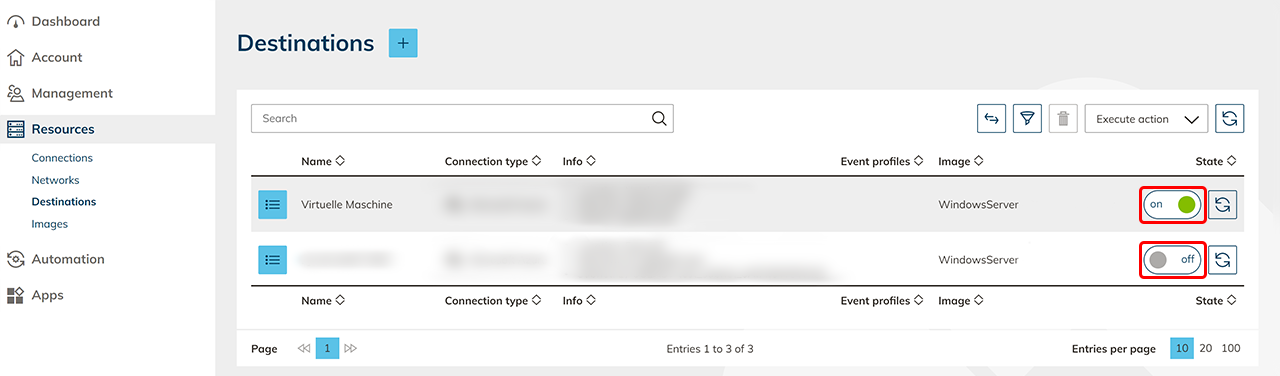
Now, create a destination pool in which you include one or more related destinations. This step is not necessary if you want to connect an internal website or a private Active Directory.
6. Create and assign app configuration
If you want to access the destination via oneclick™ streaming, configure the app access. It is best to create app instances for your oneclick™ users directly afterwards.
7. Set up a virtual machine and create an image of the master VM
If you have used a public image to create the VM, create a private image for later use after you have set up your virtual machine.
8. Send oneclick™ registration link
As soon as you have completed all the steps above, you can give your users access to oneclick™. For the final step in this process send a login link.