Port Forwarding
Port forwarding allows individual on-premises resources connected to the internet via a network or router to be specifically made accessible.
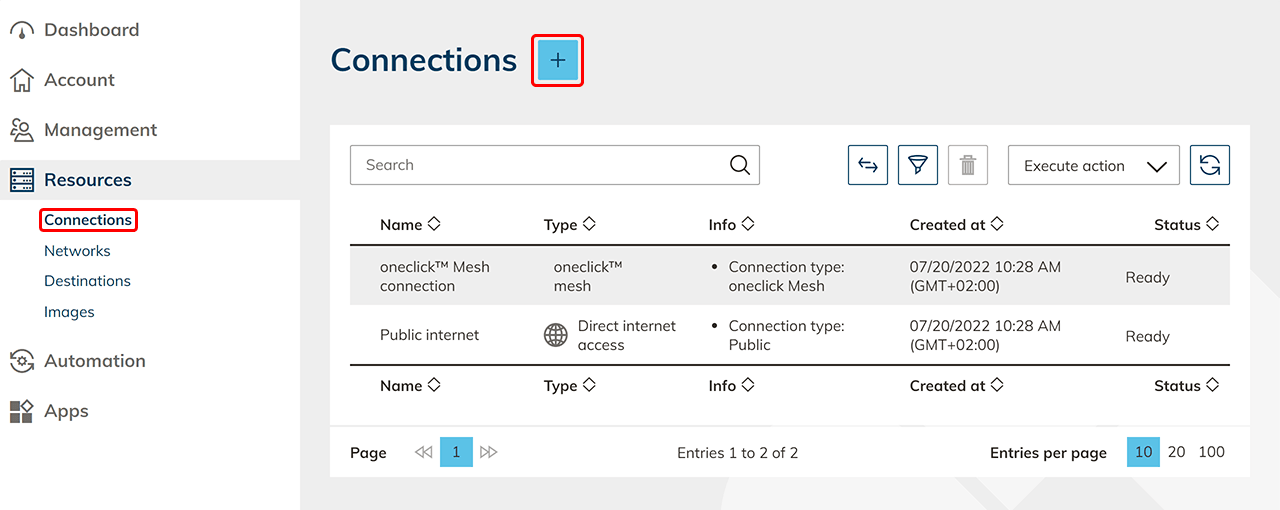
- In the Resources menu, click on the Connections tab.
- Click on the Plus icon to create a connection to oneclick™.
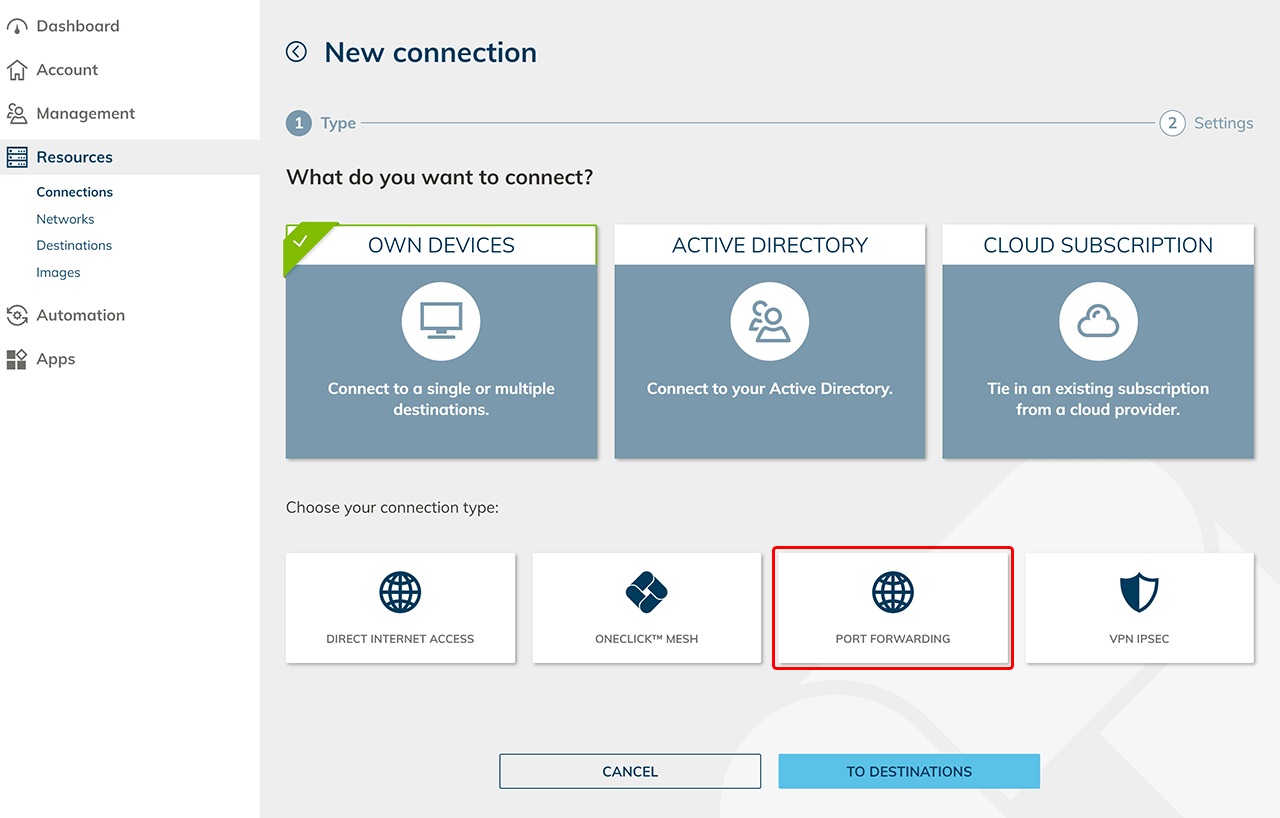
- Under Own Devices, select the Port Forwarding tile.
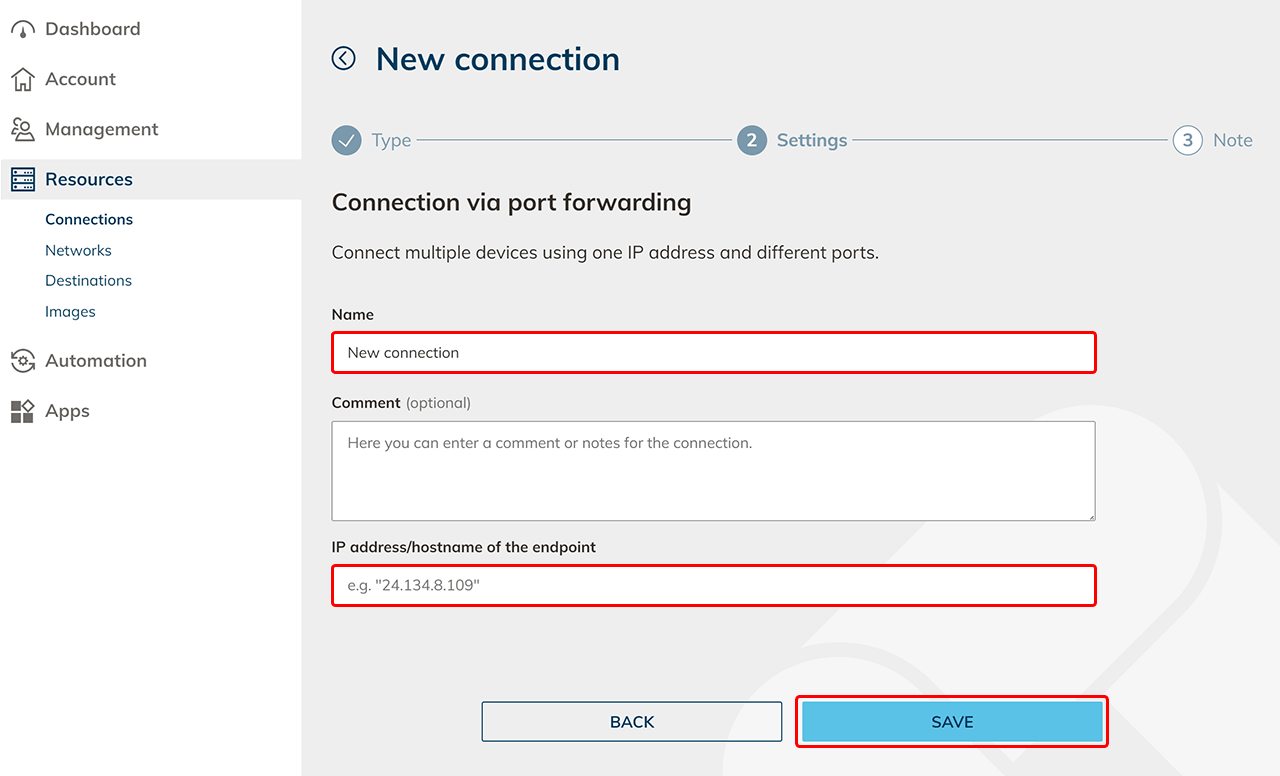
Give the new connection any name and enter the IP address or hostname of the endpoint, e.g. your router. Click Save.
A network entry will be created automatically.
- To increase security, we recommend that you optionally add the oneclick™ IP address to your whitelist. You can download a PDF in which the IP address is stored. Click on Download PDF. Alternatively, go directly to Destinations.
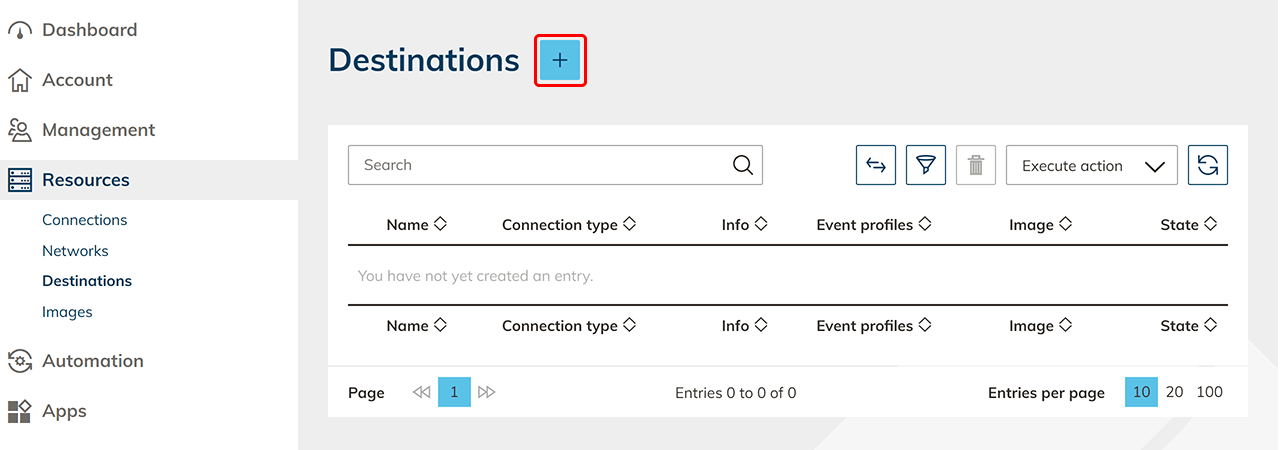
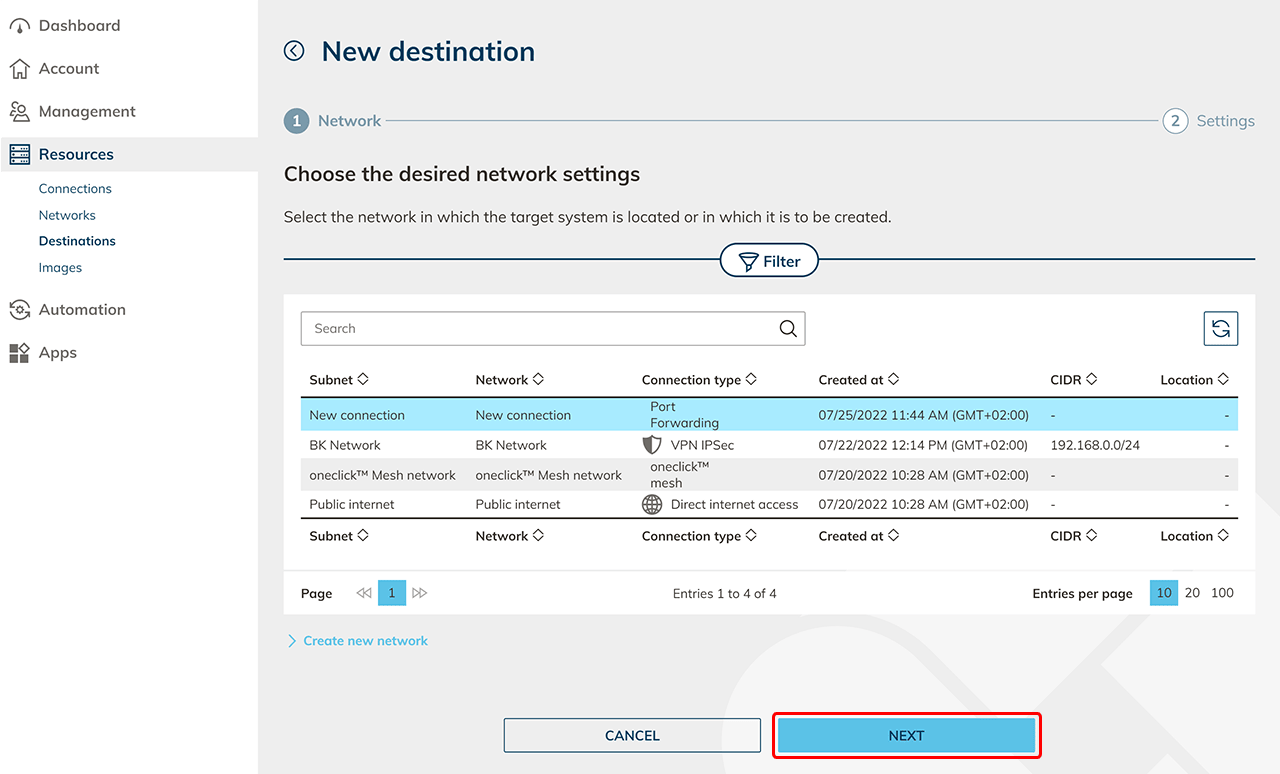
- Click on the Plus icon to create a new Destination.
- Select the automatically created network entry for the Port Forwarding connection and click Next.
- Enter a descriptive name, the port and optionally an info for better findability in tables.
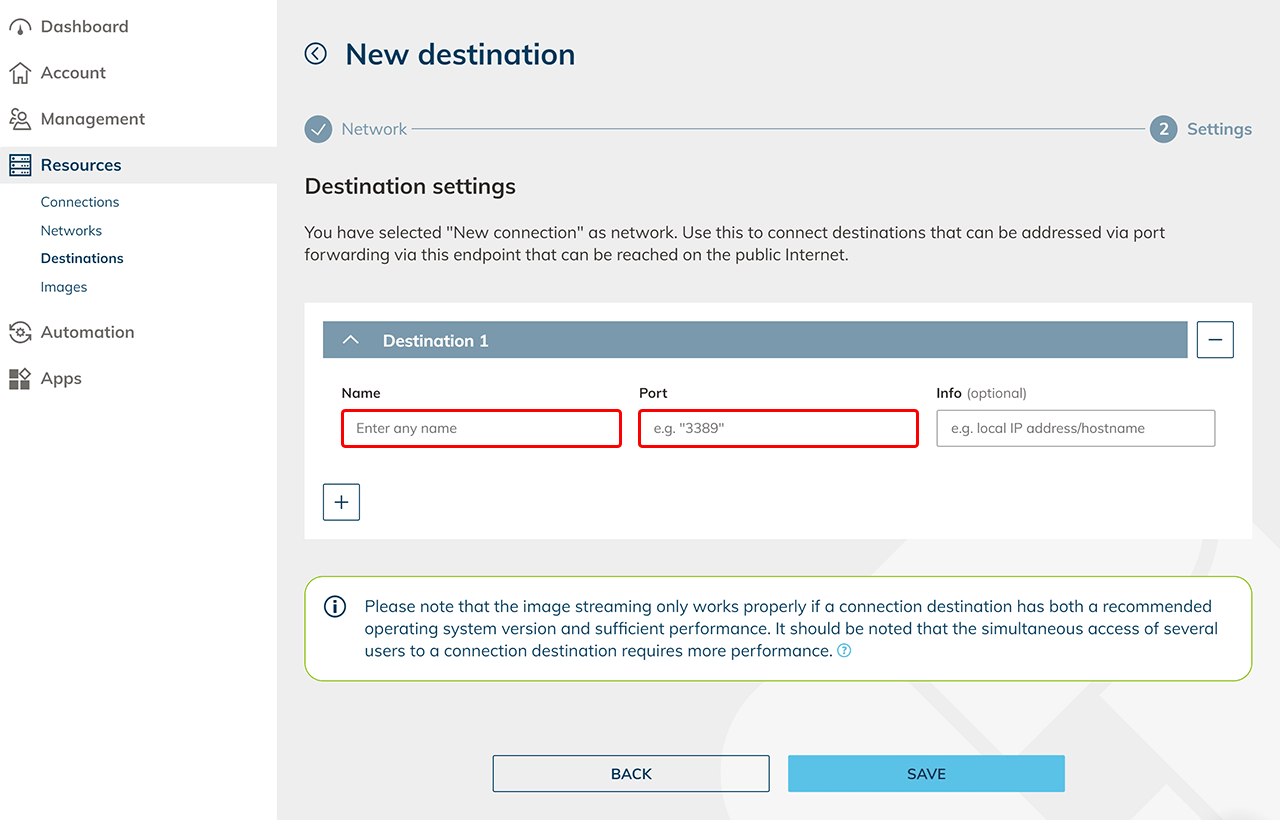
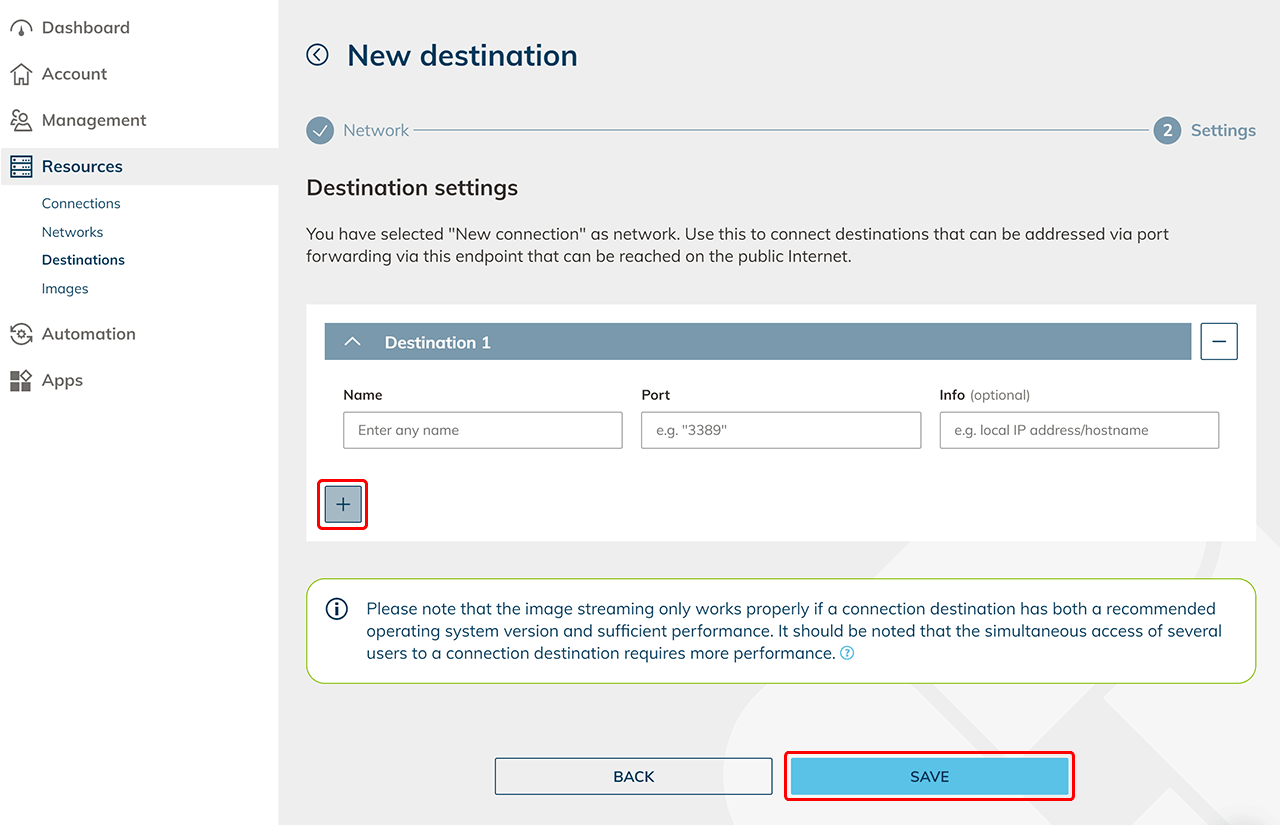
- Click on the Plus icon to create additional Destinations. Click on Save.
- Create destination pools
Next, create a destination pool in which you can include one or more destinations that belong together. This step is not necessary if you want to connect an internal website or a private Active Directory. - Check connectivity and assign apps in oneclick™
Click on the check status icon in the row to check the connectivity.

If you want to access the destination via oneclick™ streaming, then configure app access and create app instances for your oneclick™ users.
11. Send oneclick™ registration link
Once you have completed all the steps above, you can give your users access to oneclick™ by sending the registration link.