Software management with Chocolatey
You want to manage software applications on your VMs centrally and automatically?
By using a process in oneclick™ you can install Chocolatey on your virtual machines. Chocolatey is a package manager for Windows operating systems and operates similar to APT for Linux or Homebrew for macOS. In addition to a centralised installation of software packages, the program allows you to perform updates automatically without any intervention of the user.
Perform the following steps to manage a program with Chocolatey on your VMs:
-
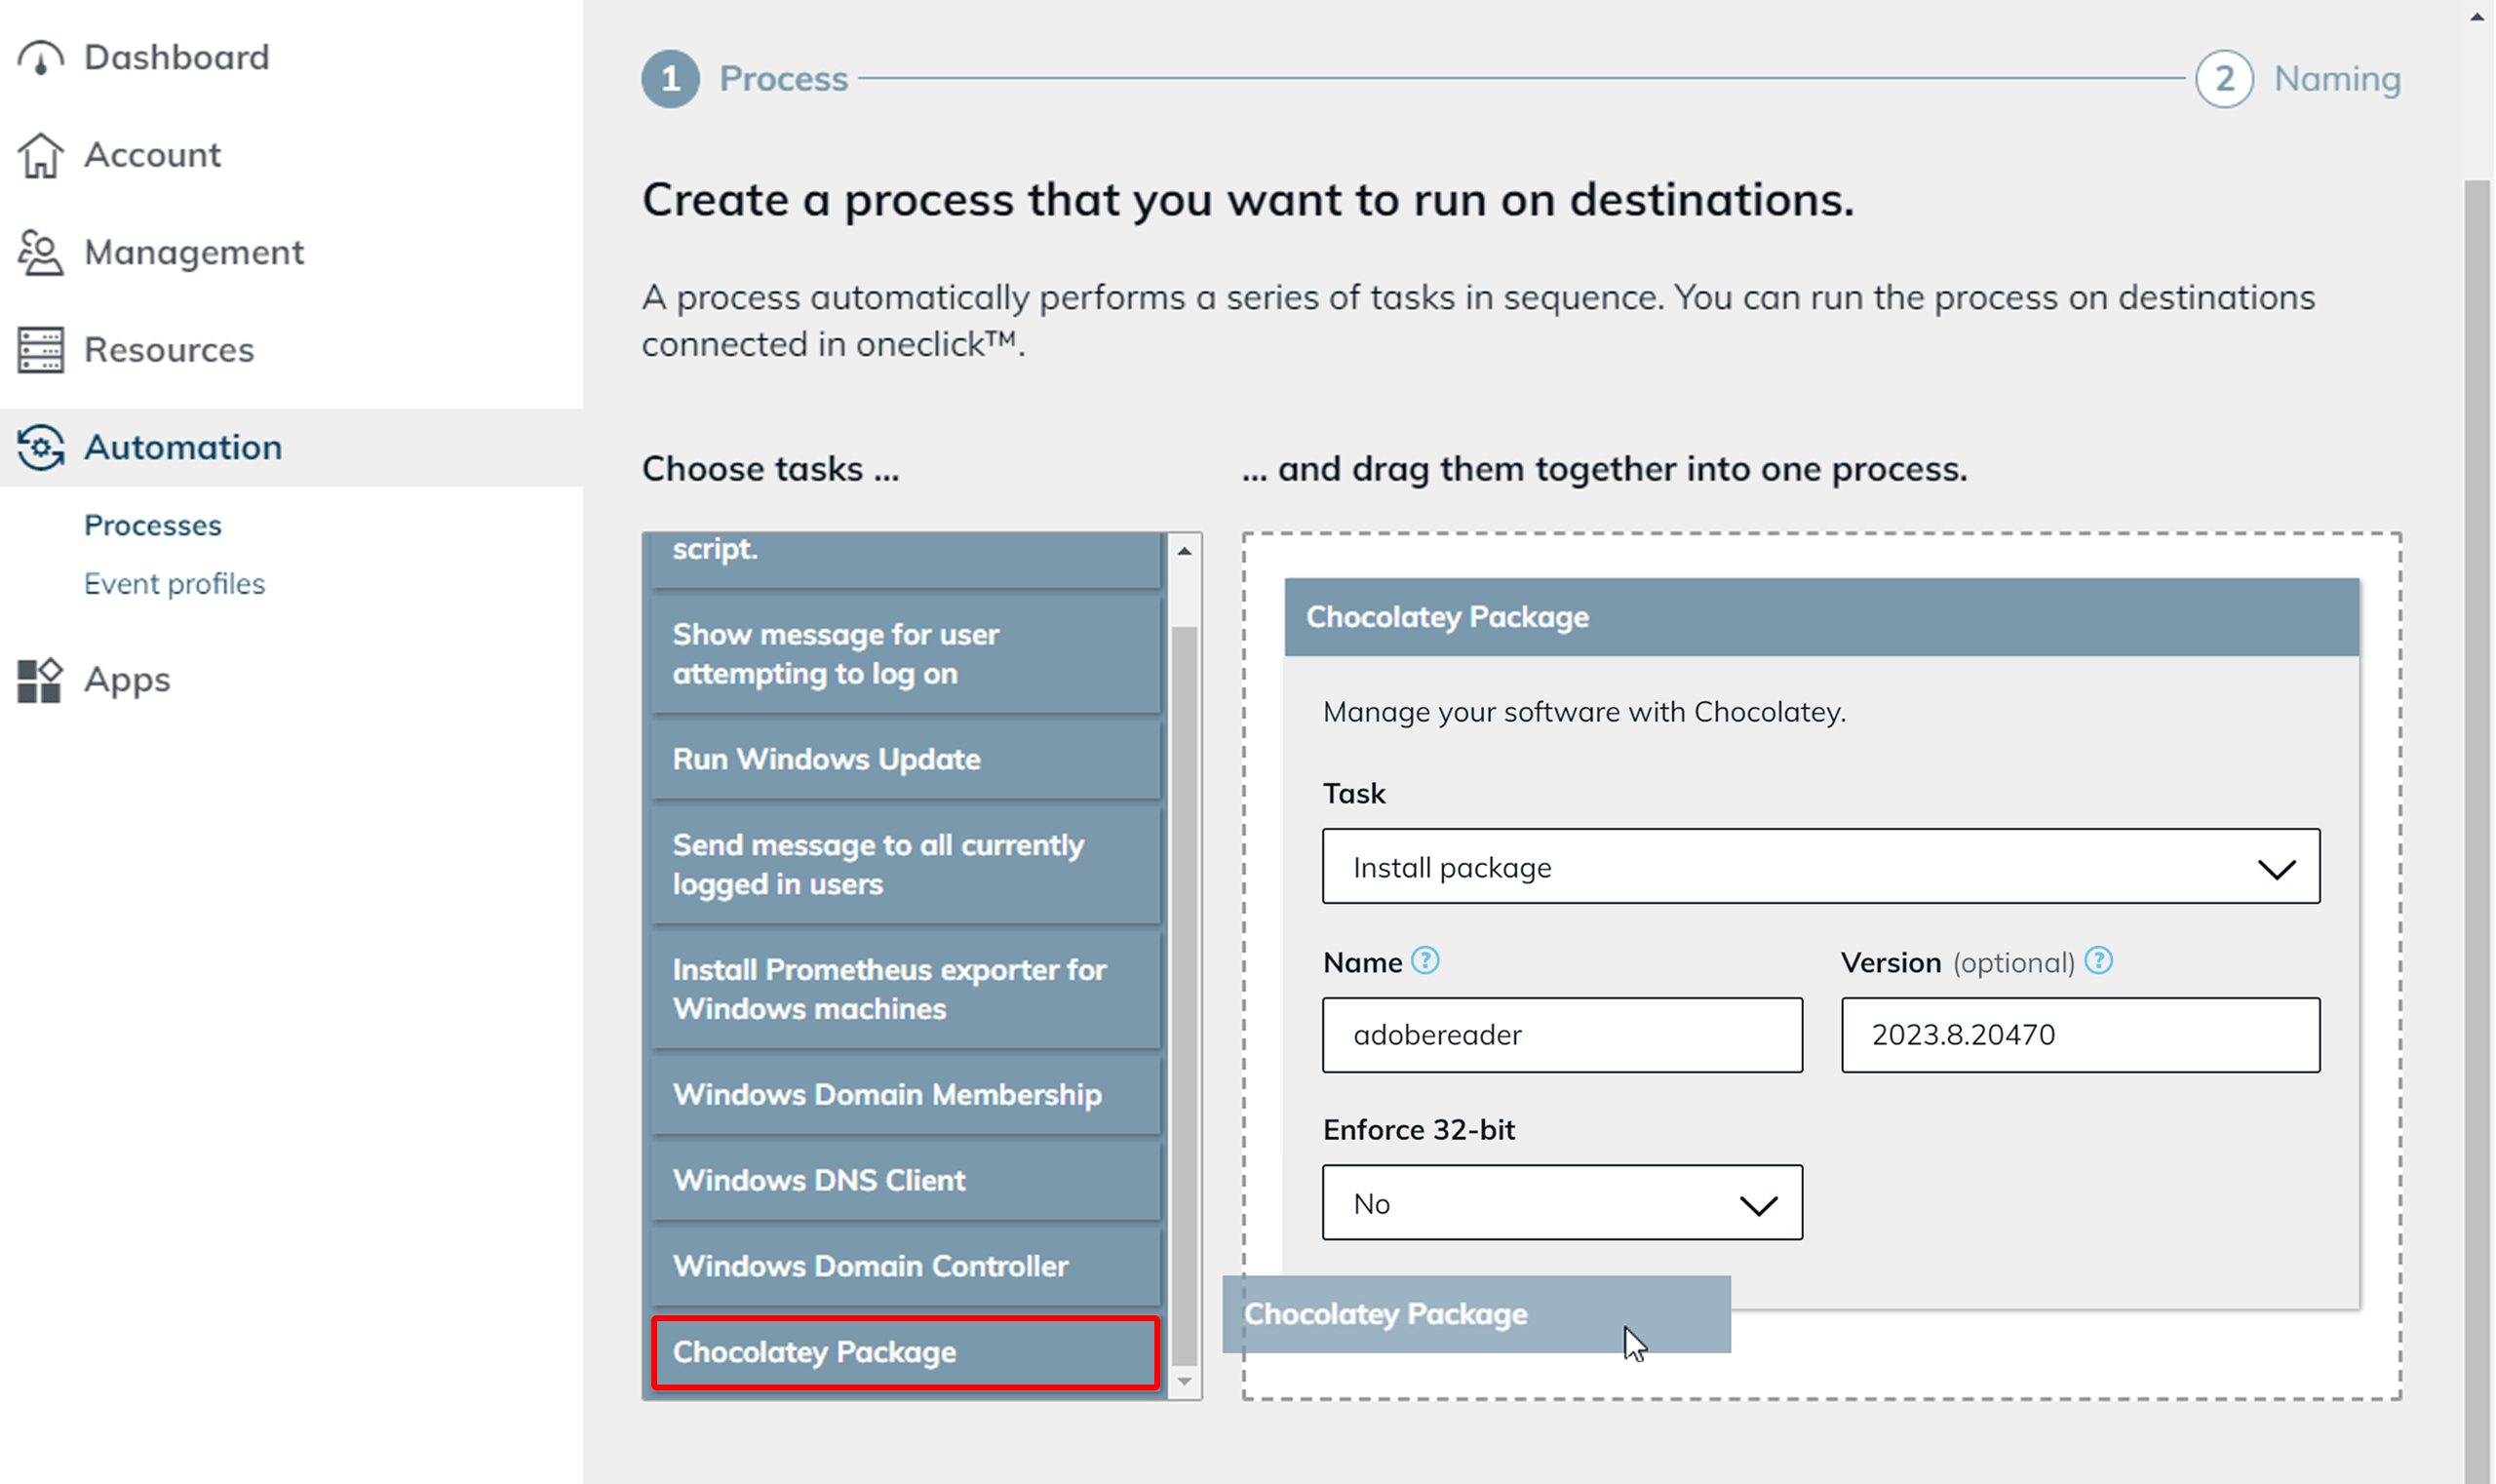
Click on Automation in the menu on the left and then on Processes.
-
Click on the Plus icon at the top of the screen to create a new process.

-
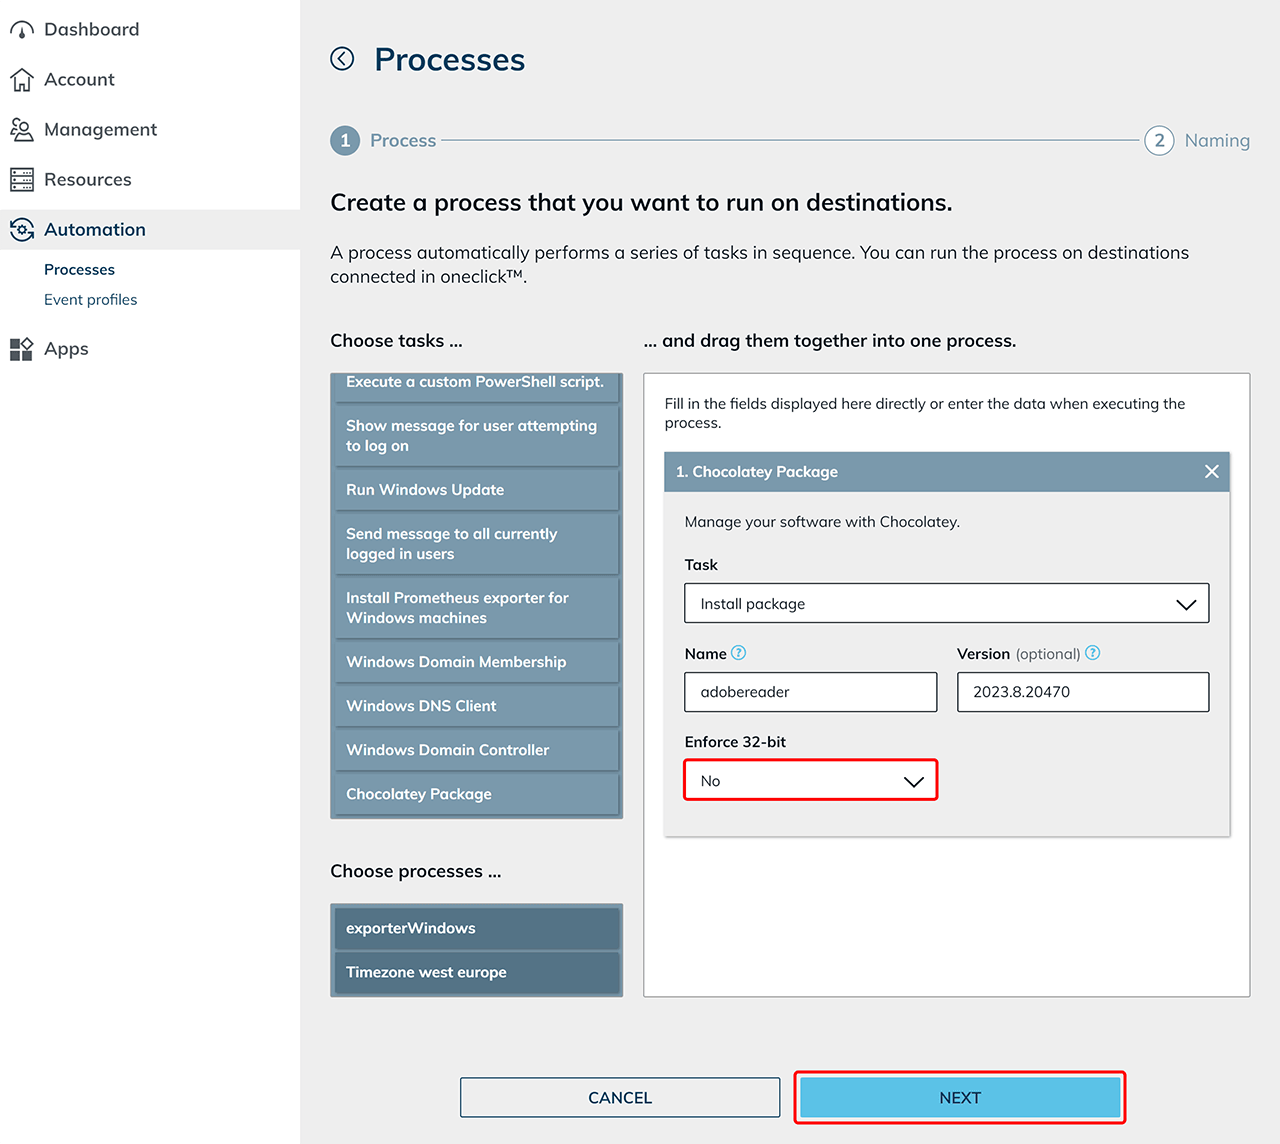
Select "Chocolatey package" in the list of tasks on the left. Drag and drop this entry into the area on the right.
-
Leave the selection under "Task" at "Install package".
-
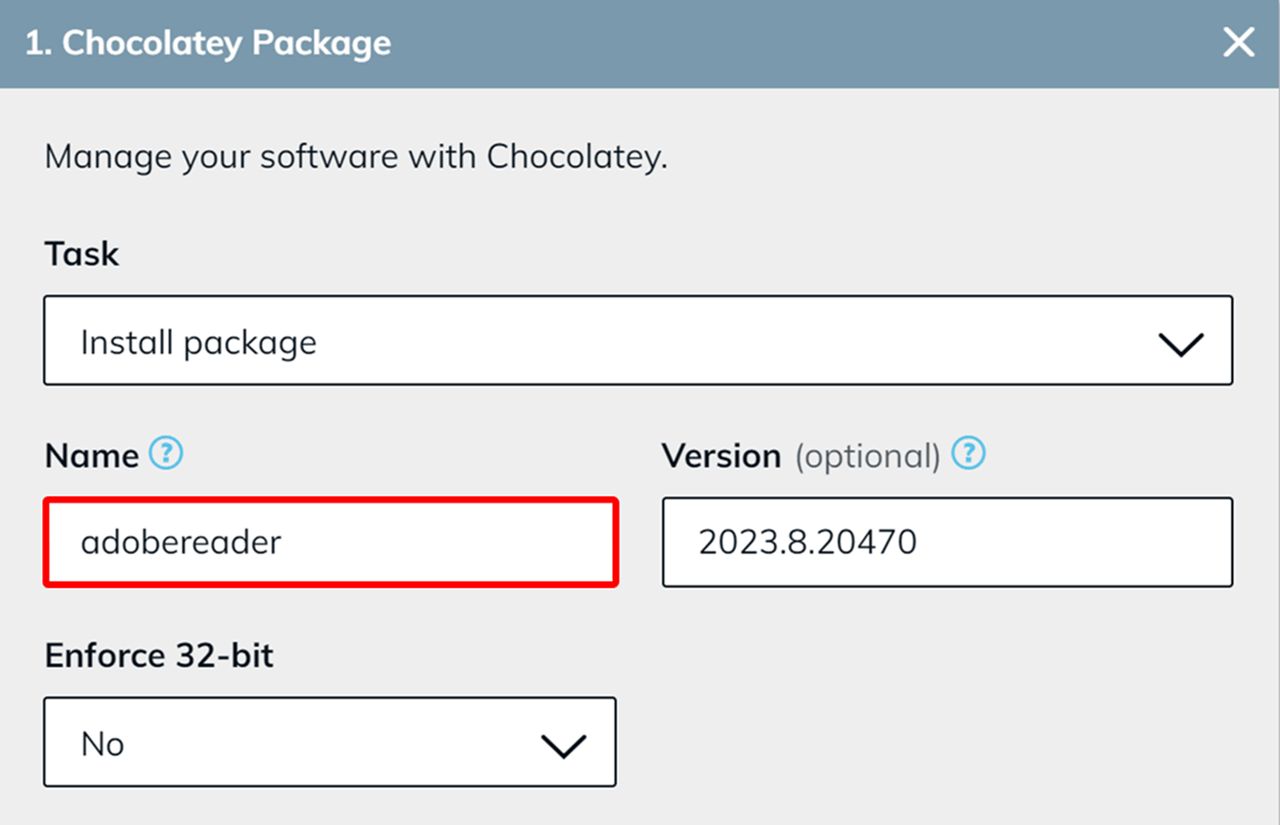
Under "Name", enter the name of the program you want to manage via Chocolatey. Attention: The name of the program entered here must correspond to the exact name given by Chocolatey on their website!
-
To find the correct entry, first open the database on the Chocolatey homepage.
-
Search the list for the program you want to manage via Chocolatey, in this example “Adobe Acrobat Reader”, and open the corresponding entry. Alternatively, use the search function to go directly to the desired package.
-
Scroll down slightly and do not copy the entire command as shown on the page. Note: If you click the copy icon next to the code, the entire command will be copied automatically (e.g.,
choco install adobereader). However, for input in oneclick, only the package name, in this exampleadobereader, should be entered, withoutchoco install.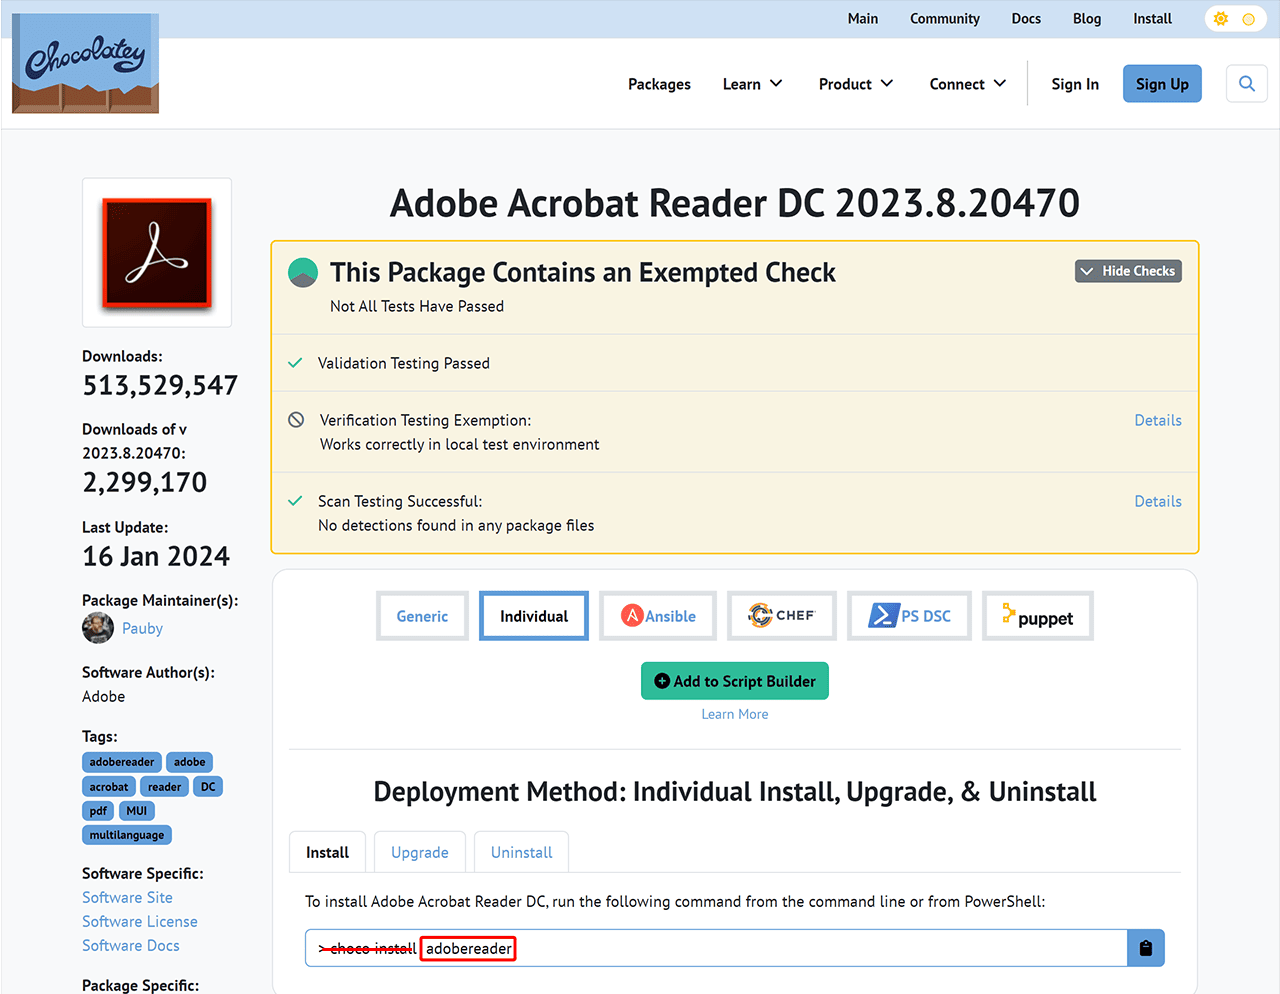
-
Enter this name in oneclick™ under "Name".
-
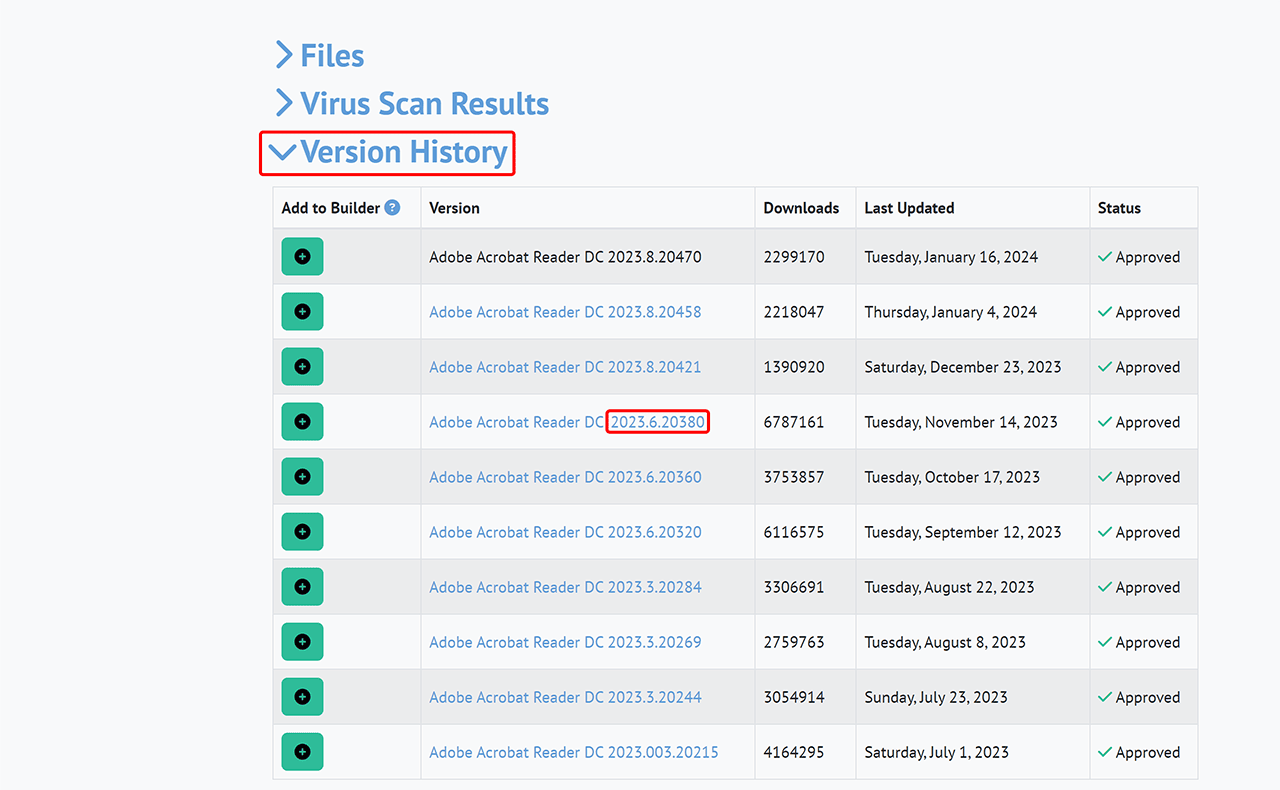
Optionally, you can enter a specific software version under "Version". You will also find the corresponding entry for this in the Chocolatey database. If you do not enter anything in this optional field, the latest version of the program will be installed automatically.
-
Return to the relevant entry in the database. Scroll down a little and open the Version History.
-
Find the correct version here and copy the corresponding number to oneclick™.
-
Leave the entry under "Enforce 32-bit" set to "No". If you intentionally want to install a 32-bit application on your 64-bit system, change the entry here to "Yes".
This can be useful if the desired application is only available in 32-bit, but should still exchange data with 64-bit applications. -
Then click Next.
-
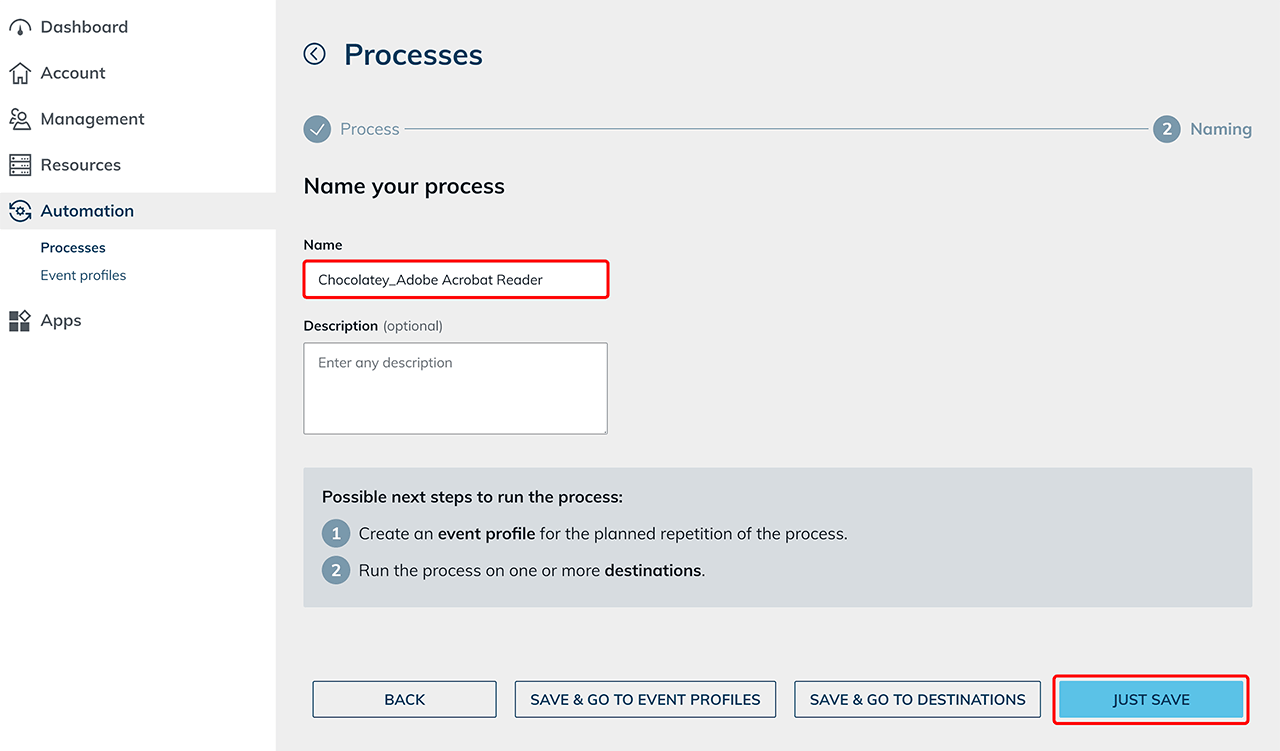
Give the newly created process a name and add a description if needed.
-
Finally click on Just save to complete the process creation.
-
Then run the process on your resource as described in Processes under 3.
If Microsoft.NET Framework 4.8 (or newer) is not yet installed on your VM, oneclick™ will perform this installation first and then reboot. -
Follow our instructions Processes under 3 to check the progress of the process execution.