Create app instances for users
To create an app instance for users or groups, you need an app configuration. Have you already created an app configuration or has one been created automatically through the Marketplace?
You can create app instances for one or more users at the same time or for an entire group.
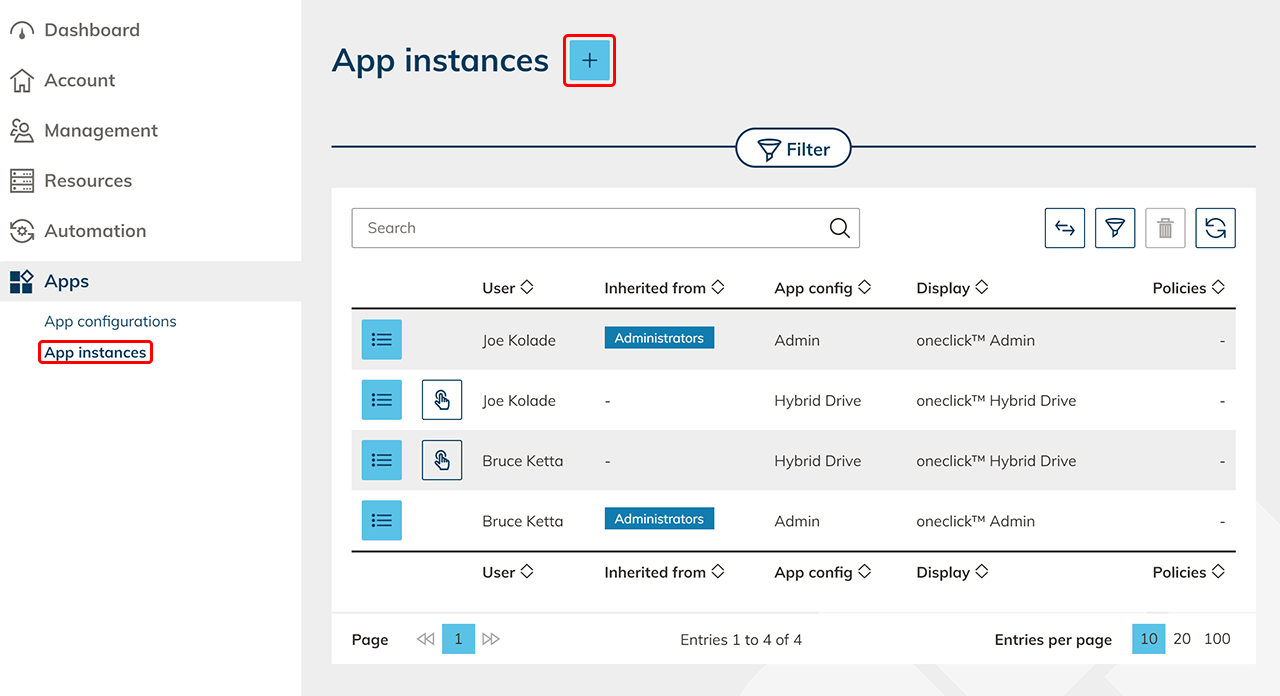
- Click on the Apps tab in the menu and then on App instances.
- Click on the Plus icon to create a new app instance.
- Select the app configuration from which you want to create an app instance and click Next.
The app license is stored in the configuration, which determines how often you can assign the app configuration.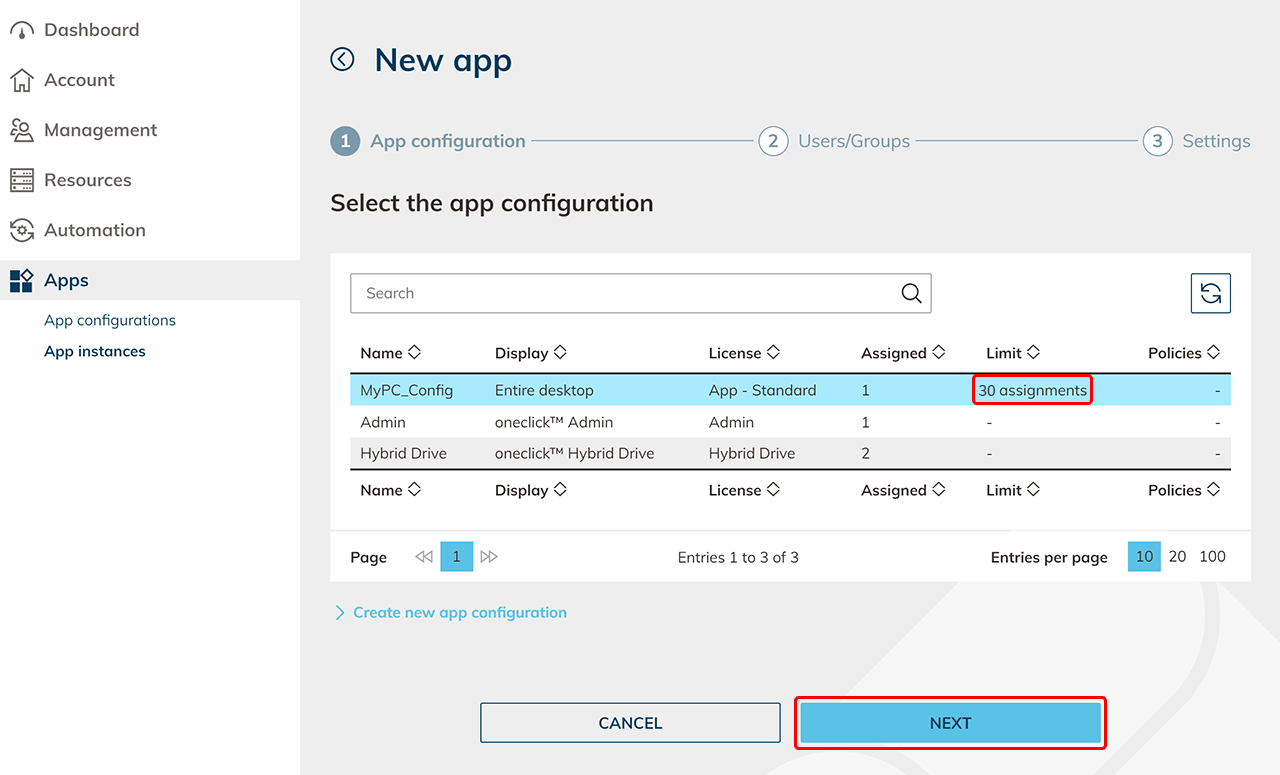
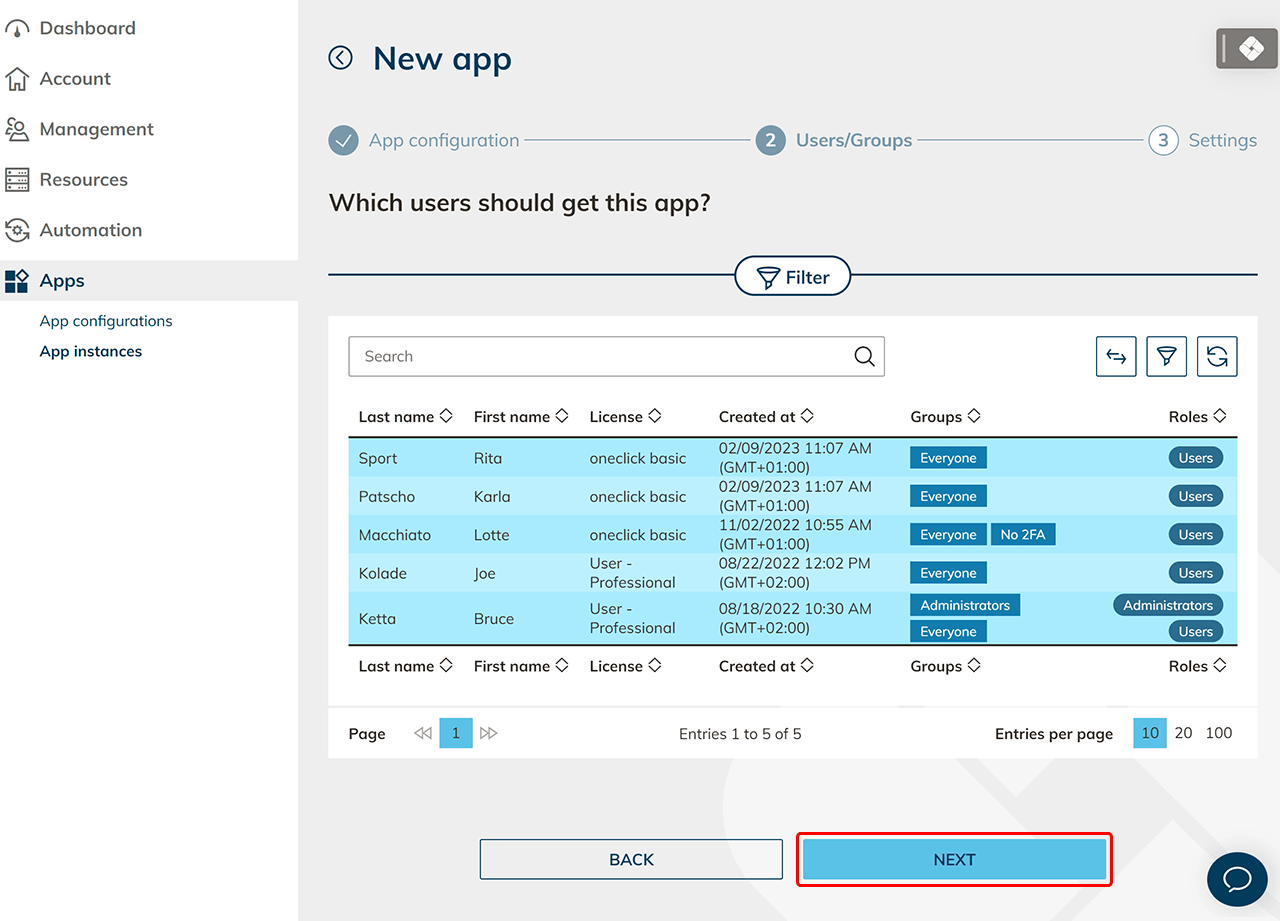
- In the next step, you can select users or groups for which an app instance of this configuration type should be created. Click Next.
If "Group License" was selected in the app license, you can select app instances for groups here.
- In the next step, you can configure the settings for individual users or for all users at once. Select the destination from the destination pool to which the user should be granted access. Enter the credentials stored in the respective resource. The input fields may vary depending on the configuration type. If you have previously defined a default destination or default credentials, they are already entered here. You can recognize this by the enabled toggle “Use default credentials”.
- If you leave the fields empty, Professional users can enter their credentials later themselves via the app tile on the oneclick™ Desk.
- For Basic users who should enter their data themselves, the option “Allow entering login credentials at app start” must be activated in the App Configuration.
- If multiple users should receive the same destination and/or the same credentials, click the ”Apply for all” button. This automatically applies the currently entered destination and credentials to all users in the list. The button is only displayed if more than one user is present.
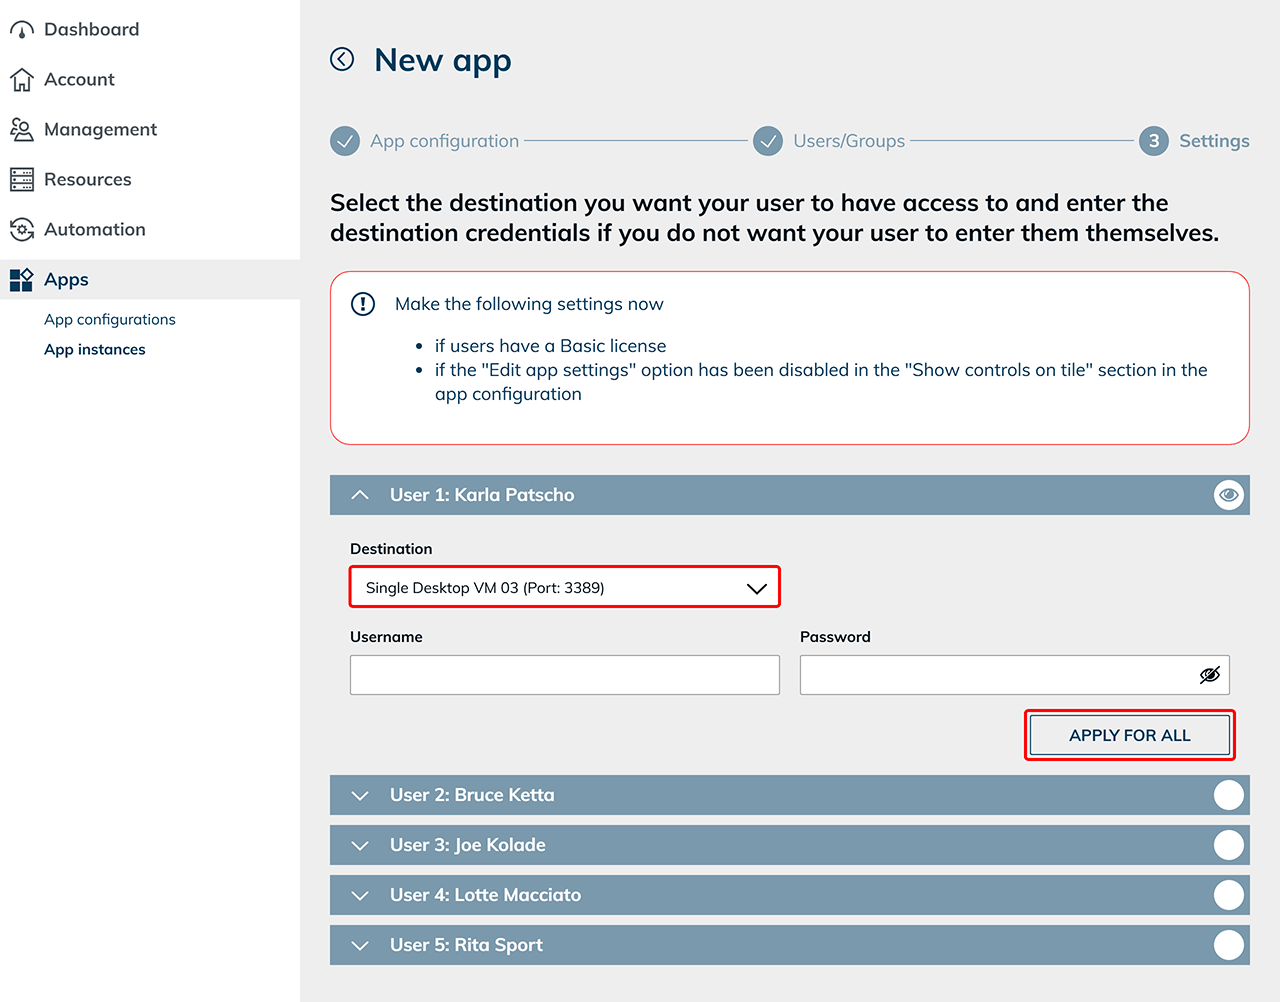
- The Eye icon indicates that the entry has already been viewed, the fields are not checked or evaluated. The Eye icon already appears in the first opened entry, even without clicking into a field.
- Save your entries.

- If you want to configure additional settings for your users on the resources, you can set them up now by clicking the Open icon .

- Once everything is set up, send the oneclick™ registration link to the users you have created.
Assigning multiple app instances to a single user
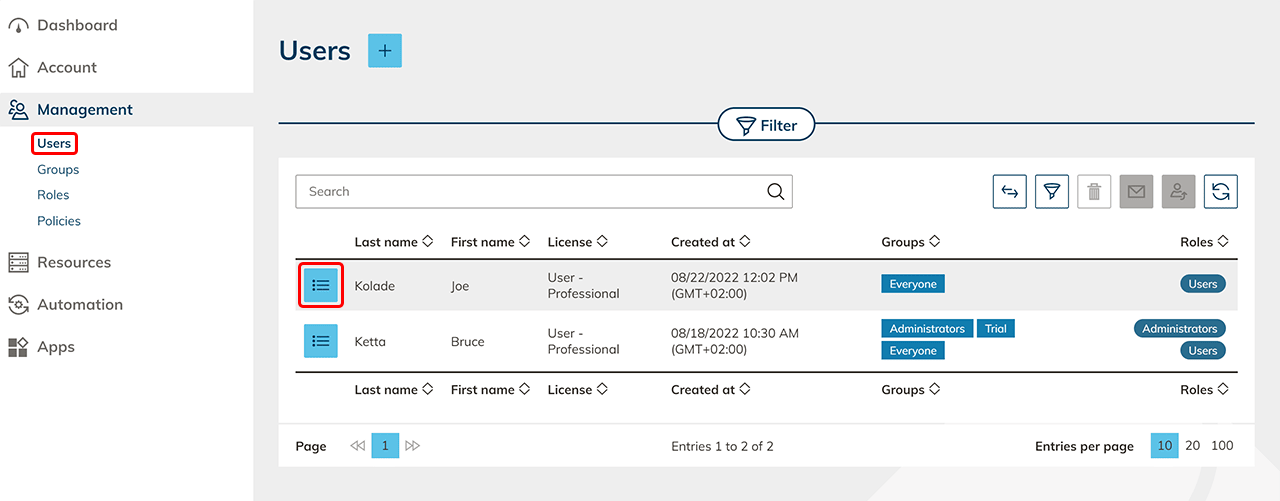
- Click on the Management tab in the menu and then on User. In the line of the user you want to assign apps to, click on the List icon for heading to the details page.
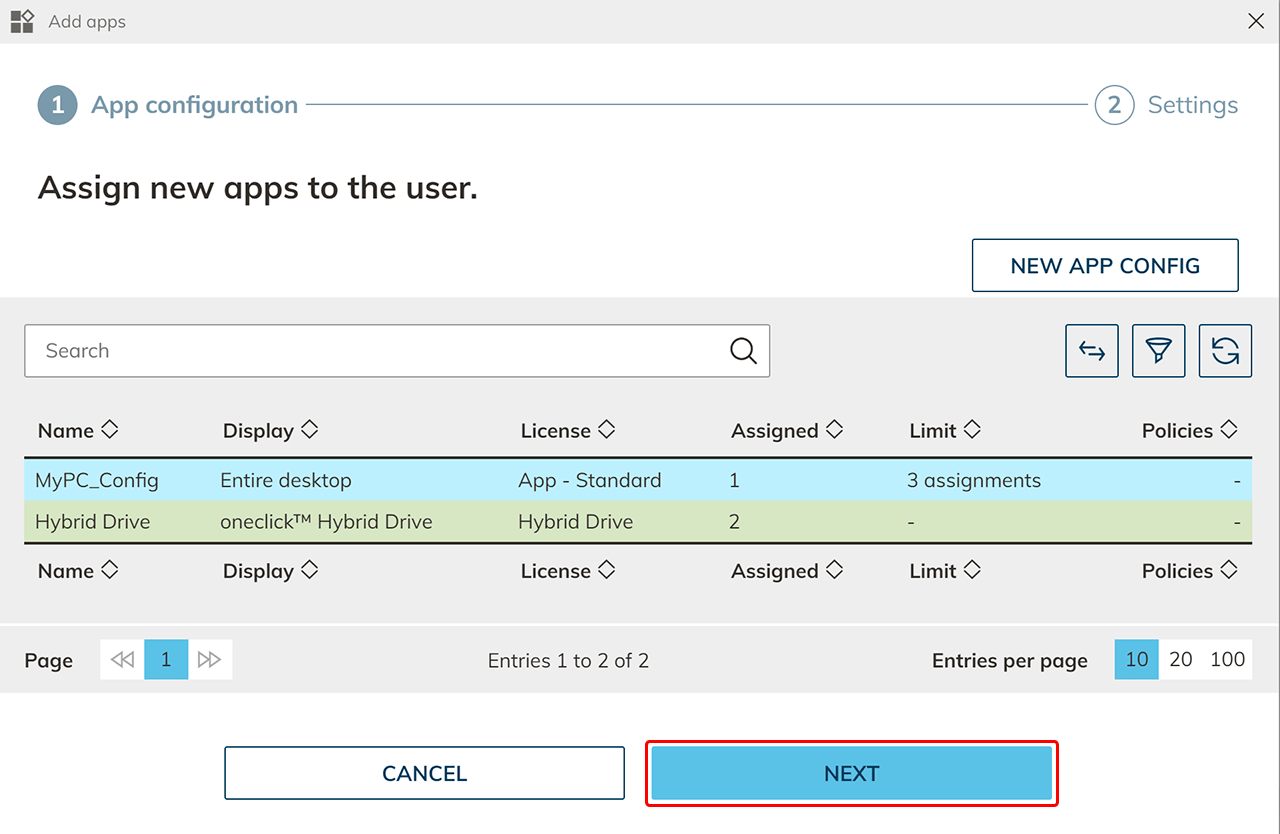
- Click on the Plus icon in the “Apps“

- Select the app configurations you want the user to get an instance of and click Next.
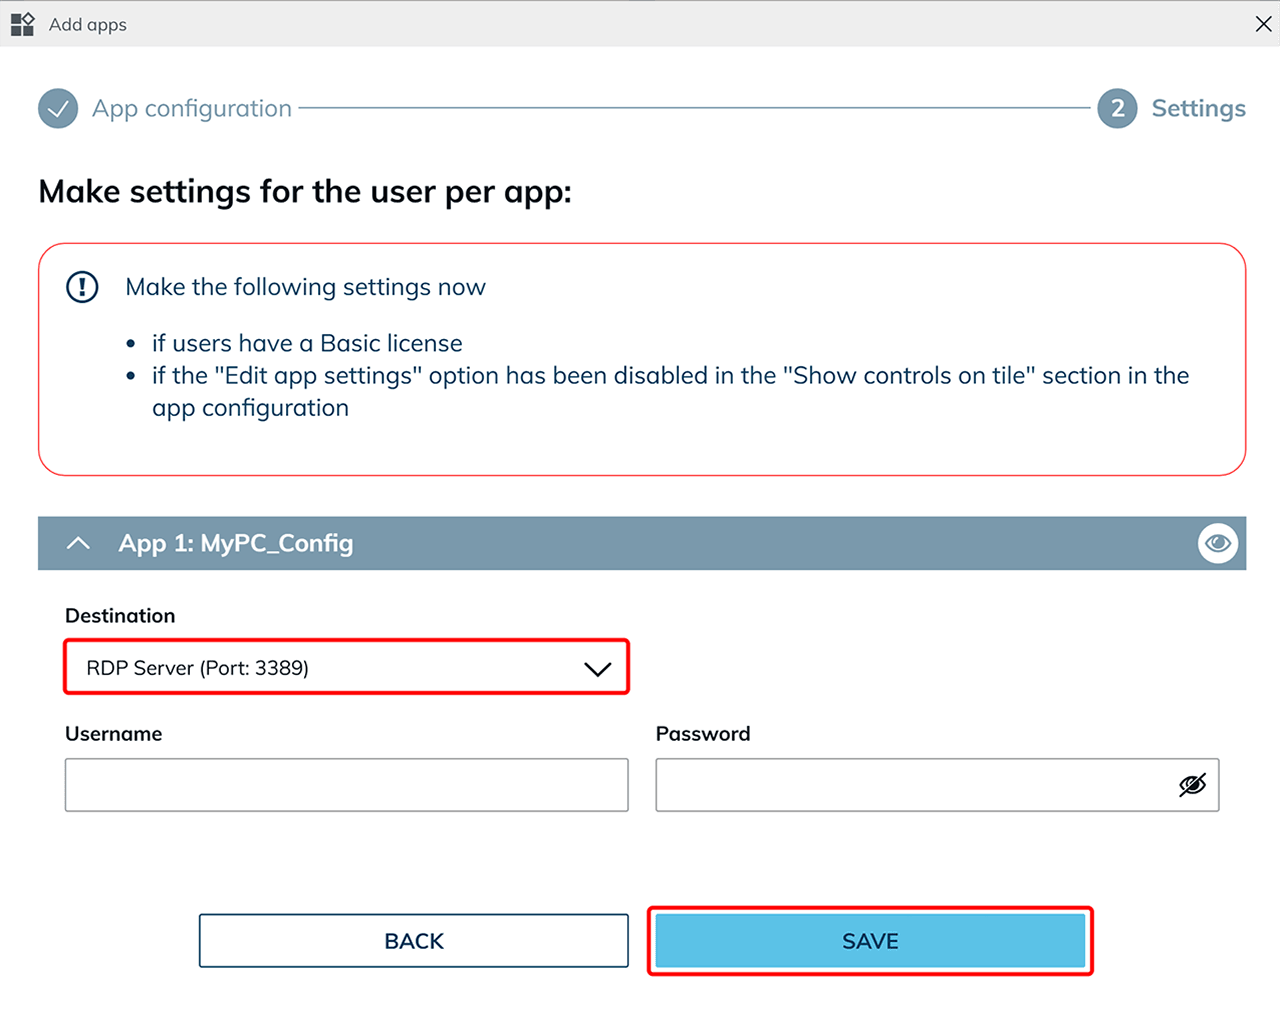
- Now you can make settings for the user per app if necessary. Click on Save.
Your user now has access.
Otherwise: Create multiple app instances for a user by storing the app configuration in a group. For this, you need an app license in which the group license option is activated. - Once you have everything set up, send the oneclick™ registration link to your created users.