To link your own, already existing Azure subscription, you must create a so-called “Service Principal” in the Azure Portal. This “Service Principal” is a kind of “key” that gives oneclick™ access to the resources created in Azure. You can then enter the data read from the “Service Principal” into oneclick™.
1. Retrieve data from the Azure subscription
- Open the Azure Portal and log in with your Azure credentials.
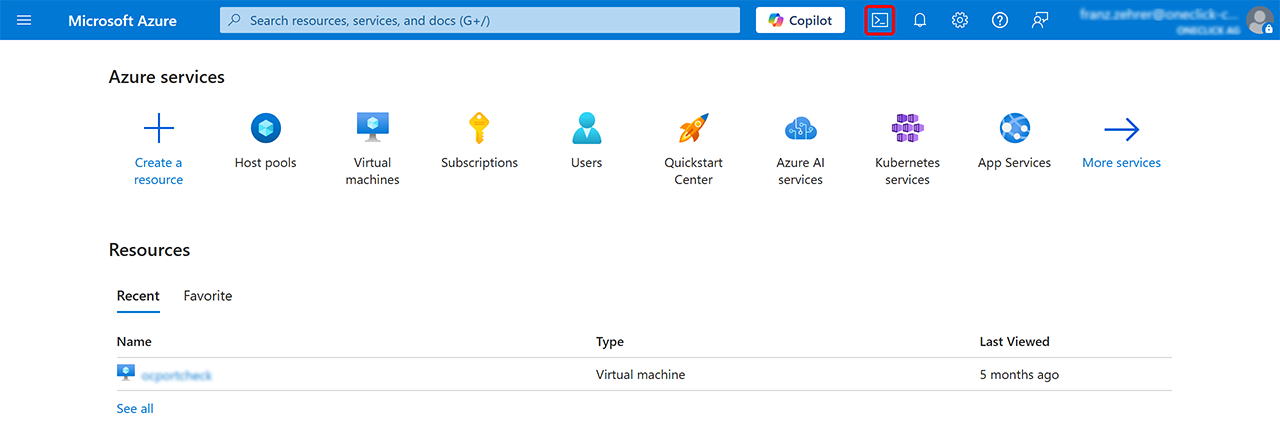
- Click on

 (in the bar at the top right) to open the Azure CLI (command interface).
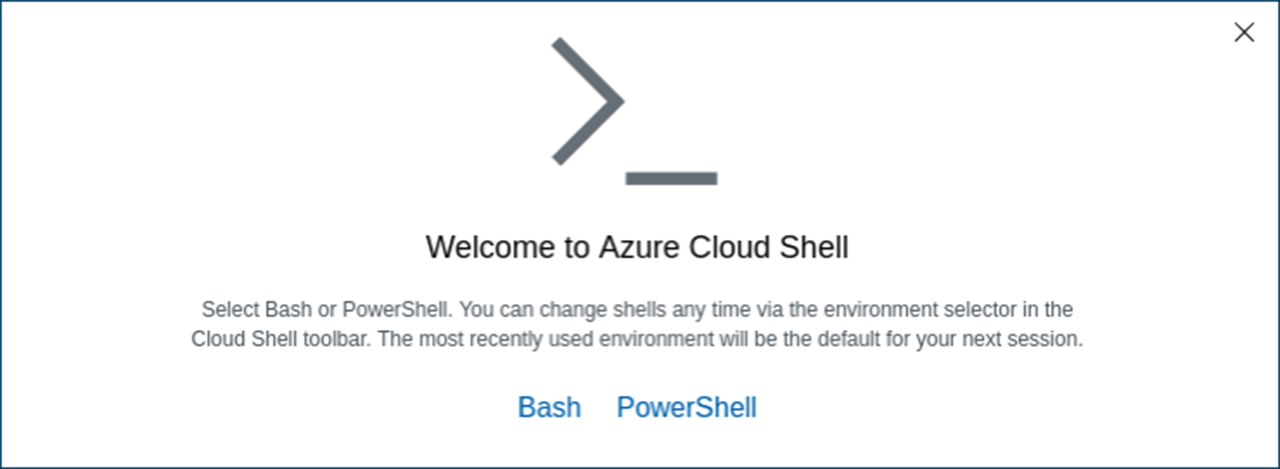
- If you are opening the Azure Cloud Shell (Azure CLI) for the first time, please select Bash as the method.

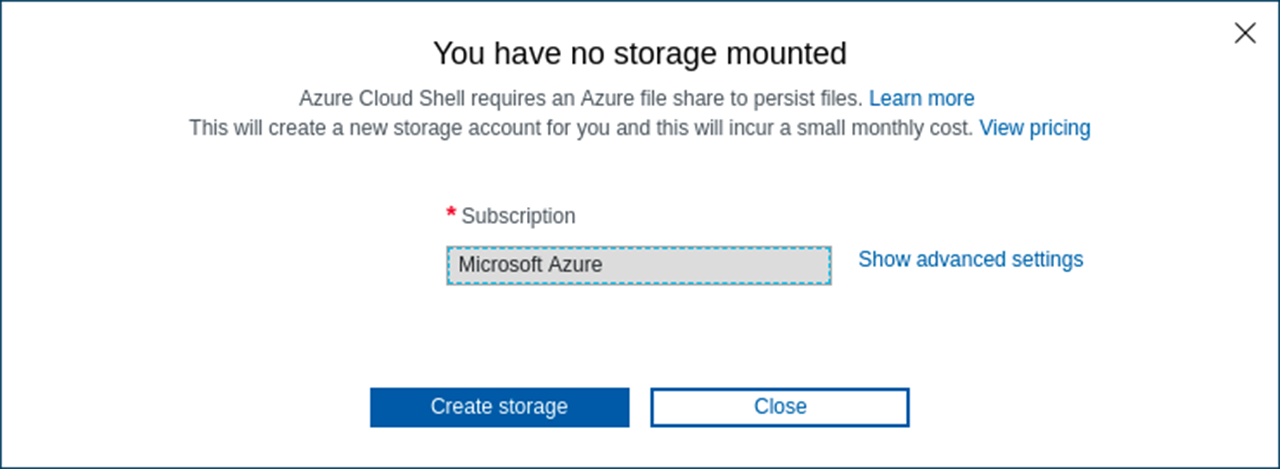
- Confirm that a storage (space) will be created. This storage is necessary for a temporary virtual machine. This machine will be deprovisioned as soon as you no longer use the Azure Cloud Shell.
- Once the environment is set up, you can execute the following commands.
2. Register resource providers in Azure
Before you can connect oneclick™ with your Azure subscription, certain resource providers in Azure must be registered. These providers ensure that the required services like storage and virtual machines (VMs) can be used properly.
Click on ![]()
![]() (in the bar at the top right) to open the Azure CLI (command interface).
(in the bar at the top right) to open the Azure CLI (command interface).
Then execute the following command:
az provider register -n microsoft.classicstorage && az provider register -n microsoft.storage && az provider register -n microsoft.storageactions && az provider register -n microsoft.storagetasks && az provider register -n microsoft.compute && az provider register -n microsoft.computeschedule && az provider register -n microsoft.hybridcompute
3. Retrieve subscription ID
- Execute the following command in the Azure CLI (Bash) to retrieve your subscription ID:
az account show --query id --output tsv - The output should look like this:
5XXXXXX1-XX1c-4XX4-XXXX-b2axxxxxx9 - Copy this ID.
4. Identify resource groups and create Service Principal
All resource groups that you want to connect to oneclick™ and that should be read and used, including Virtual Machines (VMs), Virtual Networks (VNETs), and Network Security Groups (NSGs), must be identified and specified.
- Execute the following command:
az group list --query "[].name" --output tsv - Note all names of the resource groups you want to include, for example:
oneclick-avd-pool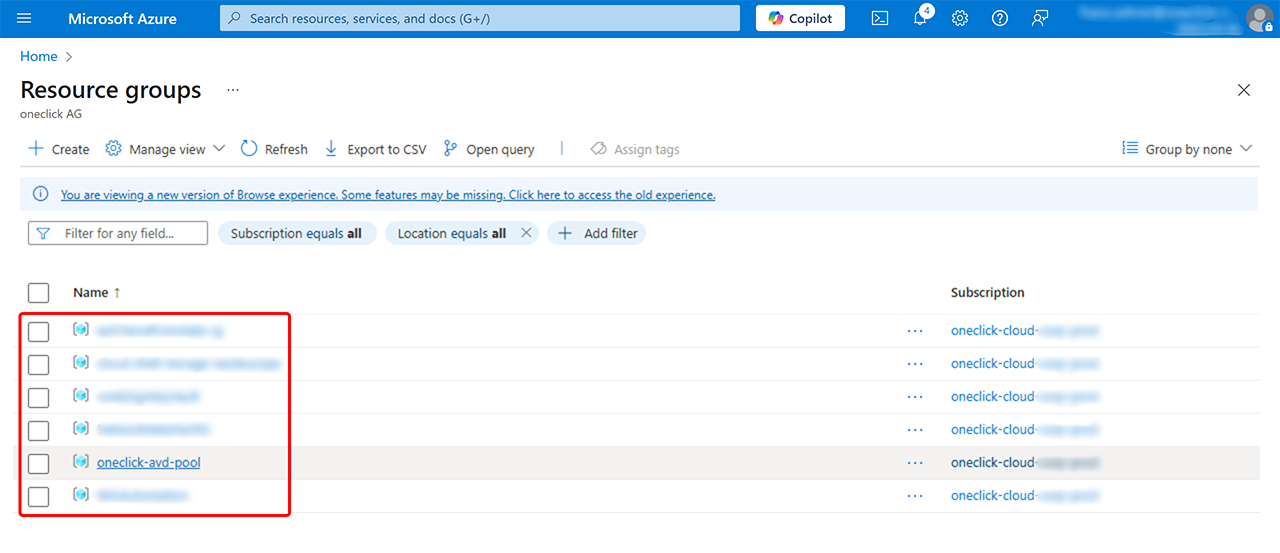

- Now create the Service Principal with the appropriate permissions by executing the following command. Replace the “subscription ID” and “resource group” name with your own values:
az ad sp create-for-rbac -n oneclick --role Contributor --scopes /subscriptions/5XXXXXX1-XX1c-4XX4-XXXX-b2axxxxxx9/resourceGroups/oneclick-avd-pool - If you want to include multiple resource groups, expand the command accordingly. Example for two resource groups:
az ad sp create-for-rbac -n oneclick --role Contributor --scopes /subscriptions/5XXXXXX1-XX1c-4XX4-XXXX-b2axxxxxx9/resourceGroups/oneclick-avd-pool,/subscriptions/5XXXXXX1-XX1c-4XX4-XXXX-b2axxxxxx9/resourceGroups/oneclick-avd-pool2 - After successful creation of the Service Principal, you will receive an output that looks like this:
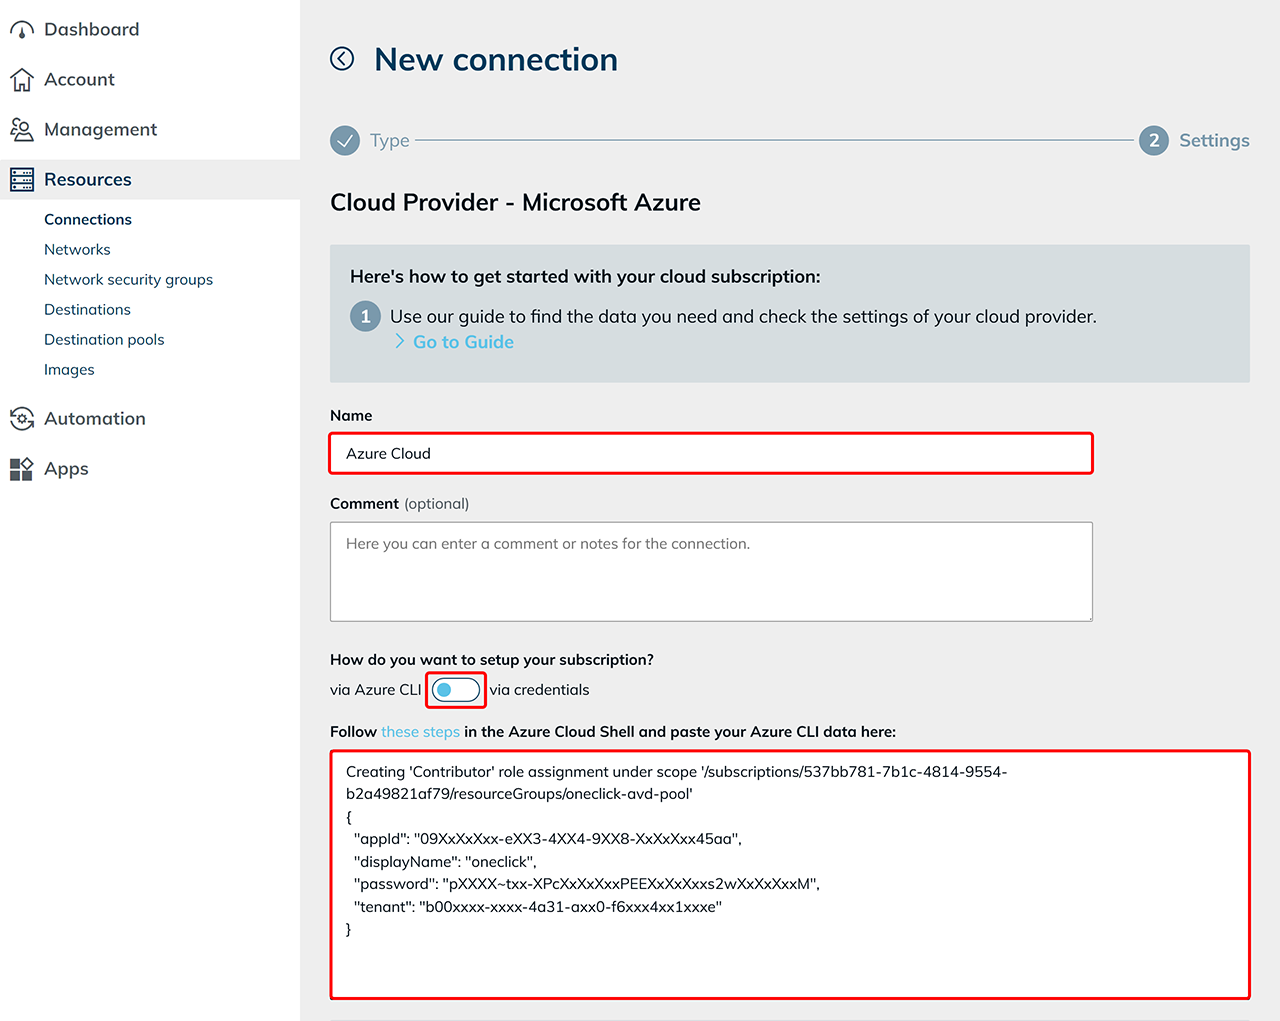
Creating 'Contributor' role assignment under scope '/subscriptions/537bb781-7b1c-4814-9554-b2a49821af79/resourceGroups/oneclick-avd-pool' { "appId": "09XxXxXxx-eXX3-4XX4-9XX8-XxXxXxx45aa", "displayName": "oneclick", "password": "pXXXX~txx-XPcXxXxXxxPEEXxXxXxxs2wXxXxXxxM", "tenant": "b00xxxx-xxxx-4a31-axx0-f6xxx4xx1xxxe" } - You now have all the required parameters for setting up the license in oneclick™.
Make a note of the appId, the password, and the tenant ID, as these are needed for the configuration.
5. Enter data in the oneclick™ Admin
- In oneclick™ Admin, click on Connections in the Resources tab.
- Click the + Symbol to connect your cloud subscription in oneclick™.
- Select the “Cloud Resources” tile and click on the corresponding cloud provider.
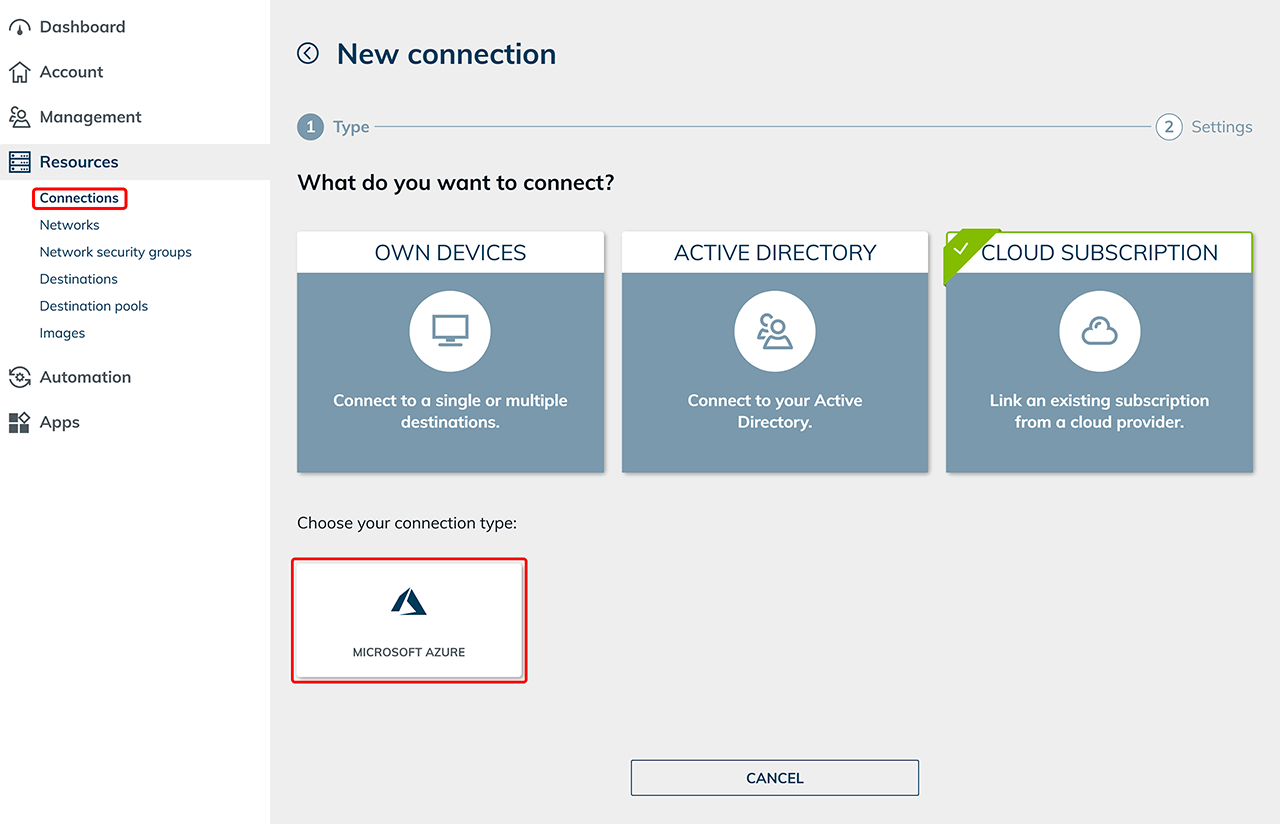

- Give the connection any name you like.
- If you choose the option “via Azure CLI,” copy the entire output you received in Step 4.5 and paste it into the text field.

- If you choose the option “via credentials,” copy the individual contents you received in Step 4.5 into the respective fields:
- Tenant ID: Enter the value from “tenant” into the field.
- Subscription ID: Use the value after “/subscriptions/”.
- Application ID: Copy the value from “appId” and paste it into the field.
- Application password: Enter the value from “password” into the field.
- Click Save. Your Azure subscription is now linked and existing resources will be read.
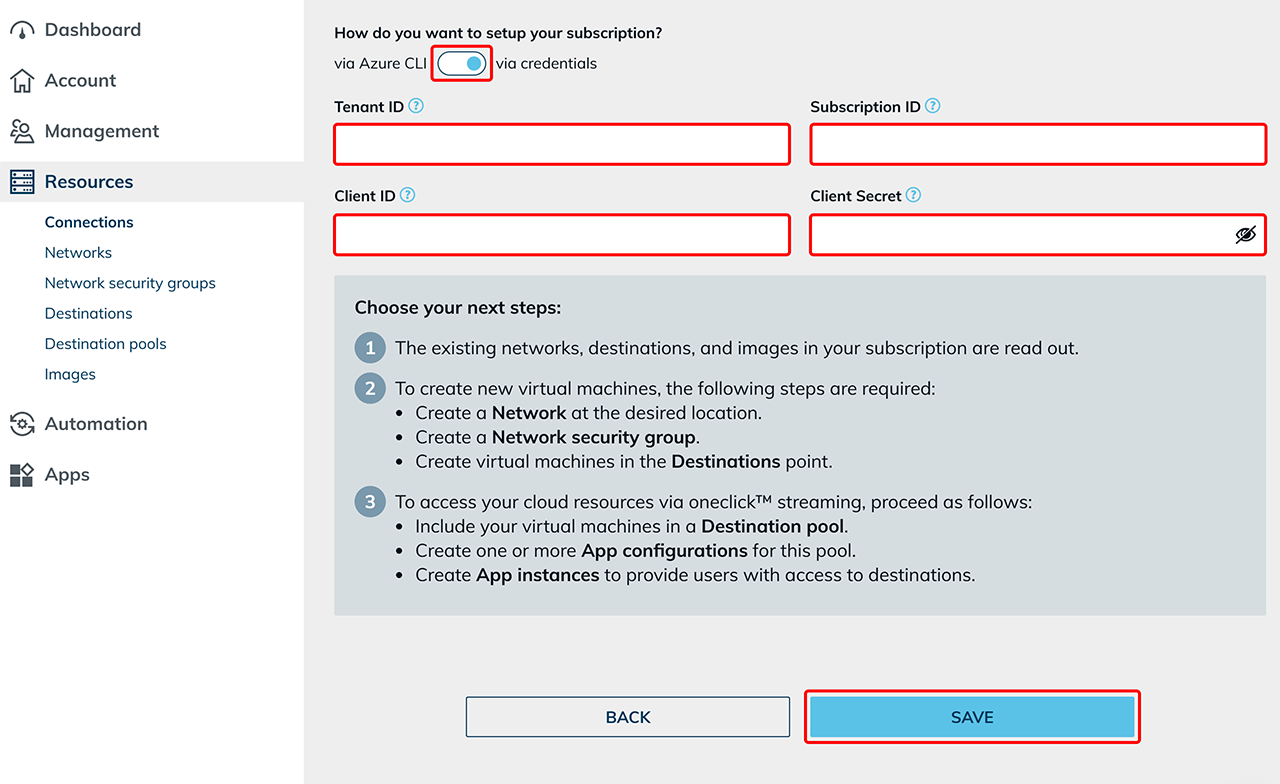

Costs are only incurred when using virtual machines.. - You can now create new virtuell maschines.