In order to link your own existing Vultr subscription in oneclick™, you need some data from your subscription.
Data from the Vultr subscription
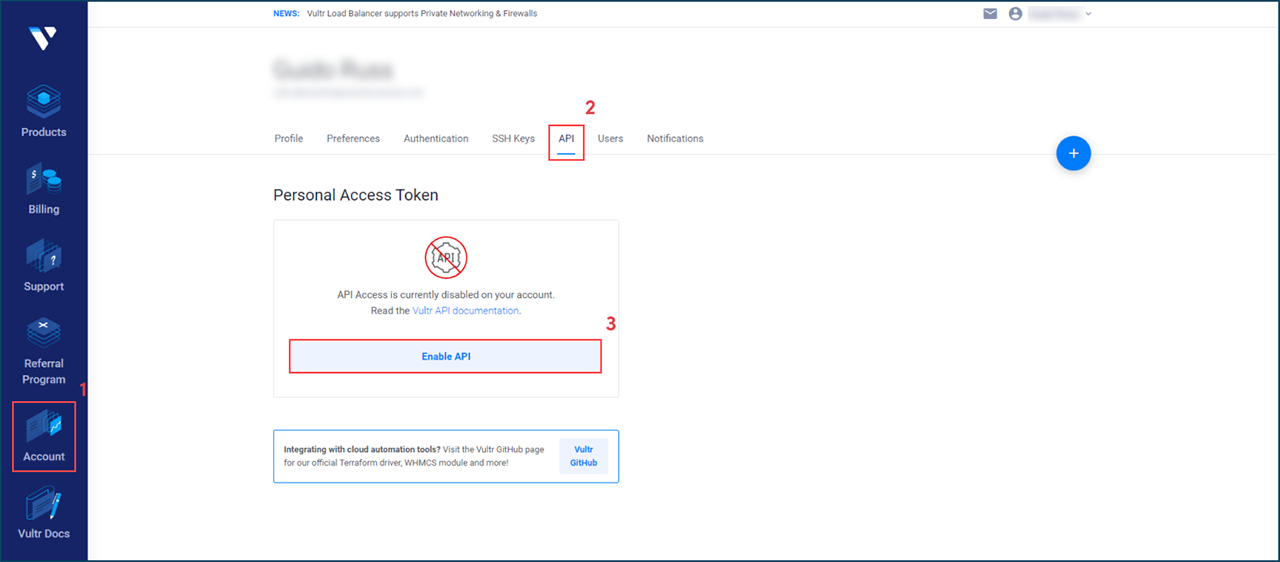
- Log in to your Vultr account.
- Click on Account and then on API.
- Generate your Personal Access Token by clicking Enable API.
-
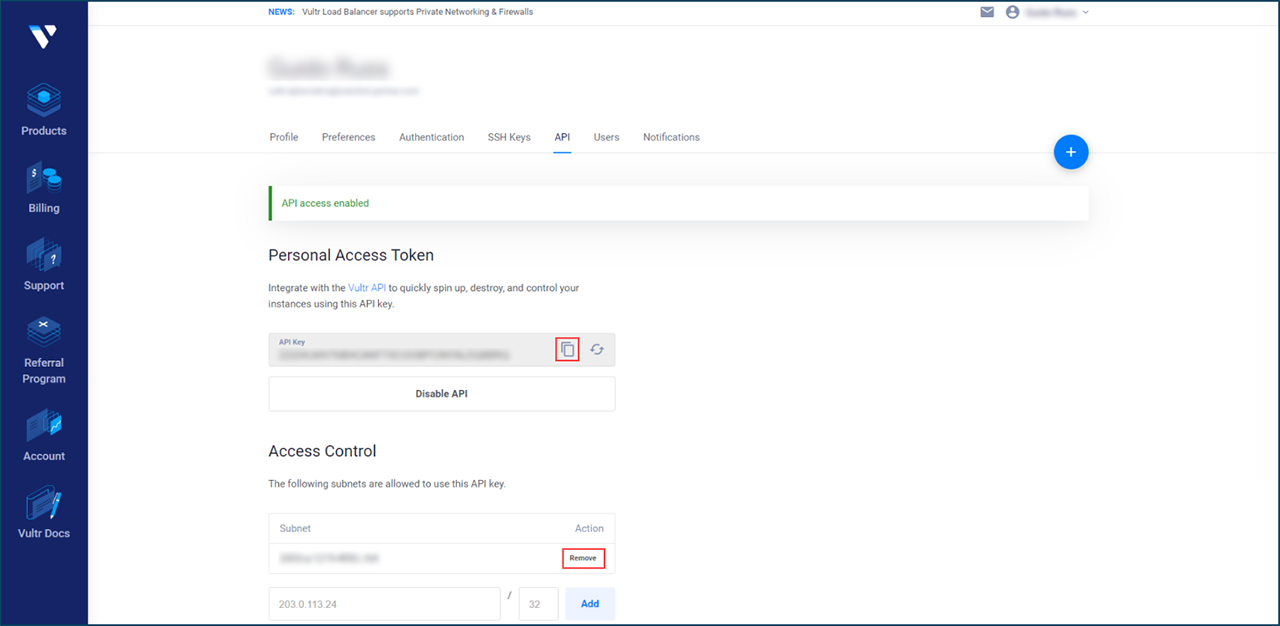
- Copy this key to enter it later in oneclick™. Your own IP will be added automatically. Click Remove next to it to delete it.
-
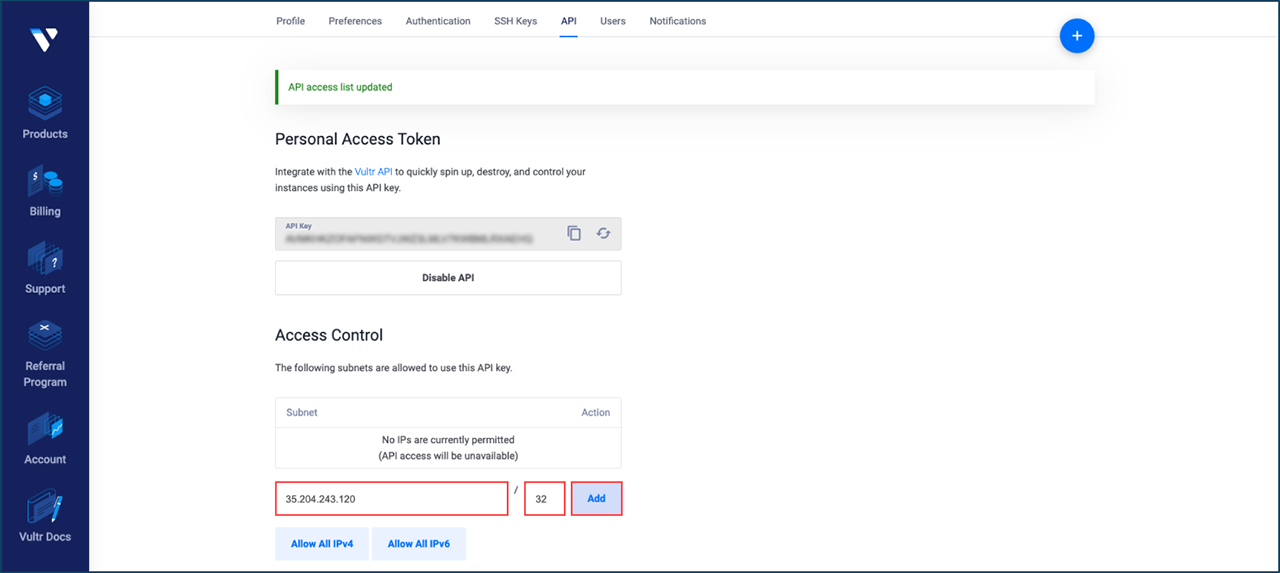
- Now add the oneclick™ IP “35.204.243.120”, enter port “32” and click Add.
-
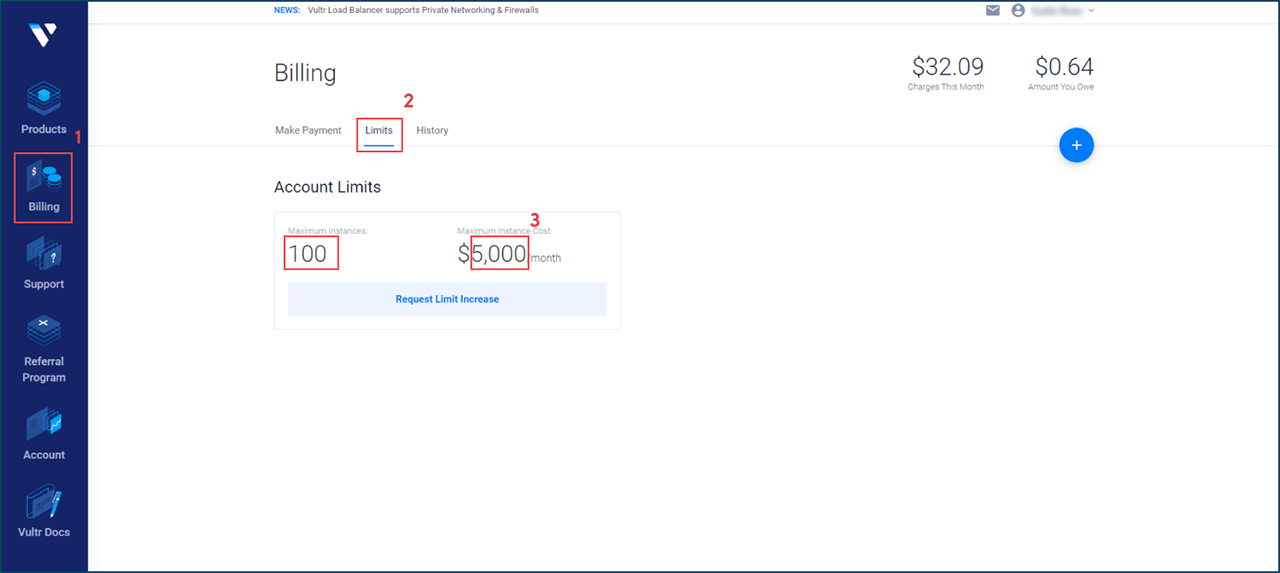
- Check which limits you have set or adjust them. To do this, go to Billing in the menu on the left and then click on Limits. Here you can see your limits. Remember these two limits.
-
Enter data in the oneclick™ Admin
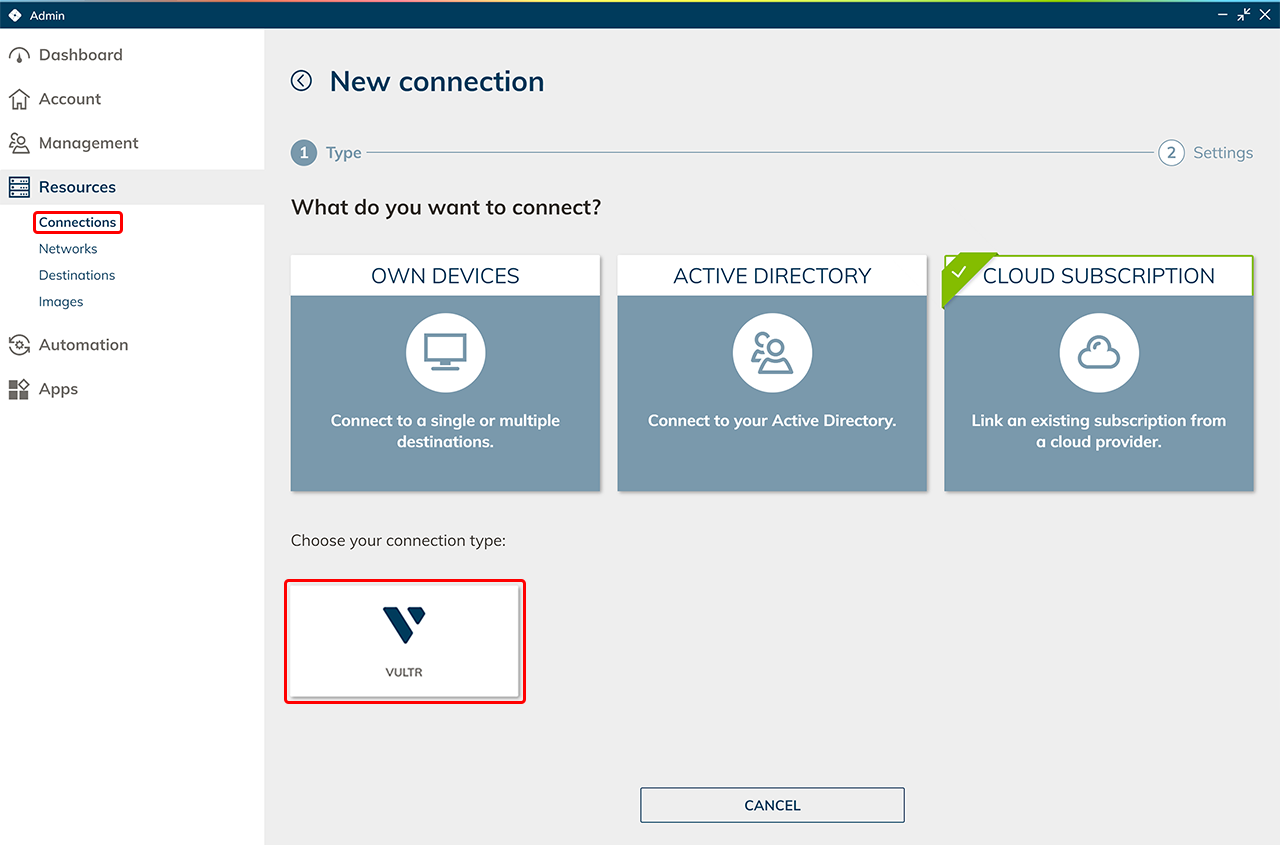
- In the oneclick™ Admin, click on Connections in the Resources tab.
- Click on the + Icon to connect your cloud subscription in oneclick™.
- Select the Cloud Resources tile and click on the required cloud provider.
-
- Give the connection a name of your choice and enter your data from your Vultr subscription:
Take the API key from point 4. The key in your Vultr account must always match the entry in oneclick™. Enter the maximum instances and the maximum instance cost from point 6. This must match the limits in Vultr. - Click Save in oneclick™. Your Vultr subscription is now linked and existing resources are read out.
You will only be charged when using virtual machines. - You can now create virtual maschines.