To link your own existing Orange Business Services subscription in oneclick™, you need some data of your subscription.
Data from the Orange Business Services subscription
- Log in to your Orange Business Services Account.
- Scroll down and click on Technical Console.
- In the overview, select Identity and Access Management.
We recommend creating a new user now.
Do not take your existing user unless you are sure you have given them “Programmatic access”.- Create a new user by clicking Create User in the upper right corner.
- Under “Access Type”, set the check mark for Programmatic access and remove the check mark for “Management console access”. Here you only have to enter a user name in the “User Details” section. Click on Next.
- Make sure admin with “full permissions” is selected and click Create. Your user is created.
Remember the username.
-

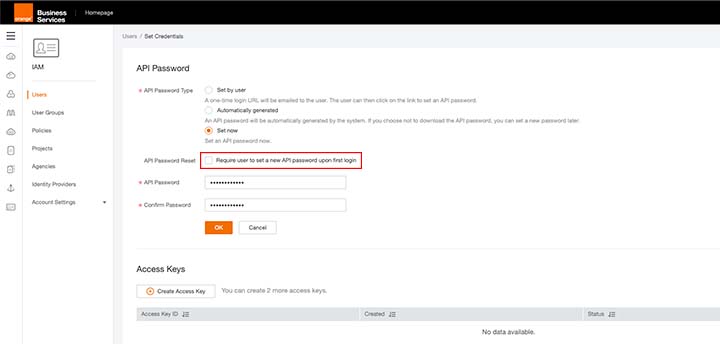
- In the User overview, you must set credentials for the user. Open your created user and click Set Credentials.
- Here you can generate a password automatically or set it yourself. In this tutorial, we set a password ourselves and choose Set now.
- Remove the checkmark from “Require user to set a new password upon first login”.
-
- Make up a password, enter it and repeat it. After that, click OK.
Remember this password. - A popup will open. Check which email address is specified and then click Send Code. This will send you a verification code to the displayed user email address.
- Copy the code from your email, paste it into the popup under “Verification Code” and then click Yes. Your password is set.
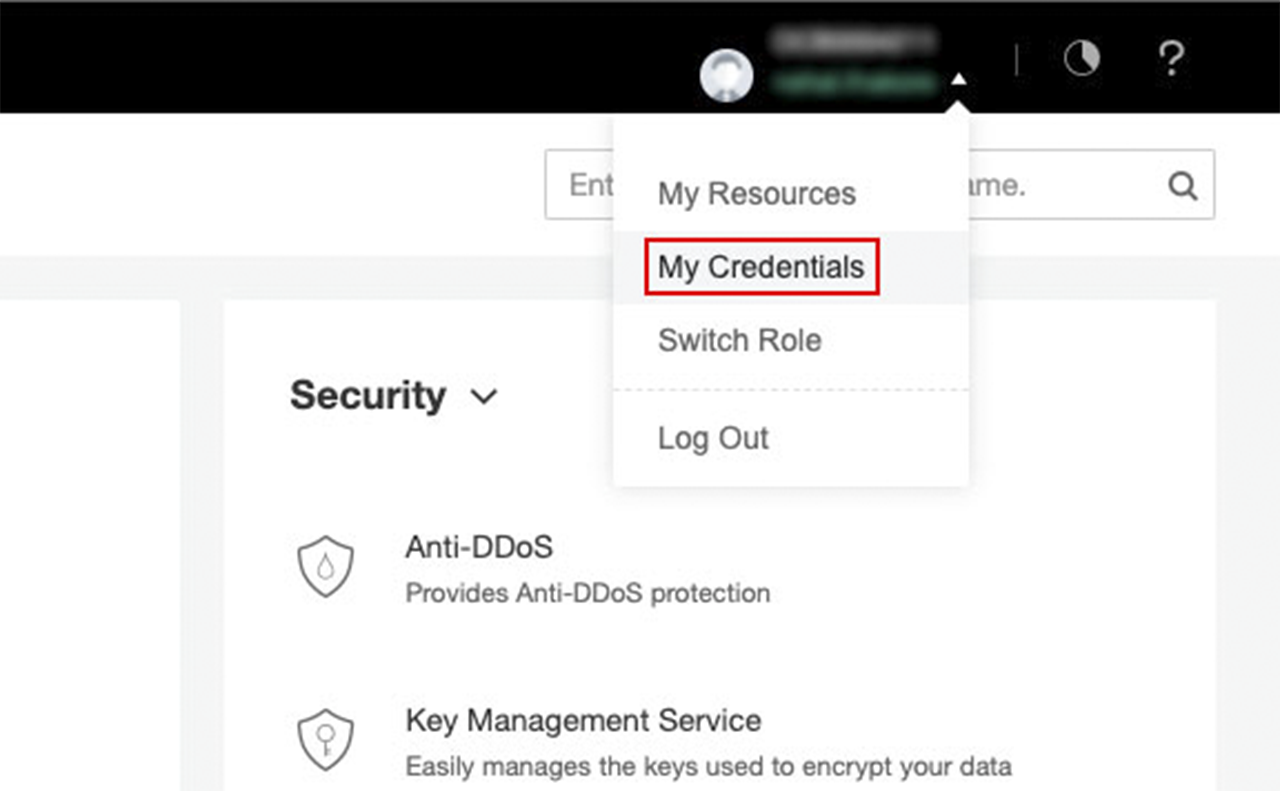
- You still need the domain name and optionally the project ID if you only need one project to be selectable in oneclick™. Open the menu at the top right and click on My Credentials.
-
- From this screen you can copy the Domain Name and optionally the Project ID.
-

Enter data in the oneclick™ Admin
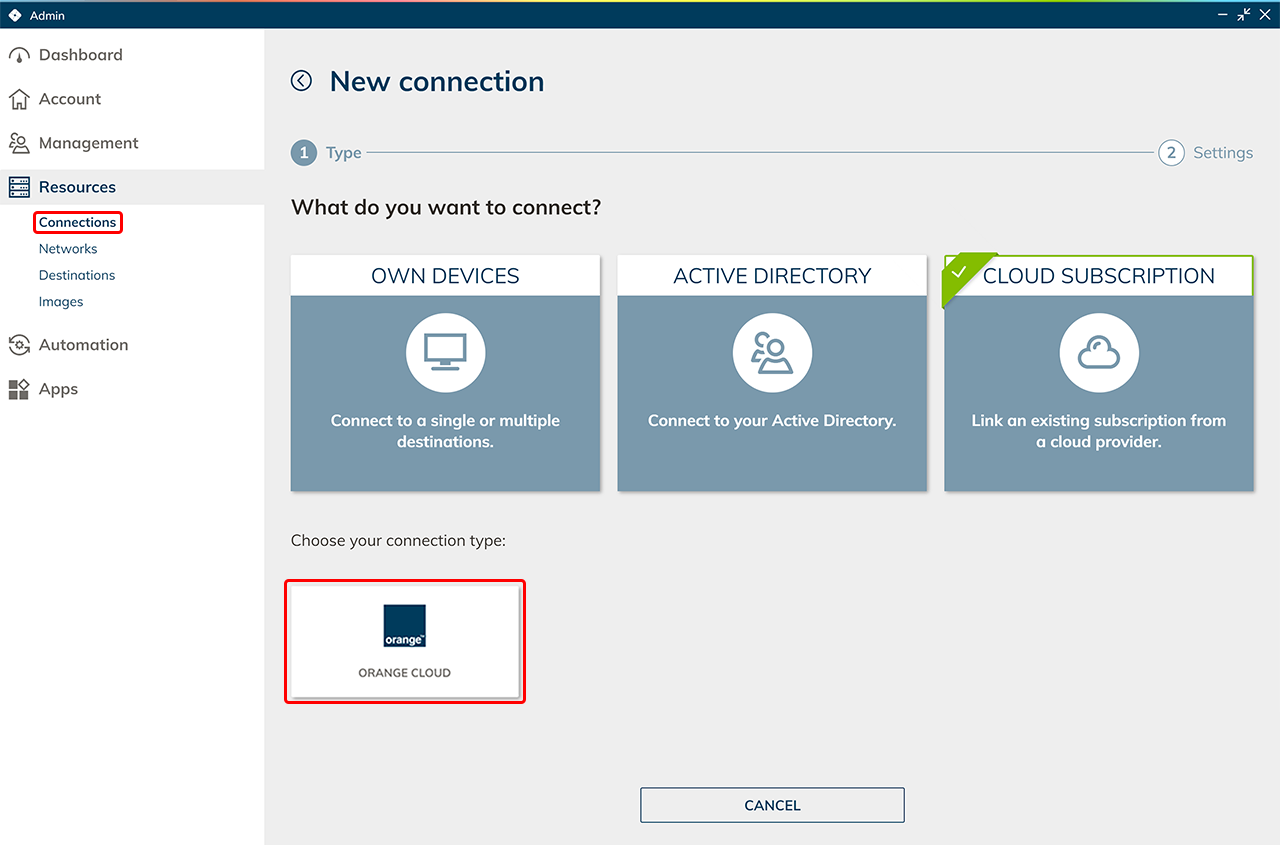
- In the oneclick™ Admin, click on Connections in the Resources tab.
- Click on the + Icon to connect your cloud subscription in oneclick™.
- Select the Cloud Resources tile and click on the required cloud provider.
-
- Give the connection a name of your choice and enter your data from your Orange Business Services Cloud subscription.
If you enter a project ID, only the one project is available. To have all projects available for selection, do not enter a project ID. - Click Save in oneclick™. Your Orange Business Services subscription is now linked and existing resources are read out.
You will only be charged when using virtual, machines. - You can now create virtual maschines.
Note on edited Default Network Security Groups
You have already created VMs via the Orange portal and read them out in oneclick™?
Then you have probably added a oneclick™ firewall rule to these cloud resources to get access to the resource via oneclick™.
Adding a firewall rule in oneclick™ creates a new Network Security Group per cloud resource in Orange and removes the Default Security Group from the resource, as it contains insecure non-deletable rules. If you have made your own settings in the Default Security Group that you still need, add them again in one of the following two ways:
- Create new firewall rules oneclick™. You can define these in the settings of the cloud resource. The firewall rules you define there will be added to the oneclick™ Network Security Group in Orange.
- Create a new Network Security Group via the Orange portal and set your previously created rules again. Add them to your cloud resource.
Renew Orange Business Services subscription password
Usually, the password for your user from the Organge Business Services project expires after 90 days and you need to store a new one. We recommend that you keep this date in mind so that your virtual machines continue to run as usual.
- Change the password in the Organge Business Services Cloud by repeating all the steps from the instructions “Data from the Orange Business Services subscription” under point 5.
- Then go back to the oneclick™ Admin and click on Connections in the Resources tab.
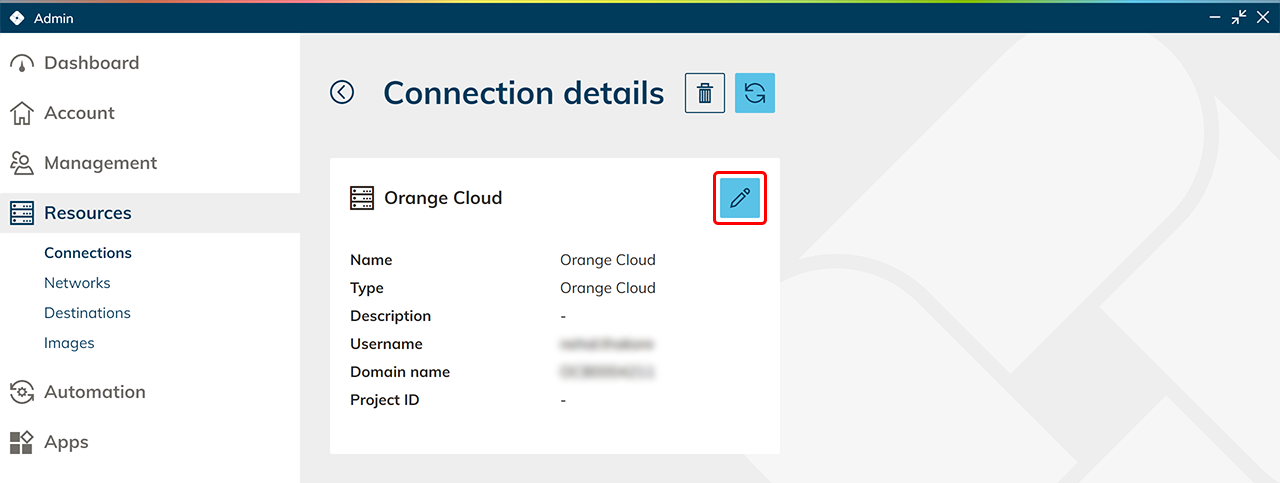
- In the row of your cloud connection click on the List icon to get to the detail view.
-
- Edit your Connection by clicking on the Pencil icon.
-
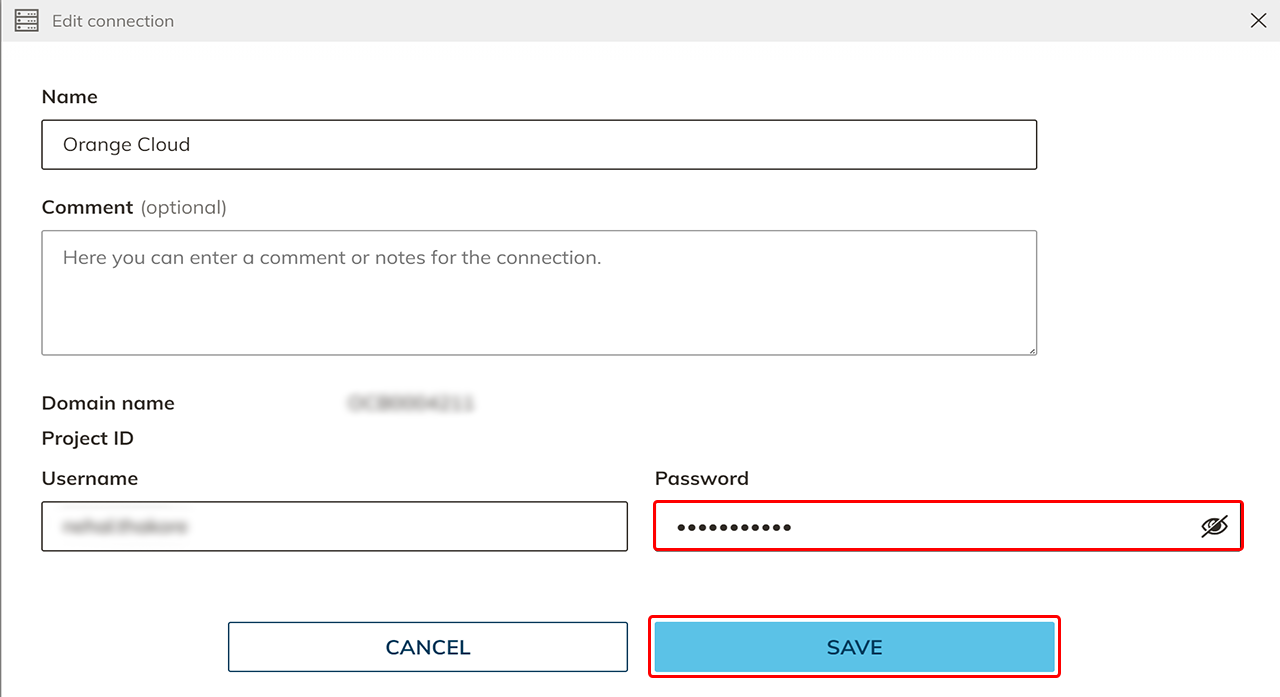
- Here you can enter the new password. Click on Save. Your new password is set.
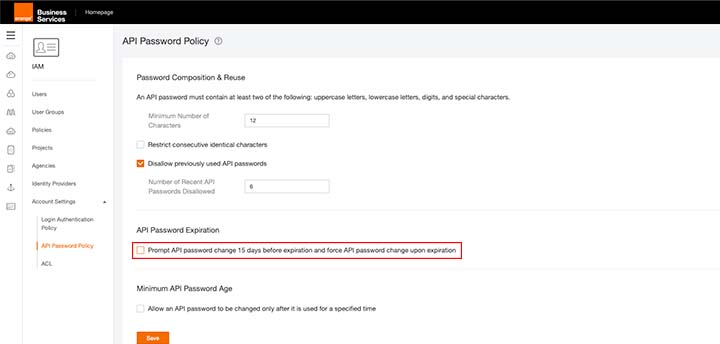
- If you do not want the password to be renewed, you can turn this off in your Organge Business Services account.
- Select Identity and Access Management in the overview.
- Click Account Settings and then click API Password Policy.
- Remove the check mark under “Prompt password change 15 days before expiration and force password change upon expiration.”
Now your password will not expire.
-
-