There are two ways for Huawei to link subscriptions to oneclick™:
- You can link your own existing Huawei subscription in oneclick™.
- If you have a partner account in Huawei and have created customer accounts under it, you can link these customer accounts in oneclick™ (next point).
You need some data for the connection. You can find out how to get this data in the following paragraphs.
It is best to open oneclick™ simultaneously in order to be able to insert the data directly.
Connecting your own Huawei subscription to oneclick™
! Your account needs the authorization that you are allowed to generate costs: The billing must be activated/approved.
Create User
- Log in to your Huawei Account.
- Open the burger menu at the top left and select Identity and Access Management.
- We recommend creating a new user now.
- Create a new user by clicking Create User in the upper right corner.
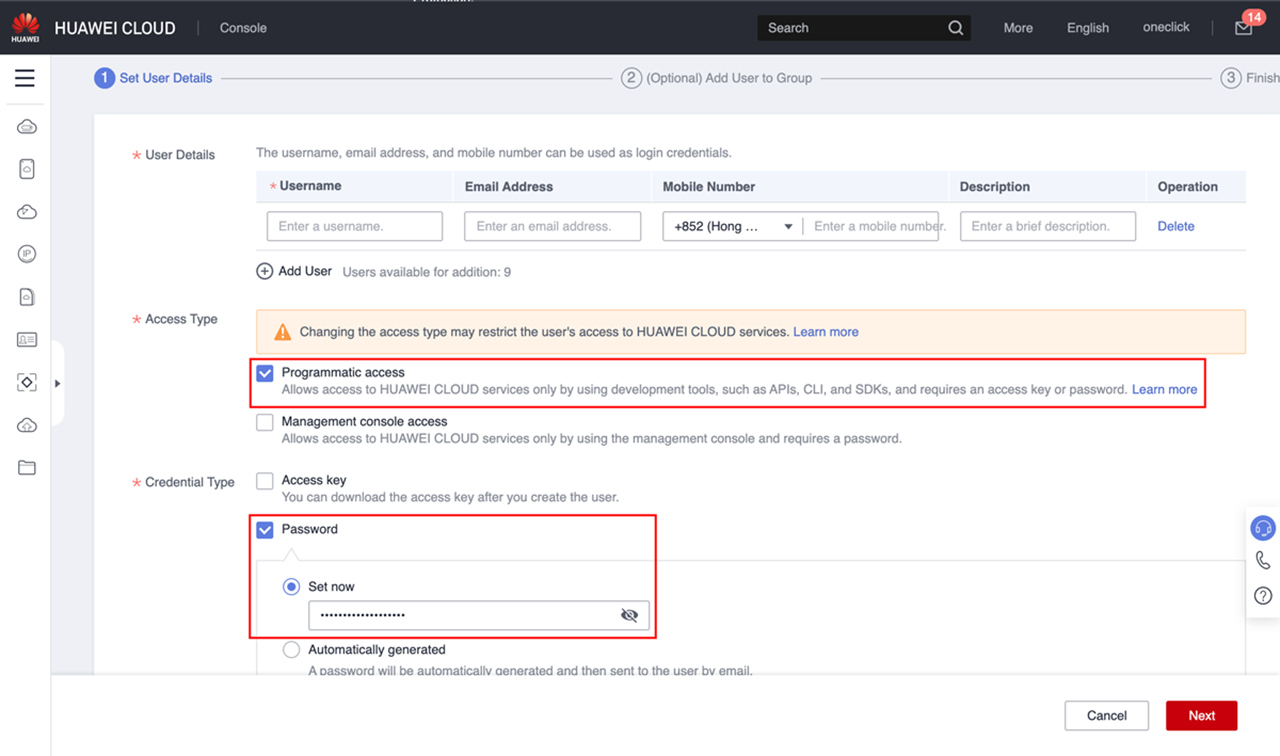
- Enter the user details. Remember the user name or the e-mail address.
- Under “Access Type”, set the check mark for Programmatic access and remove the check mark for “Management console access”.
- Here you can have a password generated automatically or set it yourself. In this tutorial we will set a password ourselves and select Set now.
- Enter a password and then click on next.
Remember this password. -
- Optionally, add groups to your user and click Create. Your user is now created.
Assign user rights
- Give your user rights via the group assignment.
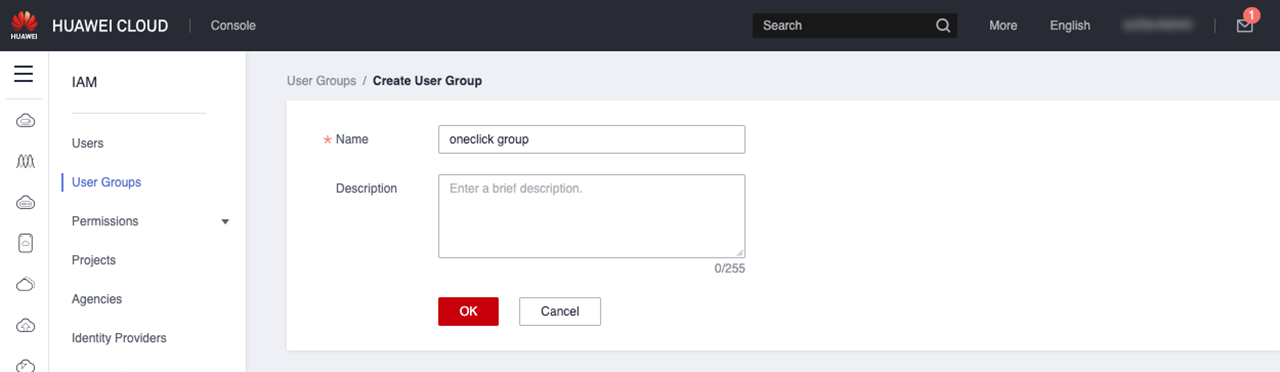
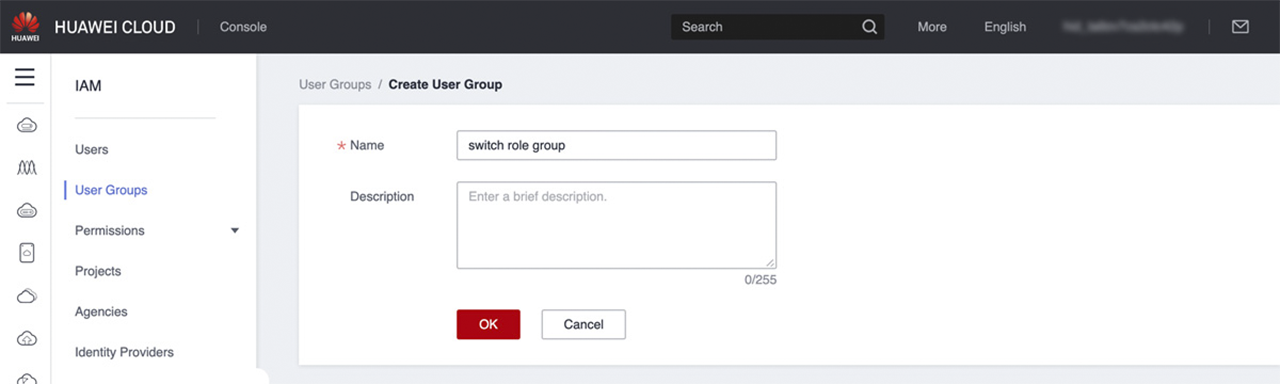
To do this, go to the menu item Users Groups and click on Create User Group in the top right-hand corner. - Name the group and click OK.
-
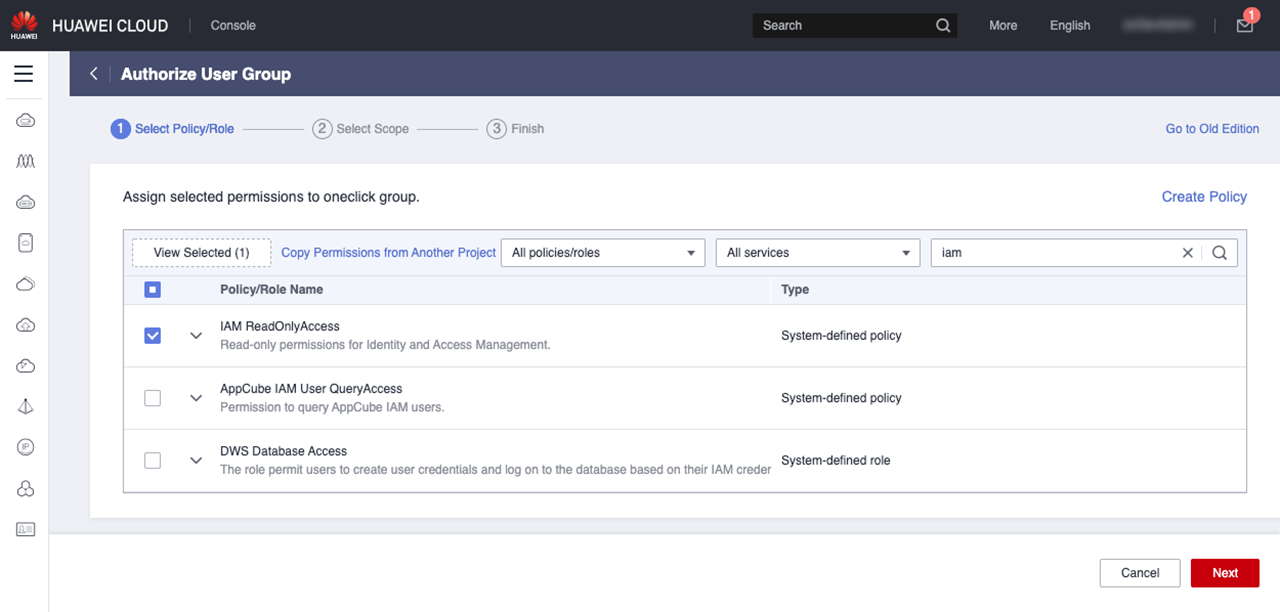
- At your group, go to Authorize.
- Search for the authorisation “IAM ReadOnlyAccess” and click Next.
-
- Select “Global service project”, click OK and then Finish.
-
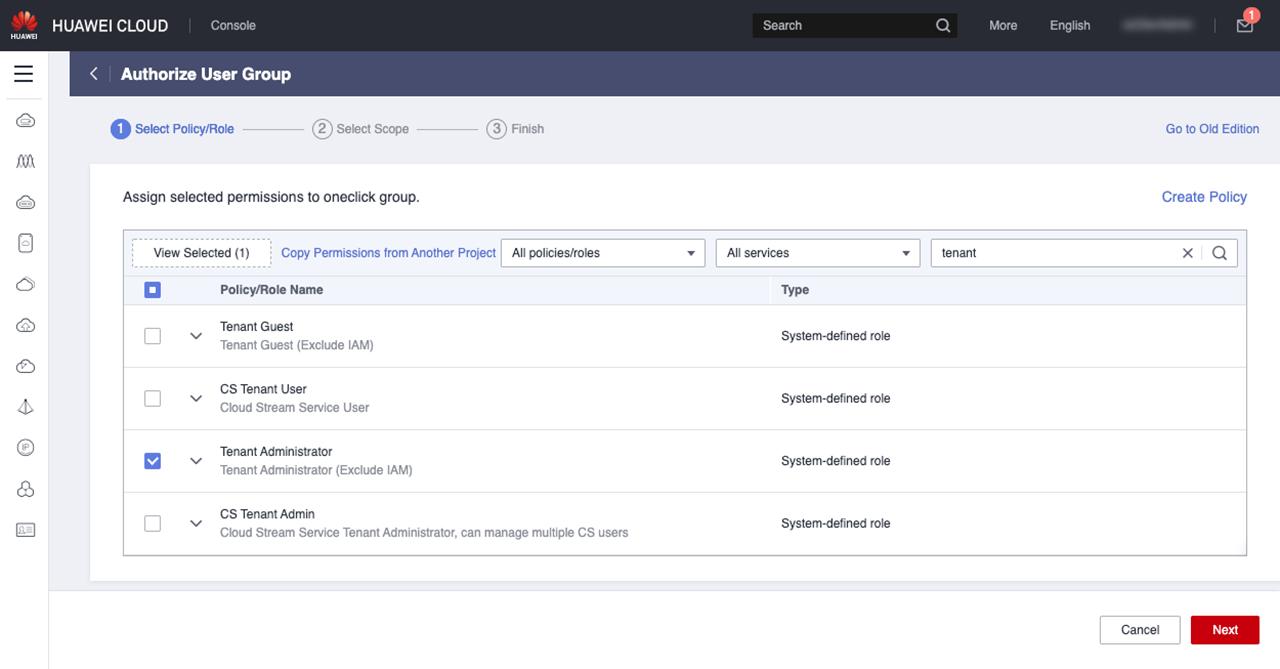
- Click Authorize again and search for the “Tenant Administrator” permission, select it and then click Next.
-
- There are two options here:
- If you want to make all projects available in oneclick™, select “All resources” (that includes future projects in all regions).
- If you only want to make one project [region] available in oneclick™, select the specific project.
Click on OK and then on Finish. -
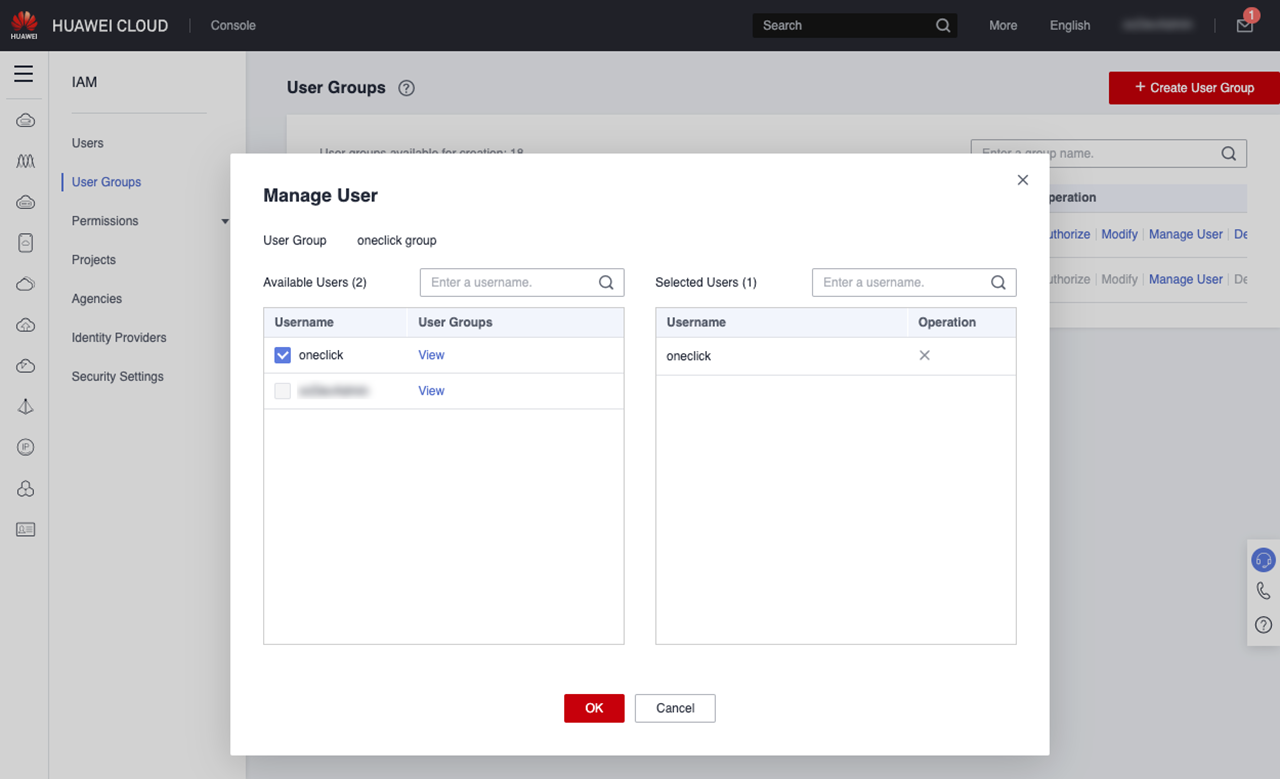
- In your group’s row, go to Manage User, select the user you created earlier and click OK.
-


Account name and project ID
- You still need the domain name and optionally the project ID if you only need one project to be selectable in oneclick™.
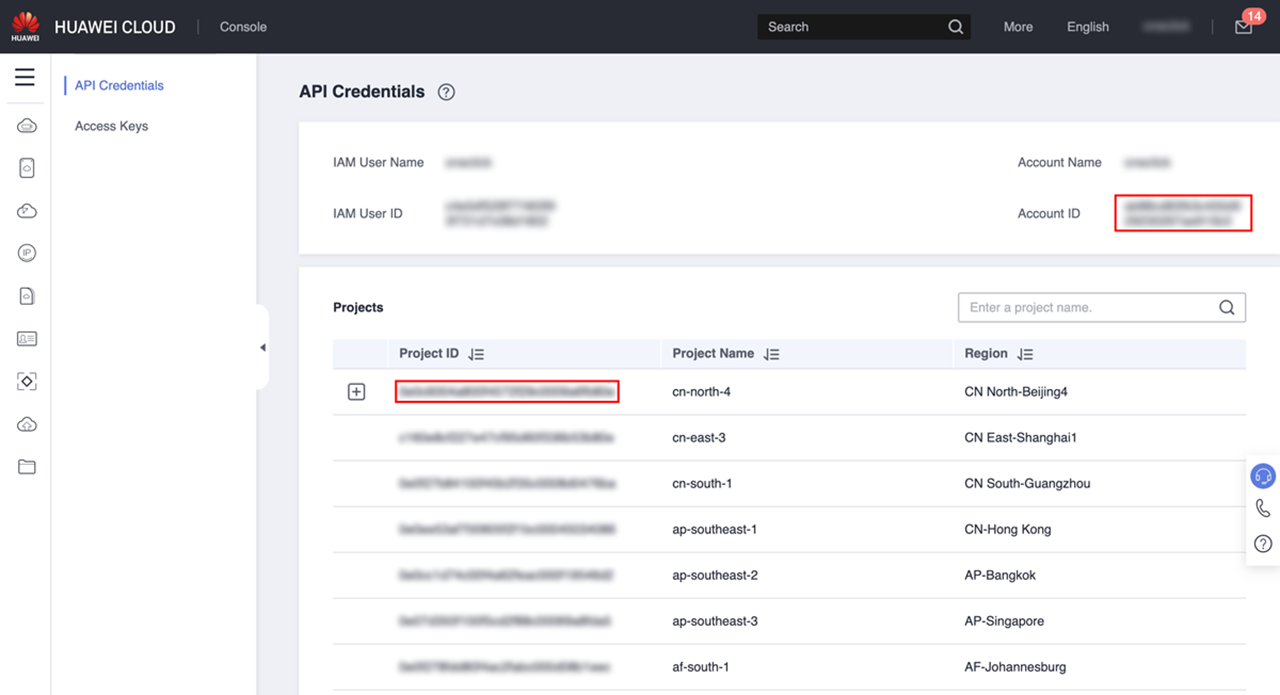
Open the menu at the top right and click on My Credentials. -
- From this view you can copy “Account ID” and optionally a “Project ID”.
-

Enter data in the oneclick™ Admin
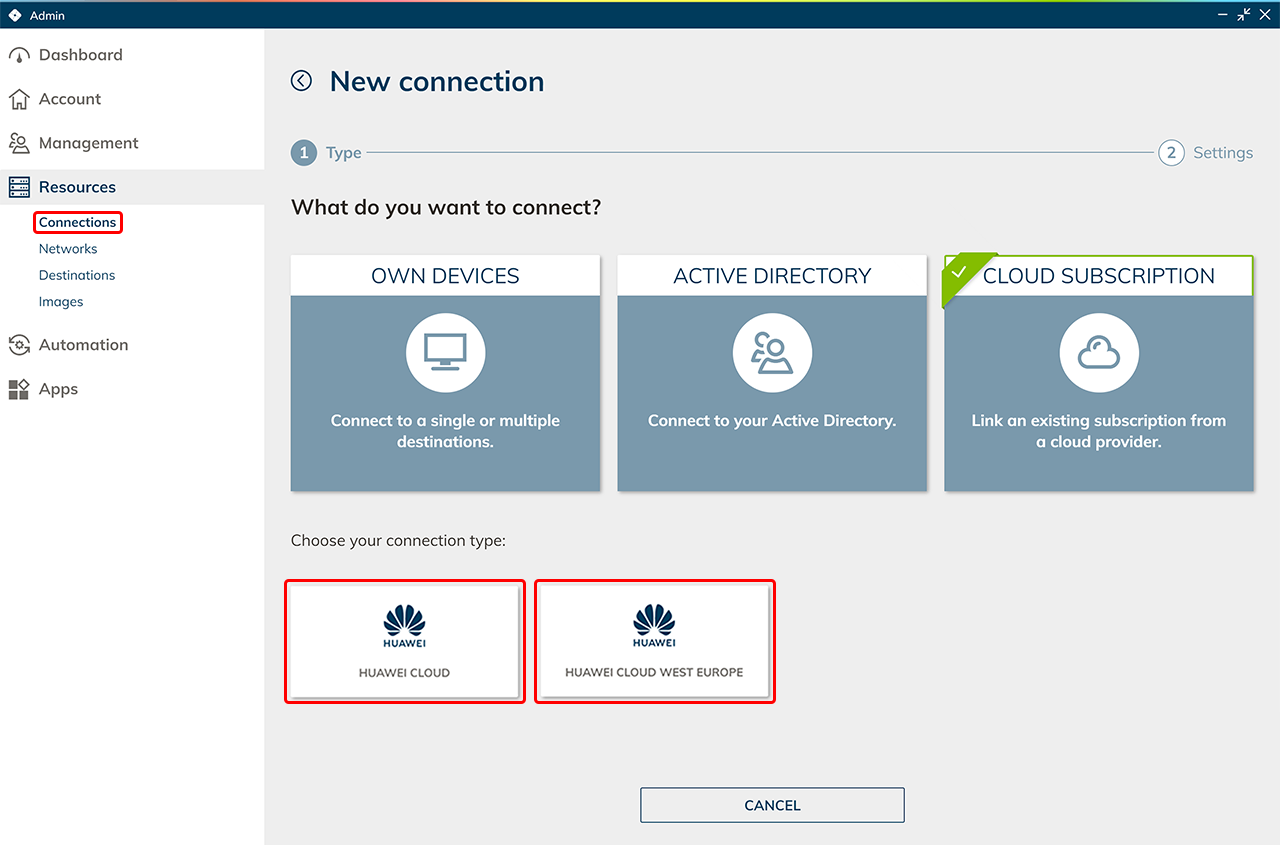
- In the oneclick™ Admin, click on Connections in the Resources tab.
- Click on the + Icon to connect your cloud subscription in oneclick™.
- Select the Cloud Resources tile and click on the required cloud provider.
-
- Give the connection a name of your choice and choose “Link a different customer account”. Enter your partner account details and then fill in your customer account details from your Huawei subscription.
If you enter a project ID, only the one project is available. In order to have all projects to choose from, do not enter a project ID. - Click Save in oneclick™. Your Huawei subscription is now linked and existing resources are read out.
You will only be charged when using virtual machines. - You can now create virtual maschines
Note on edited Default Network Security Groups
You have already created VMs via the Huawei portal and read them out in oneclick™?
Then you have probably added a oneclick™ firewall rule to these cloud resources to get access to the resource via oneclick™.
Adding a firewall rule in oneclick™ creates a new Network Security Group per cloud resource in Huawei and removes the Default Security Group from the resource, as it contains insecure non-deletable rules. If you have made your own settings in the Default Security Group that you still need, add them back in one of the following two ways:
- Create new firewall rules oneclick™. You set these in the settings of the cloud resource. The firewall rules you define there will be added to the oneclick™ Network Security Group in Huawei.
- Create a new Network Security Group via the Huawei portal and set your previously created rules again. Add them to your cloud resource.
Connecting Huawei customer subscriptions in oneclick™
Partner account data
- Log in to your Huawei Account.
- Open the burger menu at the top left and select Identity and Access Management.
- We recommend creating a new user now.
- Create a new user by clicking Create User in the upper right corner.
- Enter the user details. Remember the user name or the e-mail address.
- Under “Access Type”, set the check mark for Programmatic access and remove the check mark for “Management console access”.
- Here you can have a password generated automatically or set it yourself. In this tutorial we will set a password ourselves and select Set now.
- Enter a password and then click on next.
Remember this password. -
- Optionally, add groups to your user and click Create. Your user is now created.
- Give your user rights via the group assignment.
- To do this, go to the menu item Users Groups and click on Create User Group in the top right-hand corner.
- Name the group and click OK.
-
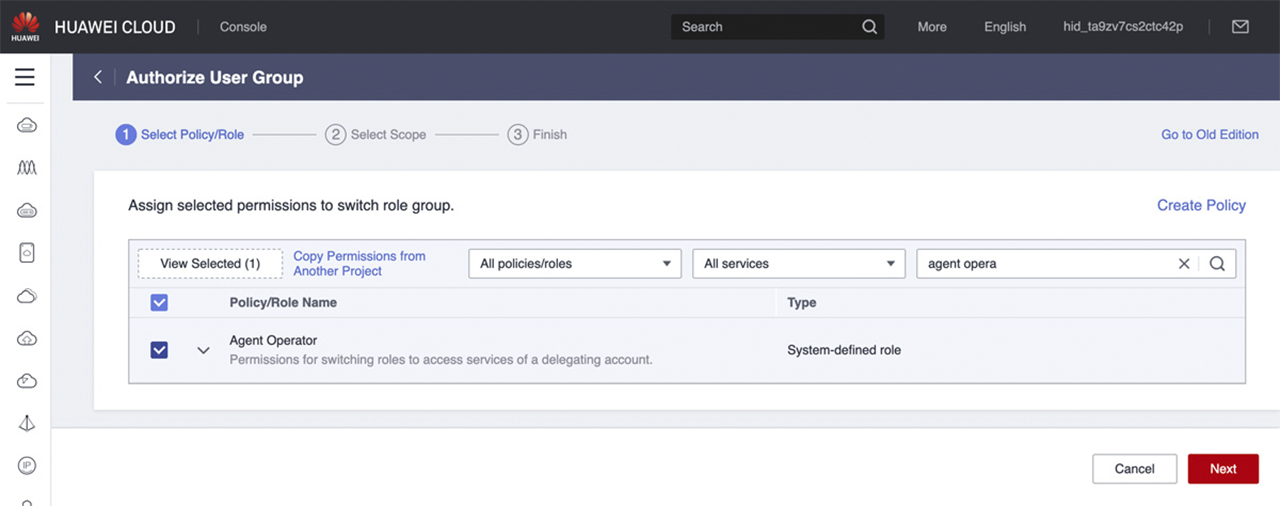
- At your group, go to Authorize. Search for the authorisation “Agent Operator” and click Next.
-
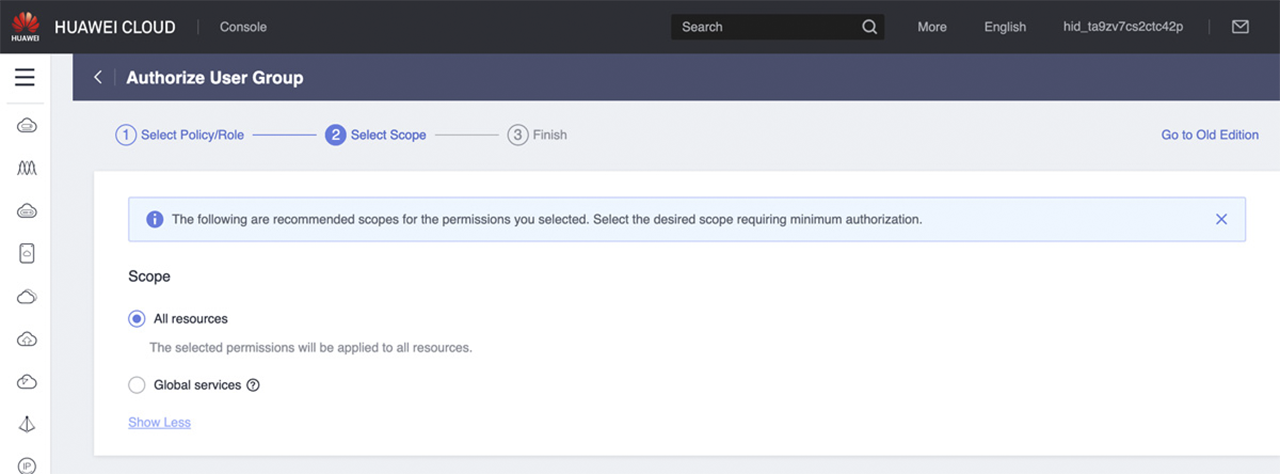
- Select “Global service project”, click OK and then Finish.
-
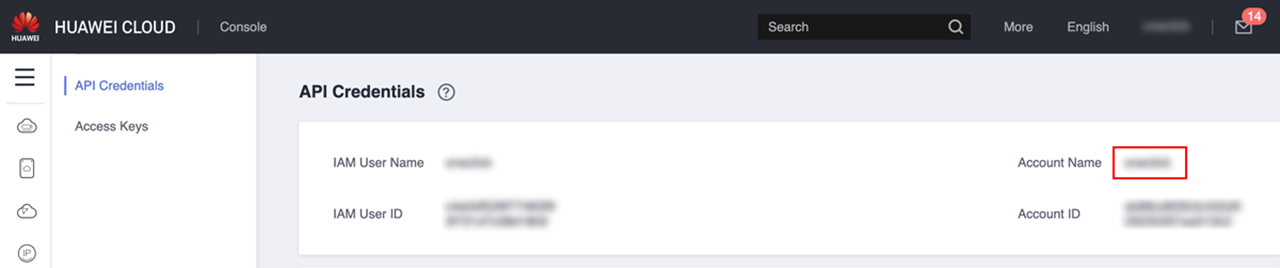
- Now you need the account name of your account.
To do this, open the menu at the top right and click on My Credentials. -
- You can copy the account name from this view.
-
Customer account data
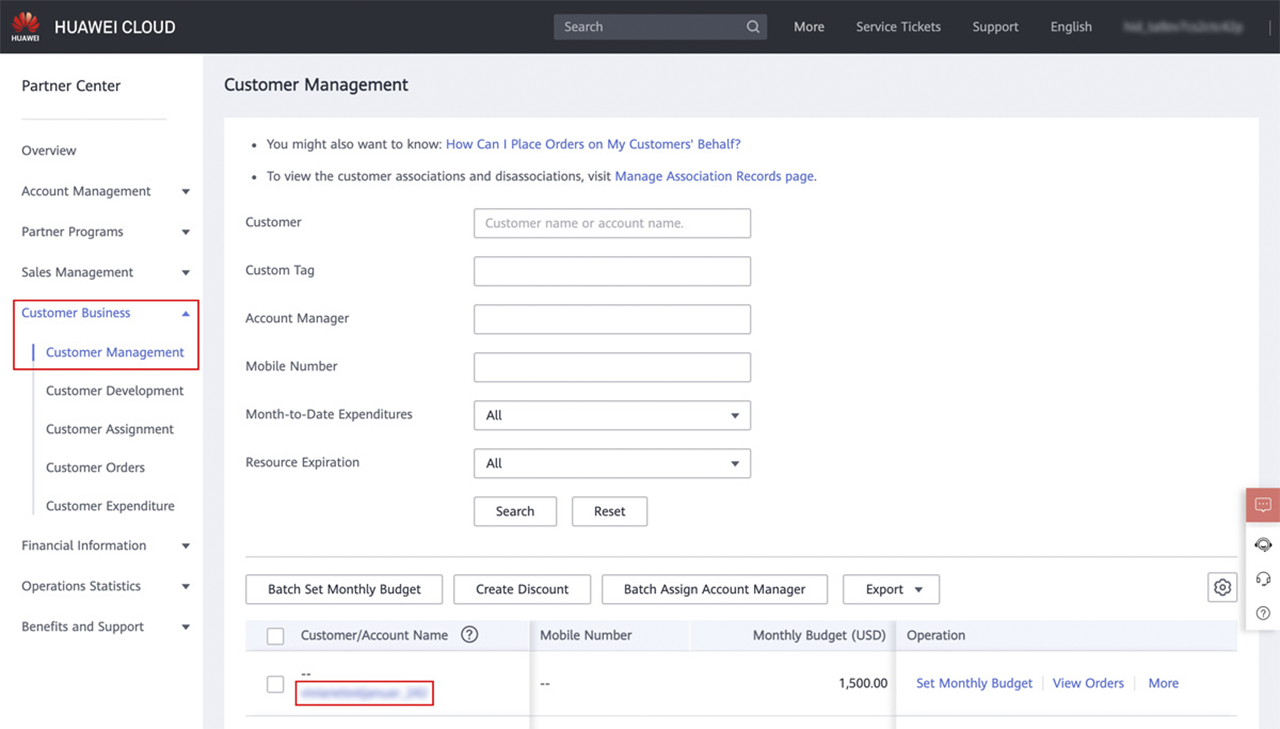
- In your partner account, go to Customer Business and then to Customer Management. Copy the customer account name here.
-
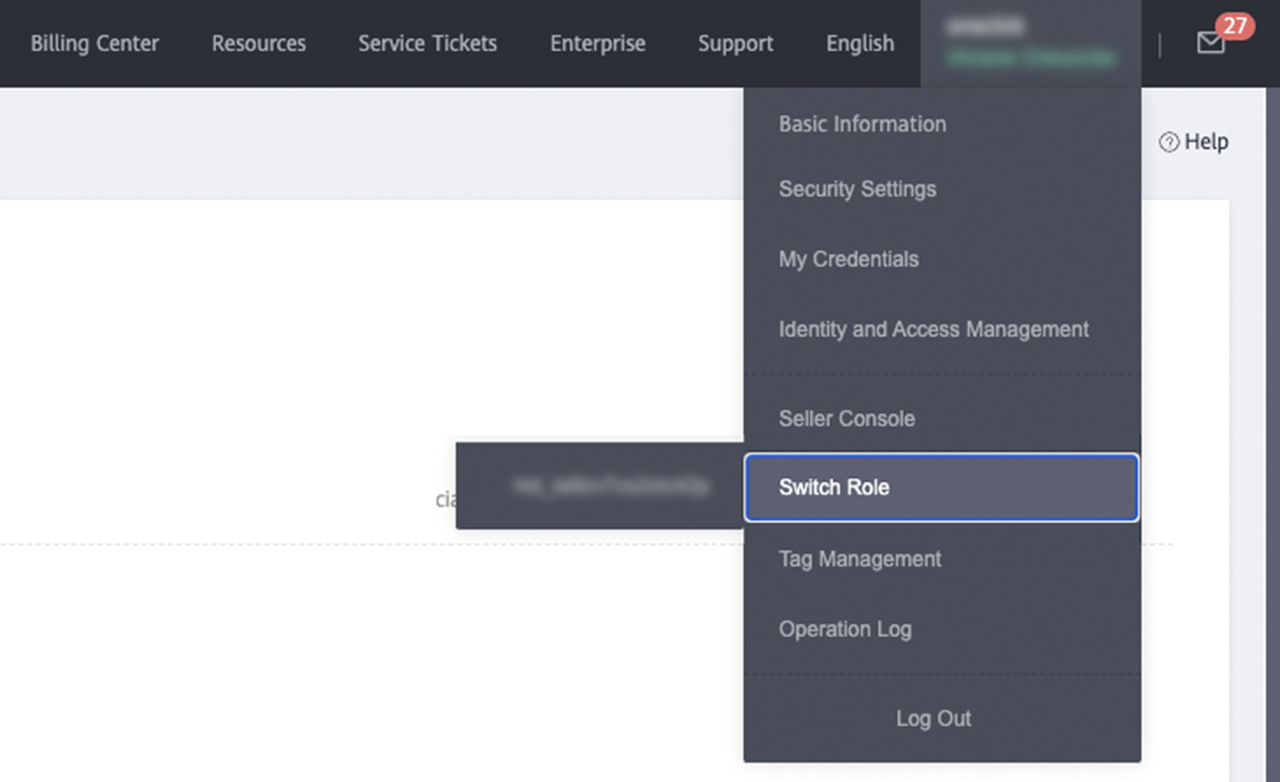
- Open the menu at the top right and click directly on Switch Role.
-
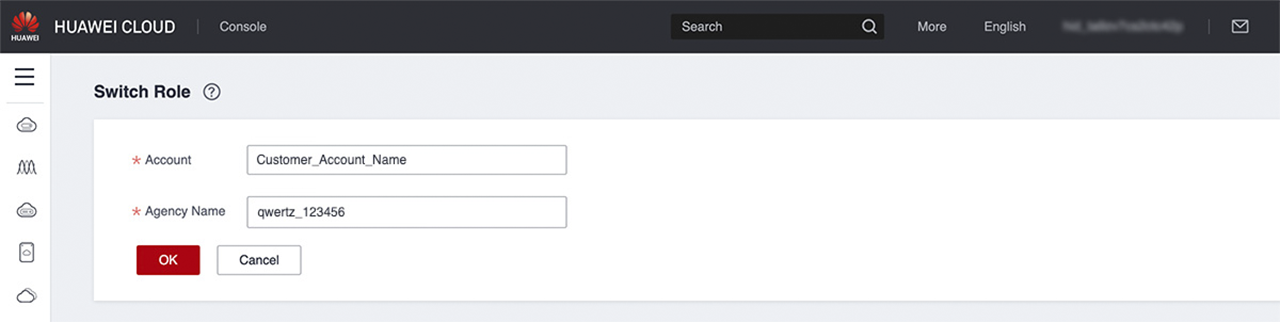
- Paste the previously copied customer name into the field “Account”. Then click in the field “Agency Name”. The Agency Name is generated, select it and copy it.
-
- If you want to offer only one project [region] for selection in oneclick™, you still need the customer project ID. Click on OK now.
- You are now in the account of your client. Open the menu at the top right and click on My Credentials.
- You can copy the required project ID from this view.
Enter data in the oneclick™ Admin
- In the oneclick™ Admin, click on Connections in the Resources tab.
- Click on the + Icon to connect your cloud subscription in oneclick™.
- Select the Cloud Resources tile and click on the required cloud provider.
-
- Give the connection a name of your choice and choose “Link a different customer account”. Enter your partner account details and then fill in your customer account details from your Huawei subscription.
If you enter a project ID, only the one project is available. In order to have all projects to choose from, do not enter a project ID. - Click Save in oneclick™. Your Huawei subscription is now linked and existing resources are read out.
You will only be charged when using virtual, machines. - You can now create virtual maschines
Renew Huawei subscription password
Usually, the password for your user from the Huawei project expires after 90 days and you need to store a new one. We recommend that you keep this date in mind so that your virtual machines continue to run as usual.
- Change the password in the Huawei Cloud by going to your created User and change the Password under “Security Settings”
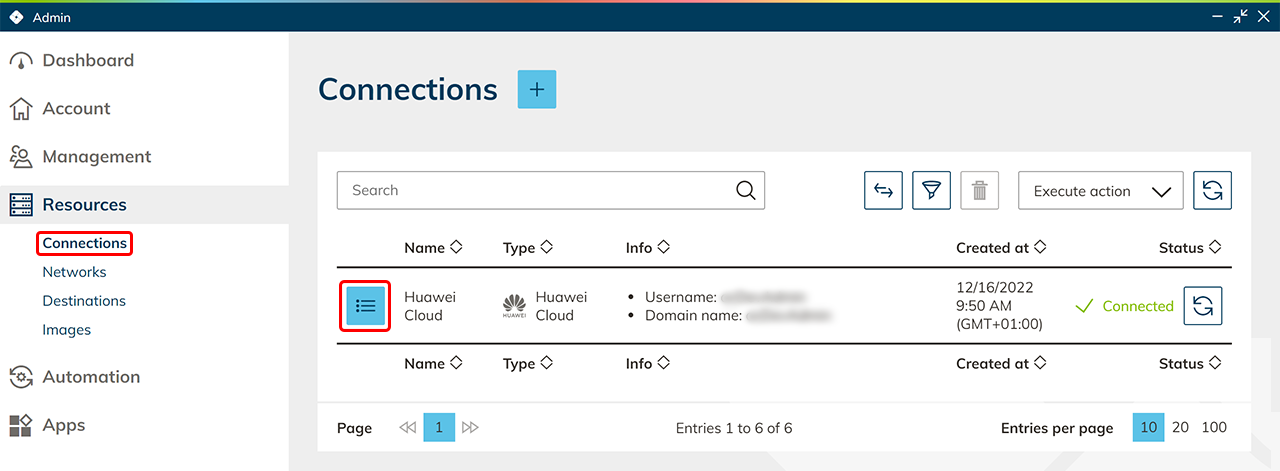
- Then go back to the oneclick™ Admin and click on Connections in the Resources tab.
- In the row of your cloud connection click on the List icon to get to the detail view.
-
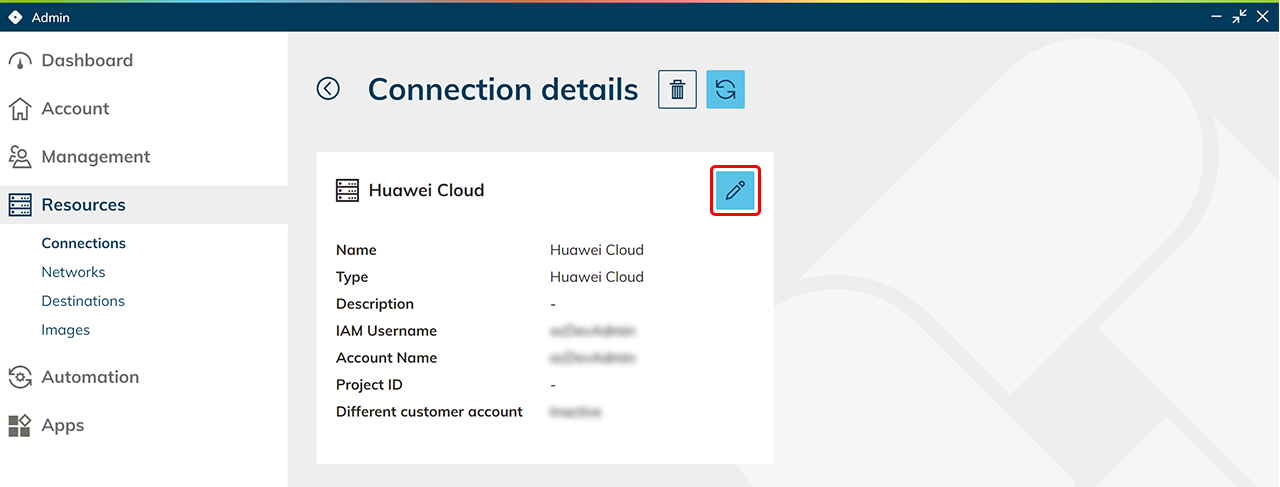
- Edit your Connection by clicking on the Pencil icon.
-
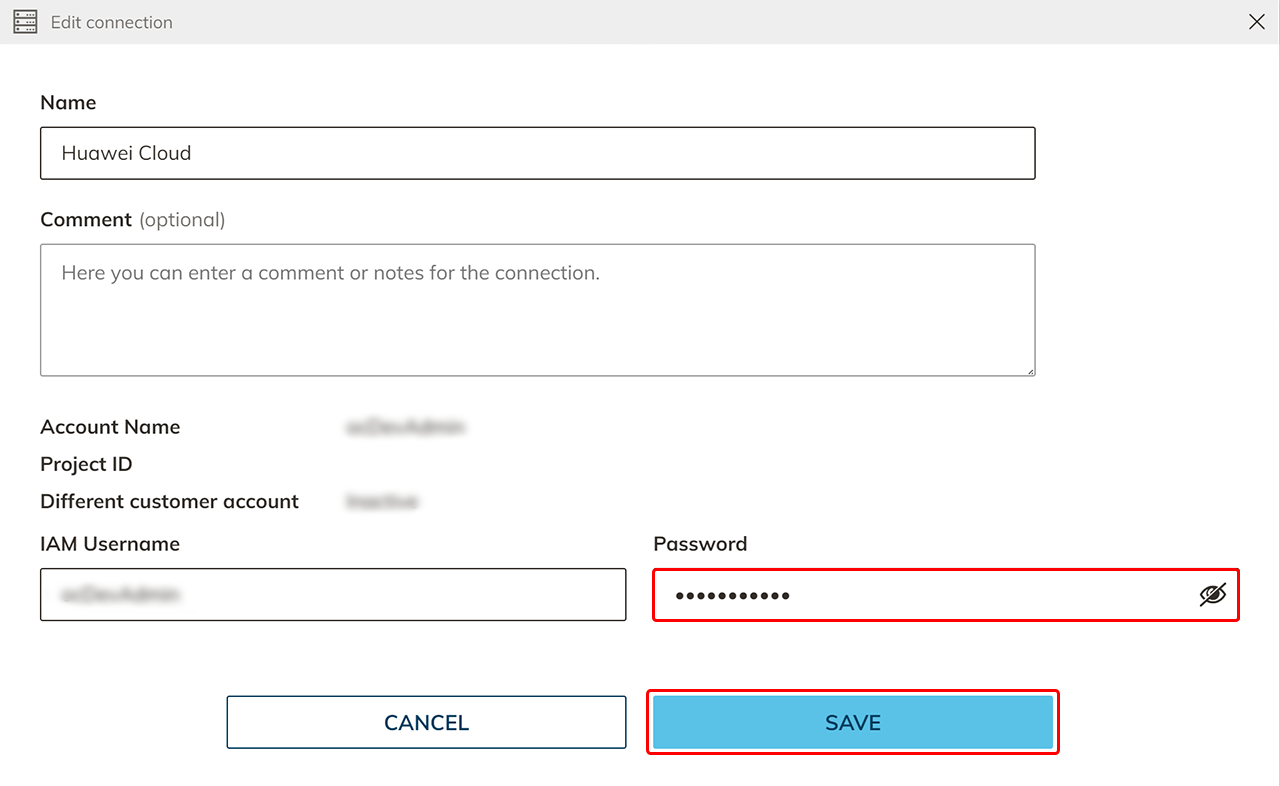
- Here you can enter the new password. Click on Save. Your new password is set.
- If you do not want the password to be renewed, you can turn this off in your Huawei account.
- Select Identity and Access Managementin the overview.
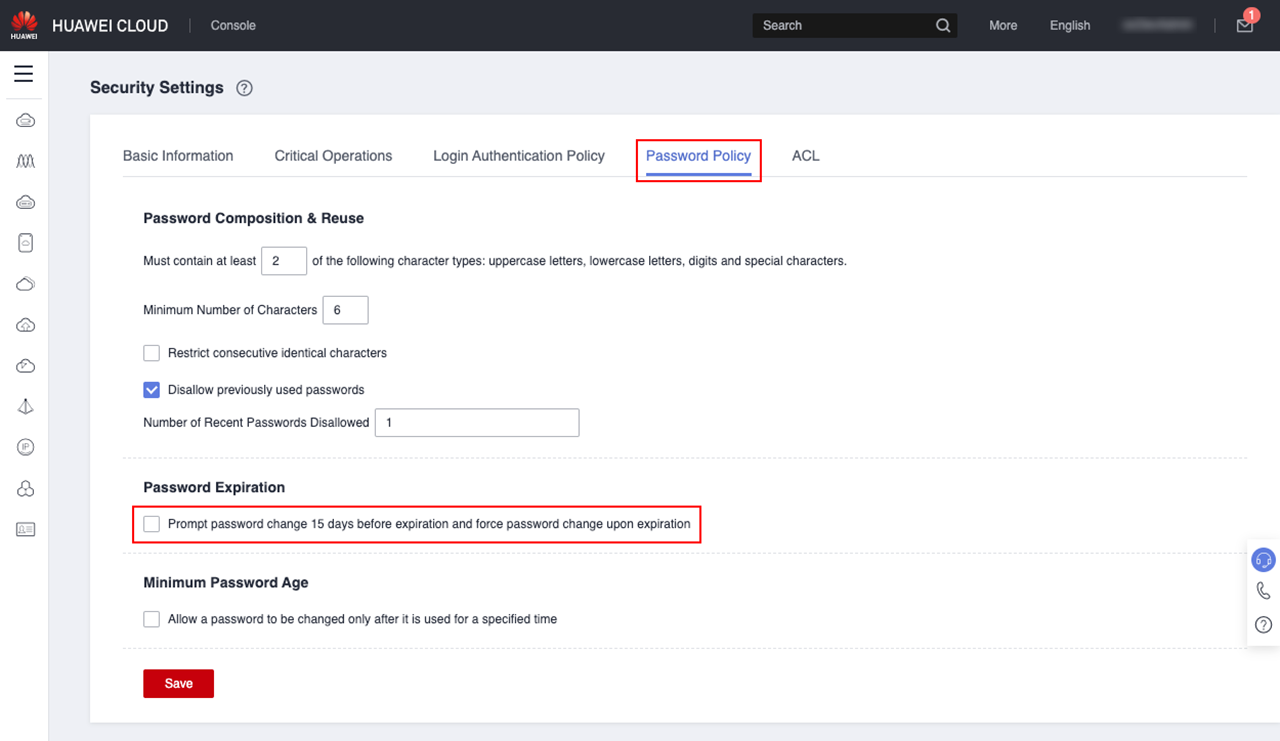
- Click Security Settings and then click Password Policy.
- Remove the check mark under “Prompt password change 15 days before expiration and force password change upon expiration.”Your password will not expire now.
-
Your password will not expire now.
-